clock CADILLAC ESCALADE ESV 2014 User Guide
[x] Cancel search | Manufacturer: CADILLAC, Model Year: 2014, Model line: ESCALADE ESV, Model: CADILLAC ESCALADE ESV 2014Pages: 508, PDF Size: 7.64 MB
Page 191 of 508
Black plate (19,1)Cadillac Escalade/Escalade ESV Owner Manual (GMNA-Localizing-U.S./
Canada/Mexico-6081529) - 2014 - CRC 1st Edition - 4/23/13
Infotainment System 7-19
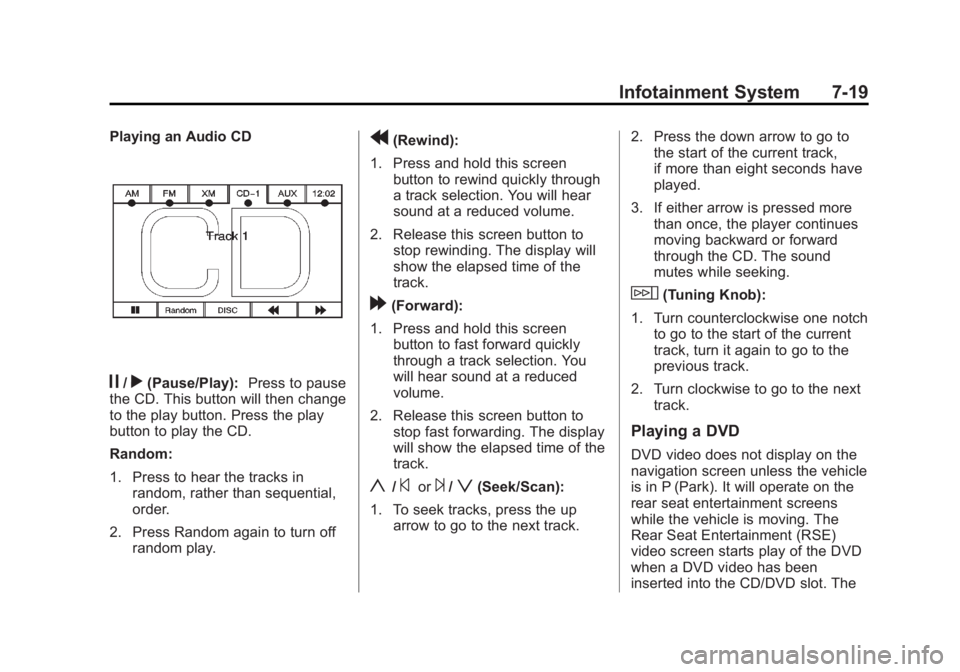
Playing an Audio CD
j/r(Pause/Play):Press to pause
the CD. This button will then change
to the play button. Press the play
button to play the CD.
Random:
1. Press to hear the tracks in
random, rather than sequential,
order.
2. Press Random again to turn off random play.
r(Rewind):
1. Press and hold this screen button to rewind quickly through
a track selection. You will hear
sound at a reduced volume.
2. Release this screen button to stop rewinding. The display will
show the elapsed time of the
track.
[(Forward):
1. Press and hold this screen button to fast forward quickly
through a track selection. You
will hear sound at a reduced
volume.
2. Release this screen button to stop fast forwarding. The display
will show the elapsed time of the
track.
y/©or¨/z(Seek/Scan):
1. To seek tracks, press the up arrow to go to the next track. 2. Press the down arrow to go to
the start of the current track,
if more than eight seconds have
played.
3. If either arrow is pressed more than once, the player continues
moving backward or forward
through the CD. The sound
mutes while seeking.
w(Tuning Knob):
1. Turn counterclockwise one notch to go to the start of the current
track, turn it again to go to the
previous track.
2. Turn clockwise to go to the next track.
Playing a DVD
DVD video does not display on the
navigation screen unless the vehicle
is in P (Park). It will operate on the
rear seat entertainment screens
while the vehicle is moving. The
Rear Seat Entertainment (RSE)
video screen starts play of the DVD
when a DVD video has been
inserted into the CD/DVD slot. The
Page 195 of 508
Black plate (23,1)Cadillac Escalade/Escalade ESV Owner Manual (GMNA-Localizing-U.S./
Canada/Mexico-6081529) - 2014 - CRC 1st Edition - 4/23/13
Infotainment System 7-23
Menu Language:Press English,
French, or Spanish to change the
default language of the DVD video
menus. The menu language must
be available on the disc. The menu
language may vary for each DVD.
Parental Level: Press to change
the rating level to only allow the play
of DVDs with a certain rating. The
rating selection is 1 through 8, with 1
Kids Safe being a G rating. If the 1
is selected, any DVD with a rating
above G will not be able to be
viewed without entering a password.
When the parental level is first
entered a keyboard will appear on
the display and a four-digit
password will need to be created.
Type in a password that you will be
able to remember. Once the
password is created, you can then
select a rating level.
If you would like to change the
rating level, press the Parental
Level button, then press the Password button. Type in the
password and then change the
rating level.
If the password has been forgotten,
contact your dealer.
This may not be available on
all DVDs.
Aspect:
Press to change the
aspect ratio of the DVD. This may
not be available on all DVDs.
y(Next Track/Chapter): Press to
go to the next track or chapter. This
button may not work when the DVD
is playing the copyright information
or the previews.
z(Previous Track/Chapter):
1. Press to return to the start of the current track or chapter.
2. Press again to go to the previous track or chapter. This
button may not work when the
DVD is playing the copyright
information or the previews.
w(Tuning Knob):
1. Turn counterclockwise one notch to go to the start of the current
chapter/track, turn it again to go
to the previous chapter/track.
2. Turn clockwise to go to the next chapter/track.
Care of Your CDs and DVDs
Sound quality can be reduced due
to disc quality, recording method,
quality of the music recorded, and
how the disc has been handled.
Handle discs carefully and store
them in their original cases or other
protective cases away from direct
sunlight and dust. If the bottom
surface of a disc is damaged, the
disc may not play properly or at all.
Do not touch the bottom surface of
a disc while handling it; this could
damage the surface. Pick up discs
by grasping the outer edges or the
edge of the hole and the outer edge.
If the bottom surface of a disc is
dirty, take a soft lint free cloth,
or dampen a clean soft cloth in a
Page 201 of 508
Black plate (29,1)Cadillac Escalade/Escalade ESV Owner Manual (GMNA-Localizing-U.S./
Canada/Mexico-6081529) - 2014 - CRC 1st Edition - 4/23/13
Infotainment System 7-29
2. Release to stop fast forwarding.The display shows the elapsed
time of the track.
q r(Folder/Artist/Album):
1. Select the left or right arrow to go to the previous or next folder,
artist, or album on the disc.
2. Press the middle screen button, with the folder, artist, or album
name, to sort the MP3 by folder,
artist, or album. It may take a
few minutes for the system to
sort the MP3.
y/©or¨/z(Seek/Scan):
1. To seek tracks, press the up arrow to go to the next track.
2. Press the down arrow to go to the start of the current track,
if more than eight seconds have
played.
3. If either arrow is pressed more than once, the player continues
moving backward or forward
through the CD. The sound
mutes while seeking.
w(Tuning Knob):
1. Turn counterclockwise one notch to go to the start of the current
track, turn it again to go to the
previous track.
2. Turn clockwise to go to the next track.
When playing an MP3 the rear seat
operator can power on the RSE
video screen and use the remote
control to navigate through the MP3.
Auxiliary Devices
Using the Auxiliary Input Jack
The navigation system has an
auxiliary input jack located on the
faceplate and in the center console.
This is not an audio output; do not
plug the headphone set into the
front auxiliary input jack. An external
audio device such as an iPod,
laptop computer, MP3 player, CD
player, or cassette tape player, etc.
can be connected to the auxiliary
input jack for use as another audio
source. Drivers are encouraged to set up
any auxiliary device while the
vehicle is in P (Park). See
Defensive
Driving on page 9-3 for more
information on driver distraction.
To use a portable audio player,
connect a 3.5 mm (1/8 in) cable to
the radio's front auxiliary input jack.
When a device is connected, press
AUDIO, then press AUDIO again
until AUX is selected or press the
AUX screen button to begin playing
audio from the device over the
vehicle speakers.
For optimal sound quality, increase
the portable audio device's volume
to the loudest level.
It is always best to power the
portable audio device through its
own battery while playing.
The vehicle may have a rear
entertainment system (RSE) with a
second and third row screen. The
RSE has audio adapters to allow
you to connect auxiliary devices.
The audio can be heard through the
speakers or through the wireless or
Page 266 of 508
Black plate (94,1)Cadillac Escalade/Escalade ESV Owner Manual (GMNA-Localizing-U.S./
Canada/Mexico-6081529) - 2014 - CRC 1st Edition - 4/23/13
7-94 Infotainment System
Night:Press to make the map
background darker.
Day: Press to make the map
background brighter.
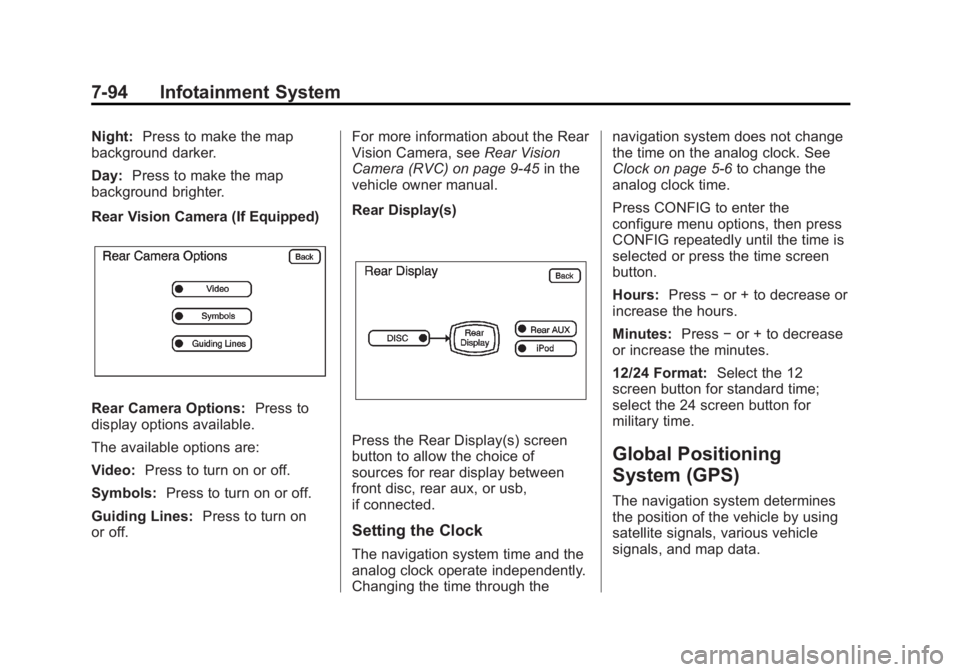
Rear Vision Camera (If Equipped)
Rear Camera Options: Press to
display options available.
The available options are:
Video: Press to turn on or off.
Symbols: Press to turn on or off.
Guiding Lines: Press to turn on
or off. For more information about the Rear
Vision Camera, see
Rear Vision
Camera (RVC) on page 9-45 in the
vehicle owner manual.
Rear Display(s)
Press the Rear Display(s) screen
button to allow the choice of
sources for rear display between
front disc, rear aux, or usb,
if connected.
Setting the Clock
The navigation system time and the
analog clock operate independently.
Changing the time through the navigation system does not change
the time on the analog clock. See
Clock on page 5-6
to change the
analog clock time.
Press CONFIG to enter the
configure menu options, then press
CONFIG repeatedly until the time is
selected or press the time screen
button.
Hours: Press−or + to decrease or
increase the hours.
Minutes: Press−or + to decrease
or increase the minutes.
12/24 Format: Select the 12
screen button for standard time;
select the 24 screen button for
military time.
Global Positioning
System (GPS)
The navigation system determines
the position of the vehicle by using
satellite signals, various vehicle
signals, and map data.
Page 283 of 508

Black plate (3,1)Cadillac Escalade/Escalade ESV Owner Manual (GMNA-Localizing-U.S./
Canada/Mexico-6081529) - 2014 - CRC 1st Edition - 4/23/13
Climate Controls 8-3
forward unless it is set to
recirculation mode. See
“Recirculation”later in this section.
Turn the knob clockwise or
counterclockwise to increase or
decrease the cabin temperature.
The display will show the
temperature setting increasing or
decreasing.
Set the passenger temperature
setting to match the driver
temperature setting by pressing the
passenger temperature knob.
When in defrost mode the
passenger temperature setting
cannot be changed.
Automatic Operation
AUTO (Automatic): When
automatic operation is active the
system will control the inside
temperature, the air delivery, and
the fan speed. Use the steps below to place the
entire system in automatic mode:
1. Press the AUTO button.
When AUTO is selected, the
display will change to show the
current temperature(s) and
AUTO come on the display. The
current delivery mode and fan
speed will also be displayed for
approximately 5 seconds.
When AUTO is selected, the air
conditioning operation and air
inlet will be automatically
controlled. The air conditioning
compressor will run when the
outside temperature is over
about 4°C (40°F). The air inlet
will normally be set to outside
air. If it is hot outside, the air
inlet may automatically switch to
recirculate inside air to help
quickly cool down the vehicle.
The light on the button comes on
in recirculation. 2. Set the driver and passenger
temperature.
To find your comfort setting, start
with a 23°C (74°F) temperature
setting and allow about
20 minutes for the system to
regulate. Use the driver or
passenger temperature buttons
to adjust the temperature setting
as necessary. If a temperature
setting of 15°C (60°F) is chosen,
the system remains at the
maximum cooling setting. If a
temperature setting of 32°C
(90°F) is chosen, the system
remains at the maximum heat
setting. Choosing either
maximum setting will not cause
the vehicle to heat or cool any
faster.
Be careful not to cover the sensor
located on the top of the instrument
panel near the windshield. This
sensor regulates air temperature
based on sun load and also turns
on the headlamps.
Page 340 of 508

Black plate (52,1)Cadillac Escalade/Escalade ESV Owner Manual (GMNA-Localizing-U.S./
Canada/Mexico-6081529) - 2014 - CRC 1st Edition - 4/23/13
9-52 Driving and Operating
Warning (Continued)
.Fuel can spray out if the fuel
cap is opened too quickly.
This spray can happen if the
tank is nearly full, and is
more likely in hot weather.
Open the fuel cap slowly and
wait for any hiss noise to stop
then unscrew the cap all
the way
The tethered fuel cap is located
behind a hinged fuel door on the
driver side of the vehicle. To open
the fuel door, push the rearward
center edge in and release and it
will open.
To remove the fuel cap, turn it
slowly counterclockwise. The fuel
cap has a spring in it; if the cap is
released too soon, it will spring back
to the right.
While refueling, hang the tethered
fuel cap from the hook on the
fuel door.
Be careful not to spill fuel. Do not
top off or overfill the tank and wait a
few seconds after you have finished
pumping before removing the
nozzle. Clean fuel from painted
surfaces as soon as possible. See
Exterior Care on page 10-89. When replacing the fuel cap, insert
the tether in its hole before
tightening the cap. Turn the fuel cap
clockwise until it clicks. It will require
more effort to turn the fuel cap on
the last turn as you tighten it. Make
sure the cap is fully installed. The
diagnostic system can determine if
the fuel cap has been left off or
improperly installed. This would
allow fuel to evaporate into the
atmosphere. See
Malfunction
Indicator Lamp on page 5-15.
If the vehicle has a Driver
Information Center (DIC), the
TIGHTEN GAS CAP message
displays if the fuel cap is not
properly installed.
{Warning
If a fire starts while you are
refueling, do not remove the
nozzle. Shut off the flow of fuel by
shutting off the pump or by
notifying the station attendant.
Leave the area immediately.
Page 349 of 508

Black plate (61,1)Cadillac Escalade/Escalade ESV Owner Manual (GMNA-Localizing-U.S./
Canada/Mexico-6081529) - 2014 - CRC 1st Edition - 4/23/13
Driving and Operating 9-61
“Weight of the Trailer Tongue”in
Trailer Towing on page 9-56 for
rating limits with various hitch types.
If a step-bumper hitch will be used,
the bumper could be damaged in
sharp turns. Make sure there
is ample room when turning to avoid
contact between the trailer and the
bumper.
Consider using sway controls with
any trailer. Ask a trailering
professional about sway controls or
refer to the trailer manufacturer's
recommendations and instructions.Weight‐Distributing Hitch
Adjustment
A. Body to Ground Distance
B. Front of Vehicle
When using a weight-distributing
hitch, the spring bars should be
adjusted so the distance (A) is the
same after coupling the trailer to the
tow vehicle and adjusting the hitch.
Hitch Cover (without Dual
Exhaust)
The vehicle may have a hitch cover.
To remove the hitch cover:
1. Turn the fasteners on the lower tabs 90 degrees
counterclockwise.
2. Lift the lower edge of the cover about 45 degrees.
3. Pull the cover downward to disengage the upper
attachments.
Page 350 of 508
Black plate (62,1)Cadillac Escalade/Escalade ESV Owner Manual (GMNA-Localizing-U.S./
Canada/Mexico-6081529) - 2014 - CRC 1st Edition - 4/23/13
9-62 Driving and Operating
To reinstall the hitch cover:
1. Hold the cover at a 45 degreeangle to the vehicle and push
the upper tabs in the hitch cover
into the chrome slots in the
fascia.
2. Move the bottom of the cover forward until the lower tabs line
up with the lower fascia slots.
3. Snap the hitch cover into place by pushing the upper corners
forward.
4. Turn the fasteners on the lower tabs 90 degrees clockwise to
lock the cover in place.Hitch Cover (with Dual
Exhaust)
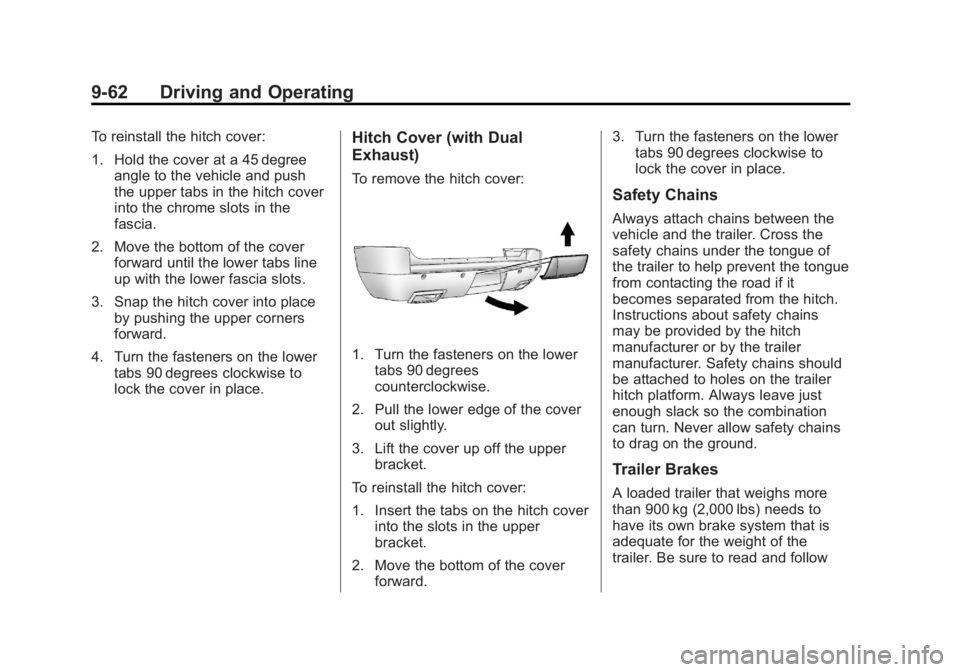
To remove the hitch cover:
1. Turn the fasteners on the lowertabs 90 degrees
counterclockwise.
2. Pull the lower edge of the cover out slightly.
3. Lift the cover up off the upper bracket.
To reinstall the hitch cover:
1. Insert the tabs on the hitch cover into the slots in the upper
bracket.
2. Move the bottom of the cover forward. 3. Turn the fasteners on the lower
tabs 90 degrees clockwise to
lock the cover in place.
Safety Chains
Always attach chains between the
vehicle and the trailer. Cross the
safety chains under the tongue of
the trailer to help prevent the tongue
from contacting the road if it
becomes separated from the hitch.
Instructions about safety chains
may be provided by the hitch
manufacturer or by the trailer
manufacturer. Safety chains should
be attached to holes on the trailer
hitch platform. Always leave just
enough slack so the combination
can turn. Never allow safety chains
to drag on the ground.
Trailer Brakes
A loaded trailer that weighs more
than 900 kg (2,000 lbs) needs to
have its own brake system that is
adequate for the weight of the
trailer. Be sure to read and follow
Page 371 of 508
Black plate (17,1)Cadillac Escalade/Escalade ESV Owner Manual (GMNA-Localizing-U.S./
Canada/Mexico-6081529) - 2014 - CRC 1st Edition - 4/23/13
Vehicle Care 10-17
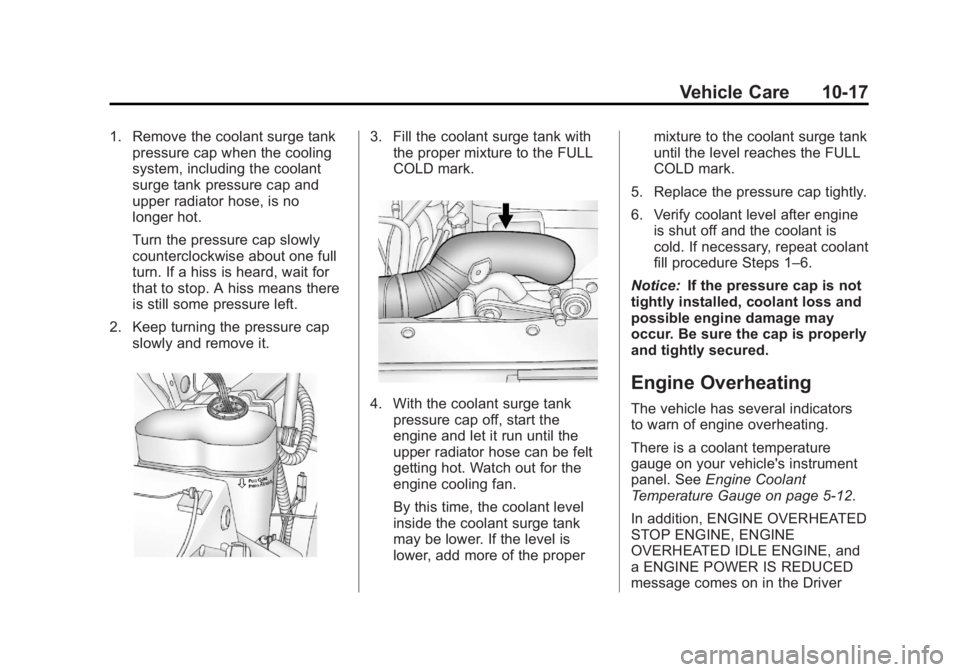
1. Remove the coolant surge tankpressure cap when the cooling
system, including the coolant
surge tank pressure cap and
upper radiator hose, is no
longer hot.
Turn the pressure cap slowly
counterclockwise about one full
turn. If a hiss is heard, wait for
that to stop. A hiss means there
is still some pressure left.
2. Keep turning the pressure cap slowly and remove it.3. Fill the coolant surge tank withthe proper mixture to the FULL
COLD mark.
4. With the coolant surge tank
pressure cap off, start the
engine and let it run until the
upper radiator hose can be felt
getting hot. Watch out for the
engine cooling fan.
By this time, the coolant level
inside the coolant surge tank
may be lower. If the level is
lower, add more of the proper mixture to the coolant surge tank
until the level reaches the FULL
COLD mark.
5. Replace the pressure cap tightly.
6. Verify coolant level after engine is shut off and the coolant is
cold. If necessary, repeat coolant
fill procedure Steps 1–6.
Notice: If the pressure cap is not
tightly installed, coolant loss and
possible engine damage may
occur. Be sure the cap is properly
and tightly secured.
Engine Overheating
The vehicle has several indicators
to warn of engine overheating.
There is a coolant temperature
gauge on your vehicle's instrument
panel. See Engine Coolant
Temperature Gauge on page 5-12.
In addition, ENGINE OVERHEATED
STOP ENGINE, ENGINE
OVERHEATED IDLE ENGINE, and
a ENGINE POWER IS REDUCED
message comes on in the Driver
Page 384 of 508

Black plate (30,1)Cadillac Escalade/Escalade ESV Owner Manual (GMNA-Localizing-U.S./
Canada/Mexico-6081529) - 2014 - CRC 1st Edition - 4/23/13
10-30 Vehicle Care
notice that the beam is a slightly
different shade than it was originally.
This is normal.
LED Lighting
This vehicle has several LED lamps.
For replacement of any LED lighting
assembly, contact your dealer.
Back-Up Lamps
To replace this bulb:
1. Open the liftgate. SeeLiftgate
on page 2-8 for more
information.
2. Remove the two screws from the taillamp assembly.
3. Pull the taillamp assembly rearward until the inner pins on
the taillamp assembly disengage
from the vehicle.
4. Turn the socket counterclockwise to remove it
from the taillamp assembly.
5. Pull the old bulb straight out from the socket. 6. Press a new bulb into the
socket, insert the socket into the
taillamp assembly and turn the
socket clockwise into the
taillamp assembly.
7. Reinstall the taillamp assembly. When reinstalling, make sure to
line up the pins on the taillamp
assembly with the vehicle. If the
pins do not line up correctly, the
taillamp assembly will not be
able to be installed properly.
If the taillamp, stoplamp, or turn
signal need to be replaced, see your
dealer for service.