key CADILLAC ESCALADE ESV 2014 Workshop Manual
[x] Cancel search | Manufacturer: CADILLAC, Model Year: 2014, Model line: ESCALADE ESV, Model: CADILLAC ESCALADE ESV 2014Pages: 508, PDF Size: 7.64 MB
Page 228 of 508
Black plate (56,1)Cadillac Escalade/Escalade ESV Owner Manual (GMNA-Localizing-U.S./
Canada/Mexico-6081529) - 2014 - CRC 1st Edition - 4/24/13
7-56 Infotainment System
Aux
Button Press Second
Row
Screen Third Row
Screen
Fourth Press Return to
DefaultState Return to
DefaultState
2(Camera): Press this button to
change camera angles on DVDs
that have this feature while a DVD is
playing. The format and content of
this function vary for each disc. 1 through 0 (Numeric Keypad):
The numeric keypad provides the
capability of direct chapter or track
number selection.
\(Clear):
Press this button within
three seconds after entering a
numeric selection, to clear all
numerical inputs.
}10 (Double Digit Entries): Press
this button to select chapter or track
numbers greater than nine. Press
this button before entering the
number. Battery Replacement
To change the remote control
batteries:
1. Slide the rear cover back on the
remote control.
2. Replace the two batteries in the compartment. Make sure they
are installed correctly using the
diagram on the inside of the
remote control.
3. Replace the battery cover.
If the remote control is to be stored
for a long period of time, remove the
batteries and keep them in a cool,
dry place.
Page 234 of 508
Black plate (62,1)Cadillac Escalade/Escalade ESV Owner Manual (GMNA-Localizing-U.S./
Canada/Mexico-6081529) - 2014 - CRC 1st Edition - 4/23/13
7-62 Infotainment System
button cycles through Full Map and
the tab that displays the current
audio source (AM, FM, XM (if
equipped), CD, etc.). Full Map
displays the screen in full map view.
Selecting the audio tab splits the
screen between the map screen and
the current audio source
screen menu.
RPT (Repeat):Press to repeat the
last voice guidance prompt.
DEST (Destination): Press to
access the Destination Entry
screen. From this screen, you can
select from several options to plan a
route by entering destination points.
CONFIG (Configure): Press to
adjust several of the system's
features and preferences.
Touch-Sensitive Screen
Buttons
Touch-sensitive screen buttons are
located on the screen. When a
screen button has been selected, a beep sounds. Screen buttons are
highlighted when a feature is
available.
Alpha-Numeric Keyboard
Letters of the alphabet, symbols,
punctuation, and numbers, when
available, displays on the navigation
screen as an alpha or numeric
keyboard. The alpha keyboard
displays when the system requires
entry of a city or street name.
All characters are touch-sensitive
screen buttons. Press a character to
select it.
A-Y (Accent Alphabet):
Select to
enter letters with accent symbols.
This button may toggle to A-Z.
A-Z (Alphabet): Select to enter
letters from the alphabet. This
button may toggle to A-Y.
0-9 (Numbers): Select to enter
numbers.
U(Space): Select to enter a
space between characters or the
words of a name. Backspace:
Select if an incorrect
character has been entered.
To make name entries easier, the
system only highlights the
characters that can follow the last
one entered. For example, if a Z is
entered, a T may not be available
for selection.
If a name does not display after
entry, it may need to be entered
differently or the map DVD disc may
not contain that information. See
Maps on page 7-62 for more
information.
Maps
This section includes basic
information that you need to know
about the map database.
The maps are stored on a compact
flash drive that is built into the
navigation system.
Detailed Areas
Road network attributes are
contained in the map database for
detailed areas. Attributes include
Page 242 of 508

Black plate (70,1)Cadillac Escalade/Escalade ESV Owner Manual (GMNA-Localizing-U.S./
Canada/Mexico-6081529) - 2014 - CRC 1st Edition - 4/23/13
7-70 Infotainment System
4. Once a state or province hasbeen selected the City name
category is automatically
selected for entry.
Enter the City Name or press the
Last 5 Cities screen button.
The Last 5 Cities screen
displays a list of the last five city
names that had been entered.
Select a city from the list and it
appears in the City name area.
If using the alpha keyboard,
finish entering the city name.
If five or fewer names are
available, a list displays. If more
than five are available, the List
screen button displays a
number. This number represents
the number of available cities.
Press this button to view the list
and select a city. 5. Once a city has been selected
the Street name category is
automatically selected for entry.
Start entering the street name.
If five or fewer names are
available, a list displays. If more
than five are available, the List
screen button displays a
number. This number represents
the number of available streets.
Press this button to view the list.
6. Once a street has been selected, press House to enter
the house number. The system
displays the house number
range that is available for the
street.
7. Press GO. The map screen, with the destination marked displays.
8. Select the route preference for Fastest, Shortest, or Other. The
system calculates and highlights
the route. 9. Press Start Guidance. The route
is now ready to be started.
See “Getting Started on Your
Route” in this section for more
information.
To enter a destination by entering
the street name first:
1. Press DEST.
2. Select
2.
3. Select the state/province screen button, if needed, to change the
current state or province. A list
of all of the available states and
provinces appear. Select the
state or province.
Page 243 of 508

Black plate (71,1)Cadillac Escalade/Escalade ESV Owner Manual (GMNA-Localizing-U.S./
Canada/Mexico-6081529) - 2014 - CRC 1st Edition - 4/23/13
Infotainment System 7-71
4. Select Street and start enteringthe street name or press the
Last 5 Streets screen button.
If the street name is common,
the city might need to be entered
first.
The Last 5 Streets screen
displays a list of the last five
street names that had been
entered. Select a street from the
list and it appears in the Street
name area.
If using the alpha keyboard,
finish entering the street name.
If five or fewer names are
available, a list displays. If more
than five are available, the List
screen button displays a
number. This number represents
the number of available streets.
Press this button to view the list
and select a street.
5. Once a street has been selected, select House to enter
the house number. The system displays the house number
range that is available for the
street.
6. Once the house number is selected, the city name
automatically populates. If there
is more than one city available
for selection, a list of cities
display. Select the city.
7. Press GO. The map screen, with the destination marked displays.
8. Select the route preference for Fastest, Shortest, or Other. The
system calculates and highlights
the route.
9. Press Start Guidance. The route is now ready to be started.
See “Getting Started on Your
Route” in this section for more
information.
To enter a destination by entering a
cross street:
1. Press DEST.
2. Press
2. 3. Select the state/province screen
button, if needed, to change the
current state or province. A list
of all of the available states and
provinces appear. Select the
state or province.
4. Select Street and start entering the street name or press the
Last 5 Streets screen button.
If the street name is common,
the city might need to be entered
first.
The Last 5 Streets screen
displays a list of the last five
street names that had been
entered. Select a street from the
list and it appears in the Street
name area.
If using the alpha keyboard,
finish entering the street name.
If five or fewer names are
available, a list displays. If more
than five are available, the List
screen button displays a
number. This number represents
Page 244 of 508

Black plate (72,1)Cadillac Escalade/Escalade ESV Owner Manual (GMNA-Localizing-U.S./
Canada/Mexico-6081529) - 2014 - CRC 1st Edition - 4/23/13
7-72 Infotainment System
the number of available streets.
Press this button to view the list
and select a street.
5. Once a street has been selected, select Cross Street
and start entering the cross
street name. If five or fewer
names are available, a list
displays. If more than five are
available, the List screen button
displays a number. This number
represents the number of
available streets. Press this
button to view the list and select
a street.
6. Press GO. The map screen, with the destination marked displays.
7. Select the route preference for Fastest, Shortest, or Other. The
system calculates and highlights
the route.
8. Press Start Guidance. The route is now ready to be started.
See “Getting Started on Your
Route” in this section for more
information. Point of Interest (POI)
The Point of Interest (POI)
destination entry method lets you
select a destination from the
POI list.
iPoint of Interest:
Press to
access the POI (Point of Interest)
screen. From this screen you have
three options to select/enter a
destination. Enter the name using
the alpha keyboard, select a
category from the category list, or select the Franchise Search
screen button to do a franchise
search.
To use the point of interest
destination entry method by entering
the name:
1. Press DEST.
2. Press
i.
3. Select the state/province screen button, if needed, to change the
current state or province. A list
of all of the available states and
provinces appear. Select the
state or province.
4. Enter the POI name. If five or fewer names are
available, a list displays. If more
than five are available, the List
screen button displays a
number. This number represents
the number of available POIs.
Press this button to view the list.
5. Press GO, located next to the POI. The map screen, with the
destination marked displays.
Page 254 of 508
Black plate (82,1)Cadillac Escalade/Escalade ESV Owner Manual (GMNA-Localizing-U.S./
Canada/Mexico-6081529) - 2014 - CRC 1st Edition - 4/23/13
7-82 Infotainment System
.Press the Add to Address Book
screen button when available on
POI information screens,
Destination Entry screens,
or POI screens. The system
automatically saves this
information in the address book.
See “Nav” under Configure Menu on
page 7-82 for information on editing
address book entries.
Adding or Changing Preset
Destinations
This feature allows additions or
changes one of five preset
destinations. When a destination
has been added as a preset
destination, it is available to select
from the Destination Entry screen.
See “Preset Destination” previously
for information on how to select a
preset destination as a final
destination. To store the current vehicle position
as a preset destination:
1. Press Mark from the map screen
to add the current vehicle
position to the address book.
The Address Book screen
appears.
2. Press Name. An alpha-keyboard displays. Enter the name. Press
OK then press Back to return to
the address book information
screen.
3. Press and hold one of the buttons at the bottom of the
screen until the name appears in
that preset destination screen
button. It is now available to
select from the Destination Entry
screen.
To store an address book entry as a
preset destination:
1. Press CONFIG.
2. Press the Nav screen button.
3. Press Edit/View. 4. Select the address book entry to
be stored as the preset
destination. Press Name to add
a name, if needed.
5. Press and hold one of the buttons at the bottom of the
screen until the name appears in
that preset destination screen
button. It is now available to
select from the Destination Entry
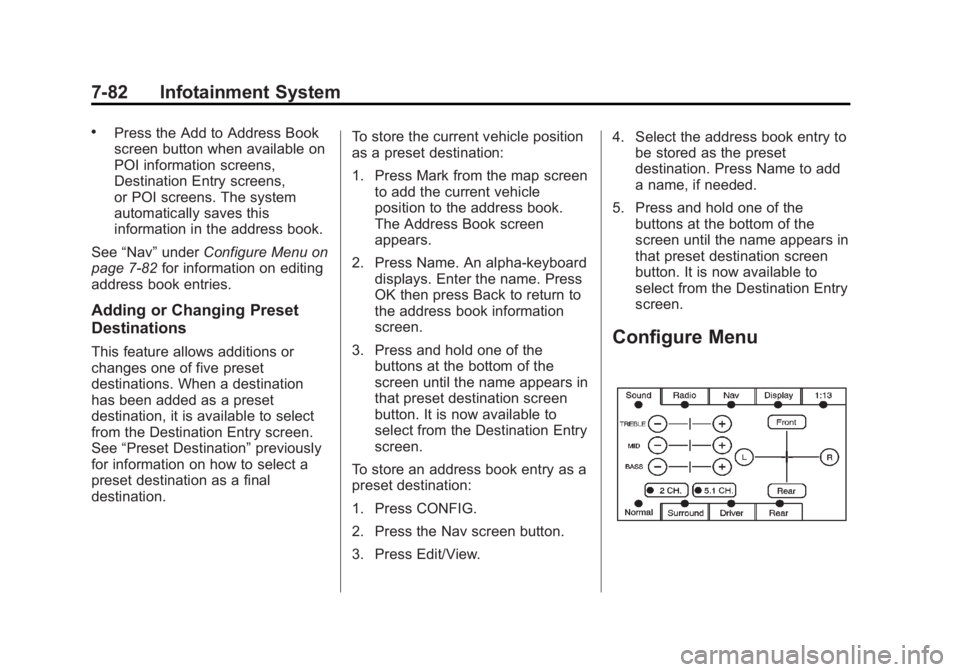
screen.Configure Menu
Page 256 of 508

Black plate (84,1)Cadillac Escalade/Escalade ESV Owner Manual (GMNA-Localizing-U.S./
Canada/Mexico-6081529) - 2014 - CRC 1st Edition - 4/23/13
7-84 Infotainment System
Allow Ferrys:This feature allows
the system to use ferries when
calculating a planned route.
Allow Time and Seasonal
Restricted Roads: This feature
allows the system to use time
restricted and seasonal roads when
calculating a planned route.
Edit Address Book —How to Add
To add an address to the address
book, see “Adding Destinations to
the Address Book” under
Destination on page 7-69.
Edit Address Book —Edit/View
To edit the name of an
address book:
1. Press CONFIG.
2. Press the Nav screen button.
3. Press Edit/View Address Book.
4. Select the Address book entry.
5. Press the Name screen button and use the alpha keyboard to
edit or add the name.
6. Press OK to save your changes, then press Back to return to the
Address Book information
screen.
To add or change the phone number
of an address book entry:
1. Press CONFIG.
2. Press the Nav screen button.
3. Press Edit/View Address Book.
4. Select the address book entry to change. 5. Press the Phone # screen button
and use the numeric keyboard to
input or change the phone
number.
6. Press OK to save your changes, then press Back to return to the
Address Book information
screen.
To change the map icon of an
address book entry:
1. Press CONFIG.
2. Press the Nav screen button.
3. Press Edit/View Address Book.
4. Select the address book entry to change.
5. Press the Icon screen button.
6. Select an icon from the list.
To add a voice tag to an address
book entry:
1. Press CONFIG.
2. Press the Nav screen button.
3. Press Edit/View Address Book.
4. Press Add Voice Tag.
Page 273 of 508
Black plate (101,1)Cadillac Escalade/Escalade ESV Owner Manual (GMNA-Localizing-U.S./
Canada/Mexico-6081529) - 2014 - CRC 1st Edition - 4/23/13
Infotainment System 7-101
.Pair cell phone(s) to the vehicle.
The system may not work with
all cell phones. See“Pairing”in
this section for more information.
.If the cell phone has voice
dialing capability, learn to use
that feature to access the
address book or contact list. See
“Voice Pass-Thru” in this section
for more information.
.See “Storing and Deleting Phone
Numbers” in this section for
more information.
{Warning
When using a cell phone, it can
be distracting to look too long or
too often at the screen of the
phone or the infotainment system.
Taking your eyes off the road too
long or too often could cause a
crash resulting in injury or death.
Focus your attention on driving. A Bluetooth system can use a
Bluetooth-capable cell phone with a
Hands-Free Profile to make and
receive phone calls. The system
can be used while the key is in the
ON/RUN or ACC/ACCESSORY
position. The range of the Bluetooth
system can be up to 9.1 m (30 ft).
Not all phones support all functions,
and not all phones work with the
in-vehicle Bluetooth system. See
www.gm.com/bluetooth for more
information on compatible phones.
Voice Recognition
The Bluetooth system uses voice
recognition to interpret voice
commands to dial phone numbers
and name tags.
For additional information, say
“Help”
while you are in a voice
recognition menu.
Noise: Keep interior noise levels to
a minimum. The system may not
recognize voice commands if there
is too much background noise. When to Speak:
A short tone
sounds after the system responds
indicating when it is waiting for a
voice command. Wait until the tone
and then speak.
How to Speak: Speak clearly in a
calm and natural voice.
Audio System
When using the in-vehicle Bluetooth
system, sound comes through the
vehicle's front audio system
speakers and overrides the audio
system. Use the audio system
volume knob, during a call, to
change the volume level. The
adjusted volume level remains in
memory for later calls. To prevent
missed calls, a minimum volume
level is used if the volume is turned
down too low.
Bluetooth Controls
Use the buttons on the steering
wheel to operate the in-vehicle
Bluetooth system. See Steering
Wheel Controls on page 5-2.
Page 293 of 508
Black plate (5,1)Cadillac Escalade/Escalade ESV Owner Manual (GMNA-Localizing-U.S./
Canada/Mexico-6081529) - 2014 - CRC 1st Edition - 4/23/13
Driving and Operating 9-5
2. Turn the steering wheel aboutone-eighth of a turn, until the
right front tire contacts the
pavement edge.
3. Turn the steering wheel to go straight down the roadway.
Loss of Control
Skidding
There are three types of skids that
correspond to the vehicle's three
control systems:
.Braking Skid —wheels are not
rolling.
.Steering or Cornering Skid —
too much speed or steering in a
curve causes tires to slip and
lose cornering force.
.Acceleration Skid —too much
throttle causes the driving
wheels to spin. Defensive drivers avoid most skids
by taking reasonable care suited to
existing conditions, and by not
overdriving those conditions. But
skids are always possible.
If the vehicle starts to slide, follow
these suggestions:
.Ease your foot off the
accelerator pedal and steer the
way you want the vehicle to go.
The vehicle may straighten out.
Be ready for a second skid if it
occurs.
.Slow down and adjust your
driving according to weather
conditions. Stopping distance
can be longer and vehicle
control can be affected when
traction is reduced by water,
snow, ice, gravel, or other
material on the road. Learn to
recognize warning clues
—such
as enough water, ice, or packed
snow on the road to make a
mirrored surface —and slow
down when you have any doubt.
.Try to avoid sudden steering,
acceleration, or braking,
including reducing vehicle speed
by shifting to a lower gear. Any
sudden changes could cause
the tires to slide.
Remember: Antilock brakes help
avoid only the braking skid.
Off-Road Driving
Four-wheel-drive and all-wheel-drive
vehicles can be used for off-road
driving. Vehicles without four-wheel
drive, all-wheel-drive and vehicles
not equipped with All Terrain (AT) or
On-Off Road (OOR) tires must not
be driven off-road except on a level,
solid surface. To contact the tire
manufacturer for more information
about the original equipment tires,
see the Limited Warranty and
Owner Assistance Information
manual.
Controlling the vehicle is the key to
successful off-road driving. One of
the best ways to control the vehicle
is to control the speed.
Page 307 of 508

Black plate (19,1)Cadillac Escalade/Escalade ESV Owner Manual (GMNA-Localizing-U.S./
Canada/Mexico-6081529) - 2014 - CRC 1st Edition - 4/23/13
Driving and Operating 9-19
Warning (Continued)
.Never stack heavier
things, like suitcases,
inside the vehicle so that
some of them are above
the tops of the seats.
.Do not leave an
unsecured child restraint
in the vehicle.
.When you carry something
inside the vehicle, secure
it whenever you can.
.Do not leave a seat folded
down unless you need to.
There is also important loading
information for off-road driving in
this manual. See “Loading Your
Vehicle for Off-Road Driving”
under Off-Road Driving on
page 9-5. Add-On Equipment
When you carry removable
items, you may need to put a
limit on how many people you
can carry inside your vehicle. Be
sure to weigh your vehicle
before you buy and install the
new equipment.
Notice:
Overloading the
vehicle may cause damage.
Repairs would not be covered
by the vehicle warranty. Do
not overload the vehicle.
Remember not to exceed the
Gross Axle Weight
Rating (GAWR) of the front or
rear axle. Automatic Level Control
The automatic level control rear
suspension comes as a part of
the Road Sensing Suspension.
See
Road Sensing Suspension
on page 9-38.
This type of level control is fully
automatic and will provide a
better leveled riding position as
well as better handling under a
variety of passenger and loading
conditions. An air compressor
connected to the rear shocks
will raise or lower the rear of the
vehicle to maintain proper
vehicle height. The system is
activated when the ignition key
is turned to RUN and will
automatically adjust vehicle
height thereafter. The system
may exhaust (lower vehicle
height) for up to 10 minutes after
the ignition key has been turned