change language CADILLAC ESCALADE ESV 2014 Owner's Manual
[x] Cancel search | Manufacturer: CADILLAC, Model Year: 2014, Model line: ESCALADE ESV, Model: CADILLAC ESCALADE ESV 2014Pages: 508, PDF Size: 7.64 MB
Page 3 of 508
Black plate (3,1)Cadillac Escalade/Escalade ESV Owner Manual (GMNA-Localizing-U.S./
Canada/Mexico-6081529) - 2014 - CRC 1st Edition - 4/24/13
Introduction iii
The names, logos, emblems,
slogans, vehicle model names, and
vehicle body designs appearing in
this manual including, but not limited
to, GM, the GM logo, CADILLAC,
the CADILLAC Crest and Wreath,
ESCALADE, and ESV are
trademarks and/or service marks of
General Motors LLC, its
subsidiaries, affiliates, or licensors.This manual describes features that
may or may not be on your specific
vehicle either because they are
options that you did not purchase or
due to changes subsequent to the
printing of this owner manual.
Please refer to the purchase
documentation relating to your
specific vehicle to confirm each of
the features found on your vehicle.
For vehicles first sold in Canada,
substitute the name
“General
Motors of Canada Limited” for
Cadillac Motor Division wherever it
appears in this manual.
Keep this manual in the vehicle for
quick reference.
Canadian Vehicle Owners
Propriétaires Canadiens
A French language manual can be
obtained from your dealer, at
www.helminc.com, or from:
On peut obtenir un exemplaire de
ce guide en français auprès du
concessionnaire ou à l'adresse
savant:
Helm, Incorporated
Attention: Customer Service
47911 Halyard Drive
Plymouth, MI 48170
Using this Manual
To quickly locate information about
the vehicle, use the Index in the
back of the manual. It is an
alphabetical list of what is in the
manual and the page number where
it can be found.
Litho in U.S.A.
Part No. 23159037 A First Printing©2013 General Motors LLC. All Rights Reserved.
Page 148 of 508
Black plate (36,1)Cadillac Escalade/Escalade ESV Owner Manual (GMNA-Localizing-U.S./
Canada/Mexico-6081529) - 2014 - CRC 1st Edition - 4/23/13
5-36 Instruments and Controls
Entering the Feature
Settings Menu
1. Turn the ignition on and placethe vehicle in P (Park).
To avoid excessive drain on the
battery, it is recommended that
the headlamps are turned off.
2. Press the customization button to scroll through the available
customizable options.
Feature Settings Menu Items
The following are customization
features that allow you to program
settings to the vehicle:
DISPLAY IN ENGLISH
This feature will only display if a
language other than English has
been set. This feature allows you to
change the language in which the
DIC messages appear to English.
Press the customization button until
the PRESS
VTO DISPLAY IN
ENGLISH screen appears on the DIC display. Press the set/reset
button once to display all DIC
messages in English.
DISPLAY LANGUAGE
This feature allows you to select the
language in which the DIC
messages will appear.
Press the customization button until
the DISPLAY LANGUAGE screen
appears on the DIC display. Press
the set/reset button once to access
the settings for this feature. Then
press the customization button to
scroll through the following settings:
ENGLISH (default):
All messages
will appear in English.
DEUTSCH: All messages will
appear in German.
ITALIANO: All messages will
appear in Italian.
FRANCAIS: All messages will
appear in French.
ESPANOL: All messages will
appear in Spanish. ARABIC:
All messages will appear
in Arabic.
CHINESE: All messages will
appear in Chinese.
RUSSIAN: All messages will
appear in Russian.
NO CHANGE: No change will be
made to this feature. The current
setting will remain.
To select a setting, press the set/
reset button while the desired
setting is displayed on the DIC.
AUTO DOOR LOCK
This feature allows you to select
when the vehicle's doors will
automatically lock. See Automatic
Door Locks on page 2-7 for more
information.
Page 177 of 508
Black plate (5,1)Cadillac Escalade/Escalade ESV Owner Manual (GMNA-Localizing-U.S./
Canada/Mexico-6081529) - 2014 - CRC 1st Edition - 4/24/13
Infotainment System 7-5
Q. AUDIO
R. FAV (Favorite)
S.
5(Phone)
T.
e(Sound)
U. CONFIG (Configure)
V. DEST (Destination)
W. RPT (Repeat)
X. NAV (Navigation)
Language —English/Metric
To change the language of the
navigation screens or to change the
navigation screens from English or
metric, see Driver Information
Center (DIC) on page 5-22 for more
information.
Deleting Personal Information
This navigation system can record
and store personal information such
as names and addresses. Delete
this information when selling your vehicle or returning a leased
vehicle. See
“Edit Address Book —
Edit/View” underConfigure Menu on
page 7-82 for deleting information
from the address book.
Limit Features While Driving
The navigation system may have
this feature.
Touch the Limit Features While
Driving screen button to turn the
ability to limit functions on and off
while driving. When this screen
button is highlighted, the following
functions are limited while driving:
.Music Navigator Scrolling
.Radio Category Scrolling
.Navigation Menu Scrolling and
some functions
See “Category” underAM-FM Radio
on page 7-9 for more information.
See “From Map” underDestination
on page 7-69 for more information.
Some functions will remain limited
regardless of the setting.
Storing Radio Station Presets
To set preset radio stations, do the
following:
1. Press
Oto turn the system on.
2. Press AUDIO and select the desired band (AM, FM, or XM (if
equipped)).
3. Use the
w(tuning) knob,
y/©, or¨/z(Seek) arrows
to tune to the desired station.
4. Press and hold one of the five preset screen buttons, at the
bottom of the screen, until a
beep is heard.
5. Repeat the steps for each preset.
See “Storing Radio Station Presets”
under AM-FM Radio on page 7-9 for
more information.
Setting the Clock
The navigation system time and the
analog clock operate independently.
Changing the time through the
navigation system does not change
Page 194 of 508
Black plate (22,1)Cadillac Escalade/Escalade ESV Owner Manual (GMNA-Localizing-U.S./
Canada/Mexico-6081529) - 2014 - CRC 1st Edition - 4/23/13
7-22 Infotainment System
you would like to watch or listen to.
This button does not work when the
DVD is stopped.
Setup:Press to display the DVD
Setup screen. This button is only
available when the DVD is not
playing. The DVD Setup screen
allows you to change the
brightness, contrast, and mode,
change the viewing on the monitor
and to change the initial settings;
language, parental level, and
aspect.
!(Brightness): Press the up or
down screen arrows to increase or
decrease the brightness of the
navigation screen.
_(Contrast): Press the up or
down screen arrows to increase or
decrease the contrast of the
navigation screen.
Auto (Automatic): Press so the
system can automatically adjust the
navigation screen background
depending on exterior lighting
conditions. Night:
Press to make the
navigation screen background
brighten.
Day: Press to make the navigation
screen background darken.
Monitor: From the DVD Setup
screen, press to adjust the viewing
angle of the DVD on the navigation
screen. This is not available on all
DVDs. This button is not available
for DVD audio
Press
eto close the screen in from
the left and right sides.
Press
Jto fill the screen on the
left and right sides.
Press
dto fill the screen on the
top and bottom.
Settings: From the DVD Setup
screen, press to change the default
audio, subtitle, and menu
languages, parental level, audio,
and to view the aspect of the DVD.
These settings are not available on
all DVDs. This button is not
available for DVD audio.
Audio Language: Press English,
French, or Spanish to change the
default language that the DVD
player uses for each disc. The audio
language must be available on the
disc. The audio language may vary
for each DVD.
Subtitle Language: Press English,
French, or Spanish to change the
default language of the subtitles that
the DVD player uses for each disc.
The subtitle language must be
available on the disc. The subtitle
language may vary for each DVD.
Page 195 of 508
Black plate (23,1)Cadillac Escalade/Escalade ESV Owner Manual (GMNA-Localizing-U.S./
Canada/Mexico-6081529) - 2014 - CRC 1st Edition - 4/23/13
Infotainment System 7-23
Menu Language:Press English,
French, or Spanish to change the
default language of the DVD video
menus. The menu language must
be available on the disc. The menu
language may vary for each DVD.
Parental Level: Press to change
the rating level to only allow the play
of DVDs with a certain rating. The
rating selection is 1 through 8, with 1
Kids Safe being a G rating. If the 1
is selected, any DVD with a rating
above G will not be able to be
viewed without entering a password.
When the parental level is first
entered a keyboard will appear on
the display and a four-digit
password will need to be created.
Type in a password that you will be
able to remember. Once the
password is created, you can then
select a rating level.
If you would like to change the
rating level, press the Parental
Level button, then press the Password button. Type in the
password and then change the
rating level.
If the password has been forgotten,
contact your dealer.
This may not be available on
all DVDs.
Aspect:
Press to change the
aspect ratio of the DVD. This may
not be available on all DVDs.
y(Next Track/Chapter): Press to
go to the next track or chapter. This
button may not work when the DVD
is playing the copyright information
or the previews.
z(Previous Track/Chapter):
1. Press to return to the start of the current track or chapter.
2. Press again to go to the previous track or chapter. This
button may not work when the
DVD is playing the copyright
information or the previews.
w(Tuning Knob):
1. Turn counterclockwise one notch to go to the start of the current
chapter/track, turn it again to go
to the previous chapter/track.
2. Turn clockwise to go to the next chapter/track.
Care of Your CDs and DVDs
Sound quality can be reduced due
to disc quality, recording method,
quality of the music recorded, and
how the disc has been handled.
Handle discs carefully and store
them in their original cases or other
protective cases away from direct
sunlight and dust. If the bottom
surface of a disc is damaged, the
disc may not play properly or at all.
Do not touch the bottom surface of
a disc while handling it; this could
damage the surface. Pick up discs
by grasping the outer edges or the
edge of the hole and the outer edge.
If the bottom surface of a disc is
dirty, take a soft lint free cloth,
or dampen a clean soft cloth in a
Page 216 of 508
Black plate (44,1)Cadillac Escalade/Escalade ESV Owner Manual (GMNA-Localizing-U.S./
Canada/Mexico-6081529) - 2014 - CRC 1st Edition - 4/23/13
7-44 Infotainment System
the remote control. If the remote
control does not seem to be
working, the batteries might need to
be replaced. See“Battery
Replacement” following this section.
The remote control provided with
the Headrest DVD RSE system, is
not a universal remote control and
will not control other equipment.
Notice: Storing the remote
control in a hot area or in direct
sunlight can damage it, and the
repairs will not be covered by the
warranty. Storage in extreme cold
can weaken the batteries. Keep
the remote control stored in a
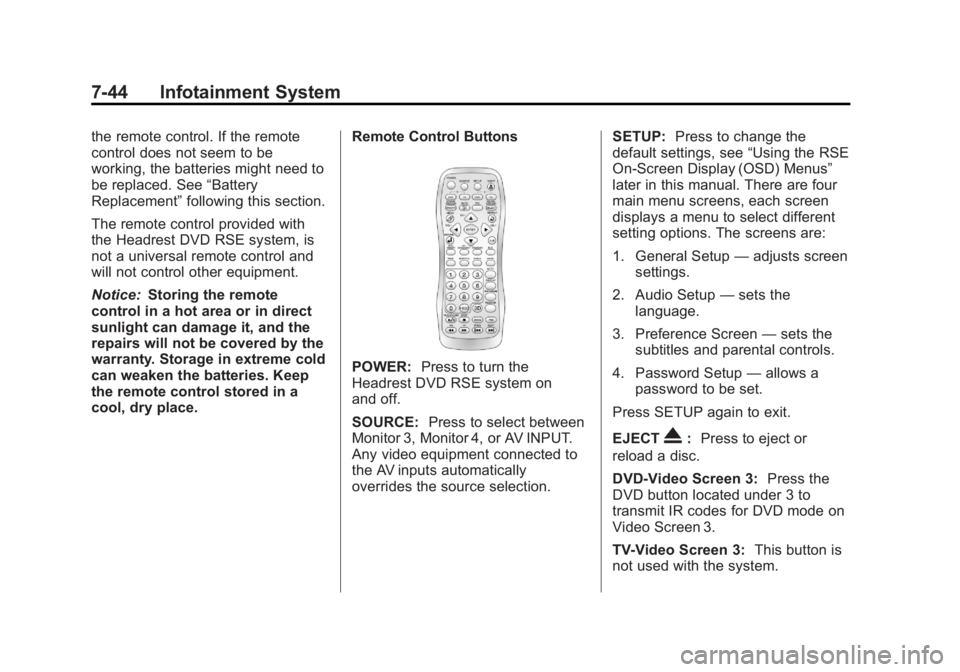
cool, dry place. Remote Control Buttons
POWER:
Press to turn the
Headrest DVD RSE system on
and off.
SOURCE: Press to select between
Monitor 3, Monitor 4, or AV INPUT.
Any video equipment connected to
the AV inputs automatically
overrides the source selection. SETUP:
Press to change the
default settings, see “Using the RSE
On-Screen Display (OSD) Menus”
later in this manual. There are four
main menu screens, each screen
displays a menu to select different
setting options. The screens are:
1. General Setup —adjusts screen
settings.
2. Audio Setup —sets the
language.
3. Preference Screen —sets the
subtitles and parental controls.
4. Password Setup —allows a
password to be set.
Press SETUP again to exit.
EJECT
X: Press to eject or
reload a disc.
DVD-Video Screen 3: Press the
DVD button located under 3 to
transmit IR codes for DVD mode on
Video Screen 3.
TV-Video Screen 3: This button is
not used with the system.
Page 218 of 508
Black plate (46,1)Cadillac Escalade/Escalade ESV Owner Manual (GMNA-Localizing-U.S./
Canada/Mexico-6081529) - 2014 - CRC 1st Edition - 4/23/13
7-46 Infotainment System
TITLE:Press to enter the disc title
mode. The title feature is
disc-specific, and may not be
available on all discs.
SUBTITLE: Press to change the
subtitle language to another
available language or to turn
subtitles off.
ANGLE: Press to select a different
viewing angle for discs that are
recorded with different camera
angles.
AUDIO: Press to select a different
language for discs that are recorded
with different languages.
0-9 (Numbers): The numbers
located on the lower left side of the
remote control can be used to enter
numbered menu options, channels,
or track numbers.
GOTO: Press to enter the GOTO
menu to choose a desired title,
chapter, track, or song inside
the disc. DISPLAY:
Press to scroll through
display information on the upper left
corner of the screen, such as title,
chapter/track, time elapsed, and
time remaining, or to turn off the
display
PROGRAM: Press to edit a
playback program containing
desired titles in the DVD or tracks in
the CD-DA.
3D: Press to change between
different 3D audio modes for DVD
or CD.
The options for DVD are: Off, Rock,
Pop, Live, Dance, Techno, Classic,
and Soft.
The options for CD are: Off,
Concert, Living room, Hall,
Bathroom Cave, Arena, and Church.
RANDOM: Press to play titles
randomly.
PLAY/PAUSE
r/j: Press to start
playback of the disc, or to pause
playback. STOP
c:
Press to stop playback
of a disc.
.To resume disc playback,
press PLAY.
.To start playback from the
beginning of the disc, press
STOP, STOP, then PLAY .
ZOOM: Press to either enlarge the
viewed image by 2X, 3X, and 4X,
or reduce the image by 1/2X, 1/3X,
and 1/4X.
PBC (Playback Control): Press to
turn video CD playback control on
or off.
FR
r(Fast Reverse): Press to
fast reverse the disc. Press multiple
times to choose between 2X, 4X,
8X, 16X, and 32X speeds.
FF
[(Fast Forward): Press to
fast forward the disc. Press multiple
times to choose between 2X, 4X,
8X, 16X, and 32X speeds.
Page 224 of 508
Black plate (52,1)Cadillac Escalade/Escalade ESV Owner Manual (GMNA-Localizing-U.S./
Canada/Mexico-6081529) - 2014 - CRC 1st Edition - 4/23/13
7-52 Infotainment System
camcorder or a video game unit to
the RSE system. Adapter
connectors or cables (not included)
may be required to connect the
auxiliary device to the A/V jacks.
Refer to the manufacturer’s
instructions for proper usage.
Power for auxiliary devices is not
supplied by the radio system.
To use the auxiliary inputs of the
RSE system, connect an external
auxiliary device to the color-coded
A/V jacks and turn both the auxiliary
device and the video screen power
on. If the video screen is in the DVD
player mode, pressing the AUX
(auxiliary) button on the remote
control switches the video screen
from the DVD player mode to the
auxiliary device. The audio of the
connected source can be listened to
over the speakers by sourcing the
radio to the auxiliary device or by
sourcing the RSA to the Rear Aux
and listening with the wireless
headphones on Channel 2 or with the wired headphones. See
“Using
the Auxiliary Input Jack” under
Auxiliary Devices on page 7-29 for
more information about changing
the source.
How to Change the RSE Video
Screen Settings
The screen display mode (normal,
full, and zoom), screen brightness,
and setup menu language can be
changed from the on screen setup
menu. To change any feature:
1. Press the
z(display menu)
button on the remote control.
2. Use the remote control
n,q,
p,o(navigation) arrows and
the
r(enter) button to use the
setup menu.
3. Press the
zbutton again to
remove the setup menu from the
screen.
Audio Output
Audio from the DVD player or
auxiliary inputs can be heard
through the following possible
sources:
.Wireless headphones
.Vehicle speakers
.Vehicle-wired headphone jacks
on the RSA system, if the
vehicle has this feature.
The RSE system always transmits
the audio signal to the wireless
headphones, if there is audio
available. See “Headphones” earlier
in this section for more information.
The DVD player is capable of
outputting audio to the wired
headphone jacks on the RSA
system, if the vehicle has this
feature. The DVD player can be
selected as an audio source on the
RSA system. See Rear Seat Audio
(RSA) System on page 7-59 for
more information.
Page 493 of 508
Black plate (7,1)Cadillac Escalade/Escalade ESV Owner Manual (GMNA-Localizing-U.S./
Canada/Mexico-6081529) - 2014 - CRC 1st Edition - 4/23/13
OnStar 14-7
OnStar Personal Identification
Number (PIN)
A PIN is needed to access some of
the OnStar services, like Remote
Door Unlock and Stolen Vehicle
Assistance. You will be prompted to
change the PIN the first time when
speaking with an Advisor. To
change the OnStar PIN, call OnStar
and provide the Advisor with the
current number.
Warranty
OnStar equipment may be
warranted as part of the New
Vehicle Limited Warranty. The
manufacturer of the vehicle
furnishes detailed warranty
information.
Languages
The vehicle can be programmed to
respond in French or Spanish.
Press
Qand ask an Advisor.
Advisors can speak French or
Spanish.
Potential Issues
Some OnStar services are disabled
after five days. OnStar cannot
perform Remote Door Unlock or
Stolen Vehicle Assistance after the
vehicle has been off continuously
for five days. After five days, OnStar
can contact Roadside Assistance
and a locksmith to help gain access
to the vehicle.
Global Positioning
System (GPS)
.Obstruction of the GPS can
occur in a large city with tall
buildings; in parking garages;
around airports; in tunnels,
underpasses, or parking
garages; or in an area with very
dense trees. If GPS signals are
not available, the OnStar system
should still operate to call
OnStar. However, OnStar could
have difficulty identifying the
exact location.
.In emergency situations, OnStar
can use the last stored GPS
location to send to emergency
responders.
.A temporary loss of GPS can
cause loss of the ability to send
a Turn-by-Turn Navigation route.
The Advisor may give a verbal
route or may ask for a call back
after the vehicle is driven into an
open area.
Cellular and GPS Antennas
Avoid placing items over or near the
antenna to prevent blocking cellular
and GPS signal reception. Cellular
reception is required for OnStar to
send remote signals to the vehicle.
Unable to Connect to OnStar
Message
If there is limited cellular coverage
or the cellular network has reached
maximum capacity, this message
may come on. Press
Qto try the
call again or try again after driving a
few miles into another cellular area.