change wheel CADILLAC ESCALADE EXT 2003 2.G User Guide
[x] Cancel search | Manufacturer: CADILLAC, Model Year: 2003, Model line: ESCALADE EXT, Model: CADILLAC ESCALADE EXT 2003 2.GPages: 473, PDF Size: 3.31 MB
Page 266 of 473

Loss of Control
Let's review what driving experts say about what
happens when the three control systems (brakes,
steering and acceleration) don't have enough friction
where the tires meet the road to do what the driver
has asked.
In any emergency, don't give up. Keep trying to steer
and constantly seek an escape route or area of
less danger.
Skidding
In a skid, a driver can lose control of the vehicle.
Defensive drivers avoid most skids by taking reasonable
care suited to existing conditions, and by not ªoverdrivingº
those conditions. But skids are always possible.
The three types of skids correspond to your vehicle's
three control systems. In the braking skid, your wheels
aren't rolling. In the steering or cornering skid, too much
speed or steering in a curve causes tires to slip and lose
cornering force. And in the acceleration skid, too much
throttle causes the driving wheels to spin.A cornering skid is best handled by easing your foot off
the accelerator pedal.
If your vehicle starts to slide, ease your foot off the
accelerator pedal and quickly steer the way you want
the vehicle to go. If you start steering quickly enough,
your vehicle may straighten out. Always be ready
for a second skid if it occurs.
Of course, traction is reduced when water, snow, ice,
gravel or other material is on the road. For safety, you'll
want to slow down and adjust your driving to these
conditions. It is important to slow down on slippery
surfaces because stopping distance will be longer and
vehicle control more limited.
While driving on a surface with reduced traction,
try your best to avoid sudden steering, acceleration or
braking (including engine braking by shifting to a
lower gear). Any sudden changes could cause the tires
to slide. You may not realize the surface is slippery
until your vehicle is skidding. Learn to recognize warning
clues Ð such as enough water, ice or packed snow
on the road to make a ªmirrored surfaceº Ð and slow
down when you have any doubt.
Remember: Any anti-lock brake system (ABS) helps
avoid only the braking skid.
4-17
Page 270 of 473
Controlling your vehicle is the key to successful off-road
driving. One of the best ways to control your vehicle
is to control your speed. Here are some things to keep
in mind. At higher speeds:
·you approach things faster and you have less time
to scan the terrain for obstacles.
·you have less time to react.
·you have more vehicle bounce when you drive over
obstacles.
·you'll need more distance for braking, especially
since you're on an unpaved surface.
{CAUTION:
When you're driving off-road, bouncing and
quick changes in direction can easily throw
you out of position. This could cause you to
lose control and crash. So, whether you're
driving on or off the road, you and your
passengers should wear safety belts.
Scanning the Terrain
Off-road driving can take you over many different kinds of
terrain. You need to be familiar with the terrain and its
many different features. Here are some things to
consider.
Surface Conditions:Off-roading can take you over
hard-packed dirt, gravel, rocks, grass, sand, mud, snow
or ice. Each of these surfaces affects the steering,
acceleration and braking of your vehicle in different
ways. Depending upon the kind of surface you are on,
you may experience slipping, sliding, wheel spinning,
delayed acceleration, poor traction and longer braking
distances.
Surface Obstacles:Unseen or hidden obstacles can
be hazardous. A rock, log, hole, rut or bump can startle
you if you're not prepared for them. Often these
obstacles are hidden by grass, bushes, snow or even
the rise and fall of the terrain itself. Here are some
things to consider:
·Is the path ahead clear?
·Will the surface texture change abruptly up ahead?
·Does the travel take you uphill or downhill?
(There's more discussion of these subjects later.)
·Will you have to stop suddenly or change direction
quickly?
4-21
Page 279 of 473
Driving in Mud, Sand, Snow or Ice
When you drive in mud, snow or sand, your wheels
won't get good traction. You can't accelerate as quickly,
turning is more difficult, and you'll need longer braking
distances.
It's best to use a low gear when you're in mud Ð the
deeper the mud, the lower the gear. In really deep mud,
the idea is to keep your vehicle moving so you don't
get stuck.
When you drive on sand, you'll sense a change in
wheel traction. But it will depend upon how loosely
packed the sand is. On loosely packed sand (as
on beaches or sand dunes) your tires will tend to sink
into the sand. This has an effect on steering,
accelerating and braking. Drive at a reduced speed and
avoid sharp turns or abrupt maneuvers.Hard packed snow and ice offer the worst tire traction.
On these surfaces, it's very easy to lose control. On
wet ice, for example, the traction is so poor that you will
have difficulty accelerating. And if you do get moving,
poor steering and difficult braking can cause you to slide
out of control.
{CAUTION:
Driving on frozen lakes, ponds or rivers can
be dangerous. Underwater springs, currents
under the ice, or sudden thaws can weaken
the ice. Your vehicle could fall through the ice
and you and your passengers could drown.
Drive your vehicle on safe surfaces only.
4-30
Page 307 of 473

During your trip, check occasionally to be sure that the
load is secure, and that the lamps and any trailer
brakes are still working.
Following Distance
Stay at least twice as far behind the vehicle ahead as
you would when driving your vehicle without a trailer.
This can help you avoid situations that require
heavy braking and sudden turns.
Passing
You'll need more passing distance up ahead when
you're towing a trailer. And, because you're a good
deal longer, you'll need to go much farther beyond the
passed vehicle before you can return to your lane.
Backing Up
Hold the bottom of the steering wheel with one hand.
Then, to move the trailer to the left, just move that hand
to the left. To move the trailer to the right, move your
hand to the right. Always back up slowly and, if possible,
have someone guide you.
Making Turns
Notice:Making very sharp turns while trailering
could cause the trailer to come in contact with the
vehicle. Your vehicle could be damaged. Avoid
making very sharp turns while trailering.
When you're turning with a trailer, make wider turns than
normal. Do this so your trailer won't strike soft shoulders,
curbs, road signs, trees or other objects. Avoid jerky or
sudden maneuvers. Signal well in advance.
Turn Signals When Towing a Trailer
The arrows on your instrument panel will ¯ash whenever
you signal a turn or lane change. Properly hooked up,
the trailer lamps will also ¯ash, telling other drivers
you're about to turn, change lanes or stop.
When towing a trailer, the arrows on your instrument
panel will ¯ash for turns even if the bulbs on the trailer
are burned out. Thus, you may think drivers behind
you are seeing your signal when they are not.
It's important to check occasionally to be sure the
trailer bulbs are still working.
4-58
Page 353 of 473

Properly torqued wheel nuts are necessary to help
prevent brake pulsation. When tires are rotated, inspect
brake pads for wear and evenly tighten wheel nuts in
the proper sequence to GM torque speci®cations.
Brake linings should always be replaced as complete
axle sets.
See
Brake System Inspection on page 6-16.
Brake Pedal Travel
See your dealer if the brake pedal does not return to
normal height, or if there is a rapid increase in
pedal travel. This could be a sign of brake trouble.
Brake Adjustment
Every time you make a brake stop, your disc brakes
adjust for wear.
Replacing Brake System Parts
The braking system on a vehicle is complex. Its many
parts have to be of top quality and work well together if
the vehicle is to have really good braking. Your vehicle
was designed and tested with top-quality GM brake
parts. When you replace parts of your braking
system Ð for example, when your brake linings wear
down and you need new ones put in Ð be sure you get
new approved GM replacement parts. If you don't,
your brakes may no longer work properly. For example,
if someone puts in brake linings that are wrong for
your vehicle, the balance between your front and rear
brakes can change Ð for the worse. The braking
performance you've come to expect can change in many
other ways if someone puts in the wrong replacement
brake parts.
5-42
Page 380 of 473
After the tires have been rotated, adjust the front and rear
in¯ation pressures as shown on the Certi®cation/Tire
label. Make certain that all wheel nuts are properly
tightened. See ªWheel Nut Torqueº under
Capacities and
Speci®cations on page 5-110.
{CAUTION:
Rust or dirt on a wheel, or on the parts to
which it is fastened, can make wheel nuts
become loose after a time. The wheel could
come off and cause an accident. When you
change a wheel, remove any rust or dirt from
places where the wheel attaches to the vehicle.
In an emergency, you can use a cloth or a
paper towel to do this; but be sure to use a
scraper or wire brush later, if you need to,
to get all the rust or dirt off. See ªChanging a
Flat Tireº in the Index.
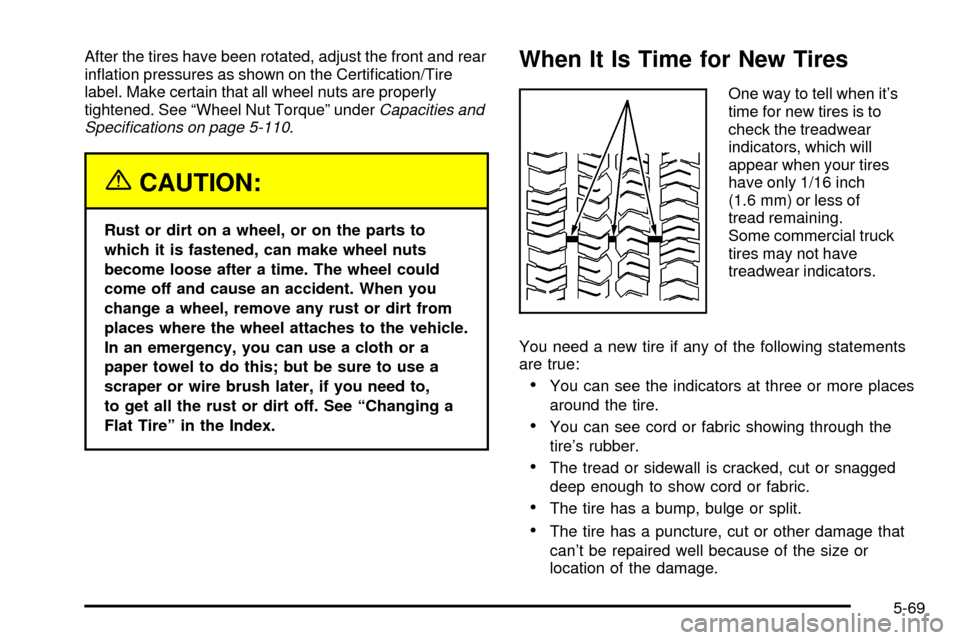
When It Is Time for New Tires
One way to tell when it's
time for new tires is to
check the treadwear
indicators, which will
appear when your tires
have only 1/16 inch
(1.6 mm) or less of
tread remaining.
Some commercial truck
tires may not have
treadwear indicators.
You need a new tire if any of the following statements
are true:
·You can see the indicators at three or more places
around the tire.
·You can see cord or fabric showing through the
tire's rubber.
·The tread or sidewall is cracked, cut or snagged
deep enough to show cord or fabric.
·The tire has a bump, bulge or split.
·The tire has a puncture, cut or other damage that
can't be repaired well because of the size or
location of the damage.
5-69
Page 386 of 473
If a Tire Goes Flat
It's unusual for a tire to ªblowoutº while you're driving,
especially if you maintain your tires properly. If air goes
out of a tire, it's much more likely to leak out slowly.
But if you should ever have a ªblowout,º here are a few
tips about what to expect and what to do:
If a front tire fails, the ¯at tire will create a drag that
pulls the vehicle toward that side. Take your foot off the
accelerator pedal and grip the steering wheel ®rmly.
Steer to maintain lane position, and then gently brake to
a stop well out of the traffic lane.
A rear blowout, particularly on a curve, acts much like a
skid and may require the same correction you'd use
in a skid. In any rear blowout, remove your foot from the
accelerator pedal. Get the vehicle under control by
steering the way you want the vehicle to go. It may be
very bumpy and noisy, but you can still steer. Gently
brake to a stop, well off the road if possible.{CAUTION:
Lifting a vehicle and getting under it to do
maintenance or repairs is dangerous without
the appropriate safety equipment and training.
The jack provided with your vehicle is designed
only for changing a ¯at tire. If it is used for
anything else, you or others could be badly
injured or killed if the vehicle slips off the jack.
Use the jack provided with your vehicle only for
changing a ¯at tire.
If a tire goes ¯at, the next part shows how to use your
jacking equipment to change a ¯at tire safely.
5-75
Page 387 of 473
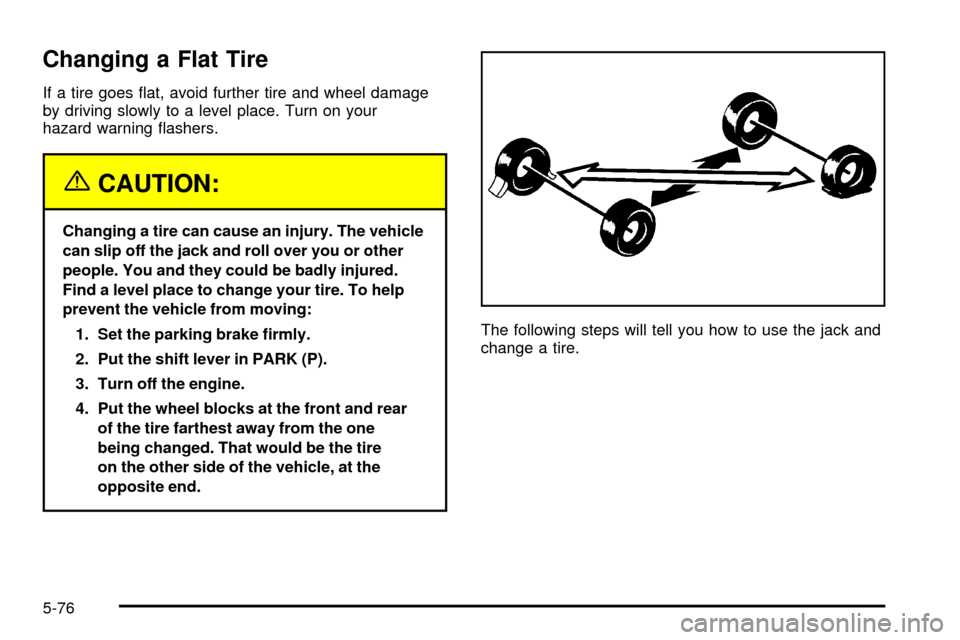
Changing a Flat Tire
If a tire goes ¯at, avoid further tire and wheel damage
by driving slowly to a level place. Turn on your
hazard warning ¯ashers.
{CAUTION:
Changing a tire can cause an injury. The vehicle
can slip off the jack and roll over you or other
people. You and they could be badly injured.
Find a level place to change your tire. To help
prevent the vehicle from moving:
1. Set the parking brake ®rmly.
2. Put the shift lever in PARK (P).
3. Turn off the engine.
4. Put the wheel blocks at the front and rear
of the tire farthest away from the one
being changed. That would be the tire
on the other side of the vehicle, at the
opposite end.The following steps will tell you how to use the jack and
change a tire.
5-76
Page 389 of 473
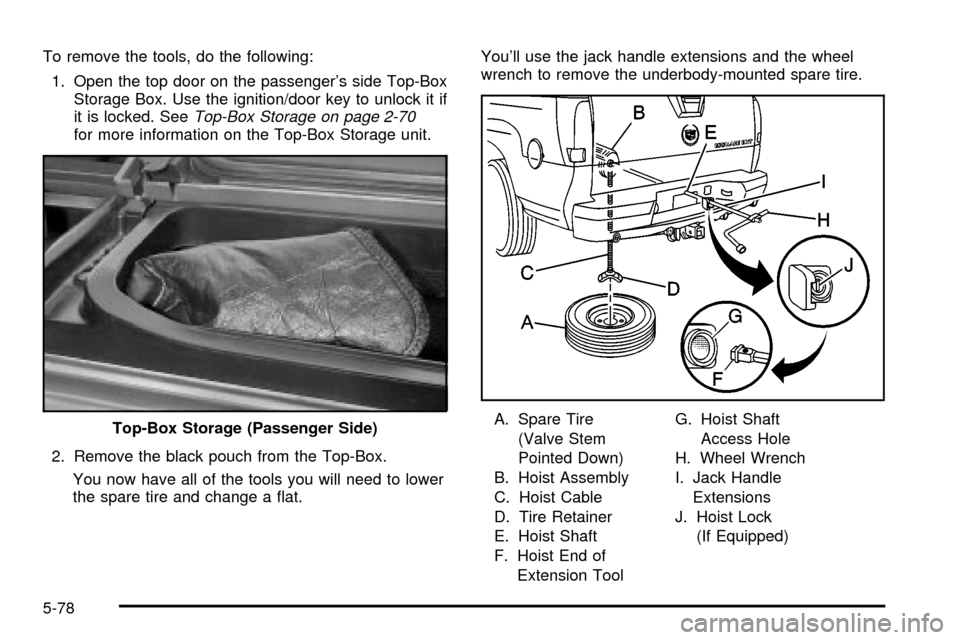
To remove the tools, do the following:
1. Open the top door on the passenger's side Top-Box
Storage Box. Use the ignition/door key to unlock it if
it is locked. See
Top-Box Storage on page 2-70for more information on the Top-Box Storage unit.
2. Remove the black pouch from the Top-Box.
You now have all of the tools you will need to lower
the spare tire and change a ¯at.You'll use the jack handle extensions and the wheel
wrench to remove the underbody-mounted spare tire.
A. Spare Tire
(Valve Stem
Pointed Down)
B. Hoist Assembly
C. Hoist Cable
D. Tire Retainer
E. Hoist Shaft
F. Hoist End of
Extension ToolG. Hoist Shaft
Access Hole
H. Wheel Wrench
I. Jack Handle
Extensions
J. Hoist Lock
(If Equipped) Top-Box Storage (Passenger Side)
5-78
Page 395 of 473

4. Remove all the wheel
nuts and take off the
¯at tire.
5. Remove any rust or dirt
from the wheel bolts,
mounting surfaces
and spare wheel.
{CAUTION:
Rust or dirt on the wheel, or on the parts to
which it is fastened, can make the wheel nuts
become loose after a time. The wheel could
come off and cause an accident. When you
change a wheel, remove any rust or dirt from
the places where the wheel attaches to the
vehicle. In an emergency, you can use a cloth
or a paper towel to do this; but be sure to use
a scraper or wire brush later, if you need to,
to get all the rust or dirt off.
{CAUTION:
Never use oil or grease on studs or nuts.
If you do, the nuts might come loose.
Your wheel could fall off, causing a serious
accident.
5-84