tow CADILLAC ESCALADE EXT 2003 2.G User Guide
[x] Cancel search | Manufacturer: CADILLAC, Model Year: 2003, Model line: ESCALADE EXT, Model: CADILLAC ESCALADE EXT 2003 2.GPages: 473, PDF Size: 3.31 MB
Page 87 of 473
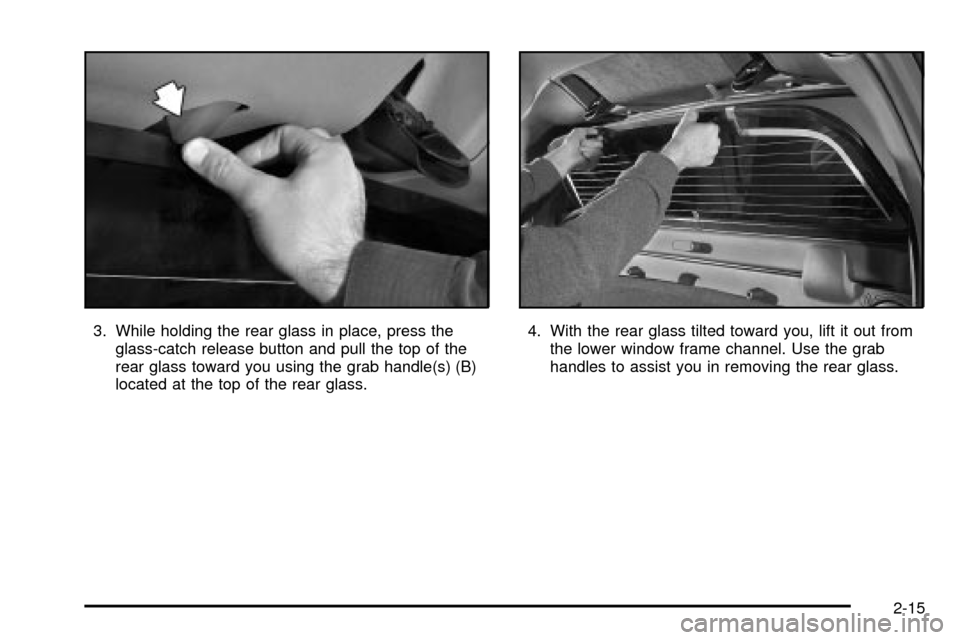
3. While holding the rear glass in place, press the
glass-catch release button and pull the top of the
rear glass toward you using the grab handle(s) (B)
located at the top of the rear glass.4. With the rear glass tilted toward you, lift it out from
the lower window frame channel. Use the grab
handles to assist you in removing the rear glass.
2-15
Page 92 of 473
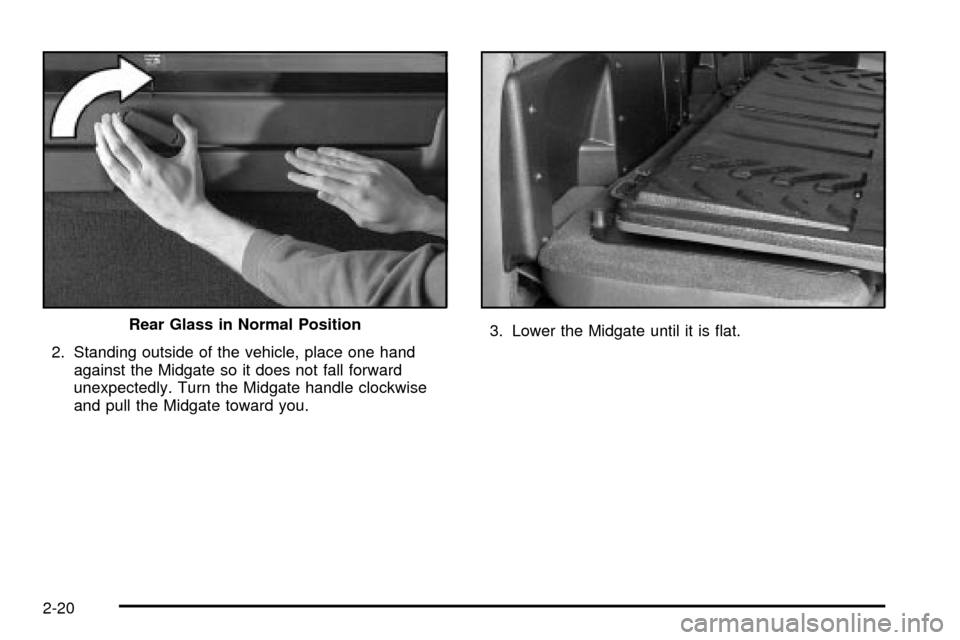
2. Standing outside of the vehicle, place one hand
against the Midgate so it does not fall forward
unexpectedly. Turn the Midgate handle clockwise
and pull the Midgate toward you.3. Lower the Midgate until it is ¯at. Rear Glass in Normal Position
2-20
Page 93 of 473
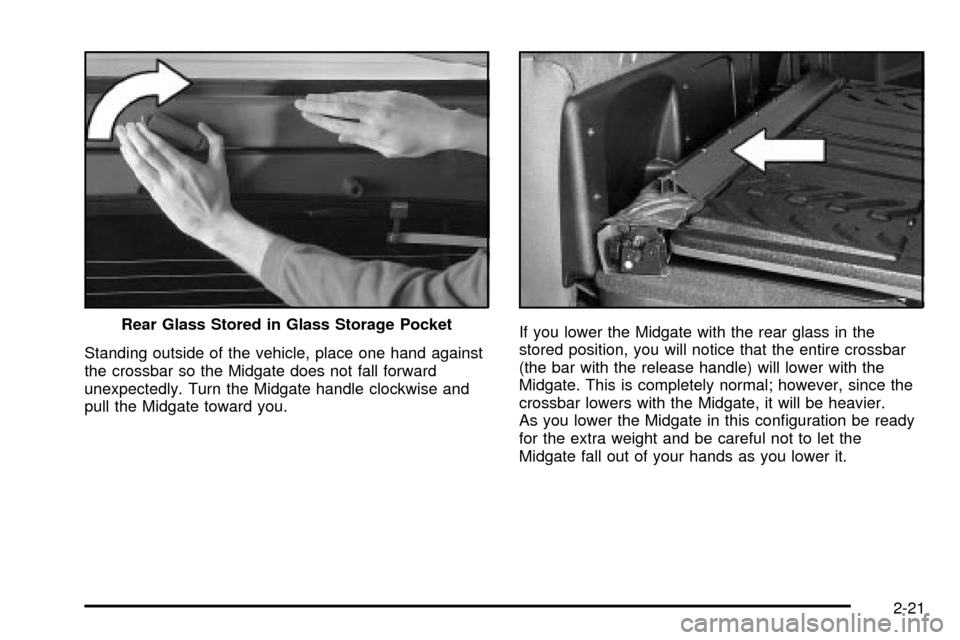
Standing outside of the vehicle, place one hand against
the crossbar so the Midgate does not fall forward
unexpectedly. Turn the Midgate handle clockwise and
pull the Midgate toward you.If you lower the Midgate with the rear glass in the
stored position, you will notice that the entire crossbar
(the bar with the release handle) will lower with the
Midgate. This is completely normal; however, since the
crossbar lowers with the Midgate, it will be heavier.
As you lower the Midgate in this con®guration be ready
for the extra weight and be careful not to let the
Midgate fall out of your hands as you lower it. Rear Glass Stored in Glass Storage Pocket
2-21
Page 94 of 473
Raising the Midgate
To return the Midgate to its normal position, raise the
Midgate up with a ®rm swinging motion (this will help to
ensure that the Midgate closes with enough force to
engage the latches) until it latches into place securely.
If the rear glass is removed and you would like to
put it back, do so using the instructions given previously.
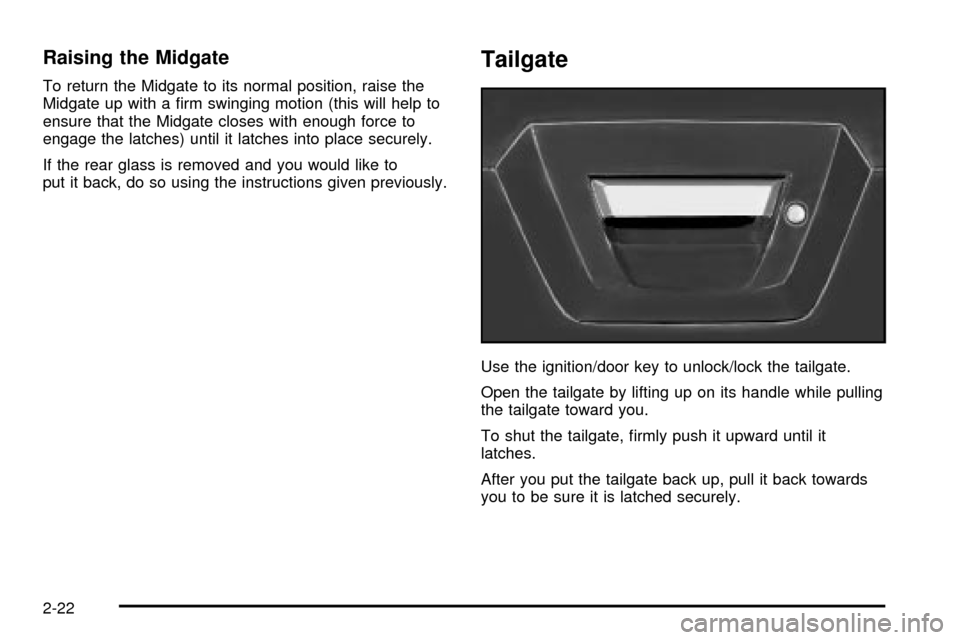
Tailgate
Use the ignition/door key to unlock/lock the tailgate.
Open the tailgate by lifting up on its handle while pulling
the tailgate toward you.
To shut the tailgate, ®rmly push it upward until it
latches.
After you put the tailgate back up, pull it back towards
you to be sure it is latched securely.
2-22
Page 100 of 473

Starting and Operating Your
Vehicle
New Vehicle Break-In
Notice:Your vehicle doesn't need an elaborate
ªbreak-in.º But it will perform better in the long run
if you follow these guidelines:
·Keep your speed at 55 mph (88 km/h) or less
for the ®rst 500 miles (805 km).
·Don't drive at any one speed Ð fast or
slow Ð for the ®rst 500 miles (805 km).
Don't make full-throttle starts.
·Avoid making hard stops for the ®rst 200 miles
(322 km) or so. During this time your new
brake linings aren't yet broken in. Hard stops
with new linings can mean premature wear and
earlier replacement. Follow this breaking-in
guideline every time you get new brake linings.
·Don't tow a trailer during break-in. See ªTowing
a Trailerº in the Index for more information.
Ignition Positions
With your key in the ignition switch you can turn it to
four different positions.
A (LOCK):This position locks your ignition and
transmission. It's a theft-deterrent feature. You will only
be able to remove your key when the ignition is
turned to LOCK.
Notice:If your key seems stuck in LOCK and you
can't turn it, be sure you are using the correct key;
if so, is it all the way in? Turn the key only with
2-28
Page 104 of 473
Automatic Transmission Operation
Your vehicle has an electronic shift position indicator
within the instrument panel cluster.
There are several different positions for your shift lever.
PARK (P):This position locks your drive wheels.
It's the best position to use when you start your engine
because your vehicle can't move easily.
{CAUTION:
It is dangerous to get out of your vehicle if the
shift lever is not fully in PARK (P) with the
parking brake ®rmly set. Your vehicle can roll.
Don't leave your vehicle when the engine is
running unless you have to. If you have left
the engine running, the vehicle can move
suddenly. You or others could be injured.
CAUTION: (Continued)
CAUTION: (Continued)
To be sure your vehicle won't move, even
when you're on fairly level ground, always set
your parking brake and move the shift lever to
PARK (P). See ªShifting Into Park (P)º in the
Index. If you're pulling a trailer, see ªTowing a
Trailerº in the Index.
REVERSE (R):Use this gear to back up.
Notice:Shifting to REVERSE (R) while your vehicle
is moving forward could damage your transmission.
Shift to REVERSE (R) only after your vehicle is
stopped.
To rock your vehicle back and forth to get out of snow,
ice or sand without damaging your transmission,
see If You Are Stuck: In Sand, Mud, Ice or Snow on
page 4-46.
2-32
Page 105 of 473
NEUTRAL (N):In this position, your engine doesn't
connect with the drive wheels. To restart when you're
already moving, use NEUTRAL (N) only.
{CAUTION:
Shifting into a drive gear while your engine is
ªracingº (running at high speed) is dangerous.
Unless your foot is ®rmly on the brake pedal,
your vehicle could move very rapidly. You
could lose control and hit people or objects.
Don't shift into a drive gear while your engine
is racing.
Notice:Damage to your transmission caused by
shifting out of PARK (P) or NEUTRAL (N) with
the engine racing isn't covered by your warranty.
DRIVE (D):This position is for normal driving.
If you need more power for passing, and you're:
·Going less than about 35 mph (55 km/h), push your
accelerator pedal about halfway down.
·Going about 35 mph (55 km/h) or more, push the
accelerator all the way down.You'll shift down to the next gear and have more power.
DRIVE (D) can be used when towing a trailer, carrying
a heavy load, driving on steep hills or for off-road driving.
You may want to shift the transmission to THIRD (3)
or, if necessary, a lower gear selection if the
transmission shifts too often.
THIRD (3):This position is also used for normal driving,
however, it offers more power and lower fuel economy
than DRIVE (D).
SECOND (2):This position gives you more power but
lower fuel economy. You can use SECOND (2) on
hills. It can help control your speed as you go down
steep mountain roads, but then you would also want to
use your brakes off and on.
If you manually select SECOND (2) the transmission will
drive in second gear. You may use this feature for
reducing the speed of the rear wheels when you are
trying to start your vehicle from a stop on slippery road
surfaces.
2-33
Page 106 of 473

FIRST (1):This position gives you even more power,
but lower fuel economy than SECOND (2). You can use
it on very steep hills, or in deep snow or mud. If the
shift lever is put in FIRST (1) while the vehicle is moving
forward, the transmission won't shift into ®rst gear
until the vehicle is going slowly enough.
Notice:If your wheels won't turn, don't try to drive.
This might happen if you were stuck in very deep
sand or mud or were up against a solid object.
You could damage your transmission. Also, if you
stop when going uphill, don't hold your vehicle there
with only the accelerator pedal. This could overheat
and damage the transmission. Use your brakes
or shift into PARK (P) to hold your vehicle in
position on a hill.
On cold days, approximately 32ÉF (0ÉC) or colder,
your transmission is designed to shift differently until
the engine reaches normal operating temperature.
This is intended to improve heater performance.
Tow/Haul Mode Selector Button
Your vehicle is equipped with a tow/haul mode.
The button for this feature is located on the end of the
column shift lever. You can use this feature to assist
when towing or hauling a heavy load. See ªTow/Haul
Modeº under
Towing a Trailer on page 4-52for
more information.
The tow/haul mode also interacts with the Road Sensing
Suspension (RSS) feature to enhance the ride when
trailering or with a loaded vehicle. See
Road Sensing
Suspension on page 4-9.
2-34
Page 107 of 473
All-Wheel Drive
With this feature, engine power is sent to all four wheels
when extra traction is needed.
This is like four-wheel drive, but there is no separate
lever or switch to engage or disengage the front axle.
It is fully automatic, and adjusts itself as needed for road
conditions.
Parking Brake
To set the parking brake, hold the regular brake pedal
down with your right foot. Push down the parking
brake pedal with your left foot.
A chime will activate and the warning light will ¯ash
when the parking brake is applied and the vehicle
is moving at least 3 mph (5 km/h) for at least
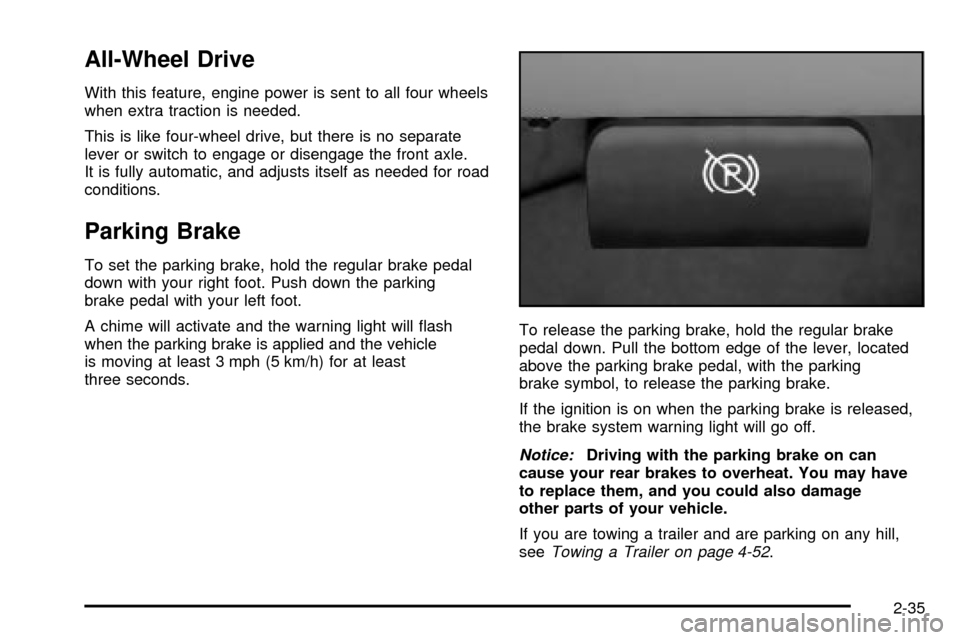
three seconds.To release the parking brake, hold the regular brake
pedal down. Pull the bottom edge of the lever, located
above the parking brake pedal, with the parking
brake symbol, to release the parking brake.
If the ignition is on when the parking brake is released,
the brake system warning light will go off.
Notice:Driving with the parking brake on can
cause your rear brakes to overheat. You may have
to replace them, and you could also damage
other parts of your vehicle.
If you are towing a trailer and are parking on any hill,
see
Towing a Trailer on page 4-52.
2-35
Page 108 of 473
Shifting Into Park (P)
{CAUTION:
It can be dangerous to get out of your vehicle
if the shift lever is not fully in PARK (P) with
the parking brake ®rmly set. Your vehicle can
roll. If you have left the engine running, the
vehicle can move suddenly. You or others
could be injured. To be sure your vehicle won't
move, even when you're on fairly level ground,
use the steps that follow. If you're pulling a
trailer, see ªTowing a Trailerº in the Index.
1. Hold the brake pedal down with your right foot and
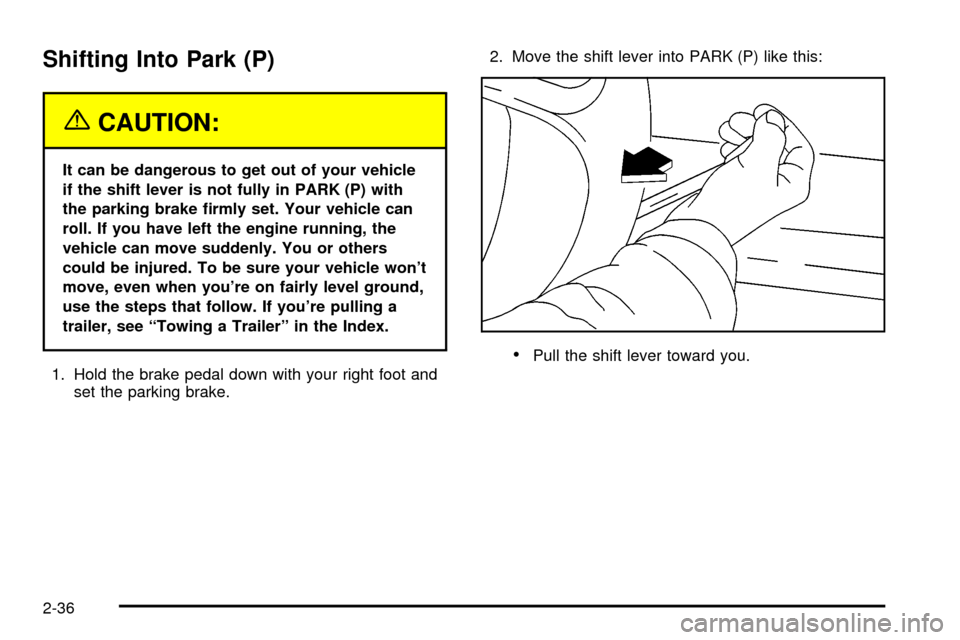
set the parking brake.2. Move the shift lever into PARK (P) like this:
·Pull the shift lever toward you.
2-36