service CADILLAC ESCALADE EXT 2003 2.G Workshop Manual
[x] Cancel search | Manufacturer: CADILLAC, Model Year: 2003, Model line: ESCALADE EXT, Model: CADILLAC ESCALADE EXT 2003 2.GPages: 473, PDF Size: 3.31 MB
Page 340 of 473

If No Steam Is Coming From Your
Engine
An overheat warning, along with a low coolant message,
can indicate a serious problem. SeeLow CoolantunderDIC Warnings and Messages on page 3-58.
If you get an engine overheat warning with no low
coolant message, but see or hear no steam, the problem
may not be too serious. Sometimes the engine can
get a little too hot when you:
·Climb a long hill on a hot day.
·Stop after high-speed driving.
·Idle for long periods in traffic.
·Tow a trailer. See ªDriving on Gradesº under
Towing a Trailer on page 4-52.If you get the overheat warning with no sign of steam,
try this for a minute or so:
1. Turn on your heater to full hot at the highest fan
speed and open the window as necessary.
2. If you're in a traffic jam, shift to NEUTRAL (N);
otherwise, shift to the highest gear while
driving ± DRIVE (D).
If you no longer have the overheat warning, you can
drive. Just to be safe, drive slower for about 10 minutes.
If the warning doesn't come back on, you can drive
normally.
If the warning continues, pull over, stop, and park your
vehicle right away.
If there's still no sign of steam, push down the
accelerator until the engine speed is about twice as fast
as normal idle speed for at least three minutes while
you're parked. If you still have the warning,
turn off the
engine and get everyone out of the vehicleuntil it
cools down. Also, see ªOverheated Engine Protection
Operating Modeº listed previously in this section.
You may decide not to lift the hood but to get service
help right away.
5-29
Page 342 of 473
{CAUTION:
Heater and radiator hoses, and other engine
parts, can be very hot. Don't touch them.
If you do, you can be burned.
Don't run the engine if there is a leak. If you
run the engine, it could lose all coolant.
That could cause an engine ®re, and you could
be burned. Get any leak ®xed before you drive
the vehicle.
If there seems to be no leak, start the engine again.
The engine cooling fan speed should increase when idle
speed is doubled by pushing the accelerator pedal
down. If it doesn't, your vehicle needs service. Turn off
the engine.
Notice:Engine damage from running your engine
without coolant isn't covered by your warranty.
See ªOverheated Engine Protection Operating
Modeº in the Index for information on driving to a
safe place in an emergency.
Notice:When adding coolant, it is important that
you use only DEX-COOLž(silicate-free) coolant.
If coolant other than DEX-COOLžis added to
the system, premature engine, heater core or
radiator corrosion may result. In addition, the engine
coolant will require change sooner Ð at 30,000 miles
(50 000 km) or 24 months, whichever occurs ®rst.
Damage caused by the use of coolant other
than DEX-COOL
žis not covered by your new
vehicle warranty.
5-31
Page 352 of 473
Notice:
·Using the wrong ¯uid can badly damage brake
system parts. For example, just a few drops of
mineral-based oil, such as engine oil, in your
brake system can damage brake system
parts so badly that they'll have to be replaced.
Don't let someone put in the wrong kind of ¯uid.
·If you spill brake ¯uid on your vehicle's painted
surfaces, the paint ®nish can be damaged.
Be careful not to spill brake ¯uid on your
vehicle. If you do, wash it off immediately.
See ªAppearance Careº in the Index.
Brake Wear
Your vehicle has four-wheel disc brakes.
Disc brake pads have built-in wear indicators that make
a high-pitched warning sound when the brake pads
are worn and new pads are needed. The sound
may come and go or be heard all the time your vehicle
is moving (except when you are pushing on the
brake pedal ®rmly).
{CAUTION:
The brake wear warning sound means that soon
your brakes won't work well. That could lead to
an accident. When you hear the brake wear
warning sound, have your vehicle serviced.
Notice:Continuing to drive with worn-out brake
pads could result in costly brake repair.
Some driving conditions or climates may cause a brake
squeal when the brakes are ®rst applied or lightly
applied. This does not mean something is wrong with
your brakes.
5-41
Page 359 of 473
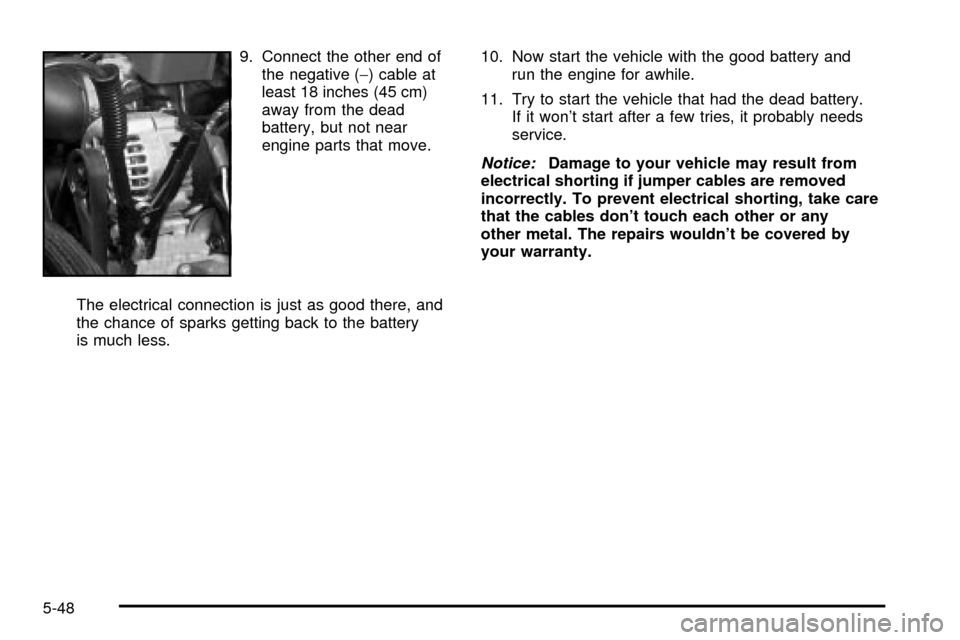
9. Connect the other end of
the negative (-) cable at
least 18 inches (45 cm)
away from the dead
battery, but not near
engine parts that move.
The electrical connection is just as good there, and
the chance of sparks getting back to the battery
is much less.10. Now start the vehicle with the good battery and
run the engine for awhile.
11. Try to start the vehicle that had the dead battery.
If it won't start after a few tries, it probably needs
service.
Notice:Damage to your vehicle may result from
electrical shorting if jumper cables are removed
incorrectly. To prevent electrical shorting, take care
that the cables don't touch each other or any
other metal. The repairs wouldn't be covered by
your warranty.
5-48
Page 362 of 473

Rear Axle
When to Check Lubricant
Refer to the Maintenance Schedule to determine how
often to check the lubricant. SeePart A: Scheduled
Maintenance Services on page 6-4.
How to Check Lubricant
To get an accurate reading, the vehicle should be on a
level surface.The proper level is from 5/8 inch to 1 5/8 inch
(15 mm to 40 mm) below the bottom of the ®ller plug
hole. Add only enough ¯uid to reach the proper level.
What to Use
Refer to the Maintenance Schedule to determine what
kind of lubricant to use. SeePart D: Recommended
Fluids and Lubricants on page 6-17.
5-51
Page 363 of 473

Front Axle
When to Check and Change Lubricant
Refer to the Maintenance Schedule to determine how
often to check the lubricant and when to change it. See
Part A: Scheduled Maintenance Services on page 6-4.
How to Check Lubricant
To get an accurate reading, the vehicle should be on a
level surface.If the level is below the bottom of the ®ller plug hole,
you may need to add some lubricant.
When the differential is cold, add enough lubricant to
raise the level to 1/2 inch (12 mm) below the ®ller
plug hole.
When the differential is at operating temperature
(warm), add enough lubricant to raise the level to the
bottom of the ®ller plug hole.
What to Use
Refer to the Maintenance Schedule to determine what
kind of lubricant to use. SeePart D: Recommended
Fluids and Lubricants on page 6-17.
5-52
Page 364 of 473

Headlamp Aiming
Your vehicle has a visual optical headlamp aiming system
equipped with horizontal aim indicators. The aim has
been preset at the factory and should need no further
adjustment. This is true even though your horizontal aim
indicators may not fall exactly on the ª0º (zero) marks on
their scales.
If your vehicle is damaged in an accident, the headlamp
aim may be affected. Aim adjustment to the low beam
may be necessary if it is difficult to see lane markers
(for horizontal aim), or if oncoming drivers ¯ash
their high beams at you (for vertical aim).
If you believe your headlamps need to be re-aimed, we
recommend that you take your vehicle to your dealer
for service. However, it is possible for you to re-aim your
headlamps as described in the following procedure.
Notice:To make sure your headlamps are aimed
properly, read all the instructions before beginning.
Failure to follow these instructions could cause
damage to headlamp parts.
The vehicle should be properly prepared as follows:
·The vehicle should be placed so the headlamps are
25 ft. (7.6 m) from a light colored wall or other ¯at
surface.
·The vehicle must have all four tires on a perfectly
level surface which is level all the way to the wall
or other ¯at surface.
·The vehicle should be placed so it is perpendicular
to the wall or other ¯at surface.
·The vehicle should not have any snow, ice or mud
attached to it.
·The vehicle should be fully assembled and all other
work stopped while headlamp aiming is being done.
·The vehicle should be normally loaded with a
full tank of fuel and one person or 160 lbs. (75 kg)
on the driver's seat.
·Tires should be properly in¯ated.
·Start the vehicle and rock it to level the suspension.
Headlamp aiming is done with the vehicle low beam
lamps. The high beam lamps will be correctly aimed if
the low beam lamps are aimed properly.
5-53
Page 368 of 473
Bulb Replacement
SeeReplacement Bulbs on page 5-64for the proper
type of bulbs to use.
For any bulb changing procedure not listed in this
section, contact your dealer.
High Intensity Discharge (HID)
Lighting
{CAUTION:
The low beam high intensity discharge lighting
system operates at a very high voltage. If you
try to service any of the system components,
you could be seriously injured. Have your
dealer or a quali®ed technician service them.
After your vehicle's HID headlamp bulb has been
replaced, you may notice that the beam is a slightly
different shade than it was originally. This is normal.
Halogen Bulbs
{CAUTION:
Halogen bulbs have pressurized gas inside and
can burst if you drop or scratch the bulb. You or
others could be injured. Be sure to read and
follow the instructions on the bulb package.
5-57
Page 377 of 473
Tires
Your new vehicle comes with high-quality tires made by
a leading tire manufacturer. If you ever have questions
about your tire warranty and where to obtain service,
see your Cadillac Warranty booklet for details.
{CAUTION:
Poorly maintained and improperly used tires
are dangerous.
·Overloading your tires can cause
overheating as a result of too much
friction. You could have an air-out and a
serious accident. See ªLoading Your
Vehicleº in the Index.
CAUTION: (Continued)
CAUTION: (Continued)
·
Underin¯ated tires pose the same danger
as overloaded tires. The resulting accident
could cause serious injury. Check all tires
frequently to maintain the recommended
pressure. Tire pressure should be checked
when your tires are cold.
·Overin¯ated tires are more likely to be
cut, punctured or broken by a sudden
impact Ð such as when you hit a pothole.
Keep tires at the recommended pressure.
·Worn, old tires can cause accidents.
If your tread is badly worn, or if your
tires have been damaged, replace them.
5-66
Page 379 of 473

Tire Inspection and Rotation
Tires should be rotated every 7,500 miles (12,500 km).
Any time you notice unusual wear, rotate your tires
as soon as possible and check wheel alignment. Also
check for damaged tires or wheels. See
When It Is Time
for New Tires on page 5-69andWheel Replacement
on page 5-73for more information.
Make sure the spare tire is stored securely. Push, pull,
and then try to rotate or turn the tire. If it moves, use the
wheel wrench and jack handle extensions to tighten the
cable. See
Changing a Flat Tire on page 5-76.
The purpose of regular rotation is to achieve more
uniform wear for all tires on the vehicle. The ®rst rotation
is the most important. See ªPart A: Scheduled
Maintenance Services,º in Section 6, for scheduled
rotation intervals.When rotating your tires, always use the correct rotation
pattern shown here.
Don't include the spare tire in your tire rotation.
5-68