turn CADILLAC ESCALADE EXT 2004 2.G Owners Manual
[x] Cancel search | Manufacturer: CADILLAC, Model Year: 2004, Model line: ESCALADE EXT, Model: CADILLAC ESCALADE EXT 2004 2.GPages: 478, PDF Size: 3.43 MB
Page 239 of 478

CD Functions
All of the CD changer functions are performed by the
radio, except for loading and ejecting.
1 PREV (Previous):Press this pushbutton to go to the
previous track if the current track has been playing
for less than eight seconds. If pressed when the current
track has been playing for more than eight seconds,
it will go to the beginning of the current track. If you hold
or press this pushbutton more than once, the player
will continue moving back through the CD.
2 NEXT:Press this pushbutton to go to the next track.
If you hold this pushbutton or press it more than
once, the player will continue moving forward through
the CD.
3 REV (Reverse):Press and hold this pushbutton to
reverse quickly through a track. Release it to resume
playing.
4 FWD (Forward):Press and hold this pushbutton to
advance quickly through a track. Release it to resume
playing.
5
X:Press this pushbutton to select a CD. The CD
number and track number will be displayed.6 RDM (Random):Press this button to hear the tracks
in random, rather than sequential, order. RDM ALL
will appear on the radio display, which will randomly play
all of the loaded CDs. Press and hold this button until
you hear a beep and the radio will display RDM
ONE, which will randomly play the tracks on the current
CD. Press this button again to turn off random play,
RDM OFF will appear on the radio display.
qSEEKr:Press the right or the left SEEK arrow to
go to the next or to the previous track on the CD.
qSCANr:Press and hold either SCAN arrow for
more than two seconds until SCAN appears on the
display and you hear a beep. The radio will go to the
next track, play for 10 seconds, then go on to the
next track. Press either SCAN arrow again to stop
scanning.
BAND:Press BAND to listen to the radio when a CD is
playing.
TAPE DISC:Press this button if you have a CD loaded
in the changer and the radio is turned on, to play a
CD. Press this button to switch between playing a tape
and the CD changer if all are loaded.
3-97
Page 240 of 478

CD Changer Errors
CHK CD (Check):If this message appears on the
display, it could be for one of the following reasons:
·It is very hot. When the temperature returns to
normal, the CD should play.
·You are driving on a very rough road. When the
road becomes smooth, the CD should play.
·The CD is dirty, scratched, wet, or upside down.
·The air is very humid. If so, wait about an hour and
try again.
·There may have been a problem while burning
the CD.
·The label may be caught in the CD player.
·The CD player is very hot.If the CD is not playing correctly, for any other reason,
try a known good CD.
If any error occurs repeatedly or if an error cannot be
corrected, contact your dealer. If your radio displays an
error message, write it down and provide it to your
dealer when reporting the problem.
Theft-Deterrent Feature
THEFTLOCKžis designed to discourage theft of your
radio. The feature works automatically by learning
a portion of the Vehicle Identi®cation Number (VIN). If
the radio is moved to a different vehicle, it will not
operate and LOCKED will appear on the display.
When the radio and vehicle are turned off, the blinking
red light indicates that THEFTLOCK
žis armed.
With THEFTLOCK
žactivated, your radio will not operate
if stolen.
3-98
Page 241 of 478

Audio Steering Wheel Controls
You can control certain radio functions using the buttons
on your steering wheel.
g(OnStar/Voice Recognition):If your vehicle has
OnStarž, you can press this button to interact with
the OnStaržsystem. See the OnStaržmanual provided
with your vehicle for more information.
If your vehicle does not have OnStar
ž, pressing this
button will mute the audio system.
PROG (Program):Press this button to play a station
you have stored on the radio preset pushbuttons.
If a CD is playing in the CD changer, press this button
to go to the next available CD.
QSOURCER:Press this button to select FM1,
FM2, AM, or XM1 or XM2 (48 contiguous US states, if
equipped), or a CD. If a CD is loaded the CD symbol
will appear on the display.
QSEEKR:Press the up or the down arrow to go to
the next or to the previous radio station and stay
there.
If a CD is playing, press the up or the down arrow to
fast forward or reverse.
QVOLR(Volume):Press the up or the down arrow
to increase or to decrease volume.
DVD Distortion
You may experience audio distortion in the
IR headphones when operating cellular phones,
scanners, CB radios, Global Positioning
Systems (GPS)*, two-way radios, mobile fax, or walkie
talkies.
It may be necessary to turn off the DVD player when
operating one of these devices in or near the vehicle.
* Excludes the OnStar
žSystem.
3-99
Page 242 of 478

Radio Reception
AM
The range for most AM stations is greater than for FM,
especially at night. The longer range, however, can
cause stations to interfere with each other. AM can pick
up noise from things like storms and power lines. Try
reducing the treble to reduce this noise.
FM Stereo
FM stereo will give you the best sound, but FM signals
will reach only about 10 to 40 miles (16 to 65 km).
Tall buildings or hills can interfere with FM signals,
causing the sound to come and go.
XMŸ Satellite Radio Service
(48 Contiguous US States)
XMŸ Satellite Radio gives you digital radio reception
from coast to coast. Just as with FM, tall buildings
or hills can interfere with satellite radio signals, causing
the sound to come and go. Your radio may display
NO SIGNAL to indicate interference.
Care of Your Cassette Tape Player
A tape player that is not cleaned regularly can cause
reduced sound quality, ruined cassettes, or a damaged
mechanism. Cassette tapes should be stored in their
cases away from contaminants, direct sunlight, and
extreme heat. If they are not, they may not operate
properly or may cause failure of the tape player.
Your tape player should be cleaned regularly after every
50 hours of use. Your radio may display CLEAN to
indicate that you have used your tape player for
50 hours without resetting the tape clean timer. If this
message appears on the display, your cassette
tape player needs to be cleaned. It will still play tapes,
but you should clean it as soon as possible to
prevent damage to your tapes and player. If you notice
a reduction in sound quality, try a known good
cassette to see if the tape or the tape player is at fault.
If this other cassette has no improvement in sound
quality, clean the tape player.
For best results, use a scrubbing action, non-abrasive
cleaning cassette with pads which scrub the tape
head as the hubs of the cleaner cassette turn. The
recommended cleaning cassette is available through
your dealer.
3-100
Page 243 of 478

When cleaning the cassette tape player with the
recommended non-abrasive cleaning cassette, it is
possible that the cassette may eject, because the cut
tape detection feature on your radio may recognize it as
a broken tape, in error. To prevent the cleaning
cassette from being ejected, use the following steps:
1. Turn the ignition on.
2. Turn the radio off.
3. Press and hold the TAPE DISC button for ®ve
seconds. READY will appear on the display and
the cassette symbol will ¯ash for ®ve seconds.
4. Insert the scrubbing action cleaning cassette.
5. Eject the cleaning cassette after the manufacturer's
recommended cleaning time.
When the cleaning cassette has been ejected, the cut
tape detection feature is active again.
You may also choose a non-scrubbing action, wet-type
cleaner which uses a cassette with a fabric belt to
clean the tape head. This type of cleaning cassette will
not eject on its own. A non-scrubbing action cleaner
may not clean as thoroughly as the scrubbing type
cleaner. The use of a non-scrubbing action, dry-type
cleaning cassette is not recommended.After you clean the player, press and hold the eject
button for ®ve seconds to reset the CLEAN indicator.
The radio will display --- or CLEANED to show the
indicator was reset.
Cassettes are subject to wear and the sound quality
may degrade over time. Always make sure the cassette
tape is in good condition before you have your tape
player serviced.
Care of Your CDs and DVDs
Handle discs carefully. Store them in their original cases
or other protective cases and away from direct sunlight
and dust. If the surface of a disc is soiled, dampen
a clean, soft cloth in a mild, neutral detergent solution
and clean it, wiping from the center to the edge.
Be sure never to touch the side without writing when
handling discs. Pick up discs by grasping the outer
edges or the edge of the hole and the outer edge.
Care of Your CD Changer
The use of CD lens cleaner discs is not advised, due to
the risk of contaminating the lens of the CD optics
with lubricants internal to the CD mechanism.
3-101
Page 244 of 478

Care of Your CD and DVD Player
The use of CD lens cleaner discs is not advised, due to
the risk of contaminating the lens of the CD optics
with lubricants internal to the CD mechanism.
Cleaning the Video Screen
Pour some isopropyl or rubbing alcohol on a clean cloth
and gently wipe the video screen. Do not spray
directly onto the screen and do not press too hard or
too long on the video screen.
Fixed Mast Antenna
The ®xed mast antenna can withstand most car washes
without being damaged. If the mast should ever
become slightly bent, you can straighten it out by hand.
If the mast is badly bent, as it might be by vandals,
you should replace it.
Check occasionally to be sure the mast is still tightened
to the cowl. If tightening is required, tighten by hand,
then with a wrench one quarter turn.
XMŸ Satellite Radio Antenna
System (48 Contiguous US States)
Your XMŸ Satellite Radio antenna is located on the roof
of your vehicle. Keep this antenna clear of snow and
ice build up for clear radio reception.
The performance of your XMŸ system may be affected
if your sunroof is open.
Loading items onto the roof of your vehicle can interfere
with the performance of your XMŸ system. Make
sure that the XMŸ satellite antenna is not obstructed.
Chime Level Adjustment
The radio is the vehicle chime producer. To change the
volume level, press and hold pushbutton 6 with the
ignition on and the radio power off. The chime volume
level will change from the normal level to loud, and
LOUD will appear on the display. To change back to the
default or normal setting, press and hold pushbutton 6
again. The chime level will change from the loud level to
normal, and NORMAL will appear on the display.
Each time the chime volume is changed, three chimes
will sound as an example of the new volume selected.
Removing the radio and not replacing it with a
factory radio or chime module will disable vehicle
chimes.
3-102
Page 246 of 478

Your Driving, the Road, and
Your Vehicle
Defensive Driving
The best advice anyone can give about driving is: Drive
defensively.
Please start with a very important safety device in your
vehicle: Buckle up. See
Safety Belts: They Are for
Everyone on page 1-8.
Defensive driving really means ªbe ready for anything.º
On city streets, rural roads or freeways, it means
ªalways expect the unexpected.º
Assume that pedestrians or other drivers are going to
be careless and make mistakes. Anticipate what
they might do. Be ready for their mistakes.
Rear-end collisions are about the most preventable of
accidents. Yet they are common. Allow enough following
distance. It is the best defensive driving maneuver, in
both city and rural driving. You never know when
the vehicle in front of you is going to brake or turn
suddenly.
Defensive driving requires that a driver concentrate on
the driving task. Anything that distracts from the
driving task Ð such as concentrating on a cellular
telephone call, reading, or reaching for something onthe ¯oor Ð makes proper defensive driving more
difficult and can even cause a collision, with resulting
injury. Ask a passenger to help do things like this, or
pull off the road in a safe place to do them yourself.
These simple defensive driving techniques could save
your life.
Drunken Driving
Death and injury associated with drinking and driving is
a national tragedy. It is the number one contributor
to the highway death toll, claiming thousands of victims
every year.
Alcohol affects four things that anyone needs to drive a
vehicle:
·Judgment
·Muscular Coordination
·Vision
·Attentiveness.
Police records show that almost half of all motor
vehicle-related deaths involve alcohol. In most cases,
these deaths are the result of someone who was
drinking and driving. In recent years, more than
16,000 annual motor vehicle-related deaths have been
associated with the use of alcohol, with more than
300,000 people injured.
4-2
Page 251 of 478
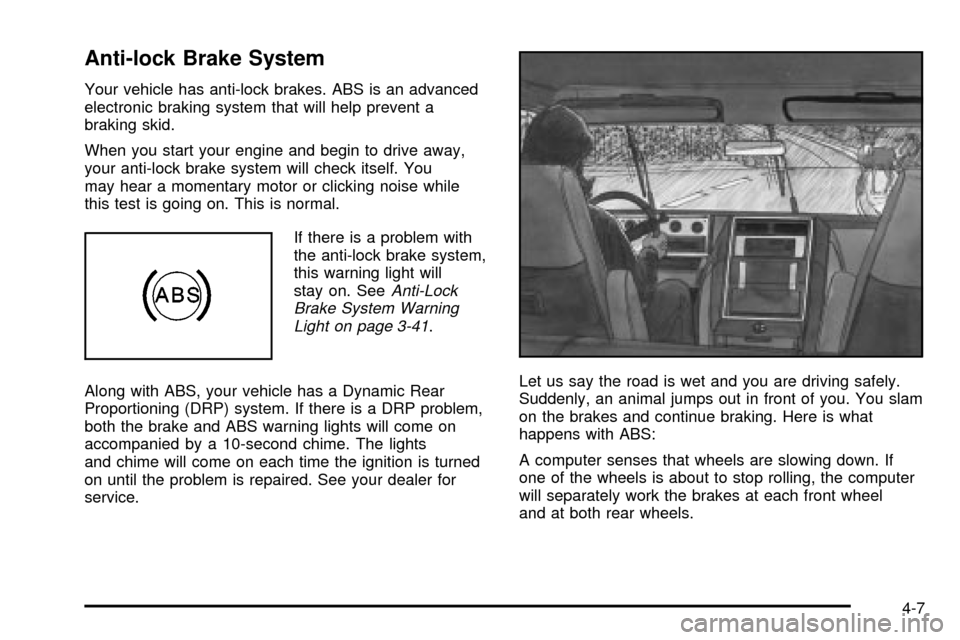
Anti-lock Brake System
Your vehicle has anti-lock brakes. ABS is an advanced
electronic braking system that will help prevent a
braking skid.
When you start your engine and begin to drive away,
your anti-lock brake system will check itself. You
may hear a momentary motor or clicking noise while
this test is going on. This is normal.
If there is a problem with
the anti-lock brake system,
this warning light will
stay on. See
Anti-Lock
Brake System Warning
Light on page 3-41
.
Along with ABS, your vehicle has a Dynamic Rear
Proportioning (DRP) system. If there is a DRP problem,
both the brake and ABS warning lights will come on
accompanied by a 10-second chime. The lights
and chime will come on each time the ignition is turned
on until the problem is repaired. See your dealer for
service.Let us say the road is wet and you are driving safely.
Suddenly, an animal jumps out in front of you. You slam
on the brakes and continue braking. Here is what
happens with ABS:
A computer senses that wheels are slowing down. If
one of the wheels is about to stop rolling, the computer
will separately work the brakes at each front wheel
and at both rear wheels.
4-7
Page 253 of 478

Road Sensing Suspension
The Road Sensing Suspension (RSS) feature provides
superior vehicle ride and handling under a variety of
passenger and loading conditions.
The system is fully automatic and uses a computer
controller to continuously monitor vehicle speed, wheel
to body position, lift/dive and steering position of the
vehicle. The controller then sends signals to each shock
absorber to independently adjust the damping level to
provide the optimum vehicle ride.
RSS also interacts with the tow/haul mode that, when
engaged, will provide additional control of the shock
absorbers. This additional control results in better ride
and handling characteristics when the vehicle is
loaded or towing a trailer. See ªTow/Haul Modeº under
Towing a Trailer on page 4-55.
StabilitrakžSystem
Your vehicle is equipped with Stabilitrakž, which
combines antilock brake, traction and stability control
systems and helps the driver maintain directional control
of the vehicle in most driving conditions.
When you ®rst start your vehicle and begin to drive
away, the system performs several diagnostic checks to
insure there are no problems. You may hear or feel
the system working. This is normal and does not mean
there is a problem with your vehicle. The system
should initialize before the vehicle reaches 20 mph (32
km/h). In some cases, it may take approximately
two miles of driving before the system initializes.
If the system fails to turn on or activate, the STABILITY
SYS DISABLED or SERVICE STABILITY message
will be displayed. If the vehicle has gone through heavy
acceleration or braking or multiple turns during the
®rst two miles of driving after starting your vehicle, the
STABILITY SYS DISABLED message may appear.
If this is the case, your vehicle does not need servicing.
You will need to turn the vehicle off and then restart
it to initialize Stabilitrak
ž. If either message appears on
the Driver Information Center (DIC), and your vehicle
hasn't gone through hard acceleration, braking or
multiple turns in the ®rst two miles of driving, your
vehicle should be taken in for service.
4-9
Page 254 of 478

The STABILITY SYS ACTIVE message will appear on
the Driver Information Center (DIC) only when the
system is both on and activated. You may also feel or
hear the system working; this is normal. For more
information on the stability messages, see
Driver
Information Center (DIC) on page 3-49.
Stabilitrak
žand part of the
traction control system can
be turned off or back on
by pressing the
Stabilitrak
žbutton located
on the instrument panel.
When the system is turned off, the traction off light will
illuminate, and the STABILITY SYS DISABLED
message will appear on the DIC to warn the driver that
both the stability system and part of the traction
control system are disabled. Your vehicle will still have
brake-traction control when Stabilitrak
žis off, but
will not be able to use the engine speed management
system. See ªTraction Control Operationº next for
more information.When the Stabilitrak
žsystem has been turned off you
may still hear system noises as a result of the
brake-traction control coming on.
It is recommended to leave the system on for normal
driving conditions, but it may be necessary to turn
the system off if your vehicle is stuck in sand, mud, ice
or snow, and you want to ªrockº your vehicle to
attempt to free it. It may also be necessary to turn off
the system when driving in extreme off-road conditions
where high wheel spin is required. See
If You Are
Stuck: In Sand, Mud, Ice or Snow on page 4-44.
Traction Control Operation
The traction control system is part of the
Stabilitrakžsystem. Traction control limits wheel spin by
reducing engine power to the wheels (engine speed
management) and by applying brakes to each individual
wheel (brake-traction control) as necessary.
The traction control system is enabled automatically
when you start your vehicle, and it will activate
and display the TRACTION ACTIVE message in the
Driver Information Center (DIC) if it senses that any of
the wheels are spinning or beginning to lose traction
while driving. If you turn off Stabilitrak
ž, only the
brake-traction control portion of traction control will
work. The engine speed management will be disabled.
4-10