key CADILLAC ESCALADE EXT 2004 2.G Workshop Manual
[x] Cancel search | Manufacturer: CADILLAC, Model Year: 2004, Model line: ESCALADE EXT, Model: CADILLAC ESCALADE EXT 2004 2.GPages: 478, PDF Size: 3.43 MB
Page 346 of 478

How to Check Power Steering Fluid
Turn the key off, let the engine compartment cool down,
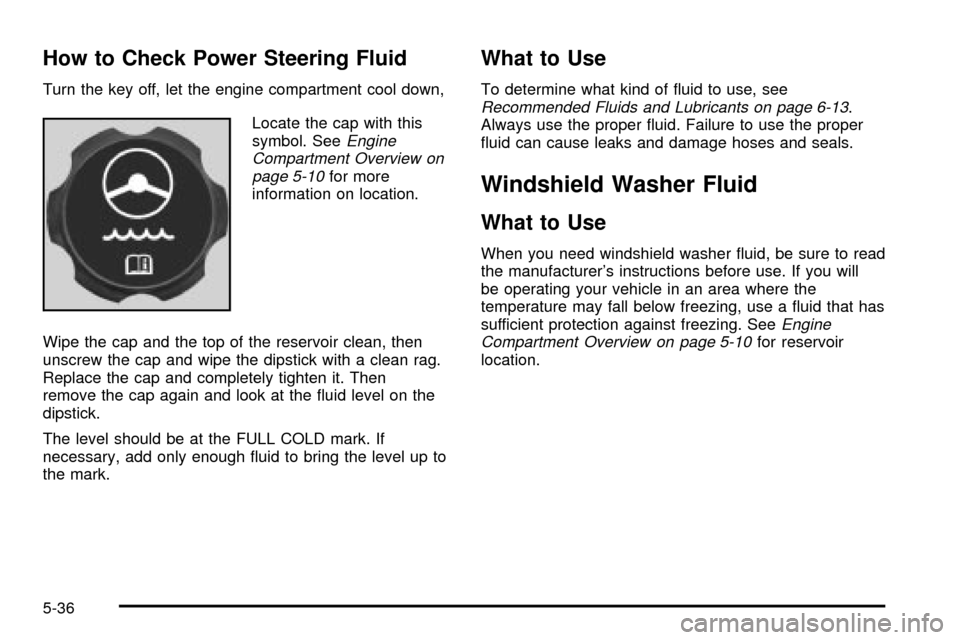
Locate the cap with this
symbol. See
Engine
Compartment Overview on
page 5-10
for more
information on location.
Wipe the cap and the top of the reservoir clean, then
unscrew the cap and wipe the dipstick with a clean rag.
Replace the cap and completely tighten it. Then
remove the cap again and look at the ¯uid level on the
dipstick.
The level should be at the FULL COLD mark. If
necessary, add only enough ¯uid to bring the level up to
the mark.
What to Use
To determine what kind of ¯uid to use, seeRecommended Fluids and Lubricants on page 6-13.
Always use the proper ¯uid. Failure to use the proper
¯uid can cause leaks and damage hoses and seals.
Windshield Washer Fluid
What to Use
When you need windshield washer ¯uid, be sure to read
the manufacturer's instructions before use. If you will
be operating your vehicle in an area where the
temperature may fall below freezing, use a ¯uid that has
sufficient protection against freezing. See
Engine
Compartment Overview on page 5-10for reservoir
location.
5-36
Page 383 of 478

TPM Sensor Identi®cation Codes
Each TPM sensor has a unique identi®cation code. Any
time you rotate your vehicle's tires or replace one or
more of the TPM sensors, the identi®cation codes
will need to be matched to the new tire/wheel position.
Each tire/wheel position is matched to a sensor, by
increasing or decreasing the tire's air pressure.
The sensors are matched to the tire/wheel positions in
the following order: left front (LF); right front (RF);
right rear (RR) and left rear (LR).
You will have one minute to match the ®rst tire/wheel
position, and ®ve minutes overall to match all four
tire/wheel positions. If it takes longer than one minute,
to match the ®rst tire and wheel, or more than ®ve
minutes to match all four tire and wheel positions the
matching process stops and you will need to start over.
The TPM sensor matching process is outlined below:
1. Set the Parking brake.
2. Turn the ignition switch to RUN with the engine off.3. Turn the exterior lamp switch from ªOffº to ªOnº
four times within 3 seconds. A double horn chirp
will sound and the TPM low tire warning light
will begin to ¯ash. The double horn chirp and
¯ashing TPM warning light indicate that the TPM
matching process has started. The TPM warning
light should continue ¯ashing throughout the
matching procedure. The SERVICE TIRE
MONITOR message will be displayed on the Driver
Information Center (DIC).
4. Start with the left (driver's side) front tire.
5. Remove the valve cap from the valve cap stem.
Activate the TPM sensor by increasing or
decreasing the tire's air pressure for 10 seconds,
then stop and listen for a single horn chirp.
The single horn chirp should sound within
15 seconds, con®rming that the sensor identi®cation
code has been matched to this tire and wheel
position. If you do not hear the con®rming single
horn chirp, you will need to start over with step
number one. To let air-pressure out of a tire you can
use the pointy end of the valve cap, a pencil-style
air pressure gage or a key.
5-73
Page 395 of 478

2. Release the jack (E) from the mounting bracket (G)
by turning the knob (B) on the jack counterclockwise
to lower the jack head (F) from the mounting
bracket.
3. Remove the wheel blocks (A) attached to the
jack (E) by turning the wing nut (C)
counterclockwise. Place the wheel blocks where
needed as indicated in the previous Caution.
The tools for changing a ¯at tire are located in the
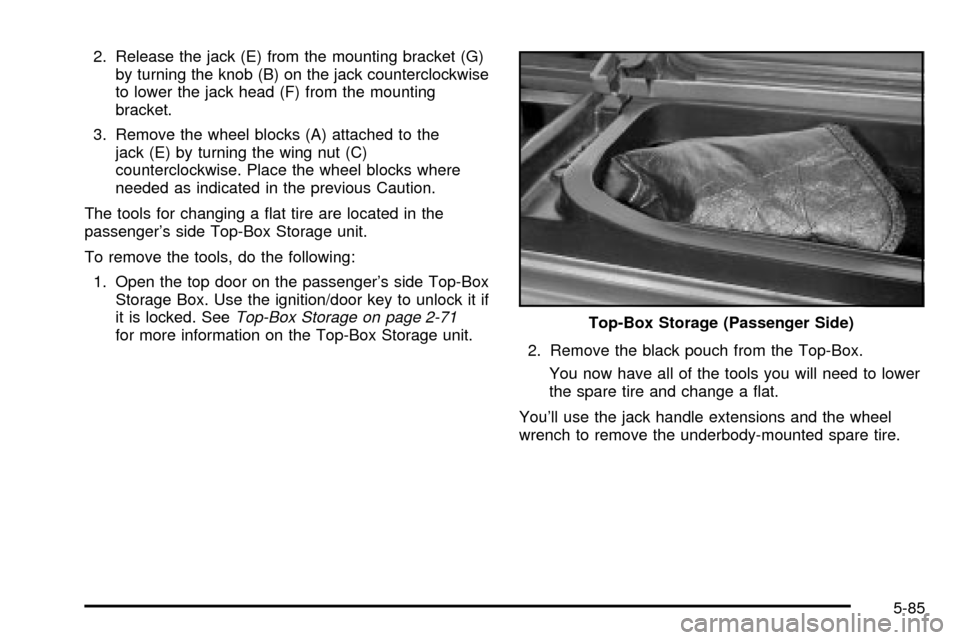
passenger's side Top-Box Storage unit.
To remove the tools, do the following:
1. Open the top door on the passenger's side Top-Box
Storage Box. Use the ignition/door key to unlock it if
it is locked. See
Top-Box Storage on page 2-71for more information on the Top-Box Storage unit.
2. Remove the black pouch from the Top-Box.
You now have all of the tools you will need to lower
the spare tire and change a ¯at.
You'll use the jack handle extensions and the wheel
wrench to remove the underbody-mounted spare tire.Top-Box Storage (Passenger Side)
5-85
Page 396 of 478

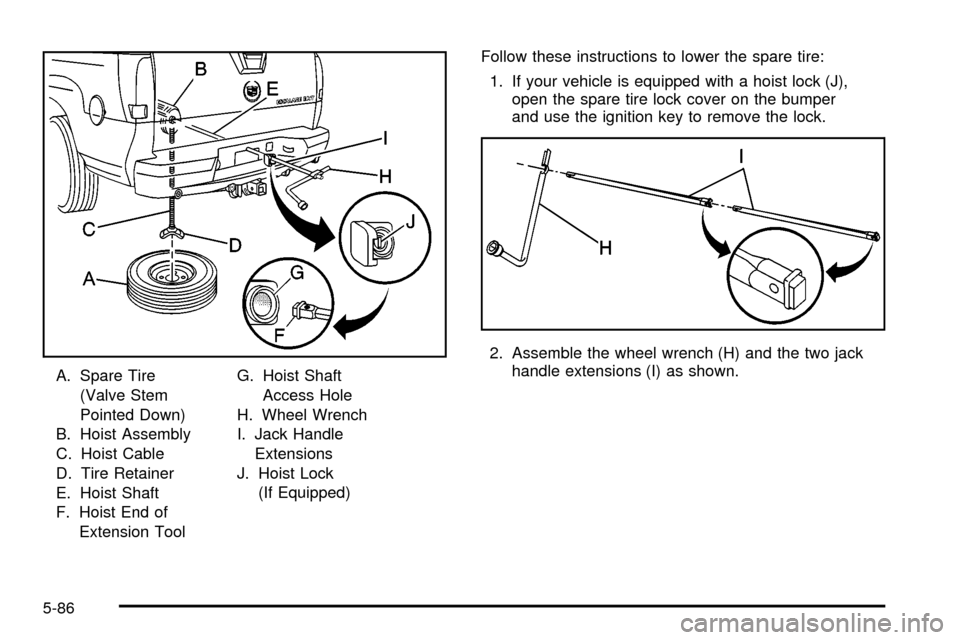
A. Spare Tire
(Valve Stem
Pointed Down)
B. Hoist Assembly
C. Hoist Cable
D. Tire Retainer
E. Hoist Shaft
F. Hoist End of
Extension ToolG. Hoist Shaft
Access Hole
H. Wheel Wrench
I. Jack Handle
Extensions
J. Hoist Lock
(If Equipped)Follow these instructions to lower the spare tire:
1. If your vehicle is equipped with a hoist lock (J),
open the spare tire lock cover on the bumper
and use the ignition key to remove the lock.
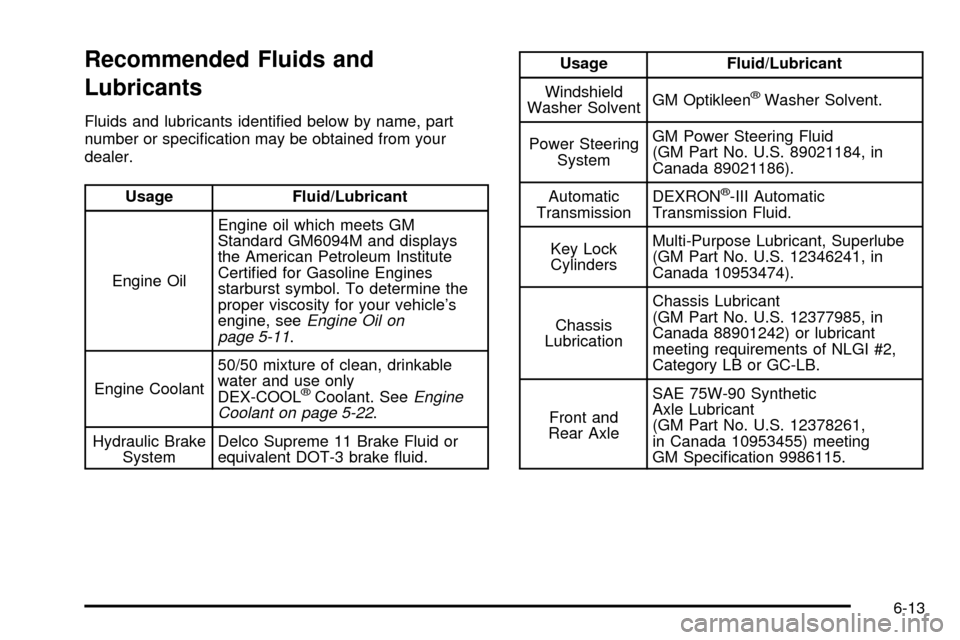
2. Assemble the wheel wrench (H) and the two jack
handle extensions (I) as shown.
5-86
Page 438 of 478

Maintenance Footnotes
²The U.S. Environmental Protection Agency or the
California Air Resources Board has determined that the
failure to perform this maintenance item will not nullify
the emission warranty or limit recall liability prior to
the completion of the vehicle's useful life. We, however,
urge that all recommended maintenance services be
performed at the indicated intervals and the
maintenance be recorded.
#Lubricate the front suspension, ball joints, steering
linkage, transmission shift linkage and parking
brake cable guides. Ball joints should not be lubricated
unless their temperature is 10ÉF (-12ÉC) or higher,
or they could be damaged.
(a)Visually inspect brake lines and hoses for proper
hook-up, binding, leaks, cracks, cha®ng, etc. Inspect
disc brake pads for wear and rotors for surface
condition. Inspect other brake parts, including calipers,
parking brake, etc.
(b)Visually inspect front and rear suspension and
steering system for damaged, loose or missing parts,
signs of wear or lack of lubrication. Inspect power
steering lines and hoses for proper hook-up, binding,
leaks, cracks, cha®ng, etc. Visually check constant
velocity joints, rubber boots and axle seals for leaks.
(c)Visually inspect hoses and have them replaced if
they are cracked, swollen or deteriorated. Inspect
all pipes, ®ttings and clamps; replace with genuine GM
parts as needed. To help ensure proper operation, a
pressure test of the cooling system and pressure
cap and cleaning the outside of the radiator and air
conditioning condenser is recommended at least once
a year.
(d)Visually inspect wiper blades for wear or cracking.
Replace blade inserts that appear worn or damaged
or that streak or miss areas of the windshield.
(e)Make sure the safety belt reminder light and all your
belts, buckles, latch plates, retractors and anchorages
are working properly. Look for any other loose or
damaged safety belt system parts. If you see anything
that might keep a safety belt system from doing its
job, have it repaired. Have any torn or frayed safety belts
replaced. Also look for any opened or broken air bag
coverings, and have them repaired or replaced. (The air
bag system does not need regular maintenance.)
(f)Lubricate all key lock cylinders, hood latch assembly,
secondary latch, pivots, spring anchor, release pawl,
rear compartment hinges, outer tailgate handle
pivot points, latch bolt, fuel door hinge and folding seat
hardware. More frequent lubrication may be required
when exposed to a corrosive environment. Applying
silicone grease on weatherstrips with a clean cloth will
make them last longer, seal better and not stick or
squeak.
6-8
Page 441 of 478

Automatic Transmission Shift Lock
Control System Check
{CAUTION:
When you are doing this inspection, the
vehicle could move suddenly. If the vehicle
moves, you or others could be injured.
1. Before you start, be sure you have enough room
around the vehicle. It should be parked on a level
surface.
2. Firmly apply the parking brake. See
Parking Brake
on page 2-37if necessary.
Be ready to apply the regular brake immediately if
the vehicle begins to move.3. With the engine off, turn the key to the RUN
position, but do not start the engine. Without
applying the regular brake, try to move the shift
lever out of PARK (P) with normal effort. If the shift
lever moves out of PARK (P), contact your GM
Goodwrench dealer for service.
Ignition Transmission Lock Check
While parked, and with the parking brake set, try to turn
the ignition key to LOCK in each shift lever position.
·The key should turn to LOCK only when the
shift lever is in PARK (P).
·The key should come out only in LOCK.
Contact your GM Goodwrench dealer if service is
required.
6-11
Page 443 of 478

Recommended Fluids and
Lubricants
Fluids and lubricants identi®ed below by name, part
number or speci®cation may be obtained from your
dealer.
Usage Fluid/Lubricant
Engine OilEngine oil which meets GM
Standard GM6094M and displays
the American Petroleum Institute
Certi®ed for Gasoline Engines
starburst symbol. To determine the
proper viscosity for your vehicle's
engine, see
Engine Oil on
page 5-11.
Engine Coolant50/50 mixture of clean, drinkable
water and use only
DEX-COOL
žCoolant. SeeEngine
Coolant on page 5-22.
Hydraulic Brake
SystemDelco Supreme 11 Brake Fluid or
equivalent DOT-3 brake ¯uid.
Usage Fluid/Lubricant
Windshield
Washer SolventGM Optikleen
žWasher Solvent.
Power Steering
SystemGM Power Steering Fluid
(GM Part No. U.S. 89021184, in
Canada 89021186).
Automatic
TransmissionDEXRON
ž-III Automatic
Transmission Fluid.
Key Lock
CylindersMulti-Purpose Lubricant, Superlube
(GM Part No. U.S. 12346241, in
Canada 10953474).
Chassis
LubricationChassis Lubricant
(GM Part No. U.S. 12377985, in
Canada 88901242) or lubricant
meeting requirements of NLGI #2,
Category LB or GC-LB.
Front and
Rear AxleSAE 75W-90 Synthetic
Axle Lubricant
(GM Part No. U.S. 12378261,
in Canada 10953455) meeting
GM Speci®cation 9986115.
6-13
Page 469 of 478

J
Jump Starting.................................................5-42
K
KEYFOB X BATTERY LOW.............................3-65
Keyless Entry System....................................... 2-4
Keys............................................................... 2-3
L
Lamps
Exterior......................................................3-15
Interior.......................................................3-19
Lamps On Reminder.......................................3-17
Lap-Shoulder Belt...................................1-14, 1-23
LATCH System
Child Restraints...........................................1-40
Securing a Child Restraint Designed for the
LATCH System........................................1-42
Leaving Your Vehicle With the Engine
Running.....................................................2-39
LEFT REAR DOOR AJAR................................3-65
Light
Air Bag Readiness.......................................3-36
Anti-Lock Brake System Warning...................3-41
Brake System Warning.................................3-39Light (cont.)
Charging System.........................................3-38
Cruise Control.............................................3-47
Low Fuel Warning.......................................3-48
Low Tire Pressure Warning Light...................3-41
Malfunction Indicator....................................3-44
Passenger Air Bag Status Indicator................3-36
Safety Belt Reminder...................................3-35
Tow/Haul Mode...........................................3-47
Traction Off................................................3-42
Listening to a DVD.........................................3-82
Loading Your Vehicle.......................................4-47
Loading Your Vehicle for Off-Road Driving..........4-18
Lockout Protection..........................................2-13
Locks
Delayed Locking........................................... 2-9
Door........................................................... 2-8
Lockout Protection.......................................2-13
Power Door.................................................. 2-9
Programmable Automatic Door Locks.............2-10
Rear Door Security Locks.............................2-12
Loss of Control...............................................4-16
LOW COOLANT LEVEL..................................3-60
Low Fuel Warning Light...................................3-48
Luggage Carrier..............................................2-54
Lumbar
Power Controls............................................. 1-3
9
Page 473 of 478

Remote Control..............................................3-86
Remote Keyless Entry System............................ 2-4
Remote Keyless Entry System Operation............. 2-5
Removing the Flat Tire and Installing the
Spare Tire..................................................5-88
Removing the Spare Tire and Tools...................5-84
Replacement Bulbs.........................................5-62
Replacing Brake System Parts..........................5-41
Replacing Restraint System Parts After
a Crash.....................................................1-62
Reporting Safety Defects
Canadian Government..................................7-10
General Motors...........................................7-10
United States Government............................7-10
Reprogramming a Single HomeLink
žButton.......2-53
Resetting Defaults...........................................2-53
Restraint System Check
Checking Your Restraint Systems...................1-61
Replacing Restraint System Parts After
a Crash..................................................1-62
Restraint Systems
Checking....................................................1-61
Replacing Parts...........................................1-62
Resynchronization............................................. 2-7
Retained Accessory Power (RAP)......................2-30
Right Front Passenger Position, Safety Belts......1-22
RIGHT REAR DOOR AJAR..............................3-65
Road Sensing Suspension................................. 4-9Roadside
Service........................................................ 7-5
Roadside Service Availability.............................. 7-6
Roadside Service for the Hearing or Speech
Impaired...................................................... 7-6
Rocking Your Vehicle To Get It Out...................4-44
Running Your Engine While You Are Parked.......2-42
S
Safety Belt
Reminder Light............................................3-35
Safety Belts
Care of....................................................5-105
Driver Position............................................1-14
How to Wear Safety Belts Properly................1-14
Questions and Answers About Safety Belts.....1-12
Rear Safety Belt Comfort Guides for Children
and Small Adults......................................1-25
Rear Seat Passengers.................................1-22
Right Front Passenger Position......................1-22
Safety Belt Extender....................................1-27
Safety Belt Use During Pregnancy.................1-21
Safety Belts Are for Everyone......................... 1-8
Safety Chains.................................................4-61
Safety Warnings and Symbols.............................. iii
Scanning the Terrain.......................................4-20
Scheduled Maintenance..................................... 6-4
13