buttons CADILLAC ESCALADE EXT 2006 2.G Owners Manual
[x] Cancel search | Manufacturer: CADILLAC, Model Year: 2006, Model line: ESCALADE EXT, Model: CADILLAC ESCALADE EXT 2006 2.GPages: 484, PDF Size: 2.98 MB
Page 10 of 484
Heated Seats
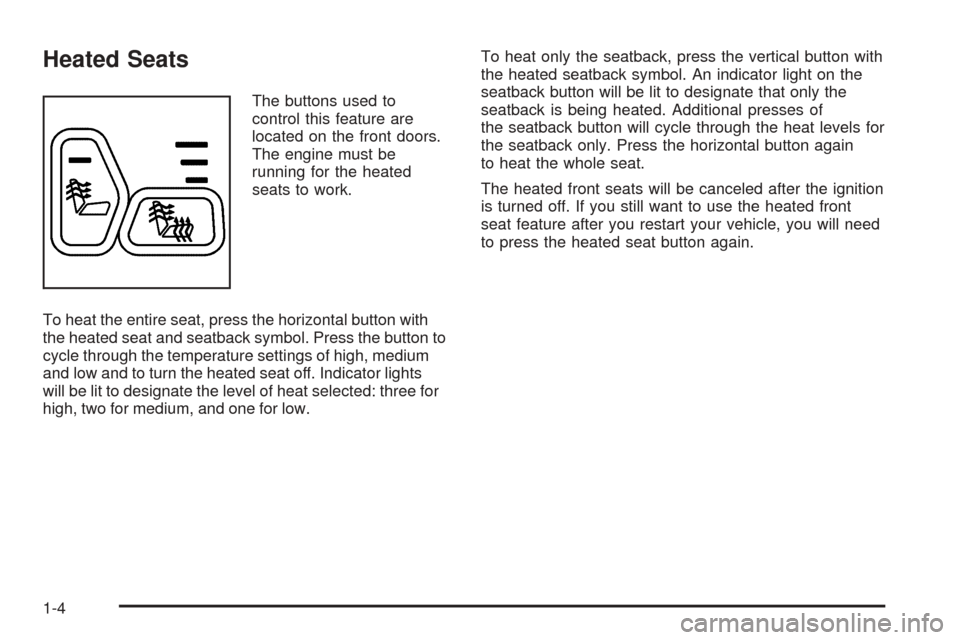
The buttons used to
control this feature are
located on the front doors.
The engine must be
running for the heated
seats to work.
To heat the entire seat, press the horizontal button with
the heated seat and seatback symbol. Press the button to
cycle through the temperature settings of high, medium
and low and to turn the heated seat off. Indicator lights
will be lit to designate the level of heat selected: three for
high, two for medium, and one for low.To heat only the seatback, press the vertical button with
the heated seatback symbol. An indicator light on the
seatback button will be lit to designate that only the
seatback is being heated. Additional presses of
the seatback button will cycle through the heat levels for
the seatback only. Press the horizontal button again
to heat the whole seat.
The heated front seats will be canceled after the ignition
is turned off. If you still want to use the heated front
seat feature after you restart your vehicle, you will need
to press the heated seat button again.
1-4
Page 81 of 484
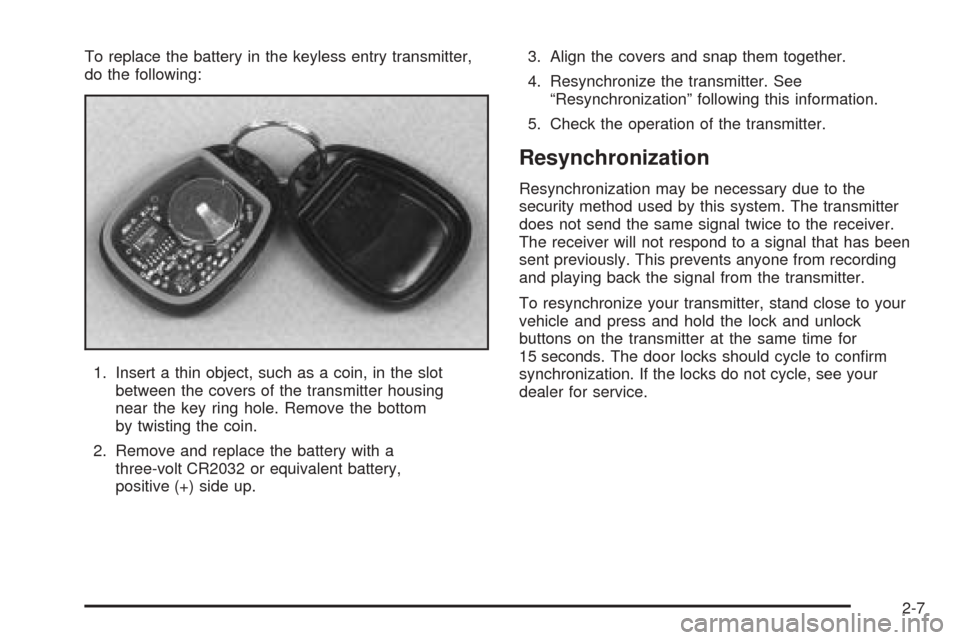
To replace the battery in the keyless entry transmitter,
do the following:
1. Insert a thin object, such as a coin, in the slot
between the covers of the transmitter housing
near the key ring hole. Remove the bottom
by twisting the coin.
2. Remove and replace the battery with a
three-volt CR2032 or equivalent battery,
positive (+) side up.3. Align the covers and snap them together.
4. Resynchronize the transmitter. See
“Resynchronization” following this information.
5. Check the operation of the transmitter.
Resynchronization
Resynchronization may be necessary due to the
security method used by this system. The transmitter
does not send the same signal twice to the receiver.
The receiver will not respond to a signal that has been
sent previously. This prevents anyone from recording
and playing back the signal from the transmitter.
To resynchronize your transmitter, stand close to your
vehicle and press and hold the lock and unlock
buttons on the transmitter at the same time for
15 seconds. The door locks should cycle to con�rm
synchronization. If the locks do not cycle, see your
dealer for service.
2-7
Page 102 of 484
Adjustable Throttle and Brake Pedal
If your vehicle has this feature, you can change the
position of the throttle and brake pedals. This feature is
designed for shorter drivers, since the pedals cannot
move farther away from the standard position, but can
move closer to you for better pedal reach. This feature
can be programmed to work with the memory function
(if equipped) on your vehicle. SeeMemory Seat on
page 2-74.
The vehicle must be in PARK (P) for this feature to
operate.
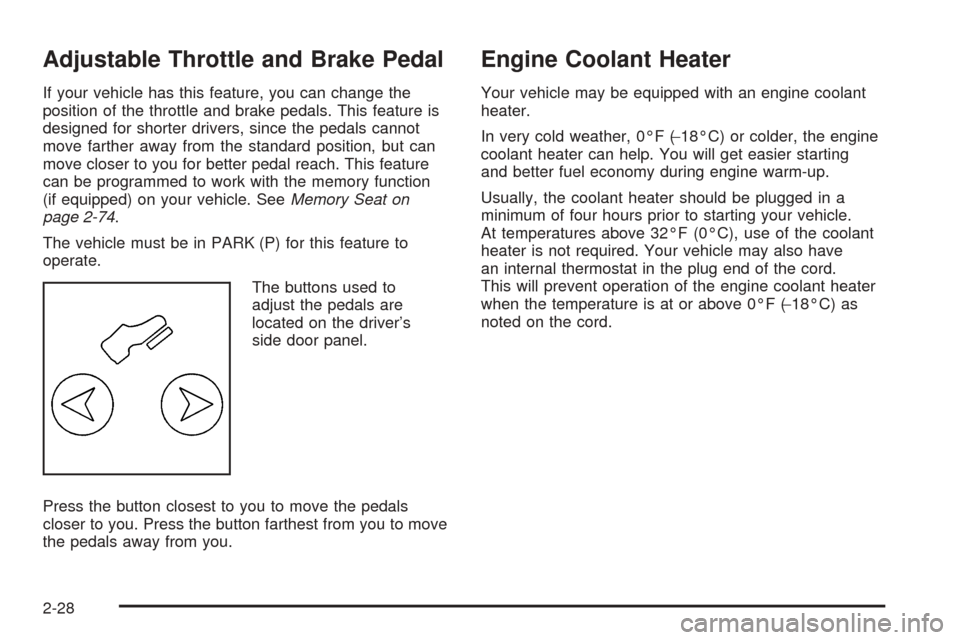
The buttons used to
adjust the pedals are
located on the driver’s
side door panel.
Press the button closest to you to move the pedals
closer to you. Press the button farthest from you to move
the pedals away from you.
Engine Coolant Heater
Your vehicle may be equipped with an engine coolant
heater.
In very cold weather, 0°F (−18°C) or colder, the engine
coolant heater can help. You will get easier starting
and better fuel economy during engine warm-up.
Usually, the coolant heater should be plugged in a
minimum of four hours prior to starting your vehicle.
At temperatures above 32°F (0°C), use of the coolant
heater is not required. Your vehicle may also have
an internal thermostat in the plug end of the cord.
This will prevent operation of the engine coolant heater
when the temperature is at or above 0°F (−18°C) as
noted on the cord.
2-28
Page 112 of 484
Mirrors
Automatic Dimming Rearview Mirror
with OnStar
®and Compass
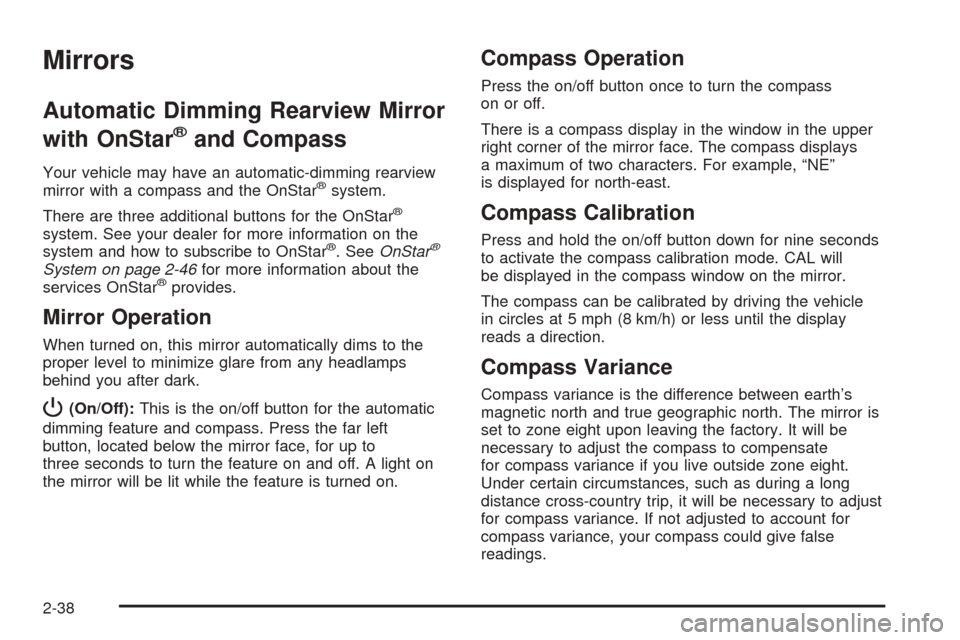
Your vehicle may have an automatic-dimming rearview
mirror with a compass and the OnStar®system.
There are three additional buttons for the OnStar
®
system. See your dealer for more information on the
system and how to subscribe to OnStar®. SeeOnStar®
System on page 2-46for more information about the
services OnStar®provides.
Mirror Operation
When turned on, this mirror automatically dims to the
proper level to minimize glare from any headlamps
behind you after dark.
P(On/Off):This is the on/off button for the automatic
dimming feature and compass. Press the far left
button, located below the mirror face, for up to
three seconds to turn the feature on and off. A light on
the mirror will be lit while the feature is turned on.
Compass Operation
Press the on/off button once to turn the compass
on or off.
There is a compass display in the window in the upper
right corner of the mirror face. The compass displays
a maximum of two characters. For example, “NE”
is displayed for north-east.
Compass Calibration
Press and hold the on/off button down for nine seconds
to activate the compass calibration mode. CAL will
be displayed in the compass window on the mirror.
The compass can be calibrated by driving the vehicle
in circles at 5 mph (8 km/h) or less until the display
reads a direction.
Compass Variance
Compass variance is the difference between earth’s
magnetic north and true geographic north. The mirror is
set to zone eight upon leaving the factory. It will be
necessary to adjust the compass to compensate
for compass variance if you live outside zone eight.
Under certain circumstances, such as during a long
distance cross-country trip, it will be necessary to adjust
for compass variance. If not adjusted to account for
compass variance, your compass could give false
readings.
2-38
Page 113 of 484
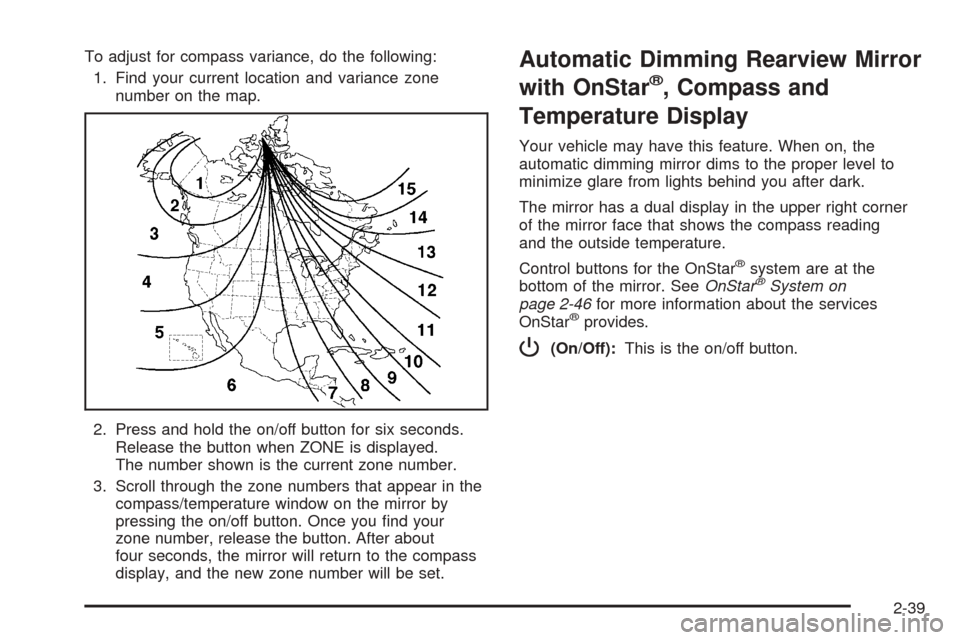
To adjust for compass variance, do the following:
1. Find your current location and variance zone
number on the map.
2. Press and hold the on/off button for six seconds.
Release the button when ZONE is displayed.
The number shown is the current zone number.
3. Scroll through the zone numbers that appear in the
compass/temperature window on the mirror by
pressing the on/off button. Once you �nd your
zone number, release the button. After about
four seconds, the mirror will return to the compass
display, and the new zone number will be set.Automatic Dimming Rearview Mirror
with OnStar
®, Compass and
Temperature Display
Your vehicle may have this feature. When on, the
automatic dimming mirror dims to the proper level to
minimize glare from lights behind you after dark.
The mirror has a dual display in the upper right corner
of the mirror face that shows the compass reading
and the outside temperature.
Control buttons for the OnStar
®system are at the
bottom of the mirror. SeeOnStar®System on
page 2-46for more information about the services
OnStar
®provides.
P(On/Off):This is the on/off button.
2-39
Page 116 of 484
Passenger Airbag Indicator
The vehicle may be equipped with a passenger airbag
indicator, on the mirror glass, just above the buttons.
For more information, seePassenger Sensing System
on page 1-60andPassenger Airbag Status Indicator
on page 3-32.
Cleaning the Mirror
When cleaning the mirror, use a paper towel or similar
material dampened with glass cleaner. Do not spray
glass cleaner directly on the mirror as that may cause
the liquid cleaner to enter the mirror housing.
Automatic Dimming Rearview Mirror
with Compass
Your vehicle may have an automatic-dimming rearview
mirror with a compass.
Mirror Operation
When turned on, this mirror automatically dims to the
proper level to minimize glare from any headlamps
behind you after dark.
P(On/Off):This is the on/off button for the automatic
dimming feature and compass. Press the far left
button, located below the mirror face, for up to
three seconds to turn the feature on and off. A light on
the mirror will be lit while the feature is turned on.
Compass Operation
Press the on/off button once to turn the compass
on or off.
There is a compass display in the window in the upper
right corner of the mirror face. The compass displays
a maximum of two characters. For example, “NE”
is displayed for north-east.
Compass Calibration
Press and hold the on/off button down for nine seconds
to activate the compass calibration mode. CAL will
be displayed in the compass window on the mirror.
The compass can be calibrated by driving the vehicle in
circles at 5 mph (8 km/h) or less until the display
reads a direction.
Compass Variance
Compass variance is the difference between earth’s
magnetic north and true geographic north. The mirror is
set to zone eight upon leaving the factory. It will be
necessary to adjust the compass to compensate
for compass variance if you live outside zone eight.
Under certain circumstances, such as during a long
distance cross-country trip, it will be necessary to adjust
for compass variance. If not adjusted to account for
compass variance, your compass could give false
readings.
2-42
Page 123 of 484
Universal Home Remote System
Operation
Do not use the Universal Home Remote with any
garage door opener that does not have the “stop and
reverse” feature. This includes any garage door opener
model manufactured before April 1, 1982. If you
have a newer garage door opener with rolling codes,
please be sure to follow Steps 6 through 8 to complete
the programming of your Universal Home Remote
Transmitter.
Read the instructions completely before attempting to
program the Universal Home Remote. Because of
the steps involved, it may be helpful to have another
person available to assist you in the programming steps.Keep the original hand-held transmitter for use in other
vehicles as well as for future Universal Home Remote
programming. It is also recommended that upon the
sale of the vehicle, the programmed Universal Home
Remote buttons should be erased for security purposes.
See “Erasing Universal Home Remote Buttons” later
in this section or, for assistance, seeCustomer
Assistance Offices on page 7-4.
Be sure that people and objects are clear of the
garage door or gate operator you are programming.
When programming a garage door, it is advised to park
outside of the garage.
It is recommended that a new battery be installed in
your hand-held transmitter for quicker and more
accurate transmission of the radio-frequency signal.
2-49
Page 124 of 484
Programming Universal Home Remote
Follow these steps to program up to three channels:
1. Press and hold down the two outside Universal
Home Remote buttons, releasing only when the
Universal Home Remote indicator light begins
to �ash, after 20 seconds. Do not hold down the
buttons for longer than 30 seconds and do not
repeat this step to program a second and/or third
hand-held transmitter to the remaining two Universal
Home Remote buttons.
2. Position the end of your hand-held transmitter
about 1 to 3 inches (3 to 8 cm) away from the
Universal Home Remote buttons while keeping the
indicator light in view.
3. Simultaneously press and hold both the desired
Universal Home Remote button and the hand-held
transmitter button. Do not release the buttons
until Step 4 has been completed.
Some entry gates and garage door openers may
require you to substitute Step 3 with the procedure
noted in “Gate Operator and Canadian
Programming” later in this section.4. The indicator light will �ash slowly at �rst and then
rapidly after Universal Home Remote successfully
receives the frequency signal from the hand-held
transmitter. Release both buttons.
5. Press and hold the newly-trained Universal Home
Remote button and observe the indicator light.
If the indicator light stays on constantly,
programming is complete and your device should
activate when the Universal Home Remote button
is pressed and released.
To program the remaining two Universal Home
Remote buttons, begin with Step 2 under
“Programming Universal Home Remote.”
Do not repeat Step 1 as this will erase all of the
programmed channels.
If the indicator light blinks rapidly for two seconds
and then turns to a constant light, continue with
Steps 6 through 8 following to complete the
programming of a rolling-code equipped device,
most commonly, a garage door opener.
2-50
Page 125 of 484
6. Locate in the garage, the garage door opener
receiver (motor-head unit). Locate the “Learn”
or “Smart” button. This can usually be found where
the hanging antenna wire is attached to the
motor-head unit.
7. Firmly press and release the “Learn” or “Smart”
button. The name and color of the button may
vary by manufacturer.
You will have 30 seconds to start Step 8.
8. Return to the vehicle. Firmly press and hold the
programmed Universal Home Remote button for
two seconds, then release. Repeat the
press/hold/release sequence a second time, and
depending on the brand of the garage door opener,
or other rolling code device, repeat this sequence
a third time to complete the programming.
The Universal Home Remote should now activate
your rolling-code equipped device.
To program the remaining two Universal Home Remote
buttons, begin with Step 2 of “Programming Universal
Home Remote.” You do not want to repeat Step 1,
as this will erase all previous programming from
the Universal Home Remote buttons.Gate Operator and Canadian
Programming
Canadian radio-frequency laws require transmitter
signals to time out or quit after several seconds of
transmission. This may not be long enough for Universal
Home Remote to pick up the signal during programming.
Similarly, some U.S. gate operators are manufactured
to time out in the same manner.
If you live in Canada, or you are having difficulty
programming a gate operator or garage door opener
by using the “Programming Universal Home Remote”
procedures, regardless of where you live, replace
Step 3 under “Programming Universal Home Remote”
with the following:
Continue to press and hold the Universal Home Remote
button while you press and release every two seconds
(cycle) the hand-held transmitter button until the
frequency signal has been successfully accepted by the
Universal Home Remote. The Universal Home Remote
indicator light will �ash slowly at �rst and then rapidly.
Proceed with Step 4 under “Programming Universal
Home Remote” to complete.
2-51
Page 126 of 484
Using Universal Home Remote
Press and hold the appropriate Universal Home Remote
button for at least half of a second. The indicator light
will come on while the signal is being transmitted.
Erasing Universal Home Remote
Buttons
To erase programming from the three Universal Home
Remote buttons do the following:
1. Press and hold down the two outside buttons until
the indicator light begins to �ash, after 20 seconds.
Do not hold the two outside buttons for longer
than 30 seconds.
2. Release both buttons.
The Universal Home Remote is now in the train
(learning) mode and can be programmed at any time
beginning with Step 2 under “Programming Universal
Home Remote” shown earlier in this section.
Individual buttons cannot be erased, but they can be
reprogrammed. See “Reprogramming a Single Universal
Home Remote Button” following this section.
Reprogramming a Single Universal
Home Remote Button
To program a device to Universal Home Remote using
a Universal Home Remote button previously trained,
follow these steps:
1. Press and hold the desired Universal Home
Remote button. Do not release the button.
2. The indicator light will begin to �ash after
20 seconds. While still holding the Universal
Home Remote button, proceed with Step 2 under
“Programming Universal Home Remote” shown
earlier in this section.
For additional information on Universal Home Remote,
seeCustomer Assistance Offices on page 7-4.
2-52