automatic transmission CADILLAC ESCALADE EXT 2007 3.G Owners Manual
[x] Cancel search | Manufacturer: CADILLAC, Model Year: 2007, Model line: ESCALADE EXT, Model: CADILLAC ESCALADE EXT 2007 3.GPages: 580, PDF Size: 3.01 MB
Page 89 of 580
Keys.............................................................. 91
Remote Keyless Entry System.................... 92
Remote Keyless Entry System Operation.... 93
Doors and Locks........................................ 101
Door Locks................................................ 101
Power Door Locks..................................... 102
Delayed Locking........................................ 102
Programmable Automatic Door Locks........ 102
Rear Door Security Locks......................... 103
Lockout Protection..................................... 103
Midgate
®................................................... 104
Tailgate..................................................... 114
Power Running Boards.............................. 114
Windows...................................................... 115
Power Windows........................................ 116
Sun Visors................................................ 117
Theft-Deterrent Systems............................. 117
Content Theft-Deterrent............................. 118
PASS-Key
®III+......................................... 120
PASS-Key®III+ Operation......................... 121Starting and Operating Your Vehicle......... 123
New Vehicle Break-In................................ 123
Ignition Positions....................................... 124
Retained Accessory Power (RAP)............. 125
Starting the Engine.................................... 126
Adjustable Throttle and Brake Pedal.......... 128
Engine Coolant Heater.............................. 128
Automatic Transmission Operation............. 129
Tow/Haul Mode......................................... 135
Parking Brake........................................... 136
Shifting Into Park (P) ................................. 138
Shifting Out of Park (P)............................. 140
Parking Over Things That Burn................. 140
Engine Exhaust......................................... 141
Running the Engine While Parked............. 142
Mirrors......................................................... 143
Automatic Dimming Rearview Mirror with
Intellibeam™, OnStar
®, Compass, and
Temperature Display.............................. 143
Automatic Dimming Rearview Mirror with
OnStar
®, Compass and Temperature
Display................................................... 145
Outside Power Foldaway Mirrors............... 149
Section 2 Features and Controls
89
Page 129 of 580
To Use the Engine Coolant Heater
1. Turn off the engine.
2. Open the hood and unwrap the electrical
cord. The cord is located on the driver’s
side of the engine compartment, near
the power steering �uid reservoir.
3. Plug the cord into a normal, grounded
110-volt AC outlet.
{CAUTION:
Plugging the cord into an ungrounded
outlet could cause an electrical shock.
Also, the wrong kind of extension cord
could overheat and cause a �re. You
could be seriously injured. Plug the cord
into a properly grounded three-prong
110-volt AC outlet. If the cord will not
reach, use a heavy-duty three-prong
extension cord rated for at least 15 amps.4. Before starting the engine, be sure to unplug
and store the cord as it was before to keep it
away from moving engine parts. If you do
not, it could be damaged.
How long should you keep the coolant heater
plugged in? The answer depends on the outside
temperature, the kind of oil you have, and
some other things. Instead of trying to list
everything here, we ask that you contact your
dealer in the area where you will be parking your
vehicle. The dealer can give you the best
advice for that particular area.Automatic Transmission Operation
Your vehicle has a Hydra-Matic®6L80 automatic
transmission, and has an electronic shift
position indicator within the instrument panel
cluster. The electronic shift position indicator
displays when the shift lever is moved out of
PARK (P).
129
Page 130 of 580
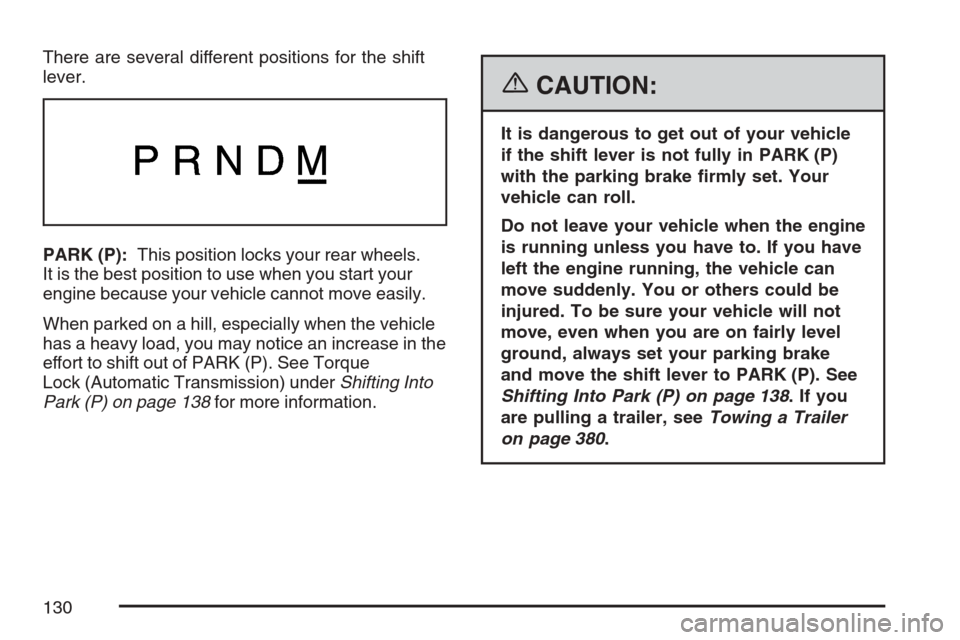
There are several different positions for the shift
lever.
PARK (P):This position locks your rear wheels.
It is the best position to use when you start your
engine because your vehicle cannot move easily.
When parked on a hill, especially when the vehicle
has a heavy load, you may notice an increase in the
effort to shift out of PARK (P). See Torque
Lock (Automatic Transmission) underShifting Into
Park (P) on page 138for more information.
{CAUTION:
It is dangerous to get out of your vehicle
if the shift lever is not fully in PARK (P)
with the parking brake �rmly set. Your
vehicle can roll.
Do not leave your vehicle when the engine
is running unless you have to. If you have
left the engine running, the vehicle can
move suddenly. You or others could be
injured. To be sure your vehicle will not
move, even when you are on fairly level
ground, always set your parking brake
and move the shift lever to PARK (P). See
Shifting Into Park (P) on page 138.Ifyou
are pulling a trailer, seeTowing a Trailer
on page 380.
130
Page 133 of 580
Your vehicle’s transmission uses adaptive shift
controls that compares key shift parameters
to pre-programmed ideal shifts stored in the
transmissions computer. The transmission
constantly makes adjustments to improve vehicle
performance according to how the vehicle is
being used, such as with a heavy load or when
temperature changes. During this adaptive
shift controls process, shifting may feel different as
the transmission determines the best settings.
When temperatures are very cold, the
Hydra-Matic
®6L80 automatic transmission’s gear
shifting may be delayed providing more stable
shifts until the engine warms up. Shifts may
be more noticeable with a cold transmission. This
difference in shifting is normal.
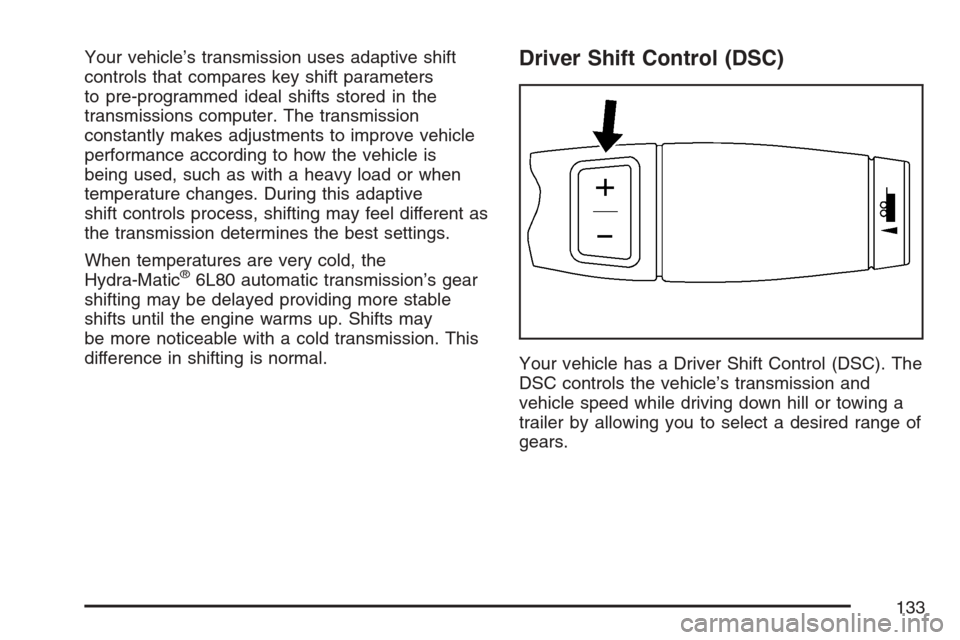
Driver Shift Control (DSC)
Your vehicle has a Driver Shift Control (DSC). The
DSC controls the vehicle’s transmission and
vehicle speed while driving down hill or towing a
trailer by allowing you to select a desired range of
gears.
133
Page 134 of 580
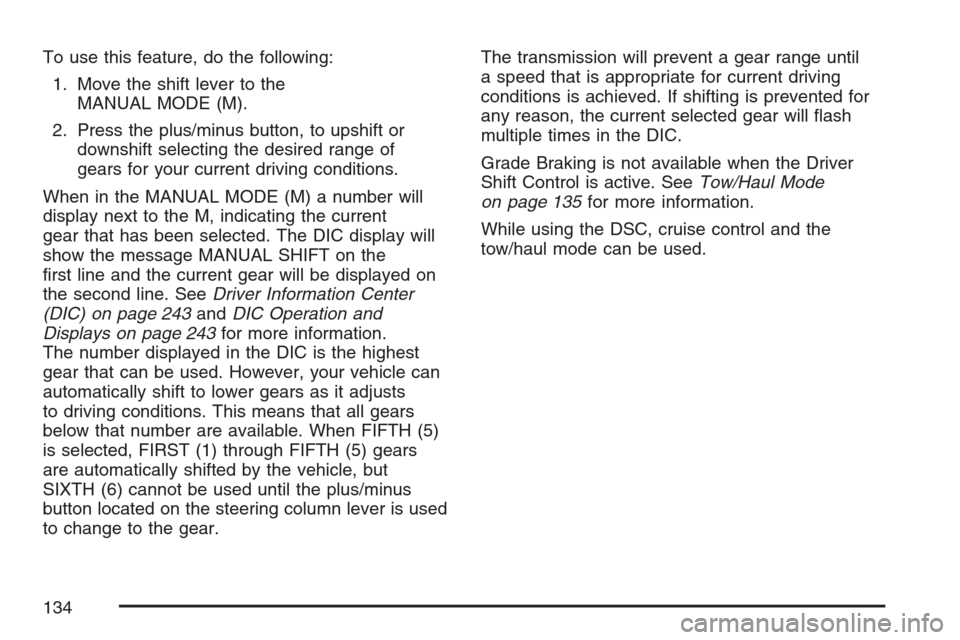
To use this feature, do the following:
1. Move the shift lever to the
MANUAL MODE (M).
2. Press the plus/minus button, to upshift or
downshift selecting the desired range of
gears for your current driving conditions.
When in the MANUAL MODE (M) a number will
display next to the M, indicating the current
gear that has been selected. The DIC display will
show the message MANUAL SHIFT on the
�rst line and the current gear will be displayed on
the second line. SeeDriver Information Center
(DIC) on page 243andDIC Operation and
Displays on page 243for more information.
The number displayed in the DIC is the highest
gear that can be used. However, your vehicle can
automatically shift to lower gears as it adjusts
to driving conditions. This means that all gears
below that number are available. When FIFTH (5)
is selected, FIRST (1) through FIFTH (5) gears
are automatically shifted by the vehicle, but
SIXTH (6) cannot be used until the plus/minus
button located on the steering column lever is used
to change to the gear.The transmission will prevent a gear range until
a speed that is appropriate for current driving
conditions is achieved. If shifting is prevented for
any reason, the current selected gear will �ash
multiple times in the DIC.
Grade Braking is not available when the Driver
Shift Control is active. SeeTow/Haul Mode
on page 135for more information.
While using the DSC, cruise control and the
tow/haul mode can be used.
134
Page 136 of 580
Grade Braking
Grade Braking assists when driving on a downhill
grade. It maintains the vehicle’s speed by
automatically implementing a shift schedule that
uses the engine and the transmission to slow
the vehicle. This reduces wear on the brakes
system and increases control of the vehicle. The
system constantly monitors the vehicle’s speed,
acceleration, throttle position, and whether
the brake pedal is being pressed, and determines
when to keep the current vehicle speed or to
slow down. The system will then automatically
command downshifts that reduces the vehicles
speed, until the brake pedal is no longer
being pressed. This indicates the desired vehicle
speed has been reached.The tow/haul mode and grade braking shift modes
can be activated by pressing the button on the
end of the shift control stalk. While in the
DSC mode, grade braking is deactivated, allowing
the driver to select a gear.
SeeAutomatic Transmission Operation on
page 129for more information.
Parking Brake
To set the parking brake, hold the regular brake
pedal down with your right foot. Push down
the parking brake pedal with your left foot.
136
Page 140 of 580
Shifting Out of Park (P)
Your vehicle has an automatic transmission shift
lock control system which locks the shift lever
in PARK (P) when the ignition is in the LOCK.
You have to fully apply your regular brakes
�rst and then press the shifter lever button before
you can shift from PARK (P) when the ignition
is in RUN. SeeAutomatic Transmission Operation
on page 129.
If you cannot shift out of PARK (P), ease pressure
on the shift lever and push the shift lever all the
way up into PARK (P) as you maintain brake
application. Then press the shift lever button and
move the shift lever into another gear.
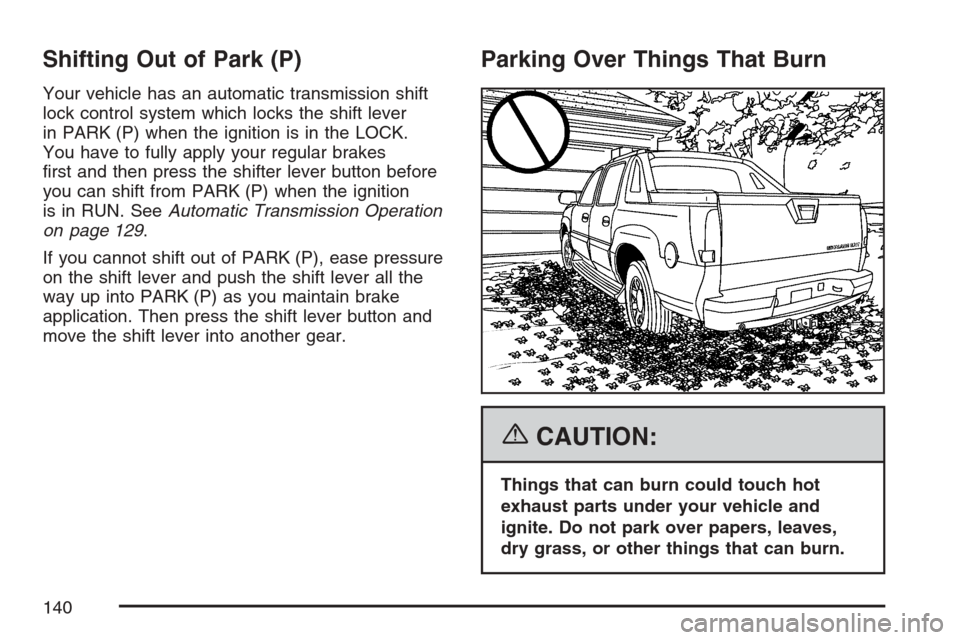
Parking Over Things That Burn
{CAUTION:
Things that can burn could touch hot
exhaust parts under your vehicle and
ignite. Do not park over papers, leaves,
dry grass, or other things that can burn.
140
Page 193 of 580
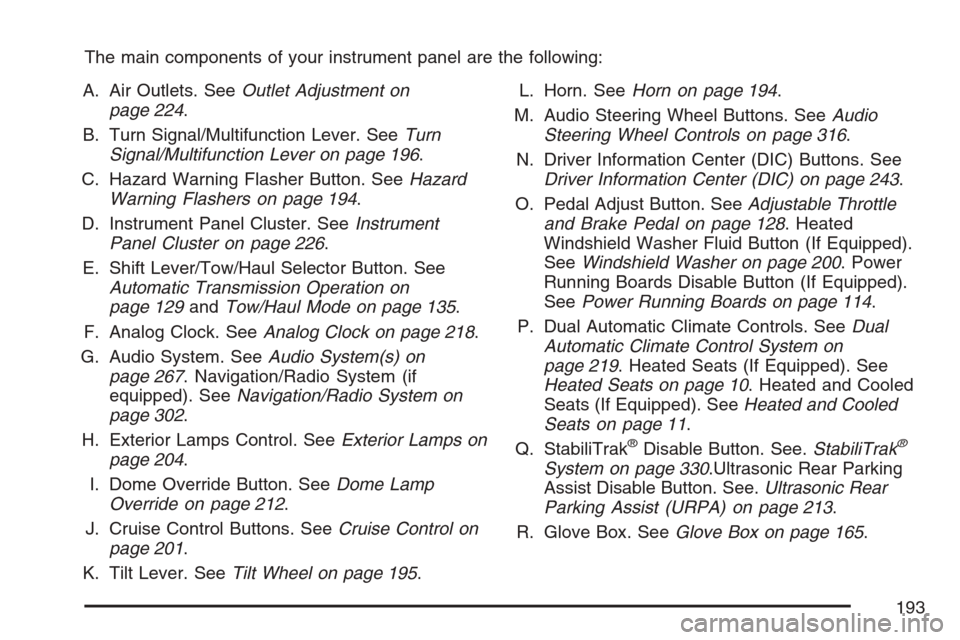
The main components of your instrument panel are the following:
A. Air Outlets. SeeOutlet Adjustment on
page 224.
B. Turn Signal/Multifunction Lever. SeeTurn
Signal/Multifunction Lever on page 196.
C. Hazard Warning Flasher Button. SeeHazard
Warning Flashers on page 194.
D. Instrument Panel Cluster. SeeInstrument
Panel Cluster on page 226.
E. Shift Lever/Tow/Haul Selector Button. See
Automatic Transmission Operation on
page 129andTow/Haul Mode on page 135.
F. Analog Clock. SeeAnalog Clock on page 218.
G. Audio System. SeeAudio System(s) on
page 267. Navigation/Radio System (if
equipped). SeeNavigation/Radio System on
page 302.
H. Exterior Lamps Control. SeeExterior Lamps on
page 204.
I. Dome Override Button. SeeDome Lamp
Override on page 212.
J. Cruise Control Buttons. SeeCruise Control on
page 201.
K. Tilt Lever. SeeTilt Wheel on page 195.L. Horn. SeeHorn on page 194.
M. Audio Steering Wheel Buttons. SeeAudio
Steering Wheel Controls on page 316.
N. Driver Information Center (DIC) Buttons. See
Driver Information Center (DIC) on page 243.
O. Pedal Adjust Button. SeeAdjustable Throttle
and Brake Pedal on page 128. Heated
Windshield Washer Fluid Button (If Equipped).
SeeWindshield Washer on page 200. Power
Running Boards Disable Button (If Equipped).
SeePower Running Boards on page 114.
P. Dual Automatic Climate Controls. SeeDual
Automatic Climate Control System on
page 219. Heated Seats (If Equipped). See
Heated Seats on page 10. Heated and Cooled
Seats (If Equipped). SeeHeated and Cooled
Seats on page 11.
Q. StabiliTrak
®Disable Button. See.StabiliTrak®
System on page 330.Ultrasonic Rear Parking
Assist Disable Button. See.Ultrasonic Rear
Parking Assist (URPA) on page 213.
R. Glove Box. SeeGlove Box on page 165.
193
Page 209 of 580
Headlamps on Reminder
If a door is open, a reminder chime will sound
when your headlamps or parking lamps are
manually turned on and your key is out of the
ignition. To turn off the chime, turn the headlamp
switch to off or AUTO and then back on, or
close and re-open the door. In the AUTO mode,
the headlamps turn off once the ignition is in
LOCK or may remain on until the headlamp delay
ends (if enabled in the DIC). See “Exit Lighting”
underDIC Vehicle Customization on page 257.
Daytime Running Lamps (DRL)
Daytime Running Lamps (DRL) can make it easier
for others to see the front of your vehicle during
the day. DRL can be helpful in many different
driving conditions, but they can be especially
helpful in the short periods after dawn and before
sunset. Fully functional daytime running lamps
are required on all vehicles �rst sold in Canada.The DRL system will come on when the following
conditions are met:
The ignition is on.
The exterior lamps control is in AUTO.
The transmission is not in PARK (P).
The light sensor determines it is daytime.
When the DRL are on, only your DRL lamps will
be on. The taillamps, sidemarker, and other lamps
will not be on. The instrument panel will not be
lit up either.
When it begins to get dark, the automatic
headlamp system will switch from DRL to the
headlamps.
To turn off the DRL lamps, turn the exterior lamps
control to the OFF position and then release.
For vehicles �rst sold in Canada, the transaxle
must be in the Park (P) position, before the DRL
lamps can be turned off.
As with any vehicle, you should turn on the
regular headlamp system when you need it.
209
Page 246 of 580
Timer
Press the trip/fuel button until TIMER displays.
This display can be used as a timer.
To start the timer, press the set/reset button while
TIMER is displayed. The display will show the
amount of time that has passed since the timer was
last reset, not including time the ignition is off. Time
will continue to be counted as long as the ignition is
on, even if another display is being shown on the
DIC. The timer will record up to 99 hours,
59 minutes and 59 seconds (99:59:59) after which
the display will return to zero.
To stop the timer, press the set/reset button brie�y
while TIMER is displayed.
To reset the timer to zero, press and hold the
set/reset button while TIMER is displayed.
Transmission Temperature
Press the trip/fuel button until TRANS TEMP
displays. This display shows the temperature of
the automatic transmission �uid in either degrees
Fahrenheit (°F) or degrees Celsius (°C).
Blank Display
This display shows no information.
Vehicle Information Menu Items
T
(Vehicle Information):Press this button to
scroll through the following menu items:
Oil Life
Press the vehicle information button until OIL LIFE
REMAINING displays. This display shows an
estimate of the oil’s remaining useful life. If you see
99% OIL LIFE REMAINING on the display, that
means 99% of the current oil life remains. The
engine oil life system will alert you to change your
oil on a schedule consistent with your driving
conditions.
When the remaining oil life is low, the CHANGE
ENGINE OIL SOON message will appear on the
display. See “CHANGE ENGINE OIL SOON” under
DIC Warnings and Messages on page 248. You
should change your oil as soon as you can. See
Engine Oil on page 407. In addition to the engine oil
life system monitoring the oil life, additional
maintenance is recommended in the Maintenance
Schedule in this manual. SeeScheduled
Maintenance on page 523for more information.
246