park assist CADILLAC ESCALADE EXT 2007 3.G Owners Manual
[x] Cancel search | Manufacturer: CADILLAC, Model Year: 2007, Model line: ESCALADE EXT, Model: CADILLAC ESCALADE EXT 2007 3.GPages: 580, PDF Size: 3.01 MB
Page 126 of 580
Starting the Engine
Move your shift lever to PARK (P) or
NEUTRAL (N). Your engine will not start in
any other position — that is a safety feature.
To restart when you are already moving,
use NEUTRAL (N) only.
Notice:Do not try to shift to PARK (P) if your
vehicle is moving. If you do, you could
damage the transmission. Shift to PARK (P)
only when your vehicle is stopped.
1. With your foot off the accelerator pedal, turn
the ignition key to START. When the engine
starts, let go of the key. The idle speed will go
down as your engine gets warm. Do not
race the engine immediately after starting it.
Operate the engine and transmission
gently until the oil warms up and lubricates all
moving parts.Your vehicle has a Computer-Controlled
Cranking System. This feature assists in
starting the engine and protects the electrical
system. If the ignition key is turned to the
START, and then released when the engine
begins cranking, the engine will continue
cranking until the vehicle starts or until
it exceeds the maximum cranking time allowed,
approximately 15 seconds to prevent cranking
motor damage. To prevent gear damage,
this system also prevents cranking if the
engine is already running. The engine cranking
can be stopped by turning the ignition switch
to the ACCESSORY or LOCK.
126
Page 136 of 580
Grade Braking
Grade Braking assists when driving on a downhill
grade. It maintains the vehicle’s speed by
automatically implementing a shift schedule that
uses the engine and the transmission to slow
the vehicle. This reduces wear on the brakes
system and increases control of the vehicle. The
system constantly monitors the vehicle’s speed,
acceleration, throttle position, and whether
the brake pedal is being pressed, and determines
when to keep the current vehicle speed or to
slow down. The system will then automatically
command downshifts that reduces the vehicles
speed, until the brake pedal is no longer
being pressed. This indicates the desired vehicle
speed has been reached.The tow/haul mode and grade braking shift modes
can be activated by pressing the button on the
end of the shift control stalk. While in the
DSC mode, grade braking is deactivated, allowing
the driver to select a gear.
SeeAutomatic Transmission Operation on
page 129for more information.
Parking Brake
To set the parking brake, hold the regular brake
pedal down with your right foot. Push down
the parking brake pedal with your left foot.
136
Page 150 of 580
Resetting the Power Foldaway Mirrors
You will need to reset the power foldaway mirrors
if the following occurs:
The mirrors are accidentally obstructed while
folding.
They are accidentally manually
folded/unfolded.
The mirrors will not stay in the unfolded
position.
The mirrors shake and �utter at normal driving
speeds.
To reset the power foldaway mirrors, fold and
unfold them one time using the mirror controls.
This will reset them to their normal position.
This mirror has the following features.
Automatic Dimming
The driver’s outside mirror will adjust for the glare
of the headlamps behind you. SeeAutomatic
Dimming Rearview Mirror with OnStar
®, Compass
and Temperature Display on page 145.
Curb View Assist
If your vehicle has the memory package, the
outside mirrors are able to perform the curb view
assist mirror function. This feature may be
useful in allowing the driver to view the curb when
parallel parking. This feature will cause the
passenger’s and/or driver’s mirror to tilt to a
preselected position when the vehicle is in
REVERSE (R).
The passenger’s and/or driver’s mirror will return
to its original position when the vehicle is
shifted out of REVERSE (R), or the ignition is
turned off or to LOCK.
This feature can be turned on or off through the
Driver Information Center (DIC). SeeDriver
Information Center (DIC) on page 243.
150
Page 157 of 580
Do not use the this system with any garage door
opener that does not have the stop and reverse
feature. This includes any garage door opener
model manufactured before April 1, 1982.
Read the instructions completely before attempting
to program the transmitter. Because of the steps
involved, it may be helpful to have another
person available to assist you in programming the
transmitter.
Be sure to keep the original remote control
transmitter for use in other vehicles, as well as, for
future programming. You only need the original
remote control transmitter for �xed code
programming. It is also recommended that upon
the sale or lease termination of the vehicle,
the programmed buttons should be erased for
security purposes. See “Erasing your Universal
Home Remote Buttons” later in this section.
Be sure that people and objects are clear of the
garage door or security device you are
programming. When programming a garage door,
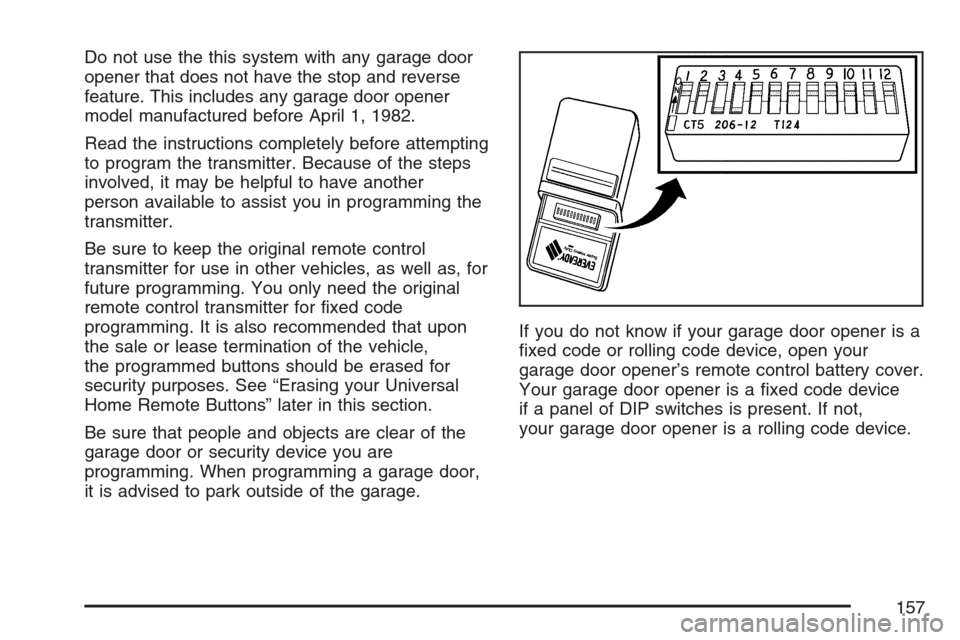
it is advised to park outside of the garage.If you do not know if your garage door opener is a
�xed code or rolling code device, open your
garage door opener’s remote control battery cover.
Your garage door opener is a �xed code device
if a panel of DIP switches is present. If not,
your garage door opener is a rolling code device.
157
Page 162 of 580
Universal Home Remote
System Operation
(With One Triangular LED)
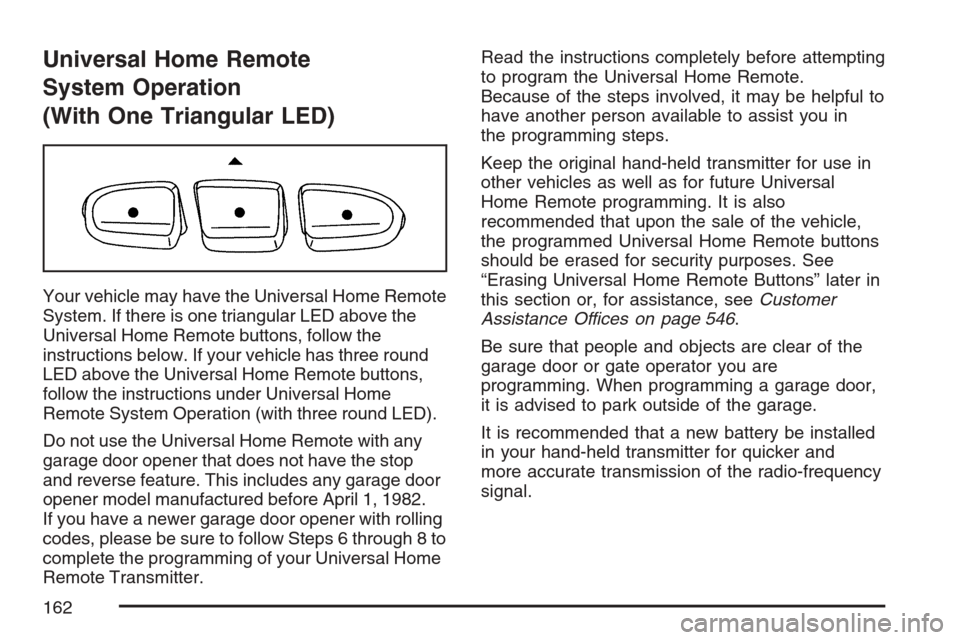
Your vehicle may have the Universal Home Remote
System. If there is one triangular LED above the
Universal Home Remote buttons, follow the
instructions below. If your vehicle has three round
LED above the Universal Home Remote buttons,
follow the instructions under Universal Home
Remote System Operation (with three round LED).
Do not use the Universal Home Remote with any
garage door opener that does not have the stop
and reverse feature. This includes any garage door
opener model manufactured before April 1, 1982.
If you have a newer garage door opener with rolling
codes, please be sure to follow Steps 6 through 8 to
complete the programming of your Universal Home
Remote Transmitter.Read the instructions completely before attempting
to program the Universal Home Remote.
Because of the steps involved, it may be helpful to
have another person available to assist you in
the programming steps.
Keep the original hand-held transmitter for use in
other vehicles as well as for future Universal
Home Remote programming. It is also
recommended that upon the sale of the vehicle,
the programmed Universal Home Remote buttons
should be erased for security purposes. See
“Erasing Universal Home Remote Buttons” later in
this section or, for assistance, seeCustomer
Assistance Offices on page 546.
Be sure that people and objects are clear of the
garage door or gate operator you are
programming. When programming a garage door,
it is advised to park outside of the garage.
It is recommended that a new battery be installed
in your hand-held transmitter for quicker and
more accurate transmission of the radio-frequency
signal.
162
Page 189 of 580
Instrument Panel Overview........................ 192
Hazard Warning Flashers.......................... 194
Other Warning Devices............................. 194
Horn.......................................................... 194
Tilt Wheel.................................................. 195
Heated Steering Wheel............................. 195
Turn Signal/Multifunction Lever.................. 196
Turn and Lane-Change Signals................. 196
Headlamp High/Low-Beam Changer.......... 197
Flash-to-Pass............................................ 198
Windshield Wipers..................................... 198
Rainsense™ II Wipers............................... 199
Windshield Washer.................................... 200
Cruise Control........................................... 201
Exterior Lamps.......................................... 204
Headlamps on Reminder........................... 209
Daytime Running Lamps (DRL)................. 209
Automatic Headlamp System..................... 210
Fog Lamps................................................ 211
Exterior Cargo Lamps................................ 211
Instrument Panel Brightness...................... 211
Dome Lamps............................................. 212
Dome Lamp Override................................ 212
Entry/Exit Lighting...................................... 212
Reading Lamps......................................... 212Battery Run-Down Protection..................... 212
Ultrasonic Rear Parking Assist (URPA)...... 213
Accessory Power Outlet(s)........................ 217
Ashtray(s) and Cigarette Lighter................ 218
Analog Clock............................................. 218
Climate Controls......................................... 219
Dual Automatic Climate Control System.... 219
Outlet Adjustment...................................... 224
Warning Lights, Gages, and Indicators..... 225
Instrument Panel Cluster........................... 226
Speedometer and Odometer...................... 227
Trip Odometer........................................... 227
Tachometer............................................... 227
Safety Belt Reminder Light........................ 228
Passenger Safety Belt
Reminder Light...................................... 228
Airbag Readiness Light............................. 229
Passenger Airbag Status Indicator............. 230
Charging System Light.............................. 232
Brake System Warning Light..................... 232
Anti-Lock Brake System
Warning Light........................................ 234
StabiliTrak
®Indicator Light......................... 235
Engine Coolant Temperature Gage............ 235
Section 3 Instrument Panel
189
Page 193 of 580
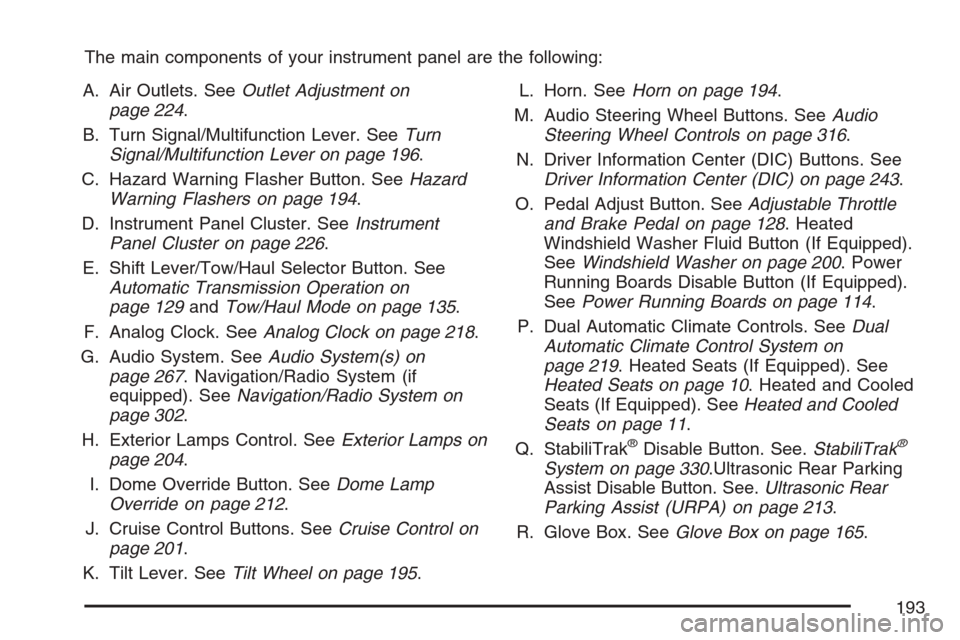
The main components of your instrument panel are the following:
A. Air Outlets. SeeOutlet Adjustment on
page 224.
B. Turn Signal/Multifunction Lever. SeeTurn
Signal/Multifunction Lever on page 196.
C. Hazard Warning Flasher Button. SeeHazard
Warning Flashers on page 194.
D. Instrument Panel Cluster. SeeInstrument
Panel Cluster on page 226.
E. Shift Lever/Tow/Haul Selector Button. See
Automatic Transmission Operation on
page 129andTow/Haul Mode on page 135.
F. Analog Clock. SeeAnalog Clock on page 218.
G. Audio System. SeeAudio System(s) on
page 267. Navigation/Radio System (if
equipped). SeeNavigation/Radio System on
page 302.
H. Exterior Lamps Control. SeeExterior Lamps on
page 204.
I. Dome Override Button. SeeDome Lamp
Override on page 212.
J. Cruise Control Buttons. SeeCruise Control on
page 201.
K. Tilt Lever. SeeTilt Wheel on page 195.L. Horn. SeeHorn on page 194.
M. Audio Steering Wheel Buttons. SeeAudio
Steering Wheel Controls on page 316.
N. Driver Information Center (DIC) Buttons. See
Driver Information Center (DIC) on page 243.
O. Pedal Adjust Button. SeeAdjustable Throttle
and Brake Pedal on page 128. Heated
Windshield Washer Fluid Button (If Equipped).
SeeWindshield Washer on page 200. Power
Running Boards Disable Button (If Equipped).
SeePower Running Boards on page 114.
P. Dual Automatic Climate Controls. SeeDual
Automatic Climate Control System on
page 219. Heated Seats (If Equipped). See
Heated Seats on page 10. Heated and Cooled
Seats (If Equipped). SeeHeated and Cooled
Seats on page 11.
Q. StabiliTrak
®Disable Button. See.StabiliTrak®
System on page 330.Ultrasonic Rear Parking
Assist Disable Button. See.Ultrasonic Rear
Parking Assist (URPA) on page 213.
R. Glove Box. SeeGlove Box on page 165.
193
Page 213 of 580

Ultrasonic Rear Parking
Assist (URPA)
If your vehicle has the Ultrasonic Rear Parking
Assist (URPA) system it is designed to help
you park while in REVERSE (R). It operates only
at speeds less than 5 mph (8 km/h). URPA
helps make parking easier and helps you avoid
colliding with objects such as parked vehicles. The
URPA system detects objects that are close to
the rear of the vehicle which are at least 10 inches
(25.4 cm) off the ground and below hood or
tailgate level. The system detects objects up to
8 feet (2.5 m) behind your vehicle. The URPA
sensors determine how close these objects are
from your bumper within this area.
{CAUTION:
Even with the Ultrasonic Rear Park Assist
system, the driver must check carefully
before backing up. The system does not
CAUTION: (Continued)
CAUTION: (Continued)
operate above speeds of 5 mph
(8 km/h). The system does not detect
objects more than 8 feet (2.5 meters)
behind the vehicle. This detection
distance limit may be reduced during
warm weather or high humidity. Also, the
system does not detect objects that are
below your bumper, underneath your
vehicle, or some objects very close to the
vehicle. The system is not designed to
detect children, pedestrians, bicyclists,
or pets.
So, unless you check carefully behind
your vehicle while you are backing up,
they could be injured or killed.
Whether or not you are using rear park
assist, always check carefully behind your
vehicle before backing up and then watch
closely as you do.
213
Page 214 of 580

The URPA display is
located above the rear
window towards the
center of the vehicle
and can be seen
by looking over your
right shoulder.
The URPA display has three color-coded lights.
The lights are used to provide distance and system
information, along with beeps that will be heard
through the speakers.
URPA can be turned off
by pressing the rear park
aid disable button
located next to the radio.
The indicator light will
come on to indicate that
URPA is off.The red light in the URPA display will also be lit if
the vehicle is in REVERSE (R). If the vehicle
has a Driver Information Center (DIC), PARKING
ASSIST OFF will display on the screen. URPA
automatically turns back on each time the vehicle
is started.
How the System Works
When the shift lever is moved into REVERSE (R),
the rear display will brie�y come on to let you
know the display is operating correctly. URPA
comes on automatically when the shift lever
is moved into REVERSE (R).
The system does not work at a reverse speed
greater than 5 mph (8 km/h). To remind you of this,
the red light on the rear display will �ash.
214
Page 215 of 580
How the System Works when Backing
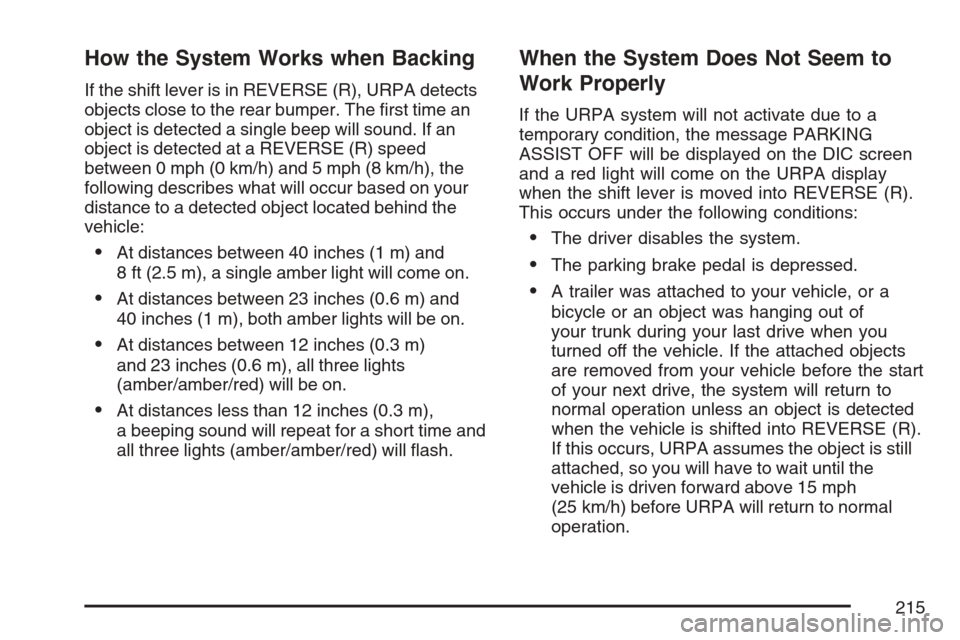
If the shift lever is in REVERSE (R), URPA detects
objects close to the rear bumper. The �rst time an
object is detected a single beep will sound. If an
object is detected at a REVERSE (R) speed
between 0 mph (0 km/h) and 5 mph (8 km/h), the
following describes what will occur based on your
distance to a detected object located behind the
vehicle:
At distances between 40 inches (1 m) and
8 ft (2.5 m), a single amber light will come on.
At distances between 23 inches (0.6 m) and
40 inches (1 m), both amber lights will be on.
At distances between 12 inches (0.3 m)
and 23 inches (0.6 m), all three lights
(amber/amber/red) will be on.
At distances less than 12 inches (0.3 m),
a beeping sound will repeat for a short time and
all three lights (amber/amber/red) will �ash.
When the System Does Not Seem to
Work Properly
If the URPA system will not activate due to a
temporary condition, the message PARKING
ASSIST OFF will be displayed on the DIC screen
and a red light will come on the URPA display
when the shift lever is moved into REVERSE (R).
This occurs under the following conditions:
The driver disables the system.
The parking brake pedal is depressed.
A trailer was attached to your vehicle, or a
bicycle or an object was hanging out of
your trunk during your last drive when you
turned off the vehicle. If the attached objects
are removed from your vehicle before the start
of your next drive, the system will return to
normal operation unless an object is detected
when the vehicle is shifted into REVERSE (R).
If this occurs, URPA assumes the object is still
attached, so you will have to wait until the
vehicle is driven forward above 15 mph
(25 km/h) before URPA will return to normal
operation.
215