display CADILLAC ESCALADE EXT 2008 3.G Owners Manual
[x] Cancel search | Manufacturer: CADILLAC, Model Year: 2008, Model line: ESCALADE EXT, Model: CADILLAC ESCALADE EXT 2008 3.GPages: 496, PDF Size: 7.02 MB
Page 8 of 496
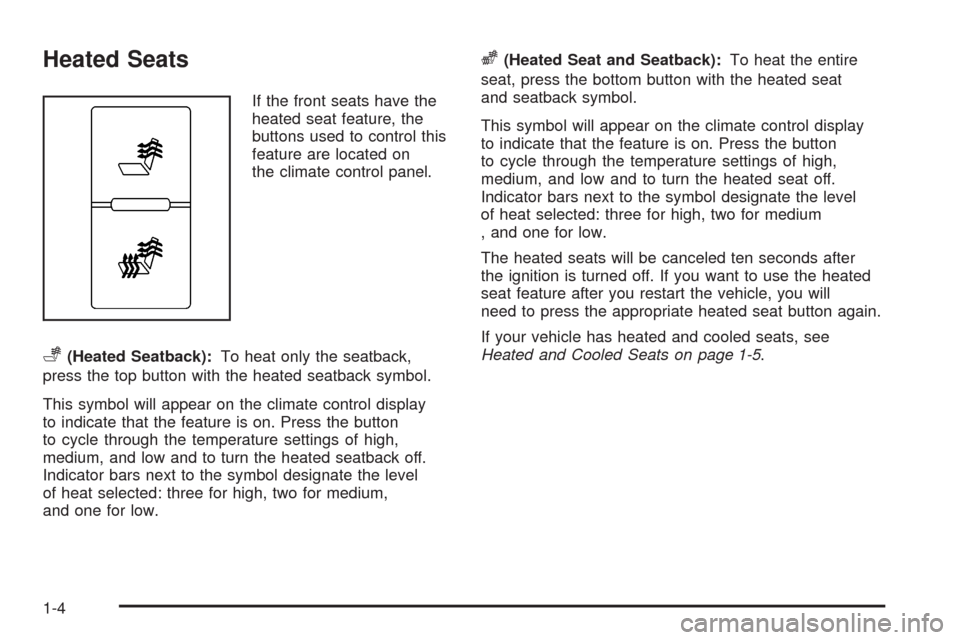
Heated Seats
If the front seats have the
heated seat feature, the
buttons used to control this
feature are located on
the climate control panel.
+(Heated Seatback):To heat only the seatback,
press the top button with the heated seatback symbol.
This symbol will appear on the climate control display
to indicate that the feature is on. Press the button
to cycle through the temperature settings of high,
medium, and low and to turn the heated seatback off.
Indicator bars next to the symbol designate the level
of heat selected: three for high, two for medium,
and one for low.
z(Heated Seat and Seatback):To heat the entire
seat, press the bottom button with the heated seat
and seatback symbol.
This symbol will appear on the climate control display
to indicate that the feature is on. Press the button
to cycle through the temperature settings of high,
medium, and low and to turn the heated seat off.
Indicator bars next to the symbol designate the level
of heat selected: three for high, two for medium
, and one for low.
The heated seats will be canceled ten seconds after
the ignition is turned off. If you want to use the heated
seat feature after you restart the vehicle, you will
need to press the appropriate heated seat button again.
If your vehicle has heated and cooled seats, see
Heated and Cooled Seats on page 1-5.
1-4
Page 9 of 496
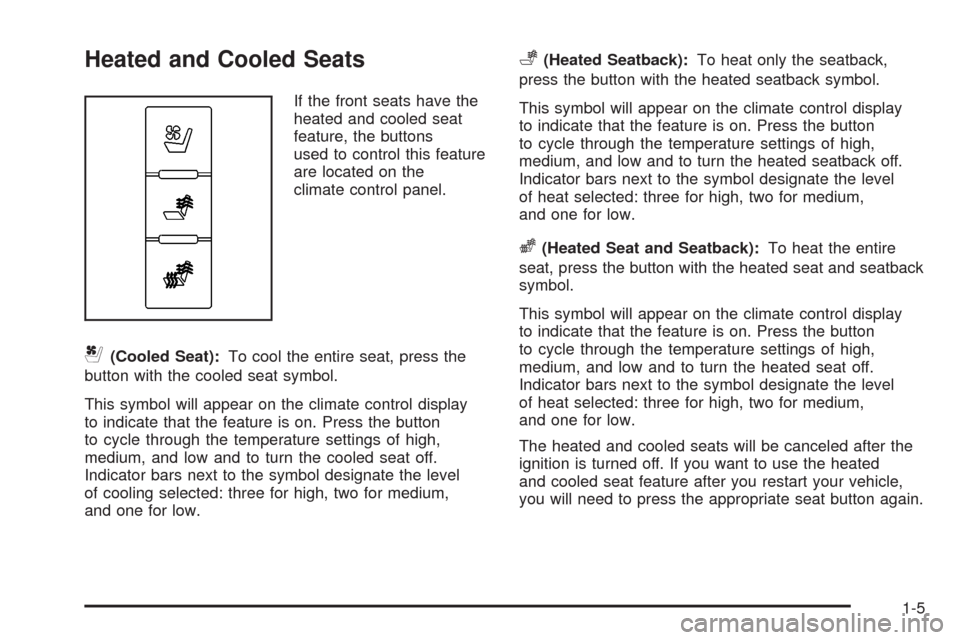
Heated and Cooled Seats
If the front seats have the
heated and cooled seat
feature, the buttons
used to control this feature
are located on the
climate control panel.
{(Cooled Seat):To cool the entire seat, press the
button with the cooled seat symbol.
This symbol will appear on the climate control display
to indicate that the feature is on. Press the button
to cycle through the temperature settings of high,
medium, and low and to turn the cooled seat off.
Indicator bars next to the symbol designate the level
of cooling selected: three for high, two for medium,
and one for low.
+(Heated Seatback):To heat only the seatback,
press the button with the heated seatback symbol.
This symbol will appear on the climate control display
to indicate that the feature is on. Press the button
to cycle through the temperature settings of high,
medium, and low and to turn the heated seatback off.
Indicator bars next to the symbol designate the level
of heat selected: three for high, two for medium,
and one for low.
z(Heated Seat and Seatback):To heat the entire
seat, press the button with the heated seat and seatback
symbol.
This symbol will appear on the climate control display
to indicate that the feature is on. Press the button
to cycle through the temperature settings of high,
medium, and low and to turn the heated seat off.
Indicator bars next to the symbol designate the level
of heat selected: three for high, two for medium,
and one for low.
The heated and cooled seats will be canceled after the
ignition is turned off. If you want to use the heated
and cooled seat feature after you restart your vehicle,
you will need to press the appropriate seat button again.
1-5
Page 80 of 496
Mirrors...........................................................2-46
Automatic Dimming Rearview Mirror
with Intellibeam
®, OnStar®, Compass,
and Temperature Display............................2-46
Automatic Dimming Rearview Mirror
with OnStar
®, Compass and
Temperature Display..................................2-48
Outside Power Foldaway Mirrors.....................2-52
Object Detection Systems...............................2-54
Ultrasonic Rear Parking Assist (URPA)............2-54
OnStar
®System.............................................2-56
Universal Home Remote System......................2-60
Universal Home Remote System Operation
(With Three Round LED)............................2-60Storage Areas................................................2-67
Glove Box...................................................2-67
Cupholder(s)................................................2-67
Instrument Panel Storage...............................2-67
Center Console Storage.................................2-67
Luggage Carrier...........................................2-68
Rear Seat Armrest........................................2-69
Cargo Cover Panels......................................2-69
All-Weather Cargo Area.................................2-82
Top-Box Storage..........................................2-86
Sunroof.........................................................2-87
Section 2 Features and Controls
2-2
Page 85 of 496
Matching Transmitter(s) to
Your Vehicle
Each RKE transmitter is coded to prevent another
transmitter from unlocking your vehicle. If a transmitter
is lost or stolen, a replacement can be purchased
through your dealer/retailer. All transmitters need to
be re-coded to match the new transmitter. The
lost transmitter will no longer work after the new
transmitters are re-coded. The vehicle can have a
maximum of eight transmitters matched to it. See
“Relearn Remote Key” underDIC Operation and
Displays on page 3-45for instructions on how to
match RKE transmitters to your vehicle.
Battery Replacement
Replace the battery if the REPLACE BATTERY
IN REMOTE KEY message displays in the DIC.
See “REPLACE BATTERY IN REMOTE KEY” under
DIC Warnings and Messages on page 3-50for
additional information.
Notice:When replacing the battery, use care not
to touch any of the circuitry. Static from your
body transferred to these surfaces may damage
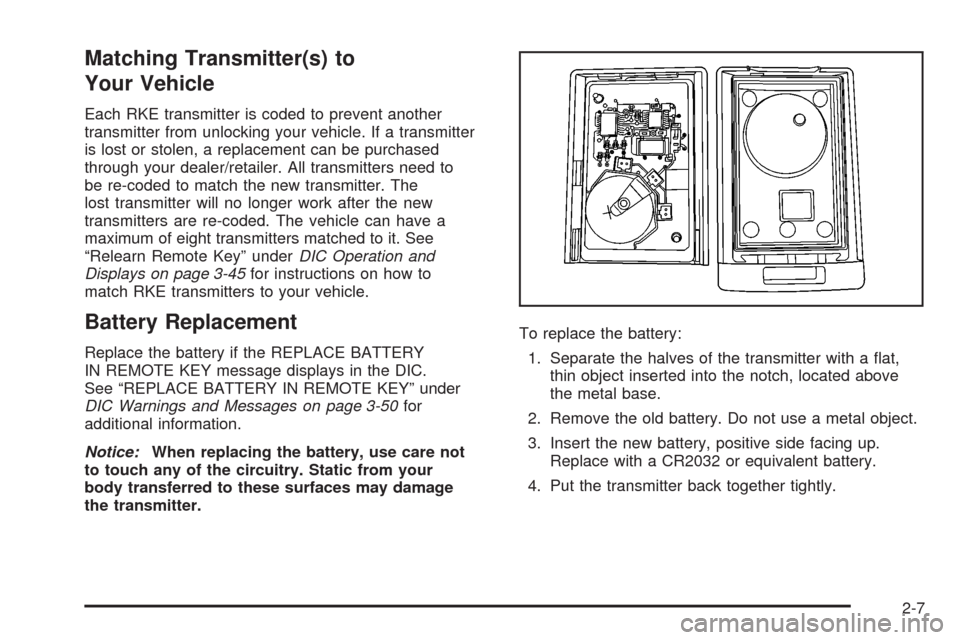
the transmitter.To replace the battery:
1. Separate the halves of the transmitter with a �at,
thin object inserted into the notch, located above
the metal base.
2. Remove the old battery. Do not use a metal object.
3. Insert the new battery, positive side facing up.
Replace with a CR2032 or equivalent battery.
4. Put the transmitter back together tightly.
2-7
Page 114 of 496
Automatic Transmission Operation
Your vehicle has a Hydra-Matic®6L80 automatic
transmission, and has an electronic shift position
indicator within the instrument panel cluster. The
electronic shift position indicator displays when the
shift lever is moved out of PARK (P).
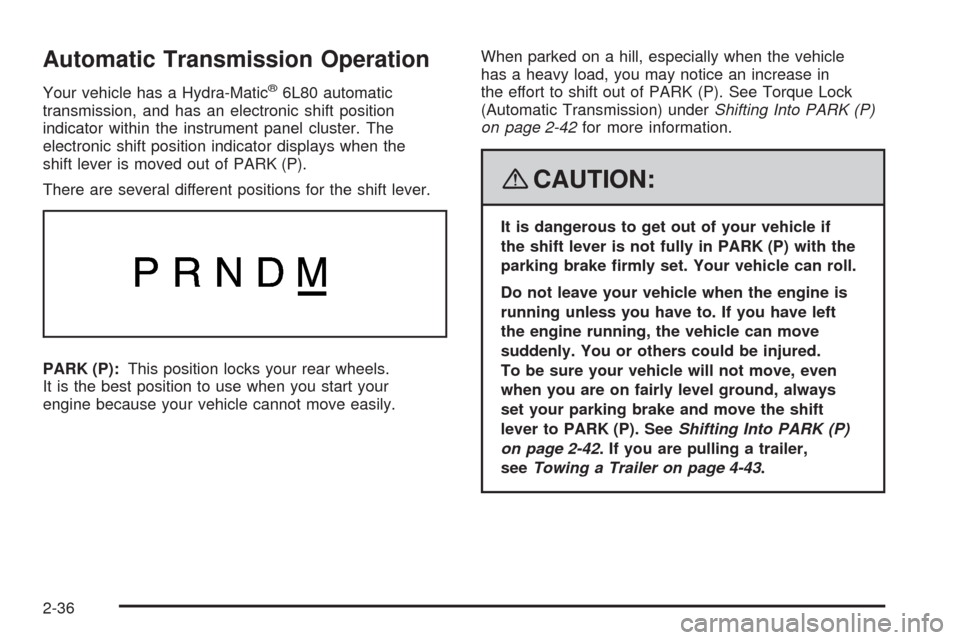
There are several different positions for the shift lever.
PARK (P):This position locks your rear wheels.
It is the best position to use when you start your
engine because your vehicle cannot move easily.When parked on a hill, especially when the vehicle
has a heavy load, you may notice an increase in
the effort to shift out of PARK (P). See Torque Lock
(Automatic Transmission) underShifting Into PARK (P)
on page 2-42for more information.
{CAUTION:
It is dangerous to get out of your vehicle if
the shift lever is not fully in PARK (P) with the
parking brake �rmly set. Your vehicle can roll.
Do not leave your vehicle when the engine is
running unless you have to. If you have left
the engine running, the vehicle can move
suddenly. You or others could be injured.
To be sure your vehicle will not move, even
when you are on fairly level ground, always
set your parking brake and move the shift
lever to PARK (P). SeeShifting Into PARK (P)
on page 2-42. If you are pulling a trailer,
seeTowing a Trailer on page 4-43.
2-36
Page 117 of 496
Driver Shift Control (DSC)
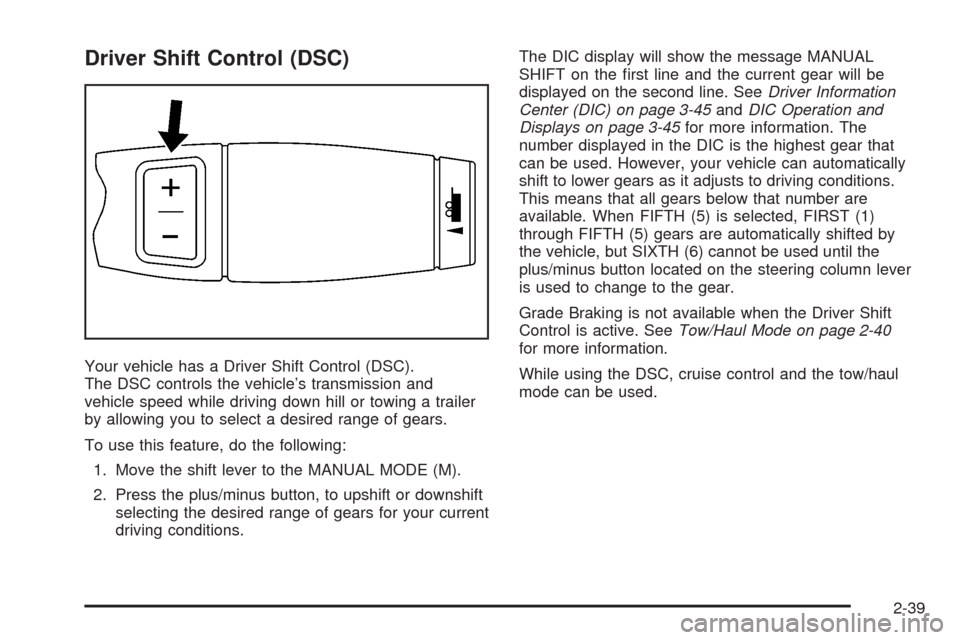
Your vehicle has a Driver Shift Control (DSC).
The DSC controls the vehicle’s transmission and
vehicle speed while driving down hill or towing a trailer
by allowing you to select a desired range of gears.
To use this feature, do the following:
1. Move the shift lever to the MANUAL MODE (M).
2. Press the plus/minus button, to upshift or downshift
selecting the desired range of gears for your current
driving conditions.The DIC display will show the message MANUAL
SHIFT on the �rst line and the current gear will be
displayed on the second line. SeeDriver Information
Center (DIC) on page 3-45andDIC Operation and
Displays on page 3-45for more information. The
number displayed in the DIC is the highest gear that
can be used. However, your vehicle can automatically
shift to lower gears as it adjusts to driving conditions.
This means that all gears below that number are
available. When FIFTH (5) is selected, FIRST (1)
through FIFTH (5) gears are automatically shifted by
the vehicle, but SIXTH (6) cannot be used until the
plus/minus button located on the steering column lever
is used to change to the gear.
Grade Braking is not available when the Driver Shift
Control is active. SeeTow/Haul Mode on page 2-40
for more information.
While using the DSC, cruise control and the tow/haul
mode can be used.
2-39
Page 124 of 496
Mirrors
Automatic Dimming Rearview
Mirror with Intellibeam
®, OnStar®,
Compass, and Temperature Display
Your vehicle may have an automatic dimming rearview
mirror with Intellibeam®, OnStar®, compass and
temperature display. For more information on OnStar®,
seeOnStar®System on page 2-56. For more information
on Intellibeam®, see “Intellibeam®Intelligent High-Beam
Headlamp Control System” underExterior Lamps
on page 3-14.
The mirror includes an eight-point compass display in
the upper right corner of the mirror face. When on, the
compass automatically calibrates as the vehicle is driven.
Outside temperature is also shown in the display.
Automatic Dimming
Your vehicle has an inside automatic dimming rearview
mirror. The automatic dimming feature is activated
whenever the vehicle is turned on and dims only
during nighttime driving.
Compass Operation
AUTO3:Press and hold the “auto highbeam”
button for about three seconds to turn the
compass/temperature display on or off.
When the ignition and the display features are on,
the display will show two character boxes for about
two seconds. After two seconds, the mirror will display
the compass heading and temperature.
Compass Calibration
If after two seconds the display does not show the
correct direction, (N for North for example), there may
be a strong magnetic �eld interfering with the compass.
Such interference may be caused by a magnetic
antenna mount, magnetic note pad holder, or a similar
magnetic item.
The compass can be placed in calibration mode
manually by pressing and holding the “auto highbeam”
button for about nine seconds until CAL is shown in
the compass display.
The mirror can then be calibrated by driving the vehicle
in circles at 5 mph (8 km/h) or less until the display
reads the correct direction.
2-46
Page 125 of 496
Compass Variance
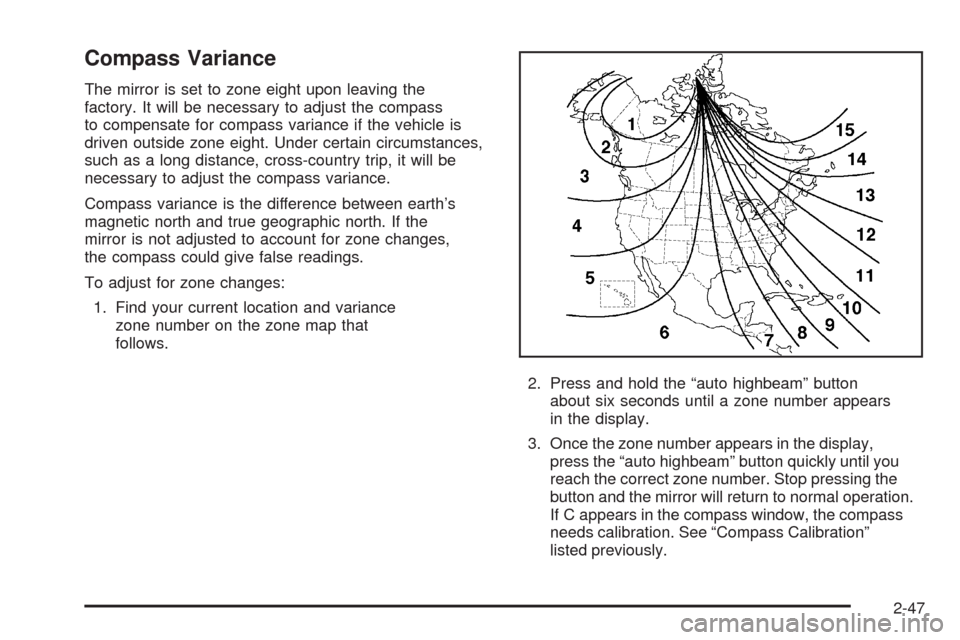
The mirror is set to zone eight upon leaving the
factory. It will be necessary to adjust the compass
to compensate for compass variance if the vehicle is
driven outside zone eight. Under certain circumstances,
such as a long distance, cross-country trip, it will be
necessary to adjust the compass variance.
Compass variance is the difference between earth’s
magnetic north and true geographic north. If the
mirror is not adjusted to account for zone changes,
the compass could give false readings.
To adjust for zone changes:
1. Find your current location and variance
zone number on the zone map that
follows.
2. Press and hold the “auto highbeam” button
about six seconds until a zone number appears
in the display.
3. Once the zone number appears in the display,
press the “auto highbeam” button quickly until you
reach the correct zone number. Stop pressing the
button and the mirror will return to normal operation.
If C appears in the compass window, the compass
needs calibration. See “Compass Calibration”
listed previously.
2-47
Page 126 of 496
Outside Temperature
Outside temperature is shown in the mirror display.
Temperature will be displayed in Fahrenheit or
Celsius based on the choice of English or metric
in the vehicle’s con�guration menu.
If an abnormal temperature reading is displayed for
an extended period of time, please consult your
dealer/retailer. Under certain circumstances, a delay
in updating the temperature is normal.
Cleaning the Mirror
When cleaning the mirror, use a paper towel or similar
material dampened with glass cleaner. Do not spray
glass cleaner directly on the mirror as that may cause
the liquid cleaner to enter the mirror housing.
Automatic Dimming Rearview
Mirror with OnStar
®, Compass and
Temperature Display
Your vehicle may have this feature. When on, the
automatic dimming mirror dims to the proper level to
minimize glare from lights behind you after dark.
The mirror has a dual display in the upper right corner
of the mirror face that shows the compass reading
and the outside temperature.
Control buttons for the OnStar
®system, if equipped,
are at the bottom of the mirror. SeeOnStar®System
on page 2-56for more information about the services
OnStar
®provides.
P(On/Off):This is the on/off button.
2-48
Page 127 of 496
Temperature and Compass Display
Press the on/off button, located on the far left
of the mirror face, to turn the compass/temperature
display on or off.
If the display reads CAL, the compass needs
to be calibrated. For more information, see
“Compass Calibration” following.
To adjust between Fahrenheit and Celsius,
do the following:
1. Press and hold the on/off button until either
a �ashing F or C appears.
2. Press the button again to change the display
to the desired unit of measurement. After
approximately four seconds of inactivity,
the new unit will be locked in and the
compass/temperature display will return.
If an abnormal temperature reading is displayed
for an extended period of time, please see your
GM dealer. Under certain circumstances, a delay
in updating the temperature is normal.
Automatic Dimming Mirror Operation
The automatic dimming mirror function is turned
on automatically each time the ignition is started.
To operate the automatic dimming mirror,
do the following:
1. Make sure the green indicator light, located
to the left of the on/off button, is lit. If it is not,
press and hold the on/off button until the
green light comes on, indicating that the mirror
is in automatic dimming mode.
2. Turn off the automatic dimming mirror function
by pressing and holding the on/off button until
the green indicator light turns off.
2-49