warning CADILLAC ESCALADE EXT 2010 3.G Owners Manual
[x] Cancel search | Manufacturer: CADILLAC, Model Year: 2010, Model line: ESCALADE EXT, Model: CADILLAC ESCALADE EXT 2010 3.GPages: 580, PDF Size: 6.23 MB
Page 455 of 580

Battery
Refer to the replacement number on the original battery
label when a new battery is needed. SeeEngine
Compartment Overview
on page 7‑14for battery
location.
{DANGER:
Battery posts, terminals, and related accessories
contain lead and lead compounds, chemicals
known to the State of California to cause cancer
and reproductive harm. Wash hands after
handling.
Vehicle Storage
{WARNING:
Batteries have acid that can burn you and gas
that can explode. You can be badly hurt if you are
not careful. See Jump Starting
on page 7‑42for
tips on working around a battery without
getting hurt.
Infrequent Usage: Remove the black, negative (−) cable
from the battery to keep the battery from running down.
Extended Storage: Remove the black, negative (−)
cable from the battery or use a battery trickle charger.
7-41
Page 456 of 580

Jump Starting
If the vehicle's battery (or batteries) has run down, you
may want to use another vehicle and some jumper
cables to start your vehicle. Be sure to use the following
steps to do it safely.
{WARNING:
Batteries can hurt you. They can be dangerous
because:
.They contain acid that can burn you.
.They contain gas that can explode or ignite.
.They contain enough electricity to burn you.
If you do not follow these steps exactly, some or
all of these things can hurt you. Notice:
Ignoring these steps could result in costly
damage to the vehicle that would not be covered by
the warranty.
Trying to start the vehicle by pushing or pulling it
will not work, and it could damage the vehicle.
1. Check the other vehicle. It must have a 12-volt battery with a negative ground system.
Notice: If the other vehicle's system is not a 12-volt
system with a negative ground, both vehicles can
be damaged. Only use vehicles with 12-volt systems
with negative grounds to jump start your vehicle.
2. Get the vehicles close enough so the jumper cables can reach, but be sure the vehicles are not
touching each other. If they are, it could cause a
ground connection you do not want. You would
not be able to start your vehicle, and the bad
grounding could damage the electrical systems.
To avoid the possibility of the vehicles rolling, set
the parking brake firmly on both vehicles involved
in the jump start procedure. Put the automatic
transmission in P (Park) or a manual transmission
in Neutral before setting the parking brake. If you
have a four-wheel-drive vehicle, be sure the
transfer case is in a drive gear, not in Neutral.
7-42
Page 458 of 580
{WARNING:
An electric fan can start up even when the engine
is not running and can injure you. Keep hands,
clothing and tools away from any underhood
electric fan.
{WARNING:
Using an open flame near a battery can cause
battery gas to explode. People have been hurt
doing this, and some have been blinded. Use a
flashlight if you need more light.
Be sure the battery has enough water. You do not
need to add water to the battery installed in your
new vehicle. But if a battery has filler caps, be
sure the right amount of fluid is there. If it is low,
add water to take care of that first. If you do not,
explosive gas could be present.
Battery fluid contains acid that can burn you.
Do not get it on you. If you accidentally get it in
your eyes or on your skin, flush the place with
water and get medical help immediately.
{WARNING:
Fans or other moving engine parts can injure you
badly. Keep your hands away from moving parts
once the engine is running.
5. Check that the jumper cables do not have loose or missing insulation. If they do, you could get a
shock. The vehicles could be damaged too.
Before you connect the cables, here are some
basic things you should know. Positive (+) will go to
positive (+) or to a remote positive (+) terminal if
the vehicle has one. Negative (−) will go to a
heavy, unpainted metal engine part or to a remote
negative (−) terminal if the vehicle has one.
Do not connect positive (+) to negative (−) or you
will get a short that would damage the battery and
maybe other parts too. And do not connect the
negative (−) cable to the negative (−) terminal on
the dead battery because this can cause sparks.
7-44
Page 467 of 580

Bulb Replacement
For the proper type of replacement bulbs, see
Replacement Bulbs on page 7‑55.
For any bulb changing procedure not listed in this
section, contact your dealer/retailer.
High Intensity Discharge (HID)
Lighting
{WARNING:
The low beam high intensity discharge lighting
system operates at a very high voltage. If you try
to service any of the system components, you
could be seriously injured. Have your dealer/
retailer or a qualified technician service them.
The vehicle may have HID headlamps. After an HID
headlamp bulb has been replaced, you may notice that
the beam is a slightly different shade than it was
originally. This is normal.
Taillamps, Turn Signal, Sidemarker,
Stoplamps and Back-up Lamps
To replace one of these bulbs:
A. Stoplamp/Turn Signal/Taillamp
B. Stoplamp/Turn Signal/Taillamp
C. Back-up Lamp
D. Sidemarker Lamp
1. Open the tailgate. See Tailgate
on page 3‑21for
more information.
7-53
Page 471 of 580
Tires
Your new vehicle comes with high-quality tires
made by a leading tire manufacturer. If you ever
have questions about your tire warranty and
where to obtain service, see your vehicle
Warranty booklet for details. For additional
information refer to the tire manufacturer.
{WARNING:
.Poorly maintained and improperly used
tires are dangerous.
.Overloading your tires can cause
overheating as a result of too much
flexing. You could have an air-out and a
serious accident. SeeLoading the Vehicle
on page 6‑32.
(Continued)
WARNING: (Continued)
.Underinflated tires pose the same danger
as overloaded tires. The resulting
accident could cause serious injury.
Check all tires frequently to maintain the
recommended pressure. Tire pressure
should be checked when your tires are
cold. SeeInflation - Tire Pressure
on
page 7‑64
.
.Overinflated tires are more likely to be
cut, punctured, or broken by a sudden
impact —such as when you hit a
pothole. Keep tires at the recommended
pressure.
.Worn, old tires can cause accidents.
If your tread is badly worn, or if your tires
have been damaged, replace them.
See High-Speed Operation
on page 7‑65for
inflation pressure adjustment for high speed
driving.
7-57
Page 479 of 580
How to Check
Use a good quality pocket-type gage to check tire
pressure. You cannot tell if your tires are properly
inflated simply by looking at them. Radial tires
may look properly inflated even when they are
underinflated. Check the tire's inflation pressure
when the tires are cold. Cold means your vehicle
has been sitting for at least three hours or driven
no more than 1 mile (1.6 km).
Remove the valve cap from the tire valve stem.
Press the tire gage firmly onto the valve to get a
pressure measurement. If the cold tire inflation
pressure matches the recommended pressure on
the Tire and Loading Information label, no further
adjustment is necessary. If the pressure is low,
add air until you reach the recommended amount.
If you overfill the tire, release air by pushing on
the metal stem in the center of the tire valve.
Recheck the tire pressure with the tire gage.
Be sure to put the valve caps back on the valve
stems. They help prevent leaks by keeping out dirt
and moisture.
High-Speed Operation
{WARNING:
Driving at high speeds, 160 km/h (100 mph) or
higher, puts an additional strain on tires.
Sustained high-speed driving causes excessive
heat build up and can cause sudden tire failure.
You could have a crash and you or others could
be killed. Some high-speed rated tires require
inflation pressure adjustment for high speed
operation. When speed limits and road conditions
are such that a vehicle can be driven at high
speeds, make sure the tires are rated for high
speed operation, in excellent condition, and set to
the correct cold tire inflation pressure for the
vehicle load.
If your vehicle has P265/65R18 or P285/45R22 size
tires and you will be driving at high speeds, speeds of
100 mph (160 km/h) or higher, set the cold inflation
pressure to 3 psi (20 kPa) above the recommended tire
pressure shown on the Tire and Loading Information
Label. When you end this high‐speed driving, return the
tires to the cold inflation pressure shown on the Tire and
Loading Information label. See Loading the Vehicle
on
page 6‑32and Inflation - Tire Pressure on page 7‑64.
7-65
Page 481 of 580
Federal Communications Commission
(FCC) and Industry and Science Canada
SeeRadio Frequency Statementon page 9‑20for
information regarding Part 15 of the Federal
Communications Commission (FCC) Rules and
RSS-210/211 of Industry and Science Canada.
Tire Pressure Monitor Operation
This vehicle may have a Tire Pressure Monitor System
(TPMS). The TPMS is designed to warn the driver when
a low tire pressure condition exists. TPMS sensors are
mounted onto each tire and wheel assembly, excluding
the spare tire and wheel assembly. The TPMS sensors
monitor the air pressure in the vehicle's tires and
transmits the tire pressure readings to a receiver
located in the vehicle.
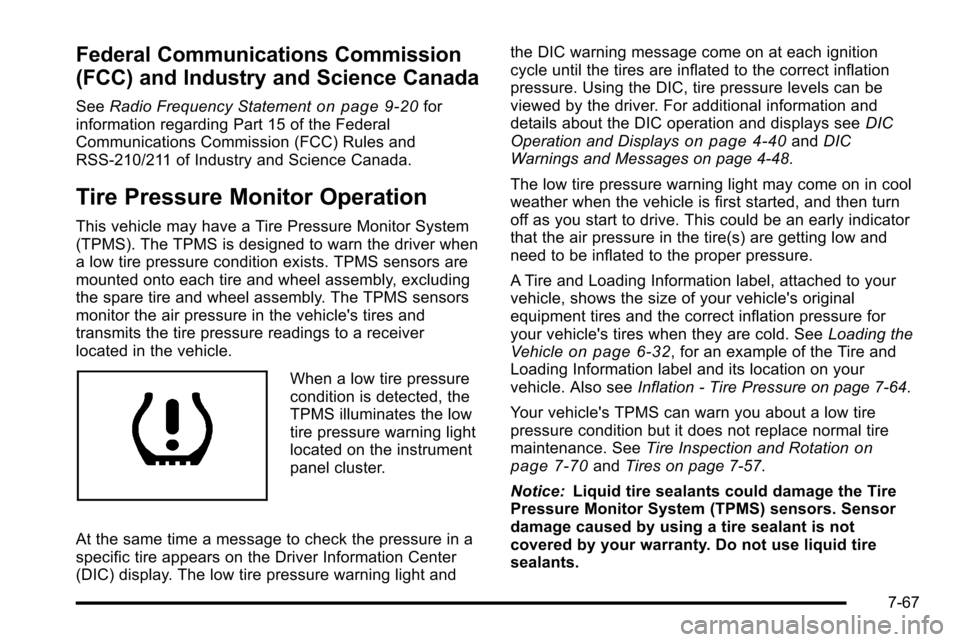
When a low tire pressure
condition is detected, the
TPMS illuminates the low
tire pressure warning light
located on the instrument
panel cluster.
At the same time a message to check the pressure in a
specific tire appears on the Driver Information Center
(DIC) display. The low tire pressure warning light and the DIC warning message come on at each ignition
cycle until the tires are inflated to the correct inflation
pressure. Using the DIC, tire pressure levels can be
viewed by the driver. For additional information and
details about the DIC operation and displays see
DIC
Operation and Displays
on page 4‑40and DIC
Warnings and Messages on page 4‑48.
The low tire pressure warning light may come on in cool
weather when the vehicle is first started, and then turn
off as you start to drive. This could be an early indicator
that the air pressure in the tire(s) are getting low and
need to be inflated to the proper pressure.
A Tire and Loading Information label, attached to your
vehicle, shows the size of your vehicle's original
equipment tires and the correct inflation pressure for
your vehicle's tires when they are cold. See Loading the
Vehicle
on page 6‑32, for an example of the Tire and
Loading Information label and its location on your
vehicle. Also see Inflation - Tire Pressure on page 7‑64.
Your vehicle's TPMS can warn you about a low tire
pressure condition but it does not replace normal tire
maintenance. See Tire Inspection and Rotation
on
page 7‑70and Tires on page 7‑57.
Notice: Liquid tire sealants could damage the Tire
Pressure Monitor System (TPMS) sensors. Sensor
damage caused by using a tire sealant is not
covered by your warranty. Do not use liquid tire
sealants.
7-67
Page 482 of 580
TPMS Malfunction Light and Message
The TPMS will not function properly if one or more of
the TPMS sensors are missing or inoperable. When the
system detects a malfunction, the low tire warning light
flashes for about one minute and then stays on for the
remainder of the ignition cycle. A DIC warning message
is also displayed. The low tire warning light and DIC
warning message come on at each ignition cycle until
the problem is corrected. Some of the conditions that
can cause the malfunction light and DIC message to
come on are:
.One of the road tires has been replaced with the
spare tire. The spare tire does not have a TPMS
sensor. The TPMS malfunction light and DIC
message should go off once you re‐install the road
tire containing the TPMS sensor.
.The TPMS sensor matching process was started
but not completed or not completed successfully
after rotating the vehicle's tires. The DIC message
and TPMS malfunction light should go off once the
TPMS sensor matching process is performed
successfully. See“TPMS Sensor Matching
Process” later in this section.
.One or more TPMS sensors are missing or
damaged. The DIC message and the TPMS
malfunction light should go off when the TPMS
sensors are installed and the sensor matching
process is performed successfully. See your
dealer/retailer for service.
.Replacement tires or wheels do not match your
vehicle's original equipment tires or wheels.
Tires and wheels other than those recommended
for your vehicle could prevent the TPMS from
functioning properly. See Buying New Tires
on
page 7‑72.
.Operating electronic devices or being near facilities
using radio wave frequencies similar to the TPMS
could cause the TPMS sensors to malfunction.
If the TPMS is not functioning it cannot detect or signal
a low tire condition. See your dealer/retailer for service
if the TPMS malfunction light and DIC message comes
on and stays on.
7-68
Page 485 of 580
Reset the Tire Pressure Monitor System. SeeTire
Pressure Monitor Operation
on page 7‑67.
Make certain that all wheel nuts are properly
tightened. See “Wheel Nut Torque” under
Capacities and Specifications
on page 7‑112.
{WARNING:
Rust or dirt on a wheel, or on the parts to
which it is fastened, can make wheel nuts
become loose after time. The wheel could
come off and cause an accident. When you
change a wheel, remove any rust or dirt from
places where the wheel attaches to the
vehicle. In an emergency, you can use a
cloth or a paper towel to do this; but be sure
to use a scraper or wire brush later,
if needed, to get all the rust or dirt off.
See Changing a Flat Tire
on page 7‑79.
Make sure the spare tire is stored securely. Push,
pull, and then try to rotate or turn the tire. If it
moves, tighten the cable. See Storing a Flat or
Spare Tire and Tools
on page 7‑92.
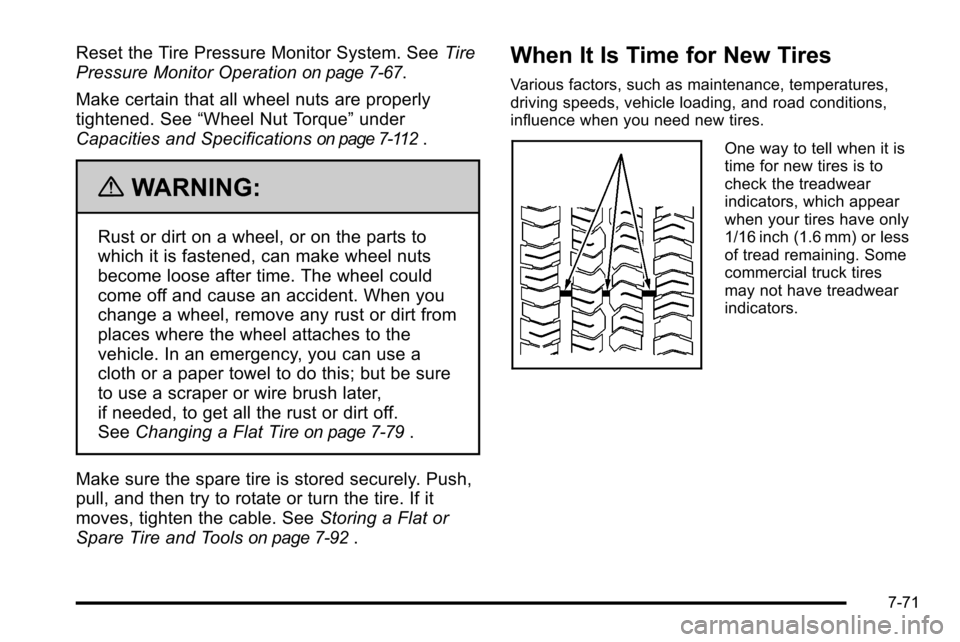
When It Is Time for New Tires
Various factors, such as maintenance, temperatures,
driving speeds, vehicle loading, and road conditions,
influence when you need new tires.
One way to tell when it is
time for new tires is to
check the treadwear
indicators, which appear
when your tires have only
1/16 inch (1.6 mm) or less
of tread remaining. Some
commercial truck tires
may not have treadwear
indicators.
7-71
Page 487 of 580
{WARNING:
Mixing tires could cause you to lose control while
driving. If you mix tires of different sizes, brands,
or types (radial and bias-belted tires), the vehicle
might not handle properly, and you could have a
crash. Using tires of different sizes, brands,
or types could also cause damage to your vehicle.
Be sure to use the same size, brand, and type
tires on all wheels.
Your vehicle may have a different size spare than
the road tires (those originally installed on your
vehicle). When new, your vehicle included a spare
tire and wheel assembly with a similar overall
diameter as your vehicle's road tires and wheels,
so it is all right to drive on it. Because this spare
was developed for use on your vehicle, it will not
affect vehicle handling.
{WARNING:
If you use bias-ply tires on the vehicle, the
wheel rim flanges could develop cracks after
many miles of driving. A tire and/or wheel
could fail suddenly, causing a crash. Use
only radial-ply tires with the wheels on the
vehicle.
If you must replace your vehicle's tires with those
that do not have a TPC Spec number, make sure they
are the same size, load range, speed rating, and
construction type (radial and bias‐belted tires) as your
vehicle's original tires.
Vehicles that have a tire pressure monitoring system
may give an inaccurate low‐pressure warning if
non‐TPC spec rated tires are installed on your vehicle.
Non‐TPC Spec rated tires may give a low‐pressure
warning that is higher or lower than the proper warning
level you would get with TPC Spec rated tires. SeeTire
Pressure Monitor System on page 7‑66.
Your vehicle's original equipment tires are listed on the
Tire and Loading Information Label. See Loading the
Vehicle
on page 6‑32, for more information about the
Tire and Loading Information Label and its location on
your vehicle.
7-73