keyless CADILLAC ESCALADE EXT 2010 3.G User Guide
[x] Cancel search | Manufacturer: CADILLAC, Model Year: 2010, Model line: ESCALADE EXT, Model: CADILLAC ESCALADE EXT 2010 3.GPages: 580, PDF Size: 6.23 MB
Page 113 of 580

The rear doors must be open to access them. The label
showing lock and unlock positions is located near
the lock.
To set the locks, do the following:1. Insert the key into the security lock slot and turn it so the slot is in the horizontal position.
2. Close the door.
When you want to open a rear door when the security
lock is on, do the following: 1. Unlock the door by lifting the rear door manual lock, using the power door lock switch, or the
Remote Keyless Entry (RKE) transmitter, if the
vehicle has one.
2. Open the door from the outside. To cancel the rear door security lock, do the following:
1. Unlock the door and open it from the outside.
2. Insert the key into the security lock slot and turn it so the slot is in the vertical position.
Lockout Protection
This feature protects you from locking your key in the
vehicle when the key is in the ignition and a door
is open.
If the power lock switch is pressed when a door is open
and the key is in the ignition, all of the doors will lock
and then the driver's door will unlock.
3-11
Page 123 of 580

Raising the Midgate®
To return the Midgate®to its normal position, raise the
Midgate®up with a firm swinging motion until it latches
into place securely. This will help to ensure that the
Midgate
®closes with enough force to engage the
latches.
If the rear glass is removed and you would like to put it
back, do so using the instructions given previously.
Tailgate
{WARNING:
It is extremely dangerous to ride on the tailgate,
even when the vehicle is operated at low speeds.
People riding on the tailgate can easily lose
their balance and fall in response to vehicle
maneuvers. Falling from a moving vehicle may
result in serious injuries or death. Do not allow
people to ride on the tailgate. Be sure everyone in
your vehicle is in a seat and using a safety belt
properly. Use the Remote Keyless Entry (RKE) transmitter or
power door lock switch to lock and unlock the tailgate.
Open the tailgate by lifting up on its handle while pulling
the tailgate toward you.
To shut the tailgate, push it firmly upward until it latches.
Push and pull on the tailgate to be sure it is latched
securely.
Tailgate Removal
The tailgate is not to be removed. This may cause
damage to electrical connector resulting in loss of
lock/unlock and rear vision camera function.
Power Assist Steps
Your vehicle may have power assist steps.
The power assist steps automatically extend from
beneath the vehicle on the side in which the door has
been opened. Once the door is closed, the assist steps
automatically move back under the vehicle after a brief
delay. The vehicle must not be moving for the assist
steps to extend or retract.
3-21
Page 128 of 580
Sun Visors with Fixed Rod and Pull‐out
Extension
Your vehicle may have this feature. Pull the sun visor
down to block glare. Pull the sun visor extender out for
additional coverage. Detach the sun visor from the
center mount and swing it to the side to cover the side
window.
Lighted Visor Vanity Mirror
Your vehicle has lighted visor vanity mirrors on both the
driver's and passenger's sun visors. Pull the sun visor
down and lift the mirror cover to turn the lamps on.
Theft-Deterrent Systems
Vehicle theft is big business, especially in some cities.
This vehicle has theft-deterrent features, however, they
do not make it impossible to steal.
Content Theft-Deterrent
Your vehicle has a content theft-deterrent alarm system.
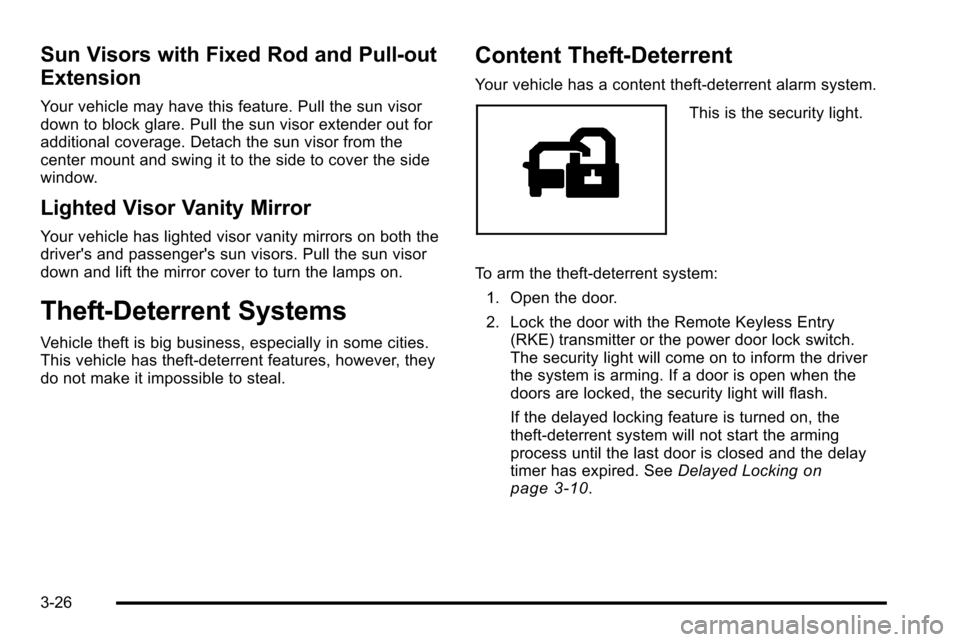
This is the security light.
To arm the theft-deterrent system: 1. Open the door.
2. Lock the door with the Remote Keyless Entry (RKE) transmitter or the power door lock switch.
The security light will come on to inform the driver
the system is arming. If a door is open when the
doors are locked, the security light will flash.
If the delayed locking feature is turned on, the
theft‐deterrent system will not start the arming
process until the last door is closed and the delay
timer has expired. See Delayed Locking
on
page 3‑10.
3-26
Page 220 of 580
All messages will appear in the DIC display located in
the center of the instrument panel cluster.
The DIC comes on when the ignition is on. After a short
delay, the DIC will display the information that was last
displayed before the engine was turned off.
SeeDIC Operation and Displays
on page 4‑40and
DIC Vehicle Customizationon page 4‑56for the
displays available.
DIC Operation and Displays
The DIC has different displays which can be accessed
by pressing the DIC buttons located on the instrument
panel, next to the steering wheel.
The DIC displays trip, fuel, and vehicle system
information, and warning messages if a system problem
is detected. A digital speedometer also appears at the
bottom of the DIC display. The digital speedometer can
be enabled or disabled. See “DISPLAY DIGITAL
SPEED” underDIC Vehicle Customization
on
page 4‑56for more information.
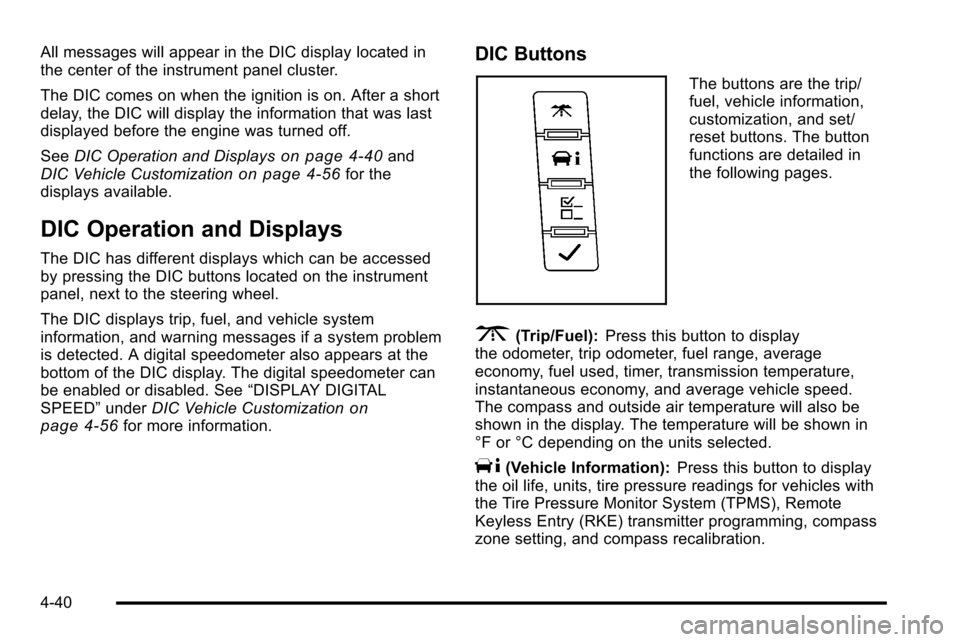
DIC Buttons
The buttons are the trip/
fuel, vehicle information,
customization, and set/
reset buttons. The button
functions are detailed in
the following pages.
3(Trip/Fuel): Press this button to display
the odometer, trip odometer, fuel range, average
economy, fuel used, timer, transmission temperature,
instantaneous economy, and average vehicle speed.
The compass and outside air temperature will also be
shown in the display. The temperature will be shown in
°F or °C depending on the units selected.
T(Vehicle Information): Press this button to display
the oil life, units, tire pressure readings for vehicles with
the Tire Pressure Monitor System (TPMS), Remote
Keyless Entry (RKE) transmitter programming, compass
zone setting, and compass recalibration.
4-40
Page 225 of 580

Relearn Remote Key
This display allows you to match Remote Keyless Entry
(RKE) transmitters to your vehicle. This procedure will
erase all previously learned transmitters. Therefore,
they must be relearned as additional transmitters.
To match an RKE transmitter to your vehicle:1. Press the vehicle information button until PRESS
VTO RELEARN REMOTE KEY displays.
2. Press the set/reset button until REMOTE KEY LEARNING ACTIVE is displayed.
3. Press and hold the lock and unlock buttons on the first transmitter at the same time for about
15 seconds.
On vehicles with memory recall seats, the first
transmitter learned will match driver 1 and the
second will match driver 2.
A chime will sound indicating that the transmitter is
matched. 4. To match additional transmitters at this time, repeat
Step 3.
Each vehicle can have a maximum of eight
transmitters matched to it.
5. To exit the programming mode, you must cycle the key to LOCK/OFF.
Compass Zone Setting
This display allows for setting the compass zone. See
DIC Compasson page 4‑46for more information.
Compass Recalibration
This display allows for calibrating the compass. See
DIC Compasson page 4‑46for more information.
Blank Display
This display shows no information.
4-45
Page 231 of 580
This message displays if low oil pressure levels occur.
Stop the vehicle as soon as safely possible and do not
operate it until the cause of the low oil pressure has
been corrected. Check the oil as soon as possible and
have your vehicle serviced by your dealer/retailer. See
Engine Oil on page 7‑15.
PARKING ASSIST BLOCKED SEE
OWNERS MANUAL
If your vehicle has the Ultrasonic Rear Parking Assist
(URPA) system, this message displays if there is
something interfering with the park assist system. See
Ultrasonic Rear Parking Assist (URPA)
on page 3‑48for more information.
PARKING ASSIST OFF
After the vehicle has been started, this message
displays to remind the driver that the Ultrasonic Rear
Parking Assist (URPA) system has been turned off.
Press the set/reset button to acknowledge this message
and clear it from the DIC display. To turn the URPA
system back on, seeUltrasonic Rear Parking Assist
(URPA) on page 3‑48.
PASSENGER DOOR OPEN
This message displays and a chime sounds if the front
passenger door is not fully closed and the vehicle is
shifted out of P (Park). Stop and turn off the vehicle,
check the door for obstructions, and close the door
again. Check to see if the message still appears on
the DIC.
REMOTE KEY LEARNING ACTIVE
This message displays while you are matching a
Remote Keyless Entry (RKE) transmitter to your
vehicle. See “Matching Transmitter(s) to Your Vehicle”
under Remote Keyless Entry (RKE) System Operation
on page 3‑4andDIC Operation and Displayson
page 4‑40for more information.
REPLACE BATTERY IN REMOTE KEY
This message displays if a Remote Keyless Entry
(RKE) transmitter battery is low. The battery needs to
be replaced in the transmitter. See “Battery
Replacement” underRemote Keyless Entry (RKE)
System Operation on page 3‑4.
4-51
Page 238 of 580

NO CHANGE :No change will be made to this feature.
The current setting will remain.
To select a setting, press the set/reset button while the
desired setting is displayed on the DIC.
REMOTE DOOR LOCK
This feature allows you to select the type of feedback
you will receive when locking the vehicle with the
Remote Keyless Entry (RKE) transmitter. You will not
receive feedback when locking the vehicle with the RKE
transmitter if the doors are open. See Remote Keyless
Entry (RKE) System Operation
on page 3‑4for more
information.
Press the customization button until REMOTE DOOR
LOCK appears on the DIC display. Press the set/reset
button once to access the settings for this feature. Then
press the customization button to scroll through the
following settings:
OFF : There will be no feedback when you press the
lock button on the RKE transmitter.
LIGHTS ONLY : The exterior lamps will flash when you
press the lock button on the RKE transmitter.
HORN ONLY : The horn will sound on the second press
of the lock button on the RKE transmitter. HORN & LIGHTS (default) :
The exterior lamps will
flash when you press the lock button on the RKE
transmitter, and the horn will sound when the lock
button is pressed again within five seconds of the
previous command.
NO CHANGE : No change will be made to this feature.
The current setting will remain.
To select a setting, press the set/reset button while the
desired setting is displayed on the DIC.
REMOTE DOOR UNLOCK
This feature allows you to select the type of feedback
you will receive when unlocking the vehicle with the
Remote Keyless Entry (RKE) transmitter. You will not
receive feedback when unlocking the vehicle with the
RKE transmitter if the doors are open. See Remote
Keyless Entry (RKE) System Operation
on page 3‑4for more information.
Press the customization button until REMOTE DOOR
UNLOCK appears on the DIC display. Press the
set/reset button once to access the settings for this
feature. Then press the customization button to scroll
through the following settings:
LIGHTS OFF : The exterior lamps will not flash when
you press the unlock button on the RKE transmitter.
LIGHTS ON (default) : The exterior lamps will flash
when you press the unlock button on the RKE
transmitter.
4-58
Page 240 of 580
NO CHANGE :No change will be made to this feature.
The current setting will remain.
To select a setting, press the set/reset button while the
desired setting is displayed on the DIC.
APPROACH LIGHTING
This feature allows you to select whether or not to have
the exterior lights turn on briefly during low light periods
after unlocking the vehicle using the Remote Keyless
Entry (RKE) transmitter.
Press the customization button until APPROACH
LIGHTING appears on the DIC display. Press the
set/reset button once to access the settings for this
feature. Then press the customization button to scroll
through the following settings:
OFF : The exterior lights will not turn on when you
unlock the vehicle with the RKE transmitter.
ON (default) : If it is dark enough outside, the exterior
lights will turn on briefly when you unlock the vehicle
with the RKE transmitter.
The lights will remain on for 20 seconds or until the lock
button on the RKE transmitter is pressed, or the vehicle
is no longer off. See Remote Keyless Entry (RKE)
System Operation
on page 3‑4for more information. NO CHANGE :
No change will be made to this feature.
The current setting will remain.
To select a setting, press the set/reset button while the
desired setting is displayed on the DIC.
AUTO HIGH BEAMS
If your vehicle has this feature, it allows you to select to
have the Intellibeam®system turned off or on. See
Exterior Lampson page 4‑10for more information.
Press the customization button until AUTO HIGH
BEAMS appears on the DIC display. Press the set/reset
button once to access the settings for this feature.
Then press the customization button to scroll through
the following settings:
OFF (default) : The Intellibeam system will be
turned off.
ON : The Intellibeam system will be turned on.
NO CHANGE : No change will be made to this feature.
The current setting will remain.
To select a setting, press the set/reset button while the
desired setting is displayed on the DIC.
4-60
Page 243 of 580
MEMORY SEAT RECALL
This feature allows you to select your preference for the
remote memory seat recall feature. SeeMemory
Features
on page 2‑6for more information.
Press the customization button until MEMORY
SEAT RECALL appears on the DIC display. Press
the set/reset button once to access the settings for
this feature. Then press the customization button to
scroll through the following settings:
OFF (default) : No remote memory seat recall will
occur.
ON : The driver's seat, and on some vehicles, the
outside mirrors will automatically move to the stored
driving position when the unlock button on the Remote
Keyless Entry (RKE) transmitter is pressed. On some
vehicles with the adjustable throttle and brake pedal
feature, the pedals will also automatically move. See
“Relearn Remote Key” underDIC Operation and
Displays
on page 4‑40for more information on
matching transmitters to driver ID numbers.
NO CHANGE : No change will be made to this feature.
The current setting will remain.
To select a setting, press the set/reset button while the
desired setting is displayed on the DIC.
REMOTE START
If your vehicle has this feature, it allows you to turn the
remote start off or on. The remote start feature allows
you to start the engine from outside of the vehicle using
the Remote Keyless Entry (RKE) transmitter. See
Remote Vehicle Start
on page 3‑7for more
information.
Press the customization button until REMOTE START
appears on the DIC display. Press the set/reset button
once to access the settings for this feature. Then press
the customization button to scroll through the following
settings:
OFF : The remote start feature will be disabled.
ON (default) : The remote start feature will be enabled.
NO CHANGE : No change will be made to this feature.
The current setting will remain.
To select a setting, press the set/reset button while the
desired setting is displayed on the DIC.
4-63
Page 419 of 580

California Proposition 65 Warning
Most motor vehicles, including this one, contain and/or
emit chemicals known to the State of California to
cause cancer and birth defects or other reproductive
harm. Engine exhaust, many parts and systems, many
fluids, and some component wear by-products contain
and/or emit these chemicals.
California Perchlorate Materials
Requirements
Certain types of automotive applications, such as airbag
initiators, seat belt pretensioners, and lithium batteries
contained in remote keyless transmitters, may contain
perchlorate materials. Special handling may be
necessary. For additional information, see
www.dtsc.ca.gov/hazardouswaste/perchlorate.
Doing Your Own Service Work
{WARNING:
You can be injured and the vehicle could be
damaged if you try to do service work on a vehicle
without knowing enough about it.
.Be sure you have sufficient knowledge,
experience, the proper replacement parts, and
tools before attempting any vehicle
maintenance task.
.Be sure to use the proper nuts, bolts, and
other fasteners. English and metric fasteners
can be easily confused. If the wrong fasteners
are used, parts can later break or fall off.
You could be hurt.
If doing some of your own service work, use the proper
service manual. It tells you much more about how to
service the vehicle than this manual can. To order the
proper service manual, see Service Publications
Ordering Information on page 9‑17.
7-5