remote start CADILLAC ESCALADE EXT 2010 3.G User Guide
[x] Cancel search | Manufacturer: CADILLAC, Model Year: 2010, Model line: ESCALADE EXT, Model: CADILLAC ESCALADE EXT 2010 3.GPages: 580, PDF Size: 6.23 MB
Page 128 of 580
Sun Visors with Fixed Rod and Pull‐out
Extension
Your vehicle may have this feature. Pull the sun visor
down to block glare. Pull the sun visor extender out for
additional coverage. Detach the sun visor from the
center mount and swing it to the side to cover the side
window.
Lighted Visor Vanity Mirror
Your vehicle has lighted visor vanity mirrors on both the
driver's and passenger's sun visors. Pull the sun visor
down and lift the mirror cover to turn the lamps on.
Theft-Deterrent Systems
Vehicle theft is big business, especially in some cities.
This vehicle has theft-deterrent features, however, they
do not make it impossible to steal.
Content Theft-Deterrent
Your vehicle has a content theft-deterrent alarm system.
This is the security light.
To arm the theft-deterrent system: 1. Open the door.
2. Lock the door with the Remote Keyless Entry (RKE) transmitter or the power door lock switch.
The security light will come on to inform the driver
the system is arming. If a door is open when the
doors are locked, the security light will flash.
If the delayed locking feature is turned on, the
theft‐deterrent system will not start the arming
process until the last door is closed and the delay
timer has expired. See Delayed Locking
on
page 3‑10.
3-26
Page 157 of 580
Programming Universal Home
Remote—Rolling Code
For questions or help programming the Universal
Home Remote System, call 1-866-572-2728 or go to
learcar2u.com.
Most garage door openers sold after 1996 are Rolling
Code units.
Programming a garage door opener involves
time-sensitive actions, so read the entire procedure
before starting. Otherwise, the device will time out and
the procedure will have to be repeated.
To program up to three devices:
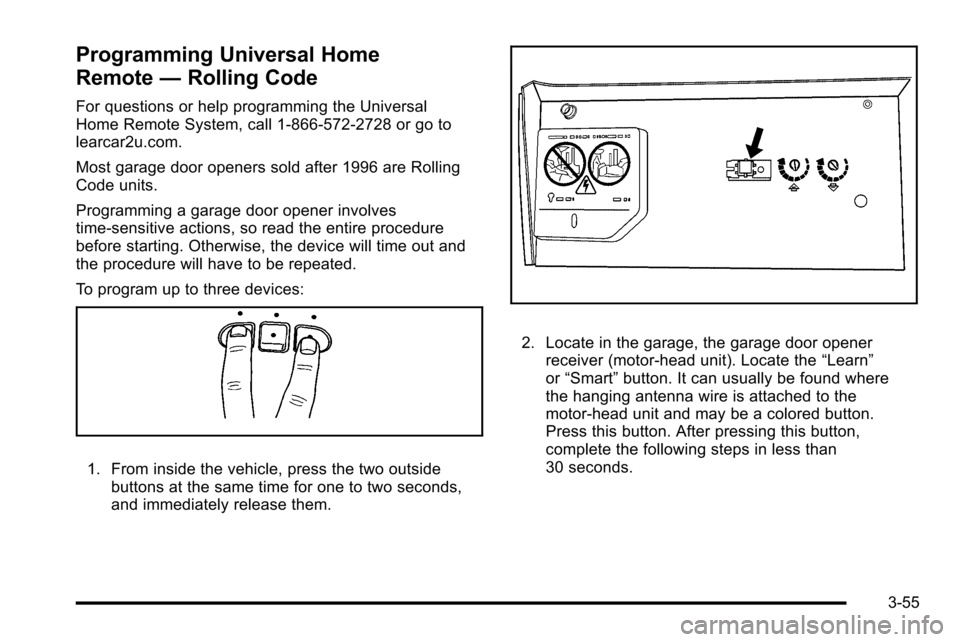
1. From inside the vehicle, press the two outside
buttons at the same time for one to two seconds,
and immediately release them.
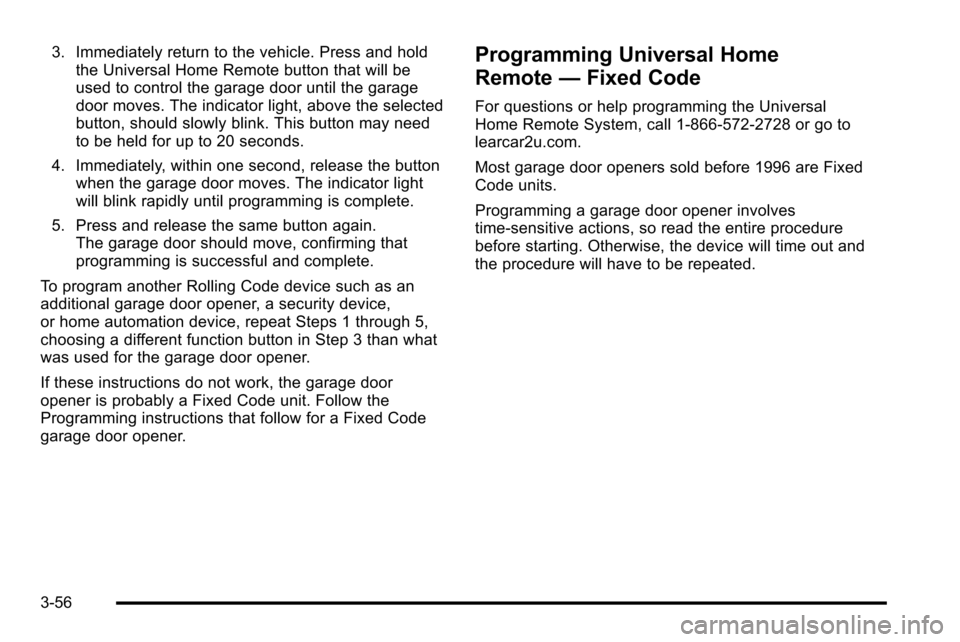
2. Locate in the garage, the garage door openerreceiver (motor-head unit). Locate the “Learn”
or “Smart” button. It can usually be found where
the hanging antenna wire is attached to the
motor-head unit and may be a colored button.
Press this button. After pressing this button,
complete the following steps in less than
30 seconds.
3-55
Page 158 of 580
3. Immediately return to the vehicle. Press and holdthe Universal Home Remote button that will be
used to control the garage door until the garage
door moves. The indicator light, above the selected
button, should slowly blink. This button may need
to be held for up to 20 seconds.
4. Immediately, within one second, release the button when the garage door moves. The indicator light
will blink rapidly until programming is complete.
5. Press and release the same button again. The garage door should move, confirming that
programming is successful and complete.
To program another Rolling Code device such as an
additional garage door opener, a security device,
or home automation device, repeat Steps 1 through 5,
choosing a different function button in Step 3 than what
was used for the garage door opener.
If these instructions do not work, the garage door
opener is probably a Fixed Code unit. Follow the
Programming instructions that follow for a Fixed Code
garage door opener.Programming Universal Home
Remote —Fixed Code
For questions or help programming the Universal
Home Remote System, call 1-866-572-2728 or go to
learcar2u.com.
Most garage door openers sold before 1996 are Fixed
Code units.
Programming a garage door opener involves
time-sensitive actions, so read the entire procedure
before starting. Otherwise, the device will time out and
the procedure will have to be repeated.
3-56
Page 209 of 580
{WARNING:
If the airbag readiness light stays on after the
vehicle is started or comes on while driving, it
means the airbag system might not be working
properly. The airbags in the vehicle might not
inflate in a crash, or they could even inflate
without a crash. To help avoid injury, have the
vehicle serviced right away.
If there is a problem with the airbag system, an airbag
Driver Information Center (DIC) message can also
come on. See DIC Warnings and Messages
on
page 4‑48for more information.
Passenger Airbag Status Indicator
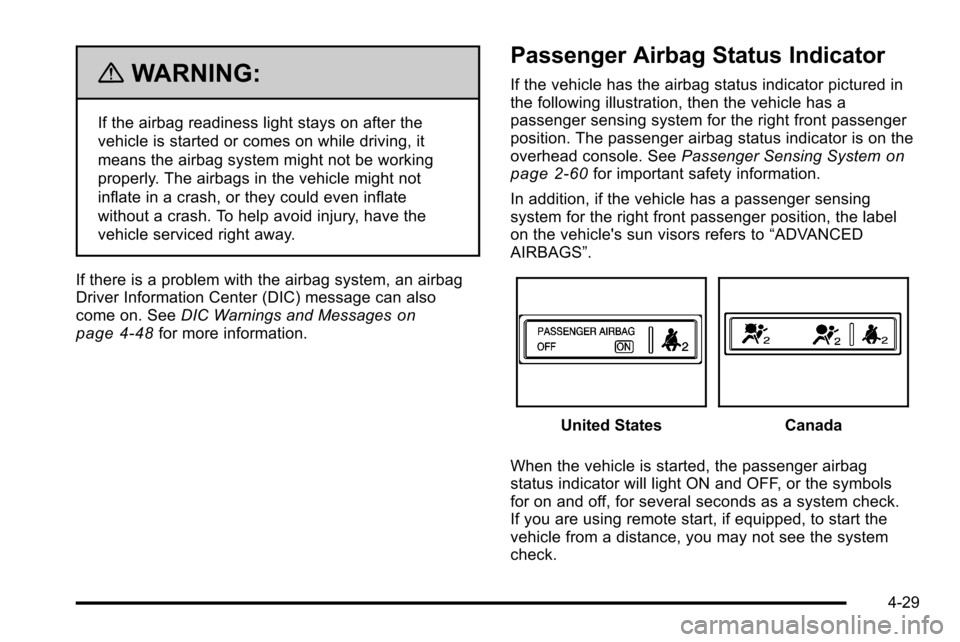
If the vehicle has the airbag status indicator pictured in
the following illustration, then the vehicle has a
passenger sensing system for the right front passenger
position. The passenger airbag status indicator is on the
overhead console. See Passenger Sensing System
on
page 2‑60for important safety information.
In addition, if the vehicle has a passenger sensing
system for the right front passenger position, the label
on the vehicle's sun visors refers to “ADVANCED
AIRBAGS”.
United StatesCanada
When the vehicle is started, the passenger airbag
status indicator will light ON and OFF, or the symbols
for on and off, for several seconds as a system check.
If you are using remote start, if equipped, to start the
vehicle from a distance, you may not see the system
check.
4-29
Page 231 of 580
This message displays if low oil pressure levels occur.
Stop the vehicle as soon as safely possible and do not
operate it until the cause of the low oil pressure has
been corrected. Check the oil as soon as possible and
have your vehicle serviced by your dealer/retailer. See
Engine Oil on page 7‑15.
PARKING ASSIST BLOCKED SEE
OWNERS MANUAL
If your vehicle has the Ultrasonic Rear Parking Assist
(URPA) system, this message displays if there is
something interfering with the park assist system. See
Ultrasonic Rear Parking Assist (URPA)
on page 3‑48for more information.
PARKING ASSIST OFF
After the vehicle has been started, this message
displays to remind the driver that the Ultrasonic Rear
Parking Assist (URPA) system has been turned off.
Press the set/reset button to acknowledge this message
and clear it from the DIC display. To turn the URPA
system back on, seeUltrasonic Rear Parking Assist
(URPA) on page 3‑48.
PASSENGER DOOR OPEN
This message displays and a chime sounds if the front
passenger door is not fully closed and the vehicle is
shifted out of P (Park). Stop and turn off the vehicle,
check the door for obstructions, and close the door
again. Check to see if the message still appears on
the DIC.
REMOTE KEY LEARNING ACTIVE
This message displays while you are matching a
Remote Keyless Entry (RKE) transmitter to your
vehicle. See “Matching Transmitter(s) to Your Vehicle”
under Remote Keyless Entry (RKE) System Operation
on page 3‑4andDIC Operation and Displayson
page 4‑40for more information.
REPLACE BATTERY IN REMOTE KEY
This message displays if a Remote Keyless Entry
(RKE) transmitter battery is low. The battery needs to
be replaced in the transmitter. See “Battery
Replacement” underRemote Keyless Entry (RKE)
System Operation on page 3‑4.
4-51
Page 243 of 580
MEMORY SEAT RECALL
This feature allows you to select your preference for the
remote memory seat recall feature. SeeMemory
Features
on page 2‑6for more information.
Press the customization button until MEMORY
SEAT RECALL appears on the DIC display. Press
the set/reset button once to access the settings for
this feature. Then press the customization button to
scroll through the following settings:
OFF (default) : No remote memory seat recall will
occur.
ON : The driver's seat, and on some vehicles, the
outside mirrors will automatically move to the stored
driving position when the unlock button on the Remote
Keyless Entry (RKE) transmitter is pressed. On some
vehicles with the adjustable throttle and brake pedal
feature, the pedals will also automatically move. See
“Relearn Remote Key” underDIC Operation and
Displays
on page 4‑40for more information on
matching transmitters to driver ID numbers.
NO CHANGE : No change will be made to this feature.
The current setting will remain.
To select a setting, press the set/reset button while the
desired setting is displayed on the DIC.
REMOTE START
If your vehicle has this feature, it allows you to turn the
remote start off or on. The remote start feature allows
you to start the engine from outside of the vehicle using
the Remote Keyless Entry (RKE) transmitter. See
Remote Vehicle Start
on page 3‑7for more
information.
Press the customization button until REMOTE START
appears on the DIC display. Press the set/reset button
once to access the settings for this feature. Then press
the customization button to scroll through the following
settings:
OFF : The remote start feature will be disabled.
ON (default) : The remote start feature will be enabled.
NO CHANGE : No change will be made to this feature.
The current setting will remain.
To select a setting, press the set/reset button while the
desired setting is displayed on the DIC.
4-63
Page 261 of 580
The overhead console contains the IR transmitters for
the wireless headphones and the IR receivers for the
remote control. They are located at the rear of the
console.
Notice:Avoid directly touching the video screen, as
damage may occur. See “Cleaning the Video
Screen” later in this section for more information.
Remote Control
To use the remote control, aim it at the transmitter
window at the rear of the overhead console and press
the desired button. Direct sunlight or very bright light
can affect the ability of the RSE transmitter to receive
signals from the remote control. If the remote control
does not seem to be working, the batteries may need to
be replaced. See “Battery Replacement” later in this
section. Objects blocking the line of sight can also affect
the function of the remote control.
If a CD or DVD is in the Radio DVD slot, the remote
control power button can be used to turn on the video
screen display and start the disc. The radio can also
turn on the video screen display. See Navigation Audio
System
on page 5‑59for more information. Notice:
Storing the remote control in a hot area or
in direct sunlight can damage it, and the repairs will
not be covered by the warranty. Storage in extreme
cold can weaken the batteries. Keep the remote
control stored in a cool, dry place.
If the remote control becomes lost or damaged, a new
universal remote control can be purchased. If this
happens, make sure the universal remote control uses
a code set of Toshiba
®.
Remote Control Buttons
O(Power): Press to turn the video screen on and off.
P(Illumination): Press to turn the remote control
backlight on. The backlight automatically times out after
7 to 10 seconds if no other button is pressed while the
backlight is on.
v(Title): Press to return the DVD to the main menu of
the DVD. This function can vary for each disc.
y(Main Menu): Press to access the DVD menu. The
DVD menu is different on every DVD. Use the
navigation arrows to move the cursor around the DVD
menu. After making a selection press the enter button.
This button only operates when using a DVD.
4-81
Page 264 of 580
Tips and Troubleshooting Chart
ProblemRecommended Action
No power. The ignition might not be
turned ON/RUN or in
ACC/ACCESSORY.
The picture does not fill the
screen. There are black
borders on the top and
bottom or on both sides or
it looks stretched out. Check the display mode
settings in the setup menu
by pressing the display
menu button on the remote
control.
In auxiliary mode, the
picture moves or scrolls. Check the auxiliary input
connections at both
devices.
The remote control does
not work. Check to make sure there
is no obstruction between
the remote control and the
transmitter window.
Check the batteries to
make sure they are not
dead or installed
incorrectly.
Tips and Troubleshooting Chart (cont'd)
Problem
Recommended Action
After stopping the player,
I push Play but sometimes
the DVD starts where I left
off and sometimes at the
beginning. If the stop button was
pressed one time, the DVD
player resumes playing
where the DVD was
stopped. If the stop button
was pressed two times the
DVD player begins to play
from the beginning of
the DVD.
The auxiliary source is
running but there is no
picture or sound. Check that the RSE video
screen is in the auxiliary
source mode.
Check the auxiliary input
connections at both
devices.
Sometimes the wireless
headphone audio cuts out
or buzzes. Check for obstructions, low
batteries, reception range,
and interference from
cellular telephone towers or
by using your cellular
telephone in the vehicle.
Check that the headphones
are on correctly using the
L (left) and R (right) on the
headphones.
4-84
Page 340 of 580
r(Rewind):Touch and hold this button to rewind
quickly through a track selection. You will hear sound
at a reduced volume. Release this button to stop
rewinding. The display will show the elapsed time
of the track.
[(Forward): Touch and hold this button to fast
forward quickly through a track selection. You will hear
sound at a reduced volume. Release this button to stop
fast forwarding. The display will show the elapsed time
of the track.
y © ¨ z(Seek): To seek tracks, press the up
arrow to go to the next track. Press the down arrow
to go to the start of the current track, if more than
eight seconds have played. If either arrow is pressed
more than once, the player continues moving backward
or forward through the CD. The sound mutes while
seeking.
w(Tuning Knob): Turn this knob counterclockwise
one notch to go to the start of the current track, turn it
again to go to the previous track. Turn this knob
clockwise to go to the next track.
When playing an audio CD the rear seat operator can
power on the RSE video screen and use the remote
control to navigate through the tracks on the CD.
Using an MP3 CD
MP3 Format
There are guidelines that must be met, when creating
an MP3 disc. If the guidelines are not met when
recording a CD-R(W), the CD may not play.
The guidelines are:
.Sampling rate: 16 kHz, 22.05 kHz, 24 kHz, 32 kHz,
and 44.1 kHz.
.Bit rates supported: 32, 40, 48, 56, 64, 80, 96, 112,
128, 160, 192, 224, 256, and 320 kbps.
.ID3 tag information is displayed by the radio if it is
available. The radio supports ID3 tag information
v1.0, v1.1, or v2.0. The radio will display a
filename, song name, artist name, album name,
and directory name.
.Maximum 32 characters, including spaces, in a file
or folder name.
.Maximum number of folders is 100 with a
maximum hierarchy of eight folders.
.Create a folder structure that makes it easy to find
songs while driving. Organize songs by albums
using one folder for each album. Each folder or
album should contain 18 songs or less.
5-70
Page 344 of 580
[(Forward):Touch and hold this button to fast
forward quickly through a track selection. You will hear
sound at a reduced volume. Release this button to stop
fast forwarding. The display will show the elapsed time
of the track.
q r(Folder/Artist/Album): Select the left or right
arrow to go to the previous or next folder, artist,
or album on the disc.
Press the middle screen button, with the folder, artist,
or album name, to sort the MP3 by folder, artist,
or album. It may take a few minutes for the system to
sort the MP3.
y © ¨ z(Seek): To seek tracks, press the up
arrow to go to the next track. Press the down arrow
to go to the start of the current track, if more than
eight seconds have played. If either arrow is pressed
more than once, the player will continue moving
backward or forward through the CD. The sound will
mute while seeking.
w(Tuning Knob): Turn this knob counterclockwise
one notch to go to the start of the current track, turn it
again to go to the previous track. Turn this knob
clockwise to go to the next track.
When playing an MP3 the rear seat operator can power
on the RSE video screen and use the remote control to
navigate through the MP3.
CD Messages
If Disc Read Error appears on the display and/or the CD
comes out, it could be for one of the following reasons:
.If a disc was inserted with an invalid or unknown
format.
.If the map DVD disc was installed into the CD slot.
See “Installing the Map DVD” underMapson
page 5‑14for more information.
.It is very hot. When the temperature returns to
normal, the CD should play.
.You are driving on a very rough road. When the
road becomes smoother, the CD should play.
.The CD is dirty, scratched, wet, or upside down.
.The air is very humid. If so, wait about an hour and
try again.
.There may have been a problem while burning
the CD.
.The label may be caught in the CD player.
If the CD is not playing correctly, for any other reason,
try a known good CD.
If any error occurs repeatedly or if an error cannot be
corrected, contact your dealer/retailer.
5-74