buttons CADILLAC ESCALADE EXT 2010 3.G Service Manual
[x] Cancel search | Manufacturer: CADILLAC, Model Year: 2010, Model line: ESCALADE EXT, Model: CADILLAC ESCALADE EXT 2010 3.GPages: 580, PDF Size: 6.23 MB
Page 306 of 580
Previous Destinations
Previous OnStar Destination Downloads are saved
under Previous Destinations in the navigation system
where they can be accessed or saved to the
address book.
Important Notes regarding OnStar Destination
Download:
.If the navigation system is turned off when the
destination download is attempted, the navigation
system will automatically turn on and display the
OnStar Destination Download Screen. The radio
will remain on after the download occurs.
.If OnStar downloads a destination and the address
is not found in the mapping disc’s database and
routing by coordinates is not available, the Go and
Map buttons gray out and routing will not be
available. Press the blue OnStar button for further
assistance.
.The Call button grays out when there is no phone
number available for your destination and while
connected to OnStar.
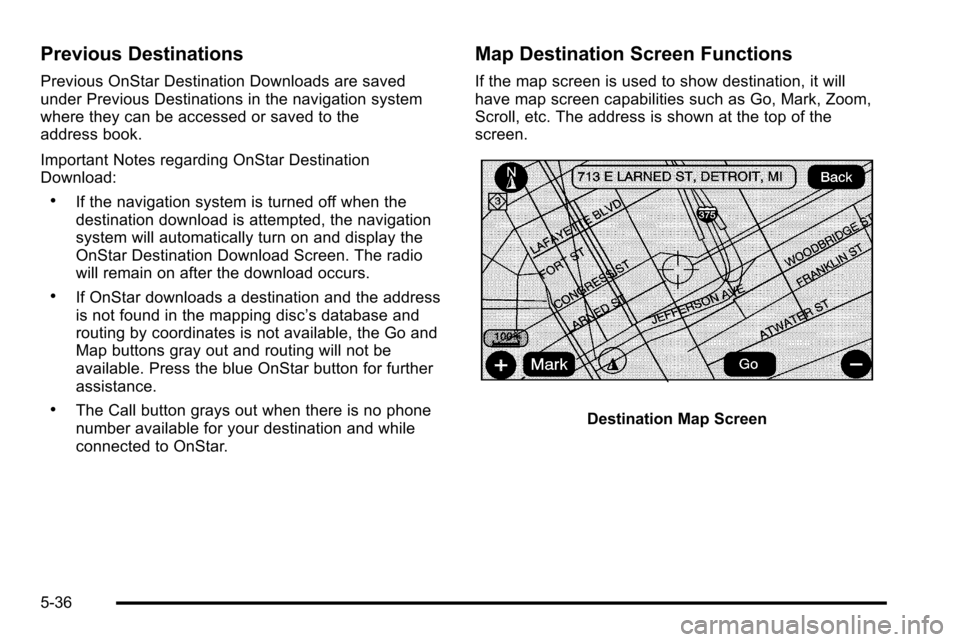
Map Destination Screen Functions
If the map screen is used to show destination, it will
have map screen capabilities such as Go, Mark, Zoom,
Scroll, etc. The address is shown at the top of the
screen.
Destination Map Screen
5-36
Page 311 of 580

Adding or Changing Preset
Destinations
This feature allows additions or changes one of
five preset destinations. When a destination has been
added as a preset destination, it is available to select
from the Destination Entry screen. See“Preset
Destination” previously for information on how to
select a preset destination as a final destination.
To store the current vehicle position as a preset
destination:
1. Select the Mark screen button from the map screen to add the current vehicle position to the
address book. The Address Book screen appears.
2. Select the Name screen button. An alpha-keyboard displays. Enter the name. Press the OK screen
button then the Back screen button to return to the
address book information screen.
3. Press and hold one of the buttons at the bottom of the screen until the name appears in that preset
destination screen button. It is now available to
select from the Destination Entry screen. To store an address book entry as a preset destination:
1. Select the CONFIG hard key.
2. Select the Nav screen button or press the CONFIG key until Nav is selected or touch the Nav screen
button.
3. Select the Edit/View screen button.
4. Select the address book entry to be stored as the preset destination. Select the Name screen button
to add a name, if needed.
5. Press and hold one of the buttons at the bottom of the screen until the name appears in that preset
destination screen button. It is now available to
select from the Destination Entry screen.
5-41
Page 313 of 580
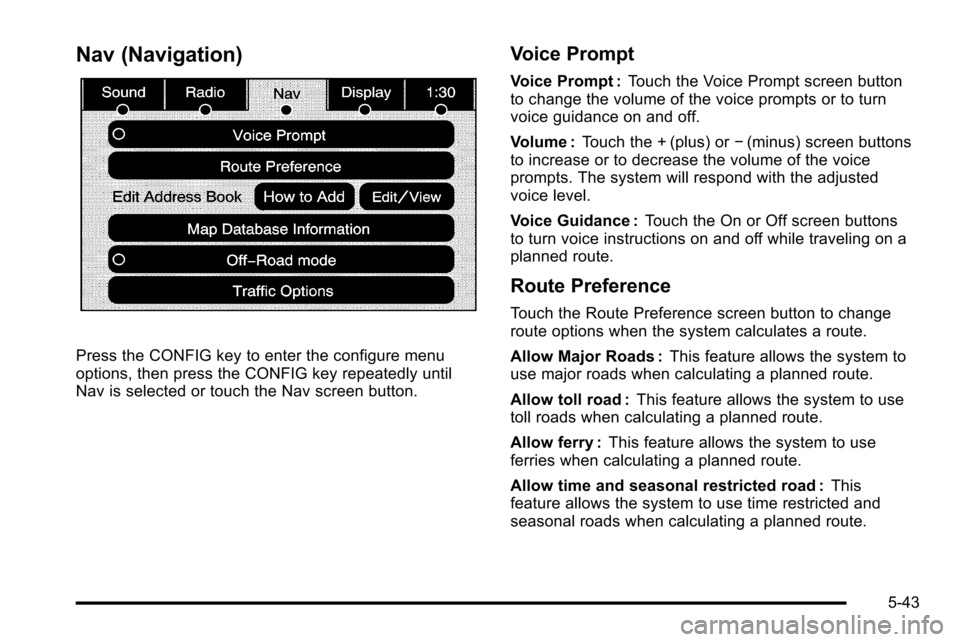
Nav (Navigation)
Press the CONFIG key to enter the configure menu
options, then press the CONFIG key repeatedly until
Nav is selected or touch the Nav screen button.
Voice Prompt
Voice Prompt :Touch the Voice Prompt screen button
to change the volume of the voice prompts or to turn
voice guidance on and off.
Volume : Touch the + (plus) or −(minus) screen buttons
to increase or to decrease the volume of the voice
prompts. The system will respond with the adjusted
voice level.
Voice Guidance : Touch the On or Off screen buttons
to turn voice instructions on and off while traveling on a
planned route.
Route Preference
Touch the Route Preference screen button to change
route options when the system calculates a route.
Allow Major Roads : This feature allows the system to
use major roads when calculating a planned route.
Allow toll road : This feature allows the system to use
toll roads when calculating a planned route.
Allow ferry : This feature allows the system to use
ferries when calculating a planned route.
Allow time and seasonal restricted road : This
feature allows the system to use time restricted and
seasonal roads when calculating a planned route.
5-43
Page 321 of 580

Traffic flow data arrows display on the map when scaled
up to eight miles.
Closed Road, Traffic Delays, Incidents, and
Advisories—These four touch screen buttons are
used to select the traffic event ICONS that appear
on the map screens.
Alert for Approaching Traffic Events : When On, if an
approaching traffic event is within the alert range, one of
two traffic alert pop-up screens display:
.With no route planned, while on expressways,
Approaching Traffic Event without Avoid screen
displays.
.With route planned, Traffic Event on Route screen
displays.
If the Alert for Approaching Traffic Events is Off, the
alert pop-up screen does not display.
On-Route
Select the On Route touch screen button to display all
events ahead on the current active route. If no traffic
events have been reported on route, No Traffic Events
Reported On route displays.
Name
Select the Name touch screen button to display traffic
events in the order of distance. The closest event is
shown first.
Refresh
Select the Refresh touch screen button to update the
screen with all of the latest traffic events, miles, etc.
Traffic events update approximately every two minutes.
To update the events immediately, press the Refresh
touch screen button.
5-51
Page 324 of 580
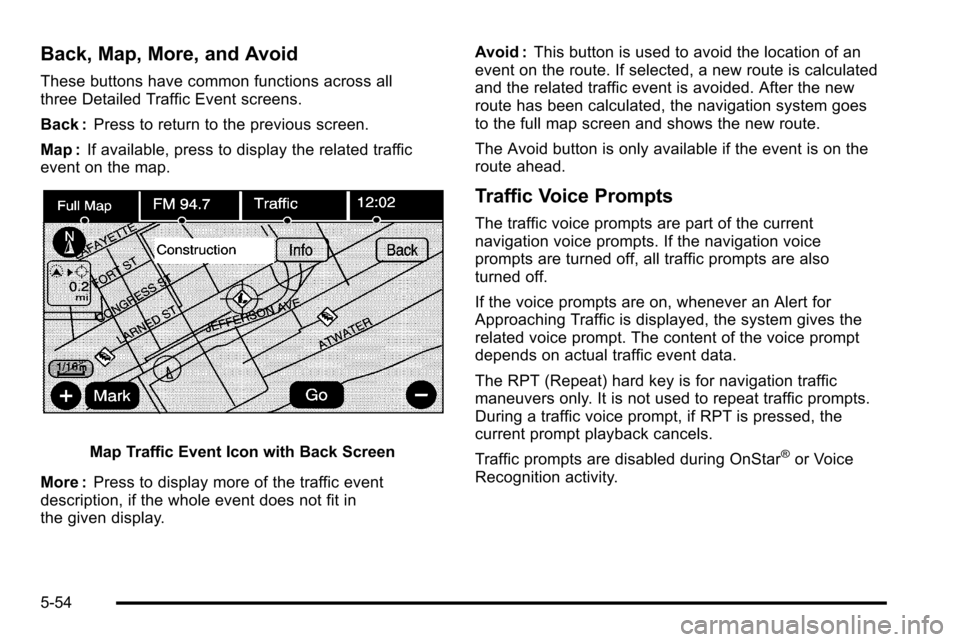
Back, Map, More, and Avoid
These buttons have common functions across all
three Detailed Traffic Event screens.
Back :Press to return to the previous screen.
Map : If available, press to display the related traffic
event on the map.
Map Traffic Event Icon with Back Screen
More : Press to display more of the traffic event
description, if the whole event does not fit in
the given display. Avoid :
This button is used to avoid the location of an
event on the route. If selected, a new route is calculated
and the related traffic event is avoided. After the new
route has been calculated, the navigation system goes
to the full map screen and shows the new route.
The Avoid button is only available if the event is on the
route ahead.
Traffic Voice Prompts
The traffic voice prompts are part of the current
navigation voice prompts. If the navigation voice
prompts are turned off, all traffic prompts are also
turned off.
If the voice prompts are on, whenever an Alert for
Approaching Traffic is displayed, the system gives the
related voice prompt. The content of the voice prompt
depends on actual traffic event data.
The RPT (Repeat) hard key is for navigation traffic
maneuvers only. It is not used to repeat traffic prompts.
During a traffic voice prompt, if RPT is pressed, the
current prompt playback cancels.
Traffic prompts are disabled during OnStar
®or Voice
Recognition activity.
5-54
Page 325 of 580
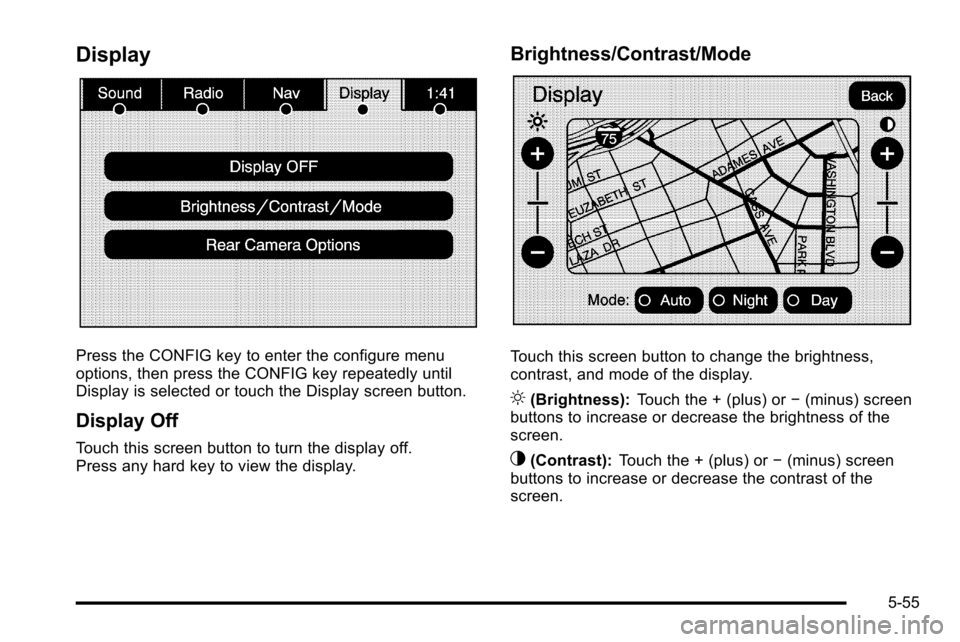
Display
Press the CONFIG key to enter the configure menu
options, then press the CONFIG key repeatedly until
Display is selected or touch the Display screen button.
Display Off
Touch this screen button to turn the display off.
Press any hard key to view the display.
Brightness/Contrast/Mode
Touch this screen button to change the brightness,
contrast, and mode of the display.
](Brightness):Touch the + (plus) or −(minus) screen
buttons to increase or decrease the brightness of the
screen.
_(Contrast): Touch the + (plus) or −(minus) screen
buttons to increase or decrease the contrast of the
screen.
5-55
Page 332 of 580
XM lists also contain a category to select and the
stations or channels that have broadcasts that relate
to that category. For XM, touch the left and right arrow
screen buttons to change categories. The station
information appears on the display. See“Radio Menu”
later in this section to add and remove XM categories
from the category list. Removed categories do not
appear on the category list screen or when the right
and left arrow category screen buttons are used.
FM lists may also contain a category to select if
stations in the broadcast area support Radio Data
Systems (RDS).
2Refresh List: Touch to refresh the list of AM or
FM stations.
When viewing a map screen, the name of the station or
channel displays.
y © ¨ z(Seek): To seek stations, press the up or
down arrows to go to the next or previous station.
To scan stations, press and hold either arrow for more
than two seconds. The radio goes to a station, plays for
a few seconds, then goes to the next station. To stop
scanning, press either arrow again.
Storing Radio Station Presets
This feature stores a mix of up to 30 AM, FM, and
XM (if equipped) preset stations. To store presets:
1. Press
Oto turn the system on.
2. If viewing a map screen, touch the source screen button, press the AUDIO key, or press
the FAV (favorite) key.
3. Select the band.
4. Seek, scan, or tune to the desired station, to select the station.
5. Press and hold one of the preset screen buttons for more than two seconds or until a beep is heard.
6. Repeat the steps for each preset.
5-62
Page 333 of 580
Sound Menu
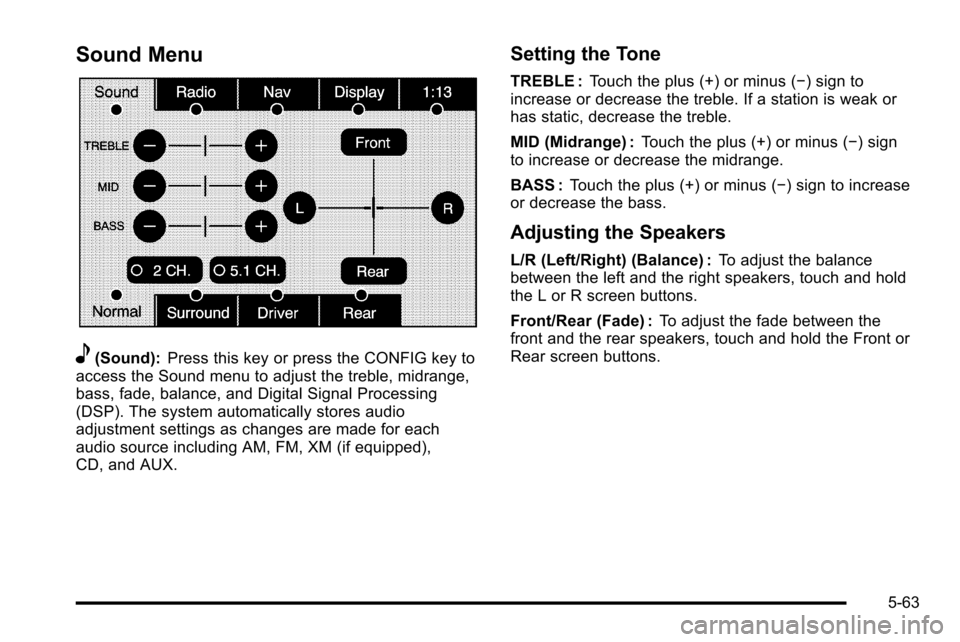
e(Sound):Press this key or press the CONFIG key to
access the Sound menu to adjust the treble, midrange,
bass, fade, balance, and Digital Signal Processing
(DSP). The system automatically stores audio
adjustment settings as changes are made for each
audio source including AM, FM, XM (if equipped),
CD, and AUX.
Setting the Tone
TREBLE : Touch the plus (+) or minus (−) sign to
increase or decrease the treble. If a station is weak or
has static, decrease the treble.
MID (Midrange) : Touch the plus (+) or minus (−) sign
to increase or decrease the midrange.
BASS : Touch the plus (+) or minus (−) sign to increase
or decrease the bass.
Adjusting the Speakers
L/R (Left/Right) (Balance) : To adjust the balance
between the left and the right speakers, touch and hold
the L or R screen buttons.
Front/Rear (Fade) : To adjust the fade between the
front and the rear speakers, touch and hold the Front or
Rear screen buttons.
5-63
Page 335 of 580
Limit Features While Driving
Touch the Limit Features While Driving screen button to
turn on and off the ability to limit functions while driving.
When this screen button is highlighted, the following
functions will be limited while driving:
.Music Navigator Scrolling
.Radio Category Scrolling
.Navigation Menu Scrolling and some functions
Number of Preset Pages
Touch the Number of Preset Pages screen button to
change the number of preset pages, 1 through 6.
Each preset page can contain five preset stations.
Touch the desired numbered screen button.
Bose®AudioPilot®
AudioPilot :The Bose®AudioPilot®noise
compensation technology.
To use AudioPilot
®:
1. Press the CONFIG key to enter the menu screen, then press the CONFIG key repeatedly until Radio
is selected or touch the Radio screen button
2. Press the Automatic Volume Control screen button to access the AudioPilot menu.
3. Press the ON screen button. To turn it off, touch the OFF screen button. When on,
AudioPilot
®continuously adjusts the audio system
equalization, to compensate for background noise, so
that the music sound is consistent at the set volume
level.
This feature is most effective at lower volume settings
where background noise can affect how well the music
being played is heard through the vehicle's audio
system. At higher volume settings, where the music is
much louder than the background noise, there may be
little or no adjustments by AudioPilot
®. For more
information on AudioPilot®, visit bose.com/audiopilot.
Remove/Add XM Categories
Touch the Remove/Add XM Categories screen button
to remove or add XM categories when selecting XM
categories from the category list screen. The list of
XM categories appear on the screen. Use the up and
down arrow screen buttons to scroll through the list.
The categories to remove are highlighted and the
categories to add are dark in color. Touch the category
to be added or removed. Touch the Restore All
Categories screen button to add all categories that have
been removed.
5-65
Page 345 of 580
DVD Player
The player can be used for DVD audio and DVD video.
DVD video will not display on the navigation screen
unless the vehicle is in PARK (P). It will operate on the
rear seat entertainment screens while the vehicle is
moving. The Rear Seat Entertainment (RSE) video
screen will start play of the DVD when a DVD video has
been inserted into the navigation system. The DVD
player can be controlled by the buttons on the
navigation system, the Rear Seat Audio (RSA) system,
and the remote control. The DVD player can also be
used for the rear seat passengers with the radio off.
The rear seat passengers can power on the video
screen and use the remote control to navigate the disc.
See“Rear Seat Entertainment System” in the Index of
your vehicle's owner manual for more information.
The DVD player is only compatible with DVDs of the
appropriate region code that is printed on the jacket of
most DVDs.
The DVD slot is compatible with most audio CDs,
CD-R, CD-RW, DVD-Video, DVD-Audio, DVD-R/RW,
DVD+R/RW media along with MP3 and WMA formats. If an error appears on the display, see
“DVD Messages”
later in this section.M(Load): To load one disc, do the following:
1. Press the load hard key and follow the screen message displayed.
2. When the system displays “Insert Disc (number)”,
insert the disc partway into the slot, label side up.
The system will pull it into the first available slot
and start playing. The system will display the type
of disc inserted.
To load multiple discs, do the following: 1. Press and hold the load hard key and follow the screen message displayed.
2. When the system displays “Insert Disc (number)”,
insert the disc partway into the slot, label side up.
The system will pull it in.
3. Once a disc is loaded, the system will display “Insert Disc (number)” again. Load the next disc.
Repeat this procedure for each disc. The player
takes up to six discs, do not try to load more than
six. The system will not display the disc types
when loading all, until the discs have been read by
the system.
Once all discs have been inserted, the system will
start playing the last loaded disc.
5-75