reset CADILLAC ESCALADE EXT 2010 3.G Service Manual
[x] Cancel search | Manufacturer: CADILLAC, Model Year: 2010, Model line: ESCALADE EXT, Model: CADILLAC ESCALADE EXT 2010 3.GPages: 580, PDF Size: 6.23 MB
Page 303 of 580
Preset Destination
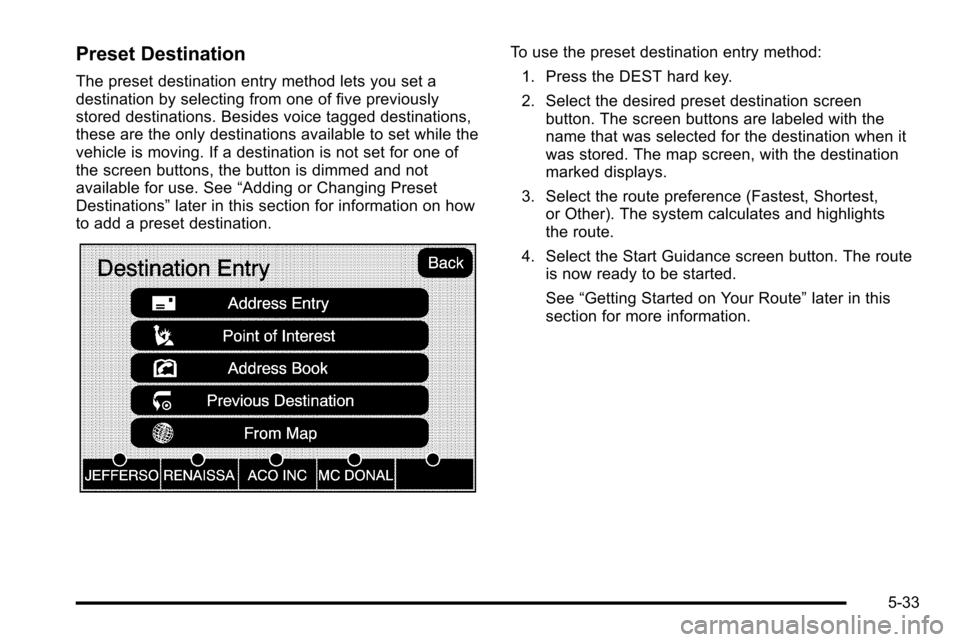
The preset destination entry method lets you set a
destination by selecting from one of five previously
stored destinations. Besides voice tagged destinations,
these are the only destinations available to set while the
vehicle is moving. If a destination is not set for one of
the screen buttons, the button is dimmed and not
available for use. See“Adding or Changing Preset
Destinations” later in this section for information on how
to add a preset destination.
To use the preset destination entry method:
1. Press the DEST hard key.
2. Select the desired preset destination screen button. The screen buttons are labeled with the
name that was selected for the destination when it
was stored. The map screen, with the destination
marked displays.
3. Select the route preference (Fastest, Shortest, or Other). The system calculates and highlights
the route.
4. Select the Start Guidance screen button. The route is now ready to be started.
See “Getting Started on Your Route” later in this
section for more information.
5-33
Page 311 of 580

Adding or Changing Preset
Destinations
This feature allows additions or changes one of
five preset destinations. When a destination has been
added as a preset destination, it is available to select
from the Destination Entry screen. See“Preset
Destination” previously for information on how to
select a preset destination as a final destination.
To store the current vehicle position as a preset
destination:
1. Select the Mark screen button from the map screen to add the current vehicle position to the
address book. The Address Book screen appears.
2. Select the Name screen button. An alpha-keyboard displays. Enter the name. Press the OK screen
button then the Back screen button to return to the
address book information screen.
3. Press and hold one of the buttons at the bottom of the screen until the name appears in that preset
destination screen button. It is now available to
select from the Destination Entry screen. To store an address book entry as a preset destination:
1. Select the CONFIG hard key.
2. Select the Nav screen button or press the CONFIG key until Nav is selected or touch the Nav screen
button.
3. Select the Edit/View screen button.
4. Select the address book entry to be stored as the preset destination. Select the Name screen button
to add a name, if needed.
5. Press and hold one of the buttons at the bottom of the screen until the name appears in that preset
destination screen button. It is now available to
select from the Destination Entry screen.
5-41
Page 312 of 580
Configure Menu
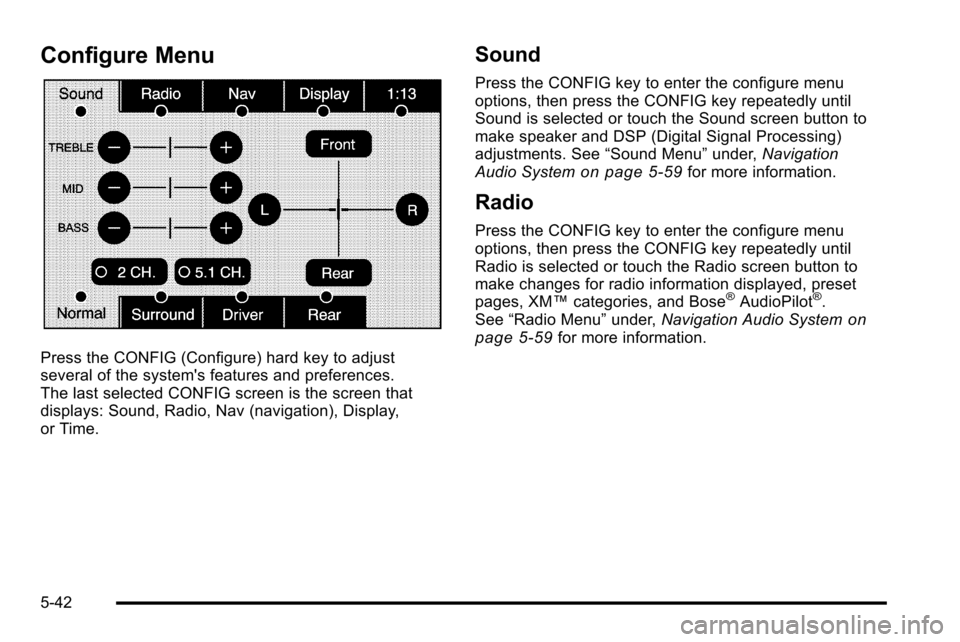
Press the CONFIG (Configure) hard key to adjust
several of the system's features and preferences.
The last selected CONFIG screen is the screen that
displays: Sound, Radio, Nav (navigation), Display,
or Time.
Sound
Press the CONFIG key to enter the configure menu
options, then press the CONFIG key repeatedly until
Sound is selected or touch the Sound screen button to
make speaker and DSP (Digital Signal Processing)
adjustments. See“Sound Menu”under,Navigation
Audio System
on page 5‑59for more information.
Radio
Press the CONFIG key to enter the configure menu
options, then press the CONFIG key repeatedly until
Radio is selected or touch the Radio screen button to
make changes for radio information displayed, preset
pages, XM™ categories, and Bose
®AudioPilot®.
See “Radio Menu” under,Navigation Audio Systemon
page 5‑59for more information.
5-42
Page 332 of 580
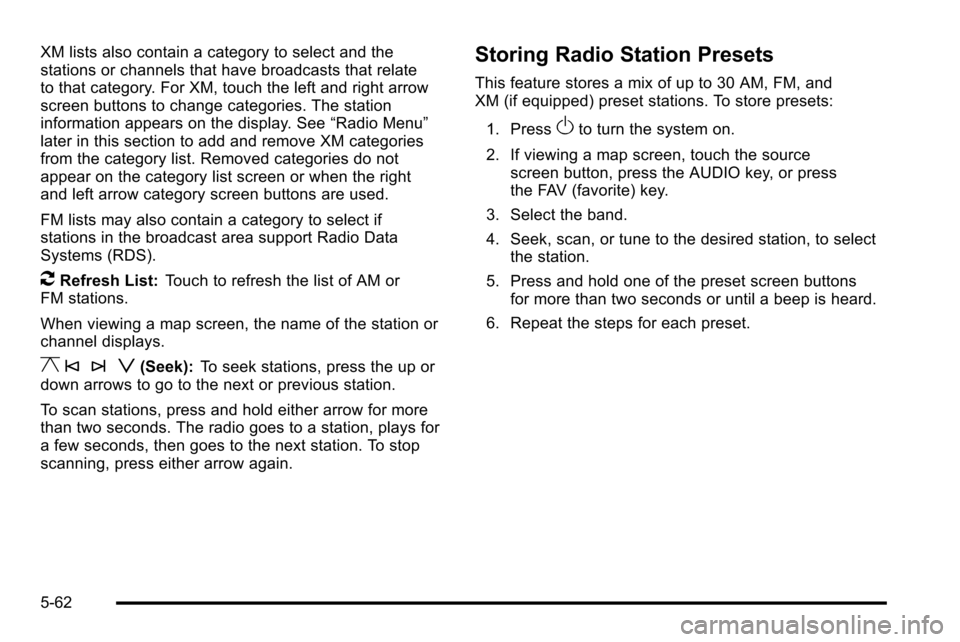
XM lists also contain a category to select and the
stations or channels that have broadcasts that relate
to that category. For XM, touch the left and right arrow
screen buttons to change categories. The station
information appears on the display. See“Radio Menu”
later in this section to add and remove XM categories
from the category list. Removed categories do not
appear on the category list screen or when the right
and left arrow category screen buttons are used.
FM lists may also contain a category to select if
stations in the broadcast area support Radio Data
Systems (RDS).
2Refresh List: Touch to refresh the list of AM or
FM stations.
When viewing a map screen, the name of the station or
channel displays.
y © ¨ z(Seek): To seek stations, press the up or
down arrows to go to the next or previous station.
To scan stations, press and hold either arrow for more
than two seconds. The radio goes to a station, plays for
a few seconds, then goes to the next station. To stop
scanning, press either arrow again.
Storing Radio Station Presets
This feature stores a mix of up to 30 AM, FM, and
XM (if equipped) preset stations. To store presets:
1. Press
Oto turn the system on.
2. If viewing a map screen, touch the source screen button, press the AUDIO key, or press
the FAV (favorite) key.
3. Select the band.
4. Seek, scan, or tune to the desired station, to select the station.
5. Press and hold one of the preset screen buttons for more than two seconds or until a beep is heard.
6. Repeat the steps for each preset.
5-62
Page 334 of 580
Digital Signal Processing (DSP)
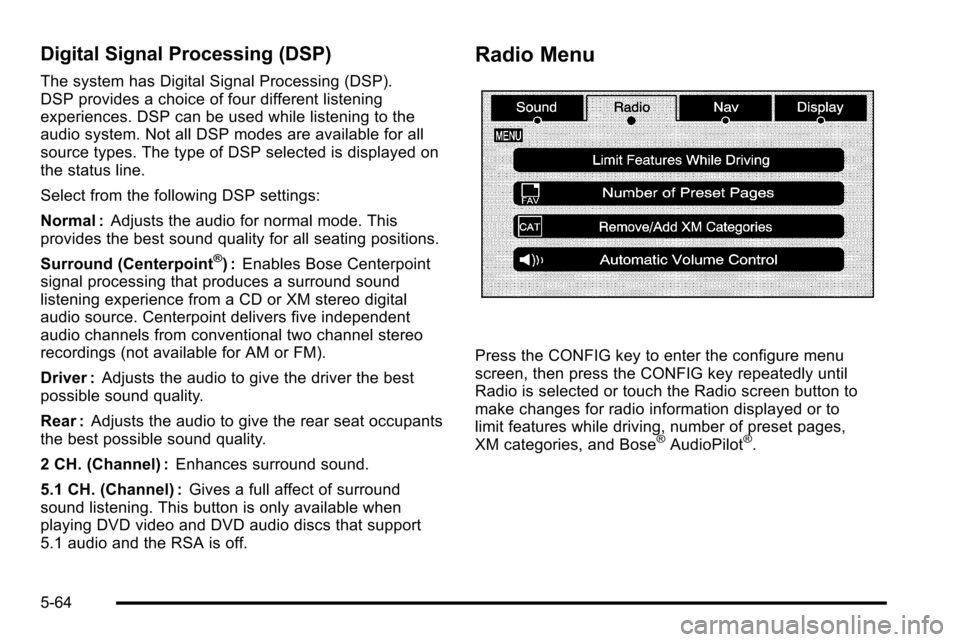
The system has Digital Signal Processing (DSP).
DSP provides a choice of four different listening
experiences. DSP can be used while listening to the
audio system. Not all DSP modes are available for all
source types. The type of DSP selected is displayed on
the status line.
Select from the following DSP settings:
Normal :Adjusts the audio for normal mode. This
provides the best sound quality for all seating positions.
Surround (Centerpoint
®) : Enables Bose Centerpoint
signal processing that produces a surround sound
listening experience from a CD or XM stereo digital
audio source. Centerpoint delivers five independent
audio channels from conventional two channel stereo
recordings (not available for AM or FM).
Driver : Adjusts the audio to give the driver the best
possible sound quality.
Rear : Adjusts the audio to give the rear seat occupants
the best possible sound quality.
2 CH. (Channel) : Enhances surround sound.
5.1 CH. (Channel) : Gives a full affect of surround
sound listening. This button is only available when
playing DVD video and DVD audio discs that support
5.1 audio and the RSA is off.
Radio Menu
Press the CONFIG key to enter the configure menu
screen, then press the CONFIG key repeatedly until
Radio is selected or touch the Radio screen button to
make changes for radio information displayed or to
limit features while driving, number of preset pages,
XM categories, and Bose
®AudioPilot®.
5-64
Page 335 of 580
Limit Features While Driving
Touch the Limit Features While Driving screen button to
turn on and off the ability to limit functions while driving.
When this screen button is highlighted, the following
functions will be limited while driving:
.Music Navigator Scrolling
.Radio Category Scrolling
.Navigation Menu Scrolling and some functions
Number of Preset Pages
Touch the Number of Preset Pages screen button to
change the number of preset pages, 1 through 6.
Each preset page can contain five preset stations.
Touch the desired numbered screen button.
Bose®AudioPilot®
AudioPilot :The Bose®AudioPilot®noise
compensation technology.
To use AudioPilot
®:
1. Press the CONFIG key to enter the menu screen, then press the CONFIG key repeatedly until Radio
is selected or touch the Radio screen button
2. Press the Automatic Volume Control screen button to access the AudioPilot menu.
3. Press the ON screen button. To turn it off, touch the OFF screen button. When on,
AudioPilot
®continuously adjusts the audio system
equalization, to compensate for background noise, so
that the music sound is consistent at the set volume
level.
This feature is most effective at lower volume settings
where background noise can affect how well the music
being played is heard through the vehicle's audio
system. At higher volume settings, where the music is
much louder than the background noise, there may be
little or no adjustments by AudioPilot
®. For more
information on AudioPilot®, visit bose.com/audiopilot.
Remove/Add XM Categories
Touch the Remove/Add XM Categories screen button
to remove or add XM categories when selecting XM
categories from the category list screen. The list of
XM categories appear on the screen. Use the up and
down arrow screen buttons to scroll through the list.
The categories to remove are highlighted and the
categories to add are dark in color. Touch the category
to be added or removed. Touch the Restore All
Categories screen button to add all categories that have
been removed.
5-65
Page 367 of 580
If the system fails to turn on or activate, the StabiliTrak
light along with one of the following messages will be
displayed on the Driver Information Center (DIC):
TRACTION CONTROL OFF, SERVICE TRACTION
CONTROL, STABILITRAK OFF, SERVICE
STABILITRAK. If these DIC messages appear, make
sure the StabiliTrak system has not been turned off
using the StabiliTrak on/off button. Then turn the
steering wheel clockwise from the nine o'clock position
to the three o'clock position. If this clears the
message(s), the vehicle does not need servicing. If this
does not clear the message(s), then turn the vehicle off,
wait 15 seconds, and then turn it back on again to reset
the system. If any of these messages still appear on the
Driver Information Center (DIC), the vehicle should be
taken in for service. For more information on the DIC
messages, seeDriver Information Center (DIC)
on
page 4‑39.
The StabiliTrak light will
flash on the instrument
panel cluster when the
system is both on and
activated.
The system may be heard or felt while it is working; this
is normal.
The traction control
disable button is located
on the instrument panel
below the climate
controls.
The traction control part of StabiliTrak can be turned
off by pressing and releasing the StabiliTrak button if
both systems (traction control and StabiliTrak) were
previously on. To disable both traction control and
StabiliTrak, press and hold the button for five seconds.
Traction control and StabiliTrak can be turned on by
pressing and releasing the StabiliTrak button if not
automatically shut off for any other reason.
When the TCS or StabiliTrak system is turned off, the
StabiliTrak light and the appropriate TCS off or
StabiliTrak off message will be displayed on the DIC to
warn the driver. The vehicle will still have brake-traction
control when traction control is off, but will not be able
to use the engine speed management system. See
“Traction Control Operation” next for more information.
When the traction control system has been turned off,
system noises may still be heard as a result of the
brake-traction control coming on.
6-7
Page 432 of 580
Engine Oil Additives / Engine Oil
Flushes
Do not add anything to the oil. The recommended oils
with the starburst symbol that meet GM standards are
all that is needed for good performance and engine
protection.
Engine oil system flushes are not recommended and
could cause engine damage not covered by the vehicle
warranty.
Engine Oil Life System
When to Change Engine Oil
This vehicle has a computer system that indicates when
to change the engine oil and filter. This is based on
engine revolutions and engine temperature, and not on
mileage. Based on driving conditions, the mileage at
which an oil change is indicated can vary considerably.
For the oil life system to work properly, the system must
be reset every time the oil is changed.When the system has calculated that oil life has been
diminished, it indicates that an oil change is necessary.
A CHANGE ENGINE OIL SOON message comes on.
See
DIC Warnings and Messages
on page 4‑48.
Change the oil as soon as possible within the next
600 miles (1 000 km). It is possible that, if driving under
the best conditions, the oil life system might not indicate
that an oil change is necessary for over a year.
However, the engine oil and filter must be changed at
least once a year and at this time the system must be
reset. Your dealer/retailer has trained service people
who will perform this work using genuine parts and
reset the system. It is also important to check the oil
regularly and keep it at the proper level.
If the system is ever reset accidentally, the oil must be
changed at 3,000 miles (5 000 km) since the last oil
change. Remember to reset the oil life system
whenever the oil is changed.
7-18
Page 433 of 580

How to Reset the Engine Oil Life
System
The Engine Oil Life System calculates when to
change the engine oil and filter based on vehicle use.
Whenever the oil is changed, reset the system so it can
calculate when the next oil change is required. If a
situation occurs where the oil is changed prior to a
CHANGE ENGINE OIL SOON message being turned
on, reset the system.
Always reset the engine oil life to 100% after every oil
change. It will not reset itself. To reset the Engine Oil
Life System:1. Display the OIL LIFE REMAINING on the DIC.
2. Press and hold the SET/RESET button on the DIC for more than five seconds. The oil life will change
to 100%.
If the CHANGE ENGINE OIL SOON message comes
back on when the vehicle is started, the Engine Oil Life
System has not reset. Repeat the procedure.
What to Do with Used Oil
Used engine oil contains certain elements that can be
unhealthy for your skin and could even cause cancer.
Do not let used oil stay on your skin for very long. Clean
your skin and nails with soap and water, or a good hand
cleaner. Wash or properly dispose of clothing or rags
containing used engine oil. See the manufacturer's
warnings about the use and disposal of oil products.
Used oil can be a threat to the environment. If you
change your own oil, be sure to drain all the oil from the
filter before disposal. Never dispose of oil by putting it in
the trash, pouring it on the ground, into sewers, or into
streams or bodies of water. Recycle it by taking it to a
place that collects used oil.
7-19
Page 437 of 580

4. Allow the engine to idle (500–800 rpm) for at least
one minute. Slowly release the brake pedal.
5. Keep the engine running and press the Trip/Fuel button or trip odometer reset stem until TRANS
TEMP (Transmission Temperature) displays on the
Driver Information Center (DIC).
6. Using the TRANS TEMP reading, determine and perform the appropriate check procedure. If the
TRANS TEMP reading is not within the required
temperature ranges, allow the vehicle to cool,
or operate the vehicle until the appropriate
transmission fluid temperature is reached.Cold Check Procedure
Use this procedure only as a reference to determine if
the transmission has enough fluid to be operated safely
until a hot check procedure can be made. The hot
check procedure is the most accurate method to check
the fluid level. Perform the hot check procedure at the
first opportunity. Use this cold check procedure to check
fluid level when the transmission temperature is
between 80°F and 90°F (27°C and 32°C).
1. Locate thetransmission dipstick at
the rear of the engine
compartment, on the
passenger side of the
vehicle.
See Engine Compartment Overview
on page 7‑14for more information.
2. Flip the handle up and then pull out the dipstick and wipe it with a clean rag or paper towel.
3. Install the dipstick by pushing it back in all the way, wait three seconds, and then pull it back out again.
7-23