fuse CADILLAC ESCALADE EXT 2010 3.G Owners Manual
[x] Cancel search | Manufacturer: CADILLAC, Model Year: 2010, Model line: ESCALADE EXT, Model: CADILLAC ESCALADE EXT 2010 3.GPages: 580, PDF Size: 6.23 MB
Page 5 of 580

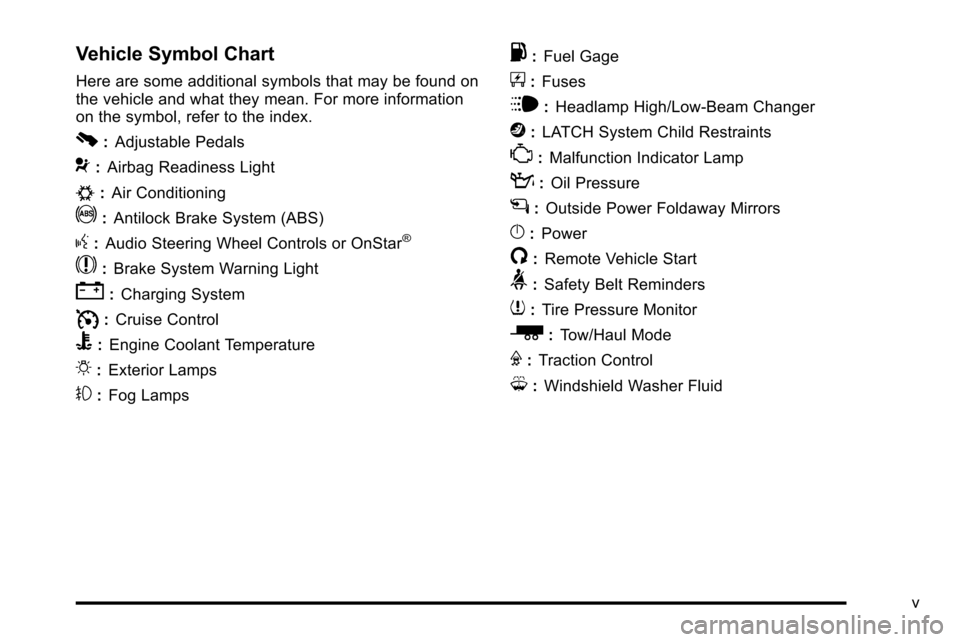
Vehicle Symbol Chart
Here are some additional symbols that may be found on
the vehicle and what they mean. For more information
on the symbol, refer to the index.
0:Adjustable Pedals
9:Airbag Readiness Light
#:Air Conditioning
!:Antilock Brake System (ABS)
g:Audio Steering Wheel Controls or OnStar®
$: Brake System Warning Light
":Charging System
I:Cruise Control
B: Engine Coolant Temperature
O:Exterior Lamps
#:Fog Lamps
.: Fuel Gage
+:Fuses
i: Headlamp High/Low-Beam Changer
j:LATCH System Child Restraints
*: Malfunction Indicator Lamp
::Oil Pressure
g:Outside Power Foldaway Mirrors
}:Power
/:Remote Vehicle Start
>:Safety Belt Reminders
7:Tire Pressure Monitor
_: Tow/Haul Mode
F:Traction Control
M:Windshield Washer Fluid
v
Page 130 of 580

If the alarm does not sound when it should but the
headlamps flash, check to see if the horn works.
The horn fuse may be blown. To replace the fuse,
seeFuses and Circuit Breakers on page 7‑105.
If the alarm does not sound or the headlamps do
not flash, the vehicle should be serviced by your
dealer/retailer.
PASS-Key®III+ Electronic
Immobilizer
See Radio Frequency Statementon page 9‑20for information regarding Part 15 of the Federal
Communications Commission (FCC) Rules and
RSS-210/211 of Industry and Science Canada.
PASS-Key®III+ Electronic
Immobilizer Operation
Your vehicle has PASS-Key®III+ (Personalized
Automotive Security System) theft-deterrent system.
PASS-Key
®III+ is a passive theft-deterrent system.
The system is automatically armed when the key is
removed from the ignition. The system is automatically disarmed when the key is
turned to ON/RUN, ACC/ACCESSORY or START from
the LOCK/OFF position.
You do not have to manually arm or disarm the system.
The security light will come on if there is a problem with
arming or disarming the theft-deterrent system.
When the PASS-Key
®III+ system senses that someone
is using the wrong key, it prevents the vehicle from
starting. Anyone using a trial-and-error method to start
the vehicle will be discouraged because of the high
number of electrical key codes.
If the engine does not start and the security light on
the instrument panel cluster comes on when trying to
start the vehicle, there may be a problem with your
theft-deterrent system. Turn the ignition off and try
again.
If the engine still does not start, and the key appears
to be undamaged, try another ignition key. At this time,
you may also want to check the fuse, see Fuses and
Circuit Breakers
on page 7‑105. If the engine still
does not start with the other key, your vehicle needs
service. If your vehicle does start, the first key may be
faulty. See your dealer/retailer who can service the
PASS-Key
®III+ to have a new key made. In an
emergency, contact Roadside Assistance.
3-28
Page 136 of 580

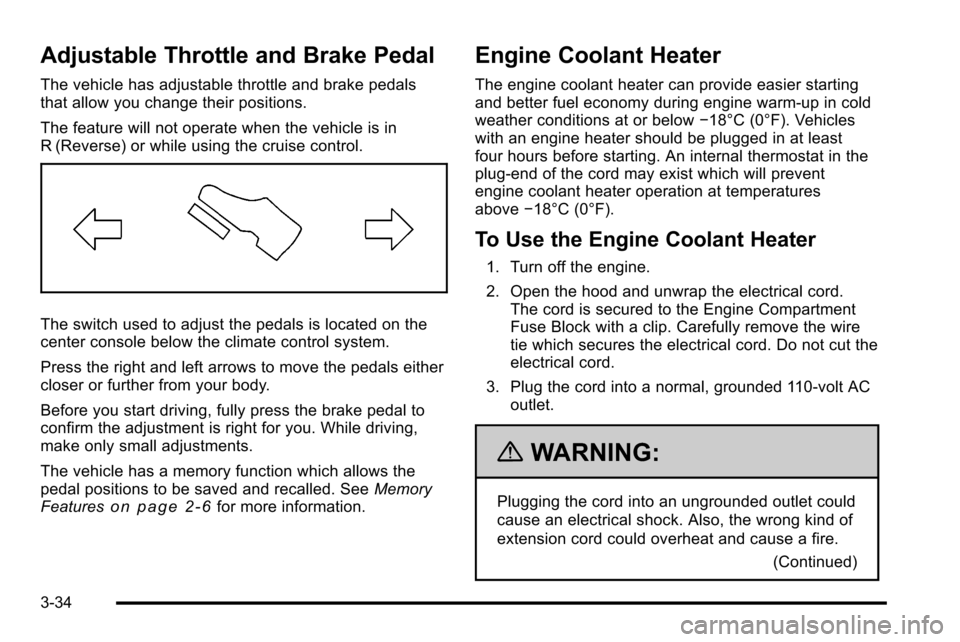
Adjustable Throttle and Brake Pedal
The vehicle has adjustable throttle and brake pedals
that allow you change their positions.
The feature will not operate when the vehicle is in
R (Reverse) or while using the cruise control.
The switch used to adjust the pedals is located on the
center console below the climate control system.
Press the right and left arrows to move the pedals either
closer or further from your body.
Before you start driving, fully press the brake pedal to
confirm the adjustment is right for you. While driving,
make only small adjustments.
The vehicle has a memory function which allows the
pedal positions to be saved and recalled. SeeMemory
Features
on page 2‑6for more information.
Engine Coolant Heater
The engine coolant heater can provide easier starting
and better fuel economy during engine warm-up in cold
weather conditions at or below −18°C (0°F). Vehicles
with an engine heater should be plugged in at least
four hours before starting. An internal thermostat in the
plug-end of the cord may exist which will prevent
engine coolant heater operation at temperatures
above −18°C (0°F).
To Use the Engine Coolant Heater
1. Turn off the engine.
2. Open the hood and unwrap the electrical cord.
The cord is secured to the Engine Compartment
Fuse Block with a clip. Carefully remove the wire
tie which secures the electrical cord. Do not cut the
electrical cord.
3. Plug the cord into a normal, grounded 110-volt AC outlet.
{WARNING:
Plugging the cord into an ungrounded outlet could
cause an electrical shock. Also, the wrong kind of
extension cord could overheat and cause a fire.
(Continued)
3-34
Page 184 of 580

Turn Signal/Multifunction Lever
The lever on the left side of the steering column
includes the following:
G:Turn and Lane Change Signals
53 :Headlamp High/Low-Beam Changer
N :Windshield Wipers
L :Windshield Washer
Flash-to-Pass.
Exterior Lamps.
Information for these features is on the pages following.
Turn and Lane-Change Signals
An arrow on the
instrument panel cluster
flashes in the direction of
the turn or lane change.
Move the lever all the way up or down to signal a turn.
Raise or lower the lever until the arrow starts to flash to
signal a lane change. The turn signals automatically
flash three times. It will flash six times if the tow-haul
mode is active. Holding the turn signal lever for more
than one second causes the turn signals to flash until
the lever is released.
The lever returns to its starting position when it is
released.
If after signaling a turn or a lane change the arrows
flash rapidly or do not come on, a signal bulb may be
burned out.
Have the bulbs replaced. If the bulb is not burned out,
check the fuse. See Instrument Panel Fuse Block
on
page 7‑105and Underhood Fuse Block on page 7‑108.
4-4
Page 199 of 580

Certain electrical accessories may not be compatible
with the accessory power outlet and could result in
blown vehicle or adapter fuses. If you experience a
problem see your dealer/retailer for additional
information on accessory power outlets.
The accessory power outlets are powered, even when
the ignition is in LOCK/OFF. Continuing to use power
outlets while the ignition is in LOCK/OFF may cause the
vehicle's battery to run down.
Notice:Adding any electrical equipment to the
vehicle can damage it or keep other components
from working as they should. The repairs would not
be covered by the vehicle warranty. Do not use
equipment exceeding maximum amperage rating of
20 amperes. Check with your dealer/retailer before
adding electrical equipment.
When adding electrical equipment, be sure to follow the
proper installation instructions included with the
electrical equipment you install.
Notice: Improper use of the power outlet can cause
damage not covered by the vehicle warranty. Do not
hang any type of accessory or accessory bracket
from the plug because the power outlets are
designed for accessory power plugs only.Ashtray(s) and Cigarette Lighter
The front ashtray and cigarette lighter are located in the
center console near the cupholders, if the vehicle has
them. Press on the access door to open it and use the
ashtray and lighter.
Notice: If papers, pins, or other flammable items are
put in the ashtray, hot cigarettes or other smoking
materials could ignite them and possibly damage
the vehicle. Never put flammable items in the
ashtray.
To remove the ashtray, pull it from the center console.
Slide it back in and push down to be sure it is secure.
To use the cigarette lighter, push it in all the way, and let
go. When it is ready, it will pop back out by itself.
Notice: Holding a cigarette lighter in while it is
heating does not let the lighter back away from the
heating element when it is hot. Damage from
overheating can occur to the lighter or heating
element, or a fuse could be blown. Do not hold a
cigarette lighter in while it is heating.
4-19
Page 376 of 580

.Always carry a litter bag and make sure all refuse
is removed from any campsite before leaving.
.Take extreme care with open fires (where
permitted), camp stoves, and lanterns.
.Never park your vehicle over dry grass or other
combustible materials that could catch fire from
the heat of the vehicle's exhaust system.
Traveling to Remote Areas
It makes sense to plan your trip, especially when going
to a remote area. Know the terrain and plan your route.
Get accurate maps of trails and terrain. Check to see if
there are any blocked or closed roads.
It is also a good idea to travel with at least one other
vehicle in case something happens to one of them.
For vehicles with a winch, be sure to read the winch
instructions. In a remote area, a winch can be handy
if you get stuck but you will want to know how to
use it properly.
Getting Familiar with Off-Road Driving
It is a good idea to practice in an area that is safe and
close to home before you go into the wilderness.
Off-roading requires some new and different skills.Tune your senses to different kinds of signals.
Your eyes need to constantly sweep the terrain for
unexpected obstacles. Your ears need to listen for
unusual tire or engine sounds. Use your arms,
hands, feet, and body to respond to vibrations and
vehicle bounce.
Controlling the vehicle is the key to successful off-road
driving. One of the best ways to control the vehicle is to
control the speed. At higher speeds:
.You approach things faster and have less time
to react.
.There is less time to scan the terrain for obstacles.
.The vehicle has more bounce when driving
over obstacles.
.More braking distance is needed, especially on
an unpaved surface.
{WARNING:
When you are driving off-road, bouncing and
quick changes in direction can easily throw you
out of position. This could cause you to lose
control and crash. So, whether you are driving on
or off the road, you and your passengers should
wear safety belts.
6-16
Page 413 of 580

Maintenance When Trailer Towing
The vehicle needs service more often when pulling a
trailer. See this manual's Maintenance Schedule or
Index for more information. Things that are especially
important in trailer operation are automatic transmission
fluid, engine oil, axle lubricant, belts, cooling system
and brake system. It is a good idea to inspect these
before and during the trip.
Check periodically to see that all hitch nuts and bolts
are tight.
Trailer Wiring Harness
Heavy-Duty Trailer Wiring Harness Package
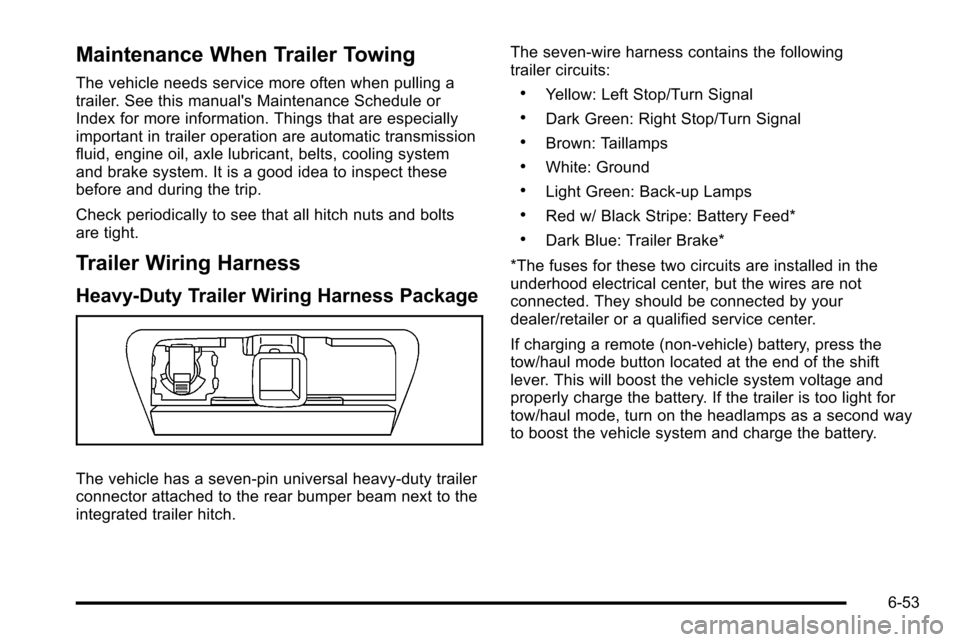
The vehicle has a seven-pin universal heavy-duty trailer
connector attached to the rear bumper beam next to the
integrated trailer hitch.The seven-wire harness contains the following
trailer circuits:
.Yellow: Left Stop/Turn Signal
.Dark Green: Right Stop/Turn Signal
.Brown: Taillamps
.White: Ground
.Light Green: Back-up Lamps
.Red w/ Black Stripe: Battery Feed*
.Dark Blue: Trailer Brake*
*The fuses for these two circuits are installed in the
underhood electrical center, but the wires are not
connected. They should be connected by your
dealer/retailer or a qualified service center.
If charging a remote (non-vehicle) battery, press the
tow/haul mode button located at the end of the shift
lever. This will boost the vehicle system voltage and
properly charge the battery. If the trailer is too light for
tow/haul mode, turn on the headlamps as a second way
to boost the vehicle system and charge the battery.
6-53
Page 417 of 580

Section 7 Service and Appearance Care
Electrical System. . . . . . . . . . . . . . . . . . . . . . . . . . . . . . . . 7-104
Add-On Electrical Equipment . . . . . . . . . . . . . . . . . 7-104
Windshield Wiper Fuses . . . . . . . . . . . . . . . . . . . . . . 7-105
Power Windows and Other Power Options . . . 7-105
Fuses and Circuit Breakers . . . . . . . . . . . . . . . . . . . 7-105 Instrument Panel Fuse Block . . . . . . . . . . . . . . . . . 7-105
Center Instrument Panel Fuse Block . . . . . . . . . 7-107
Underhood Fuse Block . . . . . . . . . . . . . . . . . . . . . . . 7-108
Capacities and Specifications . . . . . . . . . . . . . . . . . .7-112
7-3
Page 419 of 580

California Proposition 65 Warning
Most motor vehicles, including this one, contain and/or
emit chemicals known to the State of California to
cause cancer and birth defects or other reproductive
harm. Engine exhaust, many parts and systems, many
fluids, and some component wear by-products contain
and/or emit these chemicals.
California Perchlorate Materials
Requirements
Certain types of automotive applications, such as airbag
initiators, seat belt pretensioners, and lithium batteries
contained in remote keyless transmitters, may contain
perchlorate materials. Special handling may be
necessary. For additional information, see
www.dtsc.ca.gov/hazardouswaste/perchlorate.
Doing Your Own Service Work
{WARNING:
You can be injured and the vehicle could be
damaged if you try to do service work on a vehicle
without knowing enough about it.
.Be sure you have sufficient knowledge,
experience, the proper replacement parts, and
tools before attempting any vehicle
maintenance task.
.Be sure to use the proper nuts, bolts, and
other fasteners. English and metric fasteners
can be easily confused. If the wrong fasteners
are used, parts can later break or fall off.
You could be hurt.
If doing some of your own service work, use the proper
service manual. It tells you much more about how to
service the vehicle than this manual can. To order the
proper service manual, see Service Publications
Ordering Information on page 9‑17.
7-5
Page 429 of 580

A.Engine Air Cleaner/Filter on page 7‑20.
B. Coolant Surge Tank and Pressure Cap. See Cooling System on page 7‑26.
C. Remote Positive (+) Terminal. See Jump Starting
on page 7‑42.
D. Battery on page 7‑41.
E. Engine Oil Fill Cap. See “When to Add Engine Oil”
under Engine Oil on page 7‑15.
F. Automatic Transmission Dipstick (Out of View). See “Checking the Fluid Level” underAutomatic
Transmission Fluid on page 7‑22.
G. Remote Negative (−) Terminal (GND) (Out of View). See Jump Starting on page 7‑42.
H. Engine Oil Dipstick (Out of View). See “Checking
Engine Oil” underEngine Oil on page 7‑15.
I. Engine Cooling Fan (Out of View). See Cooling
System on page 7‑26.
J. Power Steering Fluid Reservoir (Out of View). See Power Steering Fluid on page 7‑36.
K. Brake Master Cylinder Reservoir. See “Brake
Fluid” under Brakes on page 7‑38.
L. Underhood Fuse Block on page 7‑108.
M. Windshield Washer Fluid Reservoir. See “Adding
Washer Fluid” underWindshield Washer Fluid
on
page 7‑37.
Engine Oil
Checking Engine Oil
It is a good idea to check the engine oil level at each
fuel fill. In order to get an accurate reading, the oil must
be warm and the vehicle must be on level ground.
The engine oil dipstick handle is a yellow loop. See
Engine Compartment Overview
on page 7‑14for the
location of the engine oil dipstick.
1. Turn off the engine and give the oil several minutes to drain back into the oil pan. If this is not done, the
oil dipstick might not show the actual level.
2. Pull out the dipstick and clean it with a paper towel or cloth, then push it back in all the way. Remove it
again, keeping the tip down, and check the level.
7-15