odometer CADILLAC ESCALADE EXT 2010 3.G Owners Manual
[x] Cancel search | Manufacturer: CADILLAC, Model Year: 2010, Model line: ESCALADE EXT, Model: CADILLAC ESCALADE EXT 2010 3.GPages: 580, PDF Size: 6.23 MB
Page 25 of 580

Bluetooth®
For vehicles with an in-vehicle Bluetooth system, it
allows users with a Bluetooth enabled cell phone to
make and receive hands-free calls using the vehicle’s
audio system and controls.
The Bluetooth enabled cell phone must be paired with
the in-vehicle Bluetooth system before it can be used in
the vehicle. Not all phones will support all functions.
For more information visit www.gm.com/bluetooth.
For more information, seeBluetooth
®on page 4‑66.
Navigation System
The vehicle's navigation system provides detailed maps
of most major freeways and roads throughout the
United States and Canada. After a destination has been
set, the system provides turn-by-turn instructions for
reaching the destination. In addition, the system can
help locate a variety of points of interest (POI), such as
banks, airports, restaurants, and more.
See Navigation System in the owner's manual for more
information.
Driver Information Center (DIC)
The DIC display is located at the bottom of the
instrument panel cluster. It shows the status of
many vehicle systems and enables access to the
personalization menu.
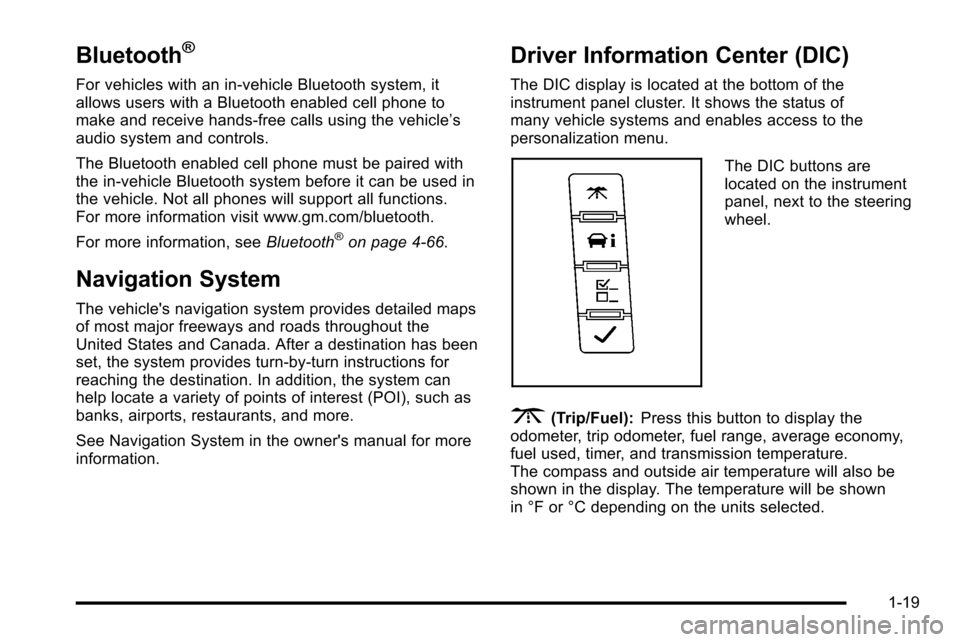
The DIC buttons are
located on the instrument
panel, next to the steering
wheel.
3(Trip/Fuel):Press this button to display the
odometer, trip odometer, fuel range, average economy,
fuel used, timer, and transmission temperature.
The compass and outside air temperature will also be
shown in the display. The temperature will be shown
in °F or °C depending on the units selected.
1-19
Page 181 of 580

Section 4 Instrument Panel
Instrument Panel Overview. . . . . . . . . . . . . . . . . . . . . . . .4-3
Hazard Warning Flashers . . . . . . . . . . . . . . . . . . . . . . . 4-3
Horn . . . . . . . . . . . . . . . . . . . . . . . . . . . . . . . . . . . . . . . . . . . . 4-3
Tilt Wheel . . . . . . . . . . . . . . . . . . . . . . . . . . . . . . . . . . . . . . . 4-3
Heated Steering Wheel . . . . . . . . . . . . . . . . . . . . . . . . . 4-3
Turn Signal/Multifunction Lever . . . . . . . . . . . . . . . . . . 4-4
Turn and Lane-Change Signals . . . . . . . . . . . . . . . . . 4-4
Headlamp High/Low-Beam Changer . . . . . . . . . . . . 4-5
Flash-to-Pass . . . . . . . . . . . . . . . . . . . . . . . . . . . . . . . . . . . 4-5
Windshield Wipers . . . . . . . . . . . . . . . . . . . . . . . . . . . . . . 4-6
Windshield Washer . . . . . . . . . . . . . . . . . . . . . . . . . . . . . 4-6
Cruise Control . . . . . . . . . . . . . . . . . . . . . . . . . . . . . . . . . . 4-7
Exterior Lamps . . . . . . . . . . . . . . . . . . . . . . . . . . . . . . . . 4-10
Headlamps on Reminder . . . . . . . . . . . . . . . . . . . . . . 4-14
Daytime Running Lamps (DRL) . . . . . . . . . . . . . . . . 4-14
Automatic Headlamp System . . . . . . . . . . . . . . . . . . 4-15
Fog Lamps . . . . . . . . . . . . . . . . . . . . . . . . . . . . . . . . . . . . 4-16
Exterior Cargo Lamps . . . . . . . . . . . . . . . . . . . . . . . . . 4-16
Instrument Panel Brightness . . . . . . . . . . . . . . . . . . . 4-16
Dome Lamps . . . . . . . . . . . . . . . . . . . . . . . . . . . . . . . . . . 4-17
Dome Lamp Override . . . . . . . . . . . . . . . . . . . . . . . . . . 4-17 Entry/Exit Lighting . . . . . . . . . . . . . . . . . . . . . . . . . . . . . 4-17
Reading Lamps . . . . . . . . . . . . . . . . . . . . . . . . . . . . . . . . 4-17
Electric Power Management . . . . . . . . . . . . . . . . . . . 4-17
Battery Run-Down Protection . . . . . . . . . . . . . . . . . . 4-18
Accessory Power Outlet(s) . . . . . . . . . . . . . . . . . . . . . 4-18
Ashtray(s) and Cigarette Lighter . . . . . . . . . . . . . . . 4-19
Analog Clock . . . . . . . . . . . . . . . . . . . . . . . . . . . . . . . . . . 4-20
Climate Controls . . . . . . . . . . . . . . . . . . . . . . . . . . . . . . . . . . 4-20
Dual Automatic Climate Control System . . . . . . . 4-20
Outlet Adjustment . . . . . . . . . . . . . . . . . . . . . . . . . . . . . . 4-24
Warning Lights, Gages, and Indicators . . . . . . . . . .4-25
Instrument Panel Cluster . . . . . . . . . . . . . . . . . . . . . . . 4-26
Speedometer and Odometer . . . . . . . . . . . . . . . . . . . 4-27
Trip Odometer . . . . . . . . . . . . . . . . . . . . . . . . . . . . . . . . . 4-27
Tachometer . . . . . . . . . . . . . . . . . . . . . . . . . . . . . . . . . . . . 4-27
Safety Belt Reminders . . . . . . . . . . . . . . . . . . . . . . . . . 4-27
Airbag Readiness Light . . . . . . . . . . . . . . . . . . . . . . . . 4-28
Passenger Airbag Status Indicator . . . . . . . . . . . . . 4-29
Charging System Light . . . . . . . . . . . . . . . . . . . . . . . . 4-30
Brake System Warning Light . . . . . . . . . . . . . . . . . . . 4-31
4-1
Page 207 of 580

Speedometer and Odometer
The speedometer shows the vehicle's speed in both
miles per hour (mph) and kilometers per hour (km/h).
The odometer works together with the Driver
Information Center (DIC). Press the Trip/Fuel button on
the instrument panel cluster to check the odometer
mileage while the vehicle is not running. See
“Odometer”underDIC Operation and Displays
on
page 4‑40for more information.
If the vehicle ever needs a new odometer installed, the
new one will be set to the correct mileage total of the
old odometer.
Trip Odometer
The trip odometer can show how far the vehicle has
been driven since the trip odometer was last set to zero.
For more information see “Trip Odometer”underDIC
Operation and Displays on page 4‑40.
Tachometer
The tachometer displays the engine speed in
revolutions per minute (rpm).
Safety Belt Reminders
Driver Safety Belt Reminder Light
When the engine is started, a chime sounds for several
seconds to remind a driver to fasten the safety belt,
unless the driver safety belt is already buckled.
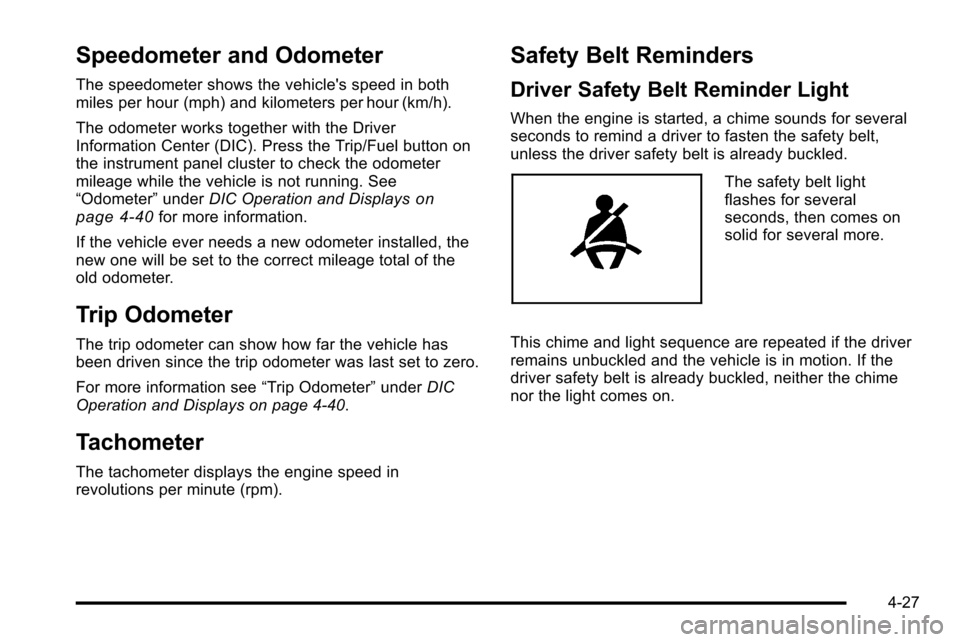
The safety belt light
flashes for several
seconds, then comes on
solid for several more.
This chime and light sequence are repeated if the driver
remains unbuckled and the vehicle is in motion. If the
driver safety belt is already buckled, neither the chime
nor the light comes on.
4-27
Page 220 of 580

All messages will appear in the DIC display located in
the center of the instrument panel cluster.
The DIC comes on when the ignition is on. After a short
delay, the DIC will display the information that was last
displayed before the engine was turned off.
SeeDIC Operation and Displays
on page 4‑40and
DIC Vehicle Customizationon page 4‑56for the
displays available.
DIC Operation and Displays
The DIC has different displays which can be accessed
by pressing the DIC buttons located on the instrument
panel, next to the steering wheel.
The DIC displays trip, fuel, and vehicle system
information, and warning messages if a system problem
is detected. A digital speedometer also appears at the
bottom of the DIC display. The digital speedometer can
be enabled or disabled. See “DISPLAY DIGITAL
SPEED” underDIC Vehicle Customization
on
page 4‑56for more information.
DIC Buttons
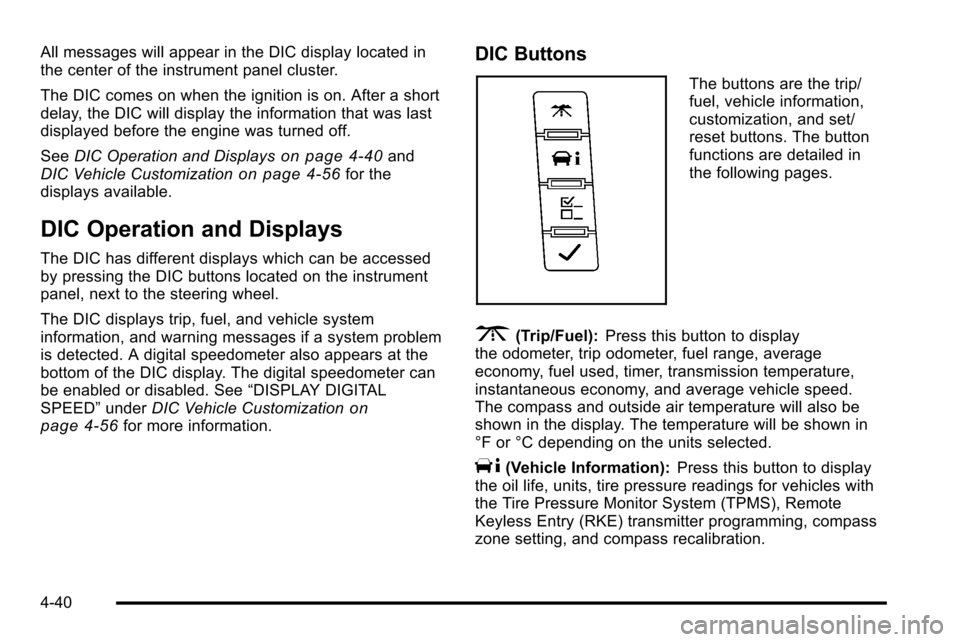
The buttons are the trip/
fuel, vehicle information,
customization, and set/
reset buttons. The button
functions are detailed in
the following pages.
3(Trip/Fuel): Press this button to display
the odometer, trip odometer, fuel range, average
economy, fuel used, timer, transmission temperature,
instantaneous economy, and average vehicle speed.
The compass and outside air temperature will also be
shown in the display. The temperature will be shown in
°F or °C depending on the units selected.
T(Vehicle Information): Press this button to display
the oil life, units, tire pressure readings for vehicles with
the Tire Pressure Monitor System (TPMS), Remote
Keyless Entry (RKE) transmitter programming, compass
zone setting, and compass recalibration.
4-40
Page 221 of 580

U(Customization):Press this button to customize the
feature settings on your vehicle. See DIC Vehicle
Customization
on page 4‑56for more information.
V(Set/Reset): Press this button to set or reset certain
functions and to turn off or acknowledge messages on
the DIC.
Trip/Fuel Menu Items
3
(Trip/Fuel): Press this button to scroll through the
following menu items:
Odometer
Press the trip/fuel button until ODOMETER displays.
This display shows the distance the vehicle has been
driven in either miles (mi) or kilometers (km).
To switch between English and metric measurements,
see “Units” later in this section.
Trip Odometer
Press the trip/fuel button until TRIP displays. This
display shows the current distance traveled in either
miles (mi) or kilometers (km) since the last reset for the
trip odometer.
The trip odometer can be reset to zero by pressing the
set/reset button while the trip odometer is displayed.
Fuel Range
Press the trip/fuel button until FUEL RANGE displays.
This display shows the approximate number of
remaining miles (mi) or kilometers (km) the vehicle
can be driven without refueling. The display will show
LOW if the fuel level is low.
The fuel range estimate is based on an average of the
vehicle's fuel economy over recent driving history and
the amount of fuel remaining in the fuel tank. This
estimate will change if driving conditions change. For
example, if driving in traffic and making frequent stops,
this display may read one number, but if the vehicle is
driven on a freeway, the number may change even
though the same amount of fuel is in the fuel tank. This
is because different driving conditions produce different
fuel economies. Generally, freeway driving produces
better fuel economy than city driving. Fuel range cannot
be reset.
Average Economy
Press the trip/fuel button until AVERAGE ECONOMY
displays. This display shows the approximate average
miles per gallon (mpg) or liters per 100 kilometers
(L/100 km). This number is calculated based on the
number of mpg (L/100 km) recorded since the last time
this menu item was reset. To reset AVERAGE
ECONOMY, press and hold the set/reset button.
4-41
Page 437 of 580

4. Allow the engine to idle (500–800 rpm) for at least
one minute. Slowly release the brake pedal.
5. Keep the engine running and press the Trip/Fuel button or trip odometer reset stem until TRANS
TEMP (Transmission Temperature) displays on the
Driver Information Center (DIC).
6. Using the TRANS TEMP reading, determine and perform the appropriate check procedure. If the
TRANS TEMP reading is not within the required
temperature ranges, allow the vehicle to cool,
or operate the vehicle until the appropriate
transmission fluid temperature is reached.Cold Check Procedure
Use this procedure only as a reference to determine if
the transmission has enough fluid to be operated safely
until a hot check procedure can be made. The hot
check procedure is the most accurate method to check
the fluid level. Perform the hot check procedure at the
first opportunity. Use this cold check procedure to check
fluid level when the transmission temperature is
between 80°F and 90°F (27°C and 32°C).
1. Locate thetransmission dipstick at
the rear of the engine
compartment, on the
passenger side of the
vehicle.
See Engine Compartment Overview
on page 7‑14for more information.
2. Flip the handle up and then pull out the dipstick and wipe it with a clean rag or paper towel.
3. Install the dipstick by pushing it back in all the way, wait three seconds, and then pull it back out again.
7-23
Page 491 of 580

Notice:The wrong wheel can also cause problems
with bearing life, brake cooling, speedometer or
odometer calibration, headlamp aim, bumper height,
vehicle ground clearance, and tire or tire chain
clearance to the body and chassis.
See Changing a Flat Tire
on page 7‑79for more
information.
Used Replacement Wheels
{WARNING:
Putting a used wheel on the vehicle is dangerous.
You cannot know how it has been used or how far
it has been driven. It could fail suddenly and
cause a crash. If you have to replace a wheel, use
a new GM original equipment wheel.
Tire Chains
{WARNING:
Do not use tire chains. There is not enough
clearance. Tire chains used on a vehicle without
the proper amount of clearance can cause
damage to the brakes, suspension, or other
vehicle parts. The area damaged by the tire
chains could cause you to lose control of the
vehicle and you or others may be injured in a
crash. Use another type of traction device only if
its manufacturer recommends it for use on the
vehicle and tire size combination and road
conditions. Follow that manufacturer's
instructions. To help avoid damage to the vehicle,
drive slowly, re‐adjust or remove the device if it is
contacting the vehicle, and do not spin the
wheels. If you do find traction devices that will fit,
install them on the rear tires.
7-77
Page 542 of 580

Maintenance Record
After the scheduled services are performed, record the date, odometer reading, who performed the service, and the
type of services performed in the boxes provided. Retain all maintenance receipts.
Maintenance Record
DateOdometer
Reading Serviced By Maintenance Stamp Services Performed
8-14
Page 543 of 580

Maintenance Record (cont'd)
DateOdometer
Reading Serviced By Maintenance Stamp Services Performed
8-15
Page 544 of 580

Maintenance Record (cont'd)
DateOdometer
Reading Serviced By Maintenance Stamp Services Performed
8-16