light CADILLAC ESCALADE HYBRID 2011 User Guide
[x] Cancel search | Manufacturer: CADILLAC, Model Year: 2011, Model line: ESCALADE HYBRID, Model: CADILLAC ESCALADE HYBRID 2011Pages: 94, PDF Size: 1.83 MB
Page 38 of 94
Black plate (12,1)Cadillac Escalade Hybrid - 2011
9-12 Driving and Operating You can choose among five driving
settings:
Indicator lights in the switches show
you which setting you are in. The
indicator lights will come on briefly
when you turn on the ignition and
the last chosen setting will stay on.
If the lights do not come on, you
should take the vehicle to your
dealer for service. An indicator light
will flash while shifting. It will stay on
when the shift is completed. If for
some reason the transfer case
cannot make a requested shift, it will
return to the last chosen setting.
2
m (Two-Wheel Drive High): This
setting is used for driving in most
street and highway situations. The
front axle is not engaged in
two-wheel drive. This setting also
provides the best fuel economy.
AUTO (Automatic Four-Wheel
Drive): This setting is ideal for use
when road surface traction
conditions are variable. When
driving your vehicle in AUTO, the
front axle is engaged, but the vehicle's power is primarily sent to
the rear wheels. When the vehicle's
software determines a need for
more traction, the system will
transfer more power to the front
wheels. Driving in this mode results
in slightly lower fuel economy than
Two-Wheel Drive High.
4
m (Four-Wheel Drive High): Use
the four-wheel high position when
you need extra traction, such as on
snowy or icy roads or in most
off-road situations. This setting also
engages the front axle to help drive
the vehicle. This is the best setting
to use when plowing snow.
4
n (Four-Wheel Drive Low) : This
setting also engages the front axle
and delivers extra torque. You may
never need this setting. It sends
maximum power to all four wheels.
You might choose Four-Wheel Drive
Low if you are driving off-road in
deep sand, deep mud, deep snow,
and while climbing or descending
steep hills. The vehicle has StabiliTrak. Shifting
into Four-Wheel-Drive Low will turn
Traction Control and StabiliTrak off.
See “ StabiliTrak System ” in the
owner manual.
{ WARNINGShifting the transfer case to
N (Neutral) can cause the vehicle
to roll even if the transmission is
in P (Park). You or someone else
could be seriously injured. Be
sure to set the parking brake
before placing the transfer case in
N (Neutral). See “ Parking Brake ”
in the owner manual for more
information.
N (Neutral): Shift the vehicle's
transfer case to N (Neutral) only
when towing the vehicle. See
“ Recreational Vehicle Towing ” or
“ Towing Your Vehicle ” in the owner
manual.
Page 39 of 94

Black plate (13,1)Cadillac Escalade Hybrid - 2011
Driving and Operating 9-13If the SERVICE 4 WHEEL DRIVE
message stays on, you should take
the vehicle to your dealer for
service. See Transmission
Messages on page 5 ‑ 7 .
Shifting Into Four-Wheel Drive
High or AUTO (Automatic
Four-Wheel Drive)
Turn the knob to the Four-Wheel
High or AUTO position. This can be
done at any speed, except when
shifting from Four-Wheel Drive Low.
The indicator light will flash while
shifting. It will remain on when the
shift is completed.
Shifting Into Two-Wheel
Drive High
Turn the knob to the Two-Wheel
High position. This can be done at
any speed, except when shifting
from Four-Wheel Drive Low.
See “ Shifting Out of Four-Wheel
Drive Low ” in this section for more
information. Shifting Into Four-Wheel
Drive Low
When Four-Wheel Low is engaged,
vehicle speed should be kept below
64 km/h (40 mph). Extended
high-speed operation in 4L may
damage or shorten the life of the
drivetrain.
To shift to the Four-Wheel Drive
Low position, the ignition must be in
ON/RUN and the vehicle must be
stopped or moving less than 5 km/h
(3 mph) with the transmission in
N (Neutral). The preferred method
for shifting into Four-Wheel Drive
Low is to have the vehicle moving
1.6 to 3.2 km/h (1 to 2 mph). Turn
the knob to the Four-Wheel Drive
Low position. You must wait for the
Four-Wheel Drive Low indicator light
to stop flashing and remain on
before shifting the transmission
into gear. Notice: Shifting the transmission
into gear before the Four-Wheel
Drive Low indicator light has
stopped flashing could damage
the transfer case. To help avoid
damaging the vehicle, always wait
for the Four-Wheel Drive Low
indicator light to stop flashing
before shifting the transmission
into gear.
The vehicle may have significant
engagement noise and bump when
shifting between Four-Wheel Drive
Low and Four-Wheel Drive High
ranges or from N (Neutral) while the
engine is running.
If the knob is turned to the
Four-Wheel Drive Low position
when the vehicle is in gear and/or
moving, the Four-Wheel Drive Low
indicator light will flash for
30 seconds and not complete the
shift unless the vehicle is moving
less than 5 km/h (3 mph) and the
transmission is in N (Neutral). After
30 seconds the transfer case will
shift to Four-Wheel Drive
High mode.
Page 40 of 94
Black plate (14,1)Cadillac Escalade Hybrid - 2011
9-14 Driving and Operating Shifting Out of Four-Wheel
Drive Low
To shift from Four-Wheel Drive Low
to Four-Wheel Drive High, AUTO,
or Two-Wheel Drive High, the
vehicle must be stopped or moving
less than 5 km/h (3 mph) with the
transmission in N (Neutral) and the
ignition in ON/RUN. The preferred
method for shifting out of
Four-Wheel Drive Low is to have
your vehicle moving 1.6 to 3.2 km/h
(1 to 2 mph). Turn the knob to the
Four-Wheel Drive High, AUTO,
or Two-Wheel Drive High position.
You must wait for the Four-Wheel
Drive High, AUTO, or Two-Wheel
Drive High indicator light to stop
flashing and remain on before
shifting the transmission into gear.
Notice: Shifting the transmission
into gear before the Four-Wheel
Drive Low indicator light has
stopped flashing could damage
the transfer case. To help avoid
damaging the vehicle, always wait
for the Four-Wheel Drive Low indicator light to stop flashing
before shifting the transmission
into gear.
The vehicle may have significant
engagement noise and bump when
shifting between Four-Wheel Drive
Low and Four-Wheel Drive High
ranges or from N (Neutral) while the
engine is running.
If the knob is turned to the
Four-Wheel Drive High, AUTO,
or Two-Wheel Drive High switch
position when the vehicle is in gear
and/or moving, the Four-Wheel
Drive High, AUTO or Two-Wheel
Drive High indicator light will flash
for 30 seconds but will not complete
the shift unless the vehicle is
moving less than 5 km/h (3 mph)
and the transmission is in
N (Neutral). Shifting into Neutral
To shift the transfer case into
N (Neutral):
1. Make sure the vehicle is parked
so that it will not roll.
2. Set the parking brake and apply
the regular brake pedal. See
“ Parking Brake ” in the owner
manual.
3. Start the vehicle or turn the
ignition to ON/RUN.
4. Put the transmission in
N (Neutral).
5. Shift the transfer case to
Two-Wheel Drive High.
6. Turn the transfer case dial
clockwise to N (Neutral) until it
stops and hold it there until the
N (Neutral) light starts blinking.
This will take at least
10 seconds. Then slowly release
the dial to the Four ‐ Wheel Drive
Low position. The N (Neutral)
light will come on when the
transfer case shift to N (Neutral)
is complete.
Page 41 of 94
Black plate (15,1)Cadillac Escalade Hybrid - 2011
Driving and Operating 9-157. If the engine is running, verify
that the transfer case is in
N (Neutral) by shifting the
transmission to R (Reverse) for
one second, then shift the
transmission to D (Drive) for
one second.
8. Turn the ignition to ACC/
ACCESSORY, which will turn the
engine off.
9. Place the transmission shift
lever in P (Park).
10. Release the parking brake prior
to moving the vehicle.
11. Turn the ignition to LOCK/OFF.
Shifting Out of Neutral
To shift the transfer case out of
N (Neutral):
1. Set the parking brake and apply
the regular brake pedal.
2. Turn the ignition to ON/RUN with
the engine off, and shift the
transmission to N (Neutral). 3. Turn the transfer case dial to the
desired transfer case shift
position (Two-Wheel Drive High,
Four-Wheel Drive High, AUTO).
After the transfer case has
shifted out of N (Neutral), the
N (Neutral) light will go out.
4. Release the parking brake prior
to moving the vehicle.
Notice: Shifting the transmission
into gear before the Four-Wheel
Drive Low indicator light has
stopped flashing could damage
the transfer case. To help avoid
damaging the vehicle, always wait
for the Four-Wheel Drive Low
indicator light to stop flashing
before shifting the transmission
into gear.
5. Start the engine and shift the
transmission to the desired
position. Excessively shifting the transfer
case into or out of the different
modes may cause the transfer case
to enter the shift protection mode.
This will protect the transfer case
from possible damage and will only
allow the transfer case to respond to
one shift per 10 seconds. The
transfer case may stay in this mode
for up to three minutes.
Page 59 of 94
Black plate (15,1)Cadillac Escalade Hybrid - 2011
Vehicle Care 10-15
Electrical System High Voltage Devices and
Wiring
{ WARNINGExposure to high voltage can
cause shock, burns, and even
death. The high voltage systems
in your vehicle can only be
serviced by technicians with
special training.
High voltage devices are
identified by labels. Do not
remove, open, take apart,
or modify these devices. High
voltage cable or wiring has
orange covering. Do not probe,
tamper with, cut, or modify high
voltage cable or wiring. Fuses and Circuit
Breakers The wiring circuits in the vehicle are
protected from short circuits by a
combination of fuses, circuit
breakers and fusible thermal links.
This greatly reduces the chance of
fires caused by electrical problems.
Be sure you replace a bad fuse with
a new one of the identical size and
rating.
If you ever have a problem on the
road and do not have a spare fuse,
you can borrow one that has the
same amperage. Just pick some
feature of the vehicle that you can
get along without, like the radio or
cigarette lighter, and use its fuse,
if it is the correct amperage.
Replace it as soon as you can.
The vehicle also has a special fuse
in the battery box for the 300-volt
batteries. If this fuse has failed and
needs to be replaced, the vehicle
will be disabled and you will need to have the vehicle repaired by your
dealer. Do not attempt to
self-service this fuse.
Engine Compartment
Fuse Block Hybrid Auxiliary Engine
Compartment Fuse Block The hybrid auxiliary engine
compartment fuse block is located
in the engine compartment near the
front of the vehicle. Lift the cover for
access to the fuse/relay block. See
Engine Compartment Overview on
page 10 ‑ 4 for more information on
its location. For more information on
the main underhood fuse block, see
“ Engine Compartment Fuse Block ”
in the owner manual.
Page 63 of 94
Black plate (19,1)Cadillac Escalade Hybrid - 2011
Vehicle Care 10-19
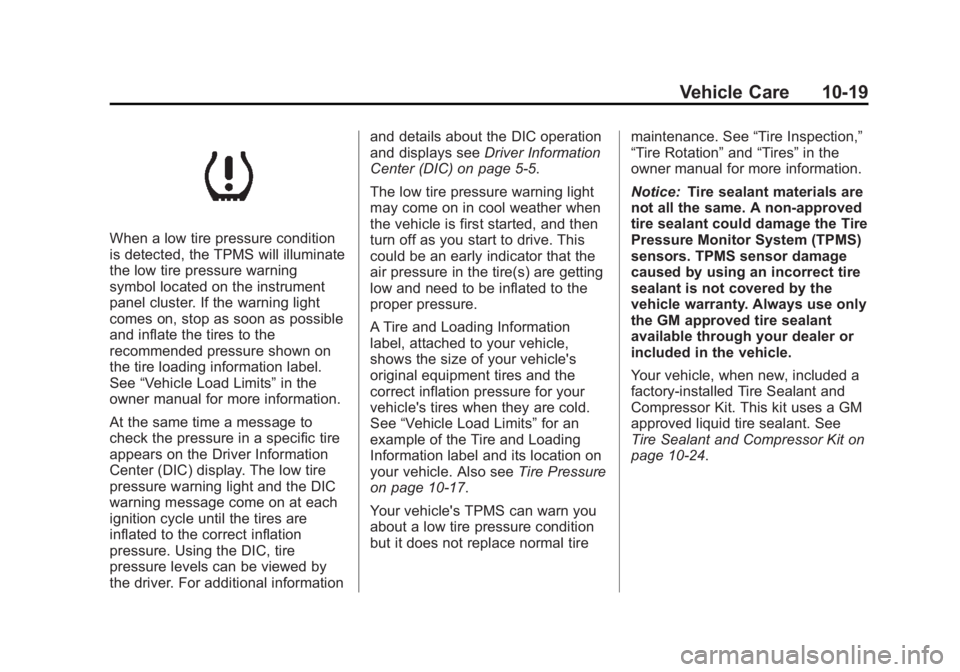
When a low tire pressure condition
is detected, the TPMS will illuminate
the low tire pressure warning
symbol located on the instrument
panel cluster. If the warning light
comes on, stop as soon as possible
and inflate the tires to the
recommended pressure shown on
the tire loading information label.
See “ Vehicle Load Limits ” in the
owner manual for more information.
At the same time a message to
check the pressure in a specific tire
appears on the Driver Information
Center (DIC) display. The low tire
pressure warning light and the DIC
warning message come on at each
ignition cycle until the tires are
inflated to the correct inflation
pressure. Using the DIC, tire
pressure levels can be viewed by
the driver. For additional information and details about the DIC operation
and displays see Driver Information
Center (DIC) on page 5 ‑ 5 .
The low tire pressure warning light
may come on in cool weather when
the vehicle is first started, and then
turn off as you start to drive. This
could be an early indicator that the
air pressure in the tire(s) are getting
low and need to be inflated to the
proper pressure.
A Tire and Loading Information
label, attached to your vehicle,
shows the size of your vehicle's
original equipment tires and the
correct inflation pressure for your
vehicle's tires when they are cold.
See “ Vehicle Load Limits ” for an
example of the Tire and Loading
Information label and its location on
your vehicle. Also see Tire Pressure
on page 10 ‑ 17 .
Your vehicle's TPMS can warn you
about a low tire pressure condition
but it does not replace normal tire maintenance. See “ Tire Inspection, ”
“ Tire Rotation ” and “ Tires ” in the
owner manual for more information.
Notice: Tire sealant materials are
not all the same. A non-approved
tire sealant could damage the Tire
Pressure Monitor System (TPMS)
sensors. TPMS sensor damage
caused by using an incorrect tire
sealant is not covered by the
vehicle warranty. Always use only
the GM approved tire sealant
available through your dealer or
included in the vehicle.
Your vehicle, when new, included a
factory ‐ installed Tire Sealant and
Compressor Kit. This kit uses a GM
approved liquid tire sealant. See
Tire Sealant and Compressor Kit on
page 10 ‑ 24 .
Page 64 of 94
Black plate (20,1)Cadillac Escalade Hybrid - 2011
10-20 Vehicle Care TPMS Malfunction Light and
Message The TPMS will not function properly
if one or more of the TPMS sensors
are missing or inoperable. When the
system detects a malfunction, the
low tire warning light flashes for
about one minute and then stays on
for the remainder of the ignition
cycle. A DIC warning message is
also displayed. The low tire warning
light and DIC warning message
come on at each ignition cycle until
the problem is corrected. Some of
the conditions that can cause the
malfunction light and DIC message
to come on are: .
The TPMS sensor matching
process was started but not
completed or not completed
successfully after rotating the
vehicle's tires. The DIC message
and TPMS malfunction light
should go off once the TPMS
sensor matching process is
performed successfully. See
“ TPMS Sensor Matching
Process ” later in this section. .
One or more TPMS sensors are
missing or damaged. The DIC
message and the TPMS
malfunction light should go off
when the TPMS sensors are
installed and the sensor
matching process is performed
successfully. See your dealer for
service. .
Replacement tires or wheels do
not match your vehicle's original
equipment tires or wheels. Tires
and wheels other than those
recommended for your vehicle
could prevent the TPMS from
functioning properly. See
“ Buying New Tires ” in the owner
manual. .
Operating electronic devices or
being near facilities using radio
wave frequencies similar to the
TPMS could cause the TPMS
sensors to malfunction. If the TPMS is not functioning it
cannot detect or signal a low tire
condition. See your dealer for
service if the TPMS malfunction
light and DIC message comes on
and stays on.
TPMS Sensor Matching
Process Each TPMS sensor has a unique
identification code. Any time you
rotate your vehicle's tires or replace
one or more of the TPMS sensors,
the identification codes will need to
be matched to the new tire/wheel
position. The sensors are matched
to the tire/wheel positions in the
following order: driver side front tire,
passenger side front tire, passenger
side rear tire, and driver side rear
tire using a TPMS diagnostic tool.
See your dealer for service.
Page 66 of 94
Black plate (22,1)Cadillac Escalade Hybrid - 2011
10-22 Vehicle Care
Tire Rotation Tires should be rotated every
12 000 km (7,500 miles).
Any time you notice unusual
wear, rotate your tires as soon
as possible and check wheel
alignment. Also check for
damaged tires or wheels. See
“ When It Is Time for New Tires ”
and “ Wheel Replacement ” in the
owner manual for more
information.
The purpose of regular rotation
is to achieve more uniform wear
for all tires on the vehicle. The
first rotation is the most
important. See “ Scheduled
Maintenance ” in the owner
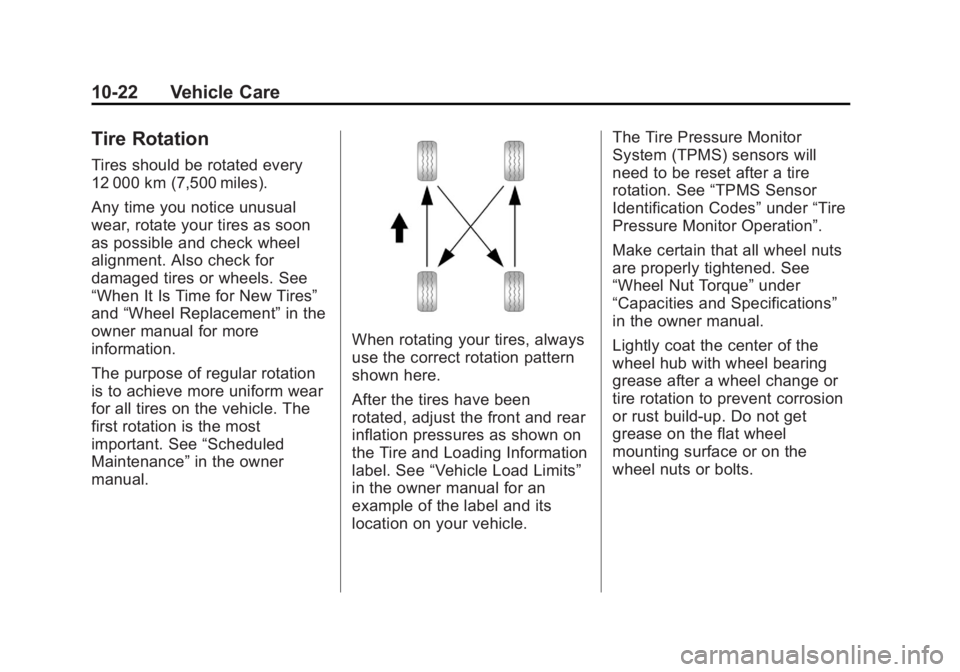
manual. When rotating your tires, always
use the correct rotation pattern
shown here.
After the tires have been
rotated, adjust the front and rear
inflation pressures as shown on
the Tire and Loading Information
label. See “ Vehicle Load Limits ”
in the owner manual for an
example of the label and its
location on your vehicle. The Tire Pressure Monitor
System (TPMS) sensors will
need to be reset after a tire
rotation. See “ TPMS Sensor
Identification Codes ” under “ Tire
Pressure Monitor Operation ” .
Make certain that all wheel nuts
are properly tightened. See
“ Wheel Nut Torque ” under
“ Capacities and Specifications ”
in the owner manual.
Lightly coat the center of the
wheel hub with wheel bearing
grease after a wheel change or
tire rotation to prevent corrosion
or rust build-up. Do not get
grease on the flat wheel
mounting surface or on the
wheel nuts or bolts.
Page 70 of 94
Black plate (26,1)Cadillac Escalade Hybrid - 2011
10-26 Vehicle Care If a tire goes flat, avoid further tire
and wheel damage by driving slowly
to a level place. Turn on the hazard
warning flashers.
See If a Tire Goes Flat on
page 10 ‑ 23 for other important
safety warnings.
Do not remove any objects that
have penetrated the tire.
1. Remove the tire sealant and
compressor kit from its storage
location. See Storing the Tire
Sealant and Compressor Kit on
page 10 ‑ 31 .
Make sure the on/off button (D)
is in the off (O) position.
2. Unwrap the sealant/air hose (G)
and the power plug (C).
3. Place the kit on the ground.
Make sure the tire valve stem is
positioned close to the ground
so the hose will reach it.
4. Remove the valve stem cap from
the flat tire by turning it
counterclockwise. 5. Attach the sealant/air hose (G)
onto the tire valve stem. Turn it
clockwise until it is tight.
6. Plug the power plug (C) into the
accessory power outlet in the
vehicle. Unplug all items from
other accessory power outlets.
See “ Power Outlets ” in the
owner manual.
If the vehicle has an accessory
power outlet, do not use the
cigarette lighter.
If the vehicle only has a cigarette
lighter, use the cigarette lighter.
Do not pinch the power plug
cord in the door or window.
7. Start the vehicle. The vehicle
must be running while using the
air compressor.
8. Press the on/off (D) button to
turn the tire sealant and
compressor kit on.
The compressor will inject
sealant and air into the tire. The pressure gauge (E) will
initially show a high pressure
while the compressor pushes the
sealant into the tire. Once the
sealant is completely dispersed
into the tire, the pressure will
quickly drop and start to rise
again as the tire inflates with
air only.
9. Inflate the tire to the
recommended inflation pressure
using the pressure gauge (E).
The recommended inflation
pressure can be found on the
Tire and Loading Information
label. See Tire Pressure on
page 10 ‑ 17 .
The pressure gauge (E) may
read higher than the actual tire
pressure while the compressor is
on. Turn the compressor off to
get an accurate pressure
reading. The compressor may
be turned on/off until the correct
pressure is reached.
Page 73 of 94
Black plate (29,1)Cadillac Escalade Hybrid - 2011
Vehicle Care 10-296. Remove the tire valve stem cap
by turning it counterclockwise.
7. Attach the air only hose (F) onto
the tire valve stem and press the
lever down to secure it.
8. Plug the power plug (C) into the
accessory power outlet in the
vehicle. Unplug all items from
other accessory power outlets.
See “ Power Outlets ” in the
owner manual.
If the vehicle has an accessory
power outlet, do not use the
cigarette lighter.
If the vehicle only has a cigarette
lighter, use the cigarette lighter.
Do not pinch the power plug
cord in the door or window.
9. Start the vehicle. The vehicle
must be running while using the
air compressor. 10. Press the on/off (D) button to
turn the compressor on.
The compressor will inflate the
tire with air only.
11. Inflate the tire to the
recommended inflation
pressure using the pressure
gauge (E). The recommended
inflation pressure can be found
on the Tire and Loading
Information label. See Tire
Pressure on page 10 ‑ 17 .
The pressure gauge (E) may
read higher than the actual tire
pressure while the compressor
is on. Turn the compressor off
to get an accurate reading. The
compressor may be turned on/
off until the correct pressure is
reached. 12. Press the on/off button (D) to
turn the tire sealant and
compressor kit off.
Be careful while handling the
tire sealant and compressor kit
as it could be warm after
usage.
13. Unplug the power plug (C) from
the accessory power outlet in
the vehicle.
14. Disconnect the air only
hose (C) from the tire valve
stem, by turning it
counterclockwise, and replace
the tire valve stem cap.
15. Replace the air only hose (F)
and the power plug (C) back in
its original location.
16. Place the equipment in the
original storage location in the
vehicle.