audio CADILLAC SEVILLE 2004 5.G Owners Manual
[x] Cancel search | Manufacturer: CADILLAC, Model Year: 2004, Model line: SEVILLE, Model: CADILLAC SEVILLE 2004 5.GPages: 410, PDF Size: 2.64 MB
Page 1 of 410
Seats and Restraint Systems........................... 1-1
Front Seats
............................................... 1-2
Safety Belts
.............................................. 1-5
Child Restraints
.......................................1-22
Supplemental Inflatable Restraint (SIR)
........1-41
Restraint System Check
............................1-50
Features and Controls..................................... 2-1
Keys
........................................................ 2-3
Doors and Locks
....................................... 2-9
Windows
.................................................2-16
Theft-Deterrent Systems
............................2-20
Starting and Operating Your Vehicle
...........2-24
Mirrors
....................................................2-37
OnStar
®System
......................................2-42
HomeLink®Transmitter
.............................2-44
Storage Areas
.........................................2-49
Sunroof
..................................................2-50
Vehicle Personalization
.............................2-52
Instrument Panel............................................. 3-1
Instrument Panel Overview
.......................... 3-4
Climate Controls
......................................3-28
Warning Lights, Gages and Indicators
.........3-37
Driver Information Center (DIC)
..................3-52Trip Computer
.........................................3-74
Audio System(s)
.......................................3-75
Driving Your Vehicle....................................... 4-1
Your Driving, the Road, and Your Vehicle
..... 4-2
Towing
...................................................4-29
Service and Appearance Care.......................... 5-1
Service
..................................................... 5-3
Fuel
......................................................... 5-4
Checking Things Under the Hood
...............5-10
Headlamp Aiming
.....................................5-49
Bulb Replacement
....................................5-53
Windshield Wiper Blade Replacement
.........5-60
Tires
......................................................5-61
Appearance Care
.....................................5-87
Vehicle Identification
.................................5-95
Electrical System
......................................5-96
Capacities and Specifications
...................5-104
Maintenance Schedule..................................... 6-1
Maintenance Schedule
................................ 6-2
Customer Assistance and Information.............. 7-1
Customer Assistance and Information
........... 7-2
Reporting Safety Defects
...........................7-11
Index................................................................ 1
2004 Cadillac Seville Owner ManualM
Page 4 of 410
Vehicle Damage Warnings
Also, in this book you will find these notices:
Notice:These mean there is something that could
damage your vehicle.
A notice will tell you about something that can damage
your vehicle. Many times, this damage would not be
covered by your warranty, and it could be costly. But the
notice will tell you what to do to help avoid the damage.
When you read other manuals, you might see CAUTION
and NOTICE warnings in different colors or in different
words.
You’ll also see warning labels on your vehicle. They use
the same words, CAUTION or NOTICE.
Vehicle Symbols
Your vehicle has components and labels that use
symbols instead of text. Symbols, used on your vehicle,
are shown along with the text describing the operation
or information relating to a specific component, control,
message, gage or indicator.
If you need help figuring out a specific name of a
component, gage or indicator, reference the following
topics:
•Seats and Restraint Systems in Section 1
•Features and Controls in Section 2
•Instrument Panel Overview in Section 3
•Climate Controls in Section 3
•Warning Lights, Gages and Indicators in Section 3
•Audio System(s) in Section 3
•Engine Compartment Overview in Section 5
iv
Page 83 of 410
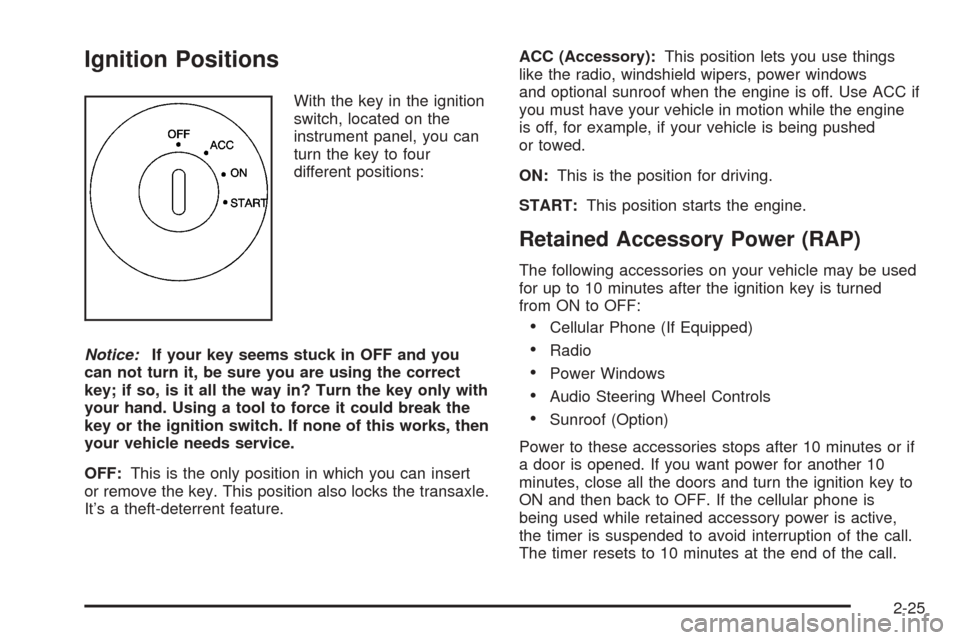
Ignition Positions
With the key in the ignition
switch, located on the
instrument panel, you can
turn the key to four
different positions:
Notice:If your key seems stuck in OFF and you
can not turn it, be sure you are using the correct
key; if so, is it all the way in? Turn the key only with
your hand. Using a tool to force it could break the
key or the ignition switch. If none of this works, then
your vehicle needs service.
OFF:This is the only position in which you can insert
or remove the key. This position also locks the transaxle.
It’s a theft-deterrent feature.ACC (Accessory):This position lets you use things
like the radio, windshield wipers, power windows
and optional sunroof when the engine is off. Use ACC if
you must have your vehicle in motion while the engine
is off, for example, if your vehicle is being pushed
or towed.
ON:This is the position for driving.
START:This position starts the engine.
Retained Accessory Power (RAP)
The following accessories on your vehicle may be used
for up to 10 minutes after the ignition key is turned
from ON to OFF:
•Cellular Phone (If Equipped)
•Radio
•Power Windows
•Audio Steering Wheel Controls
•Sunroof (Option)
Power to these accessories stops after 10 minutes or if
a door is opened. If you want power for another 10
minutes, close all the doors and turn the ignition key to
ON and then back to OFF. If the cellular phone is
being used while retained accessory power is active,
the timer is suspended to avoid interruption of the call.
The timer resets to 10 minutes at the end of the call.
2-25
Page 114 of 410
Audio System(s).............................................3-75
Setting the Time for Radios without Radio
Data Systems (RDS)..................................3-75
Setting the Time for Radios with Radio Data
Systems (RDS).........................................3-75
Radio with CD..............................................3-76
Radio with Cassette and CD..........................3-83
Navigation/Radio System...............................3-95
Console-Mounted CD Changer........................3-95
Radio Personalization with Home and Away
Feature....................................................3-98Theft-Deterrent Feature..................................3-99
Audio Steering Wheel Controls......................3-100
Radio Reception.........................................3-100
Care of Your Cassette Tape Player...............3-101
Care of Your CDs.......................................3-102
Care of Your CD Player...............................3-102
Diversity Antenna System.............................3-103
XM™ Satellite Radio Antenna System
(48 Contiguous US States)........................3-103
Section 3 Instrument Panel
3-2
Page 117 of 410
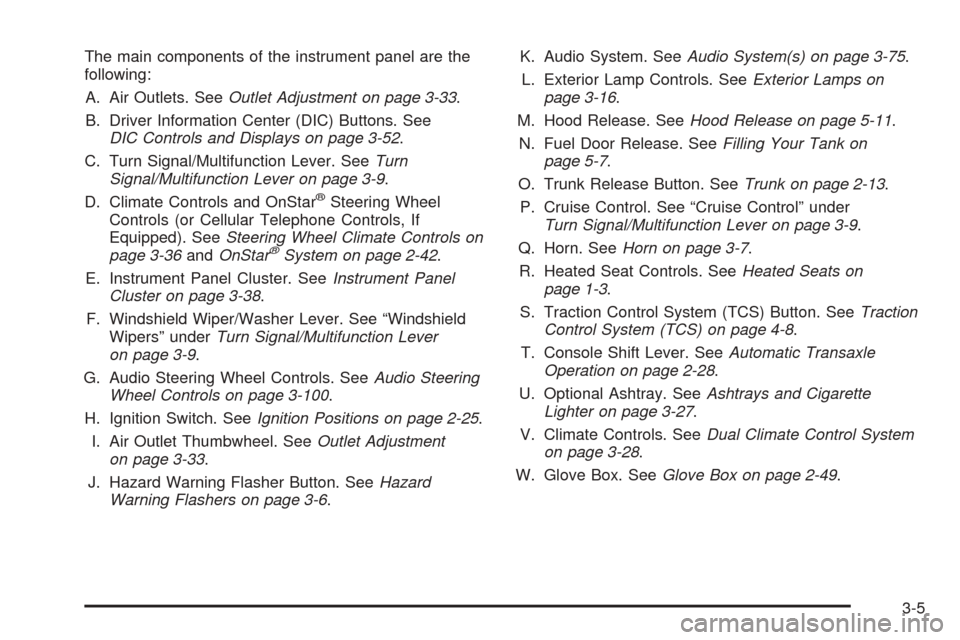
The main components of the instrument panel are the
following:
A. Air Outlets. SeeOutlet Adjustment on page 3-33.
B. Driver Information Center (DIC) Buttons. See
DIC Controls and Displays on page 3-52.
C. Turn Signal/Multifunction Lever. SeeTurn
Signal/Multifunction Lever on page 3-9.
D. Climate Controls and OnStar
®Steering Wheel
Controls (or Cellular Telephone Controls, If
Equipped). SeeSteering Wheel Climate Controls on
page 3-36andOnStar
®System on page 2-42.
E. Instrument Panel Cluster. SeeInstrument Panel
Cluster on page 3-38.
F. Windshield Wiper/Washer Lever. See “Windshield
Wipers” underTurn Signal/Multifunction Lever
on page 3-9.
G. Audio Steering Wheel Controls. SeeAudio Steering
Wheel Controls on page 3-100.
H. Ignition Switch. SeeIgnition Positions on page 2-25.
I. Air Outlet Thumbwheel. SeeOutlet Adjustment
on page 3-33.
J. Hazard Warning Flasher Button. SeeHazard
Warning Flashers on page 3-6.K. Audio System. SeeAudio System(s) on page 3-75.
L. Exterior Lamp Controls. SeeExterior Lamps on
page 3-16.
M. Hood Release. SeeHood Release on page 5-11.
N. Fuel Door Release. SeeFilling Your Tank on
page 5-7.
O. Trunk Release Button. SeeTrunk on page 2-13.
P. Cruise Control. See “Cruise Control” under
Turn Signal/Multifunction Lever on page 3-9.
Q. Horn. SeeHorn on page 3-7.
R. Heated Seat Controls. SeeHeated Seats on
page 1-3.
S. Traction Control System (TCS) Button. SeeTraction
Control System (TCS) on page 4-8.
T. Console Shift Lever. SeeAutomatic Transaxle
Operation on page 2-28.
U. Optional Ashtray. SeeAshtrays and Cigarette
Lighter on page 3-27.
V. Climate Controls. SeeDual Climate Control System
on page 3-28.
W. Glove Box. SeeGlove Box on page 2-49.
3-5
Page 187 of 410
Audio System(s)
Notice:Before you add any sound equipment to
your vehicle – like a tape player, CB radio, mobile
telephone or two-way radio – be sure you can
add what you want. If you can, it’s very important to
do it properly. Added sound equipment may
interfere with the operation of your vehicle’s engine,
radio or other systems, and even damage them.
Your vehicle’s systems may interfere with the
operation of sound equipment that has been added
improperly.
So, before adding sound equipment, check with
your dealer and be sure to check federal rules
covering mobile radio and telephone units.
Your audio system has been designed to operate easily
and to give years of listening pleasure. You will get
the most enjoyment out of it if you acquaint yourself with
it first. Figure out which radio you have in your vehicle,
find out what your audio system can do and how to
operate all of its controls to be sure you’re getting the
most out of the advanced engineering that went into it.
Your vehicle has a feature called Retained Accessory
Power (RAP). With RAP, you can play your audio
system even after the ignition is turned off. See
“Retained Accessory Power (RAP)” underIgnition
Positions on page 2-25.
Setting the Time for Radios without
Radio Data Systems (RDS)
Press and hold HR until the correct hour appears on the
display. Press and hold MN until the correct minute
appears on the display. Display the time with the ignition
off by pressing one of these buttons.
Setting the Time for Radios with
Radio Data Systems (RDS)
Press and hold HR until the correct hour appears on the
display. Press and hold MN until the correct minute
appears on the display. Display the time when the
ignition is off by pressing one of these buttons.
To synchronize the time with an FM station broadcasting
Radio Data System (RDS) information, press and
hold HR and MN at the same time until TIME UPDATED
appears on the display. If the time is not available
from the station, NO STATION TIME will appear on the
display.
RDS time is broadcast once a minute. Once you have
tuned to an RDS broadcast station, it may take a
few minutes for your time to update.
3-75
Page 188 of 410
Radio with CD
XM™ Satellite Radio Service
(48 Contiguous US States)
XM™ is a continental U.S. based satellite radio service
that offers 100 coast to coast channels including
music, news, sports, talk, and children’s programming.
XM™ provides digital quality audio and text information,
including song title and artist name. A service fee is
required in order to receive the XM™ service. For more
information, contact XM™ at www.xmradio.com or
call 1-800-852-XMXM (9696).
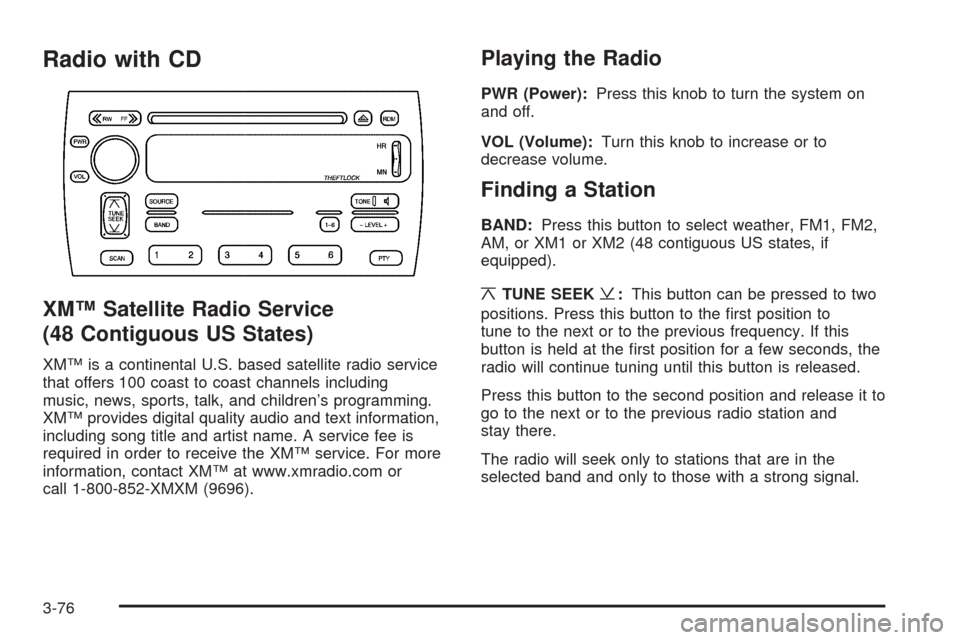
Playing the Radio
PWR (Power):Press this knob to turn the system on
and off.
VOL (Volume):Turn this knob to increase or to
decrease volume.
Finding a Station
BAND:Press this button to select weather, FM1, FM2,
AM, or XM1 or XM2 (48 contiguous US states, if
equipped).
¦TUNE SEEK¥:This button can be pressed to two
positions. Press this button to the first position to
tune to the next or to the previous frequency. If this
button is held at the first position for a few seconds, the
radio will continue tuning until this button is released.
Press this button to the second position and release it to
go to the next or to the previous radio station and
stay there.
The radio will seek only to stations that are in the
selected band and only to those with a strong signal.
3-76
Page 191 of 410
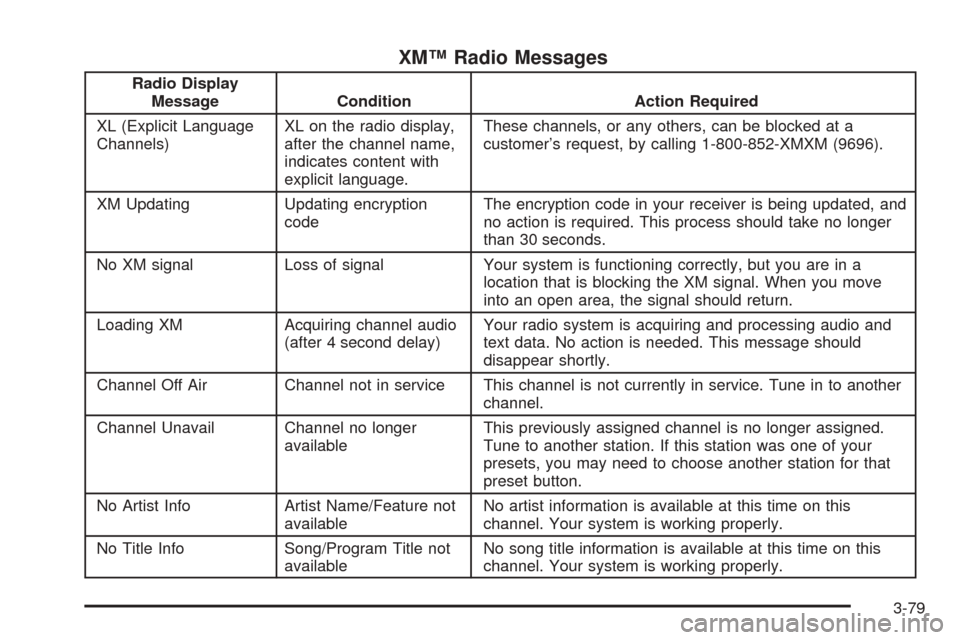
XM™ Radio Messages
Radio Display
Message Condition Action Required
XL (Explicit Language
Channels)XL on the radio display,
after the channel name,
indicates content with
explicit language.These channels, or any others, can be blocked at a
customer’s request, by calling 1-800-852-XMXM (9696).
XM Updating Updating encryption
codeThe encryption code in your receiver is being updated, and
no action is required. This process should take no longer
than 30 seconds.
No XM signal Loss of signal Your system is functioning correctly, but you are in a
location that is blocking the XM signal. When you move
into an open area, the signal should return.
Loading XM Acquiring channel audio
(after 4 second delay)Your radio system is acquiring and processing audio and
text data. No action is needed. This message should
disappear shortly.
Channel Off Air Channel not in service This channel is not currently in service. Tune in to another
channel.
Channel Unavail Channel no longer
availableThis previously assigned channel is no longer assigned.
Tune to another station. If this station was one of your
presets, you may need to choose another station for that
preset button.
No Artist Info Artist Name/Feature not
availableNo artist information is available at this time on this
channel. Your system is working properly.
No Title Info Song/Program Title not
availableNo song title information is available at this time on this
channel. Your system is working properly.
3-79
Page 193 of 410
Playing a CD
Insert a CD partway into the slot, label side up. The
player will pull it in. If the ignition and the radio are on
and the underlined CD symbol appears on the
display, the CD will begin playing. A CD may be loaded
with the radio off but it will not start playing until the
radio is on. If you want to insert a CD when the ignition
is off, first press the eject button.
If you turn off the ignition or radio with a CD in the
player it will stay in the player. When you turn on the
ignition or radio, the CD will start to play where it
stopped, if it was the last selected audio source.
As each new track starts to play, the track number will
appear on the display.
The CD player can play the smaller 8cm single CDs
with an adapter ring. Full-size CDs and the smaller CDs
are loaded in the same manner.
If playing a CD-R the sound quality may be reduced
due to CD-R quality, the method of recording, the quality
of the music that has been recorded, and the way the
CD-R has been handled. You may experience an
increase in skipping, difficulty in finding tracks, and/or
difficulty in loading and ejecting. If these problems occur
try a known good CD.Do not add paper labels to CDs, they could get caught
in the CD player.
Do not play 3-inch CDs without a standard adapter CD.
If an error appears on the display, see “CD Messages”
later in this section.
{RW (Rewind):Press and hold the left arrow to
reverse the CD. Release it to return to playing speed.
FF
|(Fast Forward):Press and hold the right arrow
to fast forward to another part of the CD. Release it
to return to playing speed.
¦TUNE SEEK¥:Press the up or the down arrow to
seek to the next or to the previous track.
1–6:Press this button to go to the next CD loaded in
the Console-Mounted CD Changer. See
Console-Mounted CD Changer on page 3-95for more
information.
RDM (Random):Press this pushbutton to listen to the
tracks in random, rather than sequential, order. RDM
will appear on the display. Press RDM to turn off random
play. RDM will disappear from the display.
3-81
Page 195 of 410
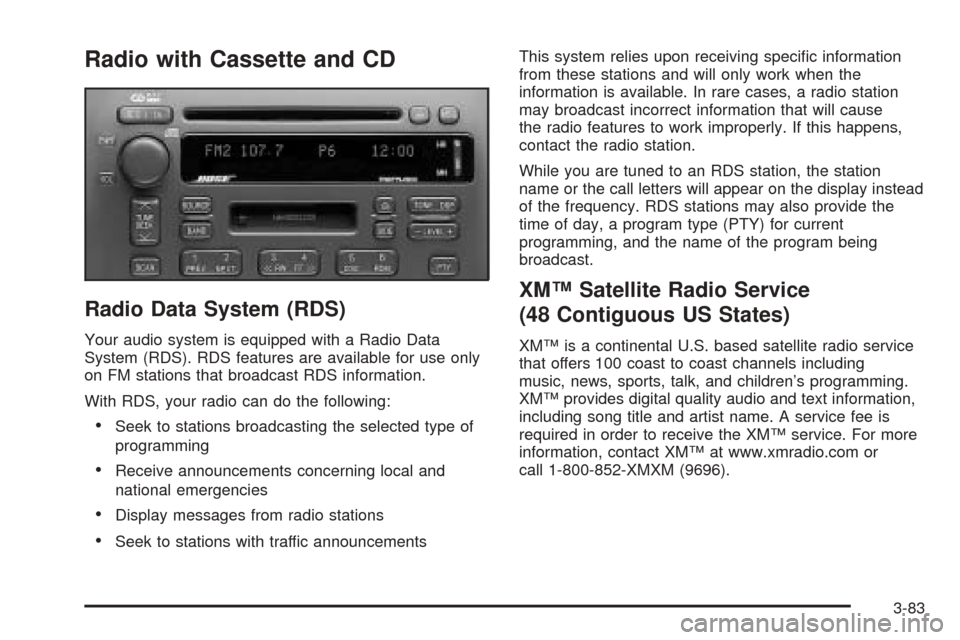
Radio with Cassette and CD
Radio Data System (RDS)
Your audio system is equipped with a Radio Data
System (RDS). RDS features are available for use only
on FM stations that broadcast RDS information.
With RDS, your radio can do the following:
•Seek to stations broadcasting the selected type of
programming
•Receive announcements concerning local and
national emergencies
•Display messages from radio stations
•Seek to stations with traffic announcementsThis system relies upon receiving specific information
from these stations and will only work when the
information is available. In rare cases, a radio station
may broadcast incorrect information that will cause
the radio features to work improperly. If this happens,
contact the radio station.
While you are tuned to an RDS station, the station
name or the call letters will appear on the display instead
of the frequency. RDS stations may also provide the
time of day, a program type (PTY) for current
programming, and the name of the program being
broadcast.
XM™ Satellite Radio Service
(48 Contiguous US States)
XM™ is a continental U.S. based satellite radio service
that offers 100 coast to coast channels including
music, news, sports, talk, and children’s programming.
XM™ provides digital quality audio and text information,
including song title and artist name. A service fee is
required in order to receive the XM™ service. For more
information, contact XM™ at www.xmradio.com or
call 1-800-852-XMXM (9696).
3-83