cooling CADILLAC SEVILLE 2004 5.G Owners Manual
[x] Cancel search | Manufacturer: CADILLAC, Model Year: 2004, Model line: SEVILLE, Model: CADILLAC SEVILLE 2004 5.GPages: 410, PDF Size: 2.64 MB
Page 71 of 410
Trunk
{CAUTION:
It can be dangerous to drive with the trunk lid
open because carbon monoxide (CO) gas can
come into your vehicle. You can not see or
smell CO. It can cause unconsciousness and
even death. If you must drive with the trunk lid
open or if electrical wiring or other cable
connections must pass through the seal
between the body and the trunk lid:
•Make sure all other windows are shut.
•Turn the fan on your heating or cooling
system to its highest speed and select the
control setting that will force outside air
into your vehicle. See Climate Control
System in the Index.
•If you have air outlets on or under the
instrument panel, open them all the way.
SeeEngine Exhaust on page 2-35.
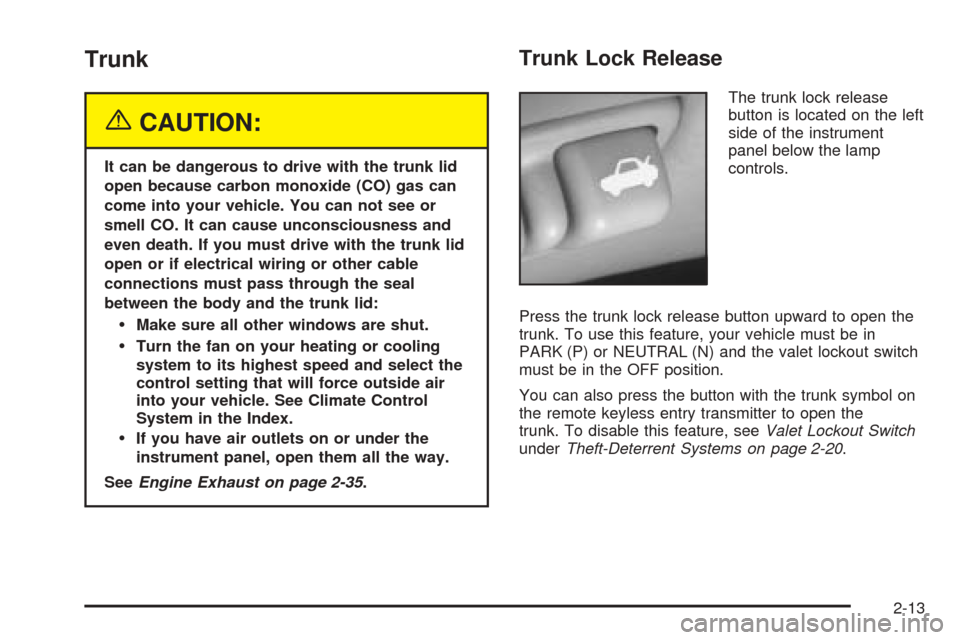
Trunk Lock Release
The trunk lock release
button is located on the left
side of the instrument
panel below the lamp
controls.
Press the trunk lock release button upward to open the
trunk. To use this feature, your vehicle must be in
PARK (P) or NEUTRAL (N) and the valet lockout switch
must be in the OFF position.
You can also press the button with the trunk symbol on
the remote keyless entry transmitter to open the
trunk. To disable this feature, seeValet Lockout Switch
underTheft-Deterrent Systems on page 2-20.
2-13
Page 72 of 410
Trunk Lid Tie Down
{CAUTION:
Driving with the trunk lid open can allow
dangerous CO (carbon monoxide) gas to come
into your vehicle. You can not see or smell CO.
It can cause unconsciousness and even death.
If you ever need to drive with your trunk lid
open, then:
•Make sure all windows, the rear seat
pass-through and sunroof are closed.
•Turn the fan on your heating and cooling
system to its highest speed, with the
setting on AUTO and temperature between
65°F (18°C) and 85°F (29°C). This forces
fresh outside air into your vehicle.
•Open all air ducts on the instrument panel.
Do not use the trunk lid tie down if you are
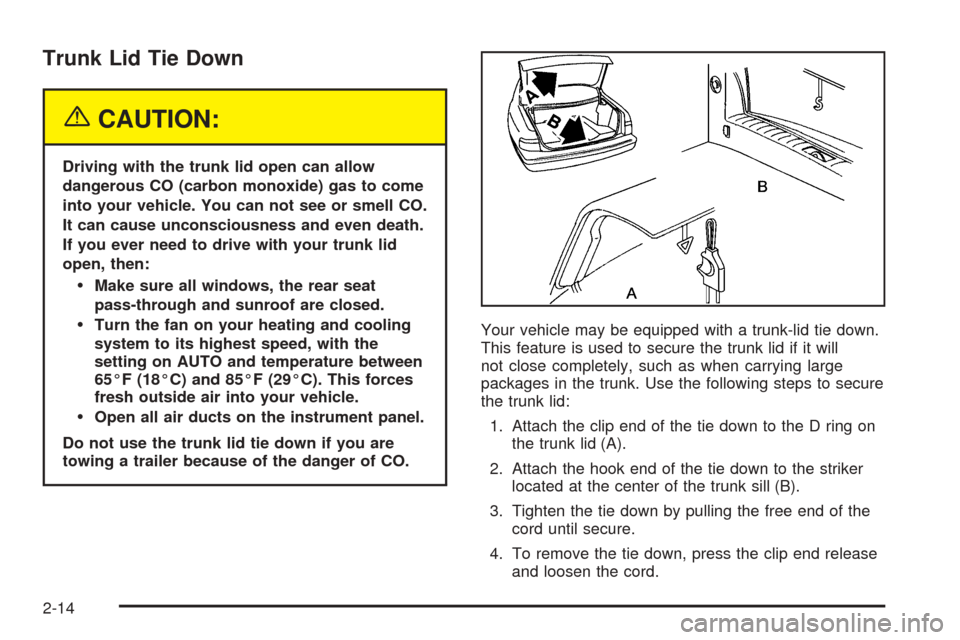
towing a trailer because of the danger of CO.Your vehicle may be equipped with a trunk-lid tie down.
This feature is used to secure the trunk lid if it will
not close completely, such as when carrying large
packages in the trunk. Use the following steps to secure
the trunk lid:
1. Attach the clip end of the tie down to the D ring on
the trunk lid (A).
2. Attach the hook end of the tie down to the striker
located at the center of the trunk sill (B).
3. Tighten the tie down by pulling the free end of the
cord until secure.
4. To remove the tie down, press the clip end release
and loosen the cord.
2-14
Page 135 of 410
Entry Lighting
The entry lighting system automatically turns on the
courtesy lamps and the backlighting to the door switches
and to the exterior lamp control when a door is opened
or if you press the remote keyless entry transmitter
unlock button. If activated due to the transmitter,
the lighting will remain active for about 40 seconds.
Since the entry lighting system uses the light sensor, it
must be dark outside in order for the courtesy lamps
to turn on. The courtesy lamps turn off approximately
25 seconds after the last door is closed. They will dim to
off if the ignition key is placed in ON, or immediately
deactivate if the power locks are activated.
Parade Dimming
This feature prohibits dimming of the digital displays and
backlighting during daylight hours when the key is in
the ignition and the headlamps are on. This feature
operates with the light sensor for the Twilight
Sentinel
®and is fully automatic. When the light sensor
reads darkness outside and the parking lamps are
active, the digital displays can be adjusted by turning
the instrument panel brightness knob counterclockwise
to dim and clockwise to brighten lighting.
Reading Lamps
The front reading lamps are located in the overhead
console. These lamps and the interior courtesy lamps
come on when a door is opened and it is dark outside.
The rear reading lamps will not come on when a
front door is opened.
The rear courtesy lamps are located on the rear
headliner above the rear seat outboard positions. When
a rear door is opened, both the front and rear reading
lamps come on with the courtesy lamps.
Press the button near each lamp to turn it on and off.
If the reading lamps are left on, they automatically shut
off 10 minutes after the ignition has been turned off.
Battery Load Management
The battery load management feature is designed to
monitor the vehicle’s electrical load and determine when
the battery is in a heavy discharge condition. During
times of high electrical loading, the engine may idle at a
higher revolutions per minute (rpm) setting than
normal to make sure the battery charges. High electrical
loads may occur when several of the following are
on: headlamps, high beams, fog lamps, rear window
defogger, the climate control fan at high speeds, heated
seats and engine cooling fans.
3-23
Page 140 of 410
Climate Controls
Dual Climate Control System
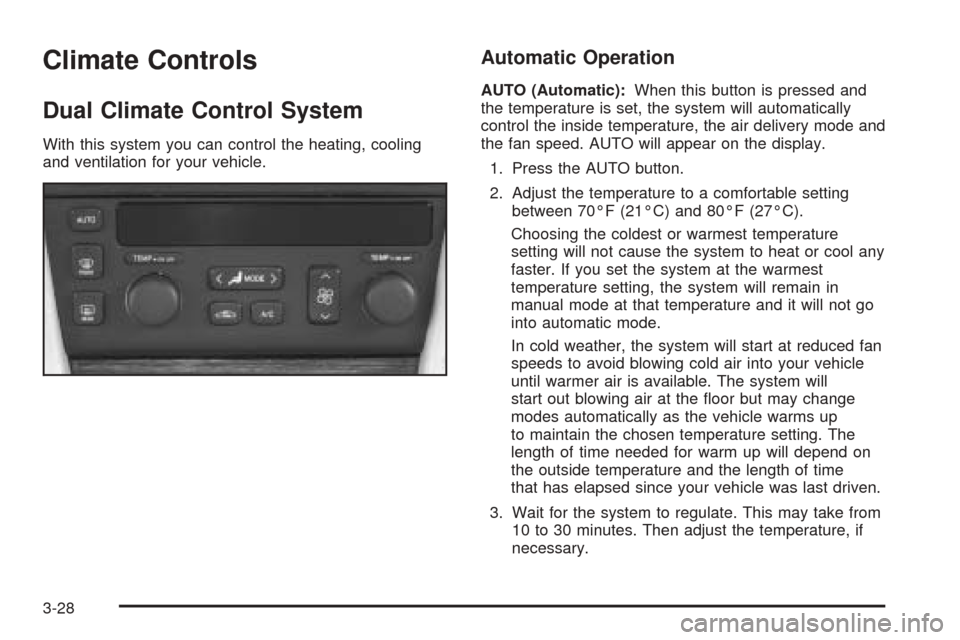
With this system you can control the heating, cooling
and ventilation for your vehicle.
Automatic Operation
AUTO (Automatic):When this button is pressed and
the temperature is set, the system will automatically
control the inside temperature, the air delivery mode and
the fan speed. AUTO will appear on the display.
1. Press the AUTO button.
2. Adjust the temperature to a comfortable setting
between 70°F (21°C) and 80°F (27°C).
Choosing the coldest or warmest temperature
setting will not cause the system to heat or cool any
faster. If you set the system at the warmest
temperature setting, the system will remain in
manual mode at that temperature and it will not go
into automatic mode.
In cold weather, the system will start at reduced fan
speeds to avoid blowing cold air into your vehicle
until warmer air is available. The system will
start out blowing air at the floor but may change
modes automatically as the vehicle warms up
to maintain the chosen temperature setting. The
length of time needed for warm up will depend on
the outside temperature and the length of time
that has elapsed since your vehicle was last driven.
3. Wait for the system to regulate. This may take from
10 to 30 minutes. Then adjust the temperature, if
necessary.
3-28
Page 168 of 410
CHANGE ENGINE OIL – 82:This means that the life
of the engine oil has expired and it should be changed
within 200 miles. After an oil change, the Oil Life
Indicator must be reset. SeeOil Life Indicator on
page 3-74. SeeEngine Oil on page 5-13.
CHANGE TRANS FLUID – 47:This message will
appear when it is time to change the transaxle fluid. See
Scheduled Maintenance on page 6-4for the proper
fluid and change intervals.
CHECK BRAKE FLUID – 37:This message will
display if the ignition is in ON to inform the driver that
the brake fluid level is low. Have the brake system
serviced by a technician as soon as possible. SeeBrake
System Warning and Parking Brake Indicator Light on
page 3-43.
CHECK COOLANT LEVEL – 2:This message will
appear when there is a low level of engine coolant. Have
the cooling system serviced by a technician as soon
as possible. SeeEngine Coolant on page 5-23.
CHECK FUEL GAGE – 50:This message will appear
when the fuel supply is less than 5 gallons (18.9 L)
and the display is turned off. A single chime will also
sound when this message is displayed.CHECK GAS CAP – 61:This message will appear if
the gas cap has not been fully tightened. You should
recheck your gas cap to ensure that it is on properly.
CHECK OIL LEVEL – 36:For correct operation of the
low oil sensing system, your vehicle should be on a
level surface. A false CHECK OIL LEVEL message may
appear if the vehicle is parked on a grade. The oil
level sensing system does not check for actual oil level
if the engine has been off for a short period of time,
and the oil level is never checked while the engine is
running. If the CHECK OIL LEVEL message appears,
and your vehicle has been parked on level ground
with the engine off for at least 30 minutes, the oil level
should be checked by observing the oil dipstick. Prior to
checking the oil level, be sure the engine has been
off for a few minutes and your vehicle is on a level
surface. Then check the dipstick and add oil if
necessary. SeeEngine Oil on page 5-13.
3-56
Page 239 of 410
If you drive regularly in steep country, or if you are
planning to visit there, here are some tips that can make
your trips safer and more enjoyable.
•Keep your vehicle in good shape. Check all fluid
levels and also the brakes, tires, cooling system
and transaxle. These parts can work hard on
mountain roads.
•Know how to go down hills. The most important
thing to know is this: let your engine do some of
the slowing down. Shift to a lower gear when you go
down a steep or long hill.
{CAUTION:
If you do not shift down, your brakes could get
so hot that they would not work well. You
would then have poor braking or even none
going down a hill. You could crash. Shift down
to let your engine assist your brakes on a
steep downhill slope.
{CAUTION:
Coasting downhill in NEUTRAL (N) or with the
ignition off is dangerous. Your brakes will have
to do all the work of slowing down. They could
get so hot that they would not work well. You
would then have poor braking or even none
going down a hill. You could crash. Always
have your engine running and your vehicle in
gear when you go downhill.
•Know how to go uphill. You may want to shift down
to a lower gear. The lower gears help you climb the
hill better.
•Stay in your own lane when driving on two-lane
roads in hills or mountains. Do not swing wide
or cut across the center of the road. Drive at speeds
that let you stay in your own lane.
•As you go over the top of a hill, be alert. There
could be something in your lane, like a stalled car or
an accident.
•You may see highway signs on mountains that warn
of special problems. Examples are long grades,
passing or no-passing zones, a falling rocks area or
winding roads. Be alert to these and take appropriate
action.
4-23
Page 259 of 410
Driving on Grades
Reduce speed and shift to a lower gearbeforeyou start
down a long or steep downgrade. If you do not shift
down, you might have to use your brakes so much that
they would get hot and no longer work well.
On long uphill grades, reduce speed to 45 to 50 mph
(70 to 90 km/h) and avoid prolonged use of SECOND (2)
gear and engine speeds above 3800 rpm.
Climbing grades steeper than four percent at
temperatures above 90° F (32° C) with a loaded vehicle
and trailer is not recommended. The cooling system
may temporarily overheat. SeeEngine Overheating on
page 5-26.
Parking on Hills
{CAUTION:
You really should not park your vehicle, with a
trailer attached, on a hill. If something goes
wrong, your rig could start to move. People
can be injured, and both your vehicle and the
trailer can be damaged.
But if you ever have to park your rig on a hill, here is
how to do it:
1. Apply your regular brakes, but do not shift into
PARK (P).
2. Have someone place chocks behind the trailer
wheels.
3. When the wheel chocks are in place, release the
regular brakes until the chocks absorb the load.
4. Reapply the regular brakes. Then shift into
PARK (P) firmly and apply your parking brake.
5. Release the regular brakes.
4-43
Page 260 of 410
When You Are Ready to Leave After
Parking on a Hill:
1. Apply your regular brakes and hold the pedal down
while you:
•start your engine,
•shift into a gear, and
•make sure the parking brake has released.
2. Let up on the brake pedal.
3. Drive slowly until the trailer is clear of the chocks.
4. Stop and have someone pick up and store the
chocks.
Maintenance When Trailer Towing
Your vehicle will need service more often when you are
pulling a trailer. See the Maintenance Schedule for
more on this. Things that are especially important in
trailer operation are automatic transaxle fluid (do
not overfill), engine oil, drive belt, cooling system and
brake system. Each of these is covered in this manual,
and the Index will help you find them quickly. If you
are trailering, it is a good idea to review this information
before you start your trip.
Check periodically to see that all hitch nuts and bolts
are tight.
Engine Cooling When Trailer Towing
Your cooling system may temporarily overheat during
severe operating conditions. SeeEngine Overheating on
page 5-26.
4-44
Page 261 of 410
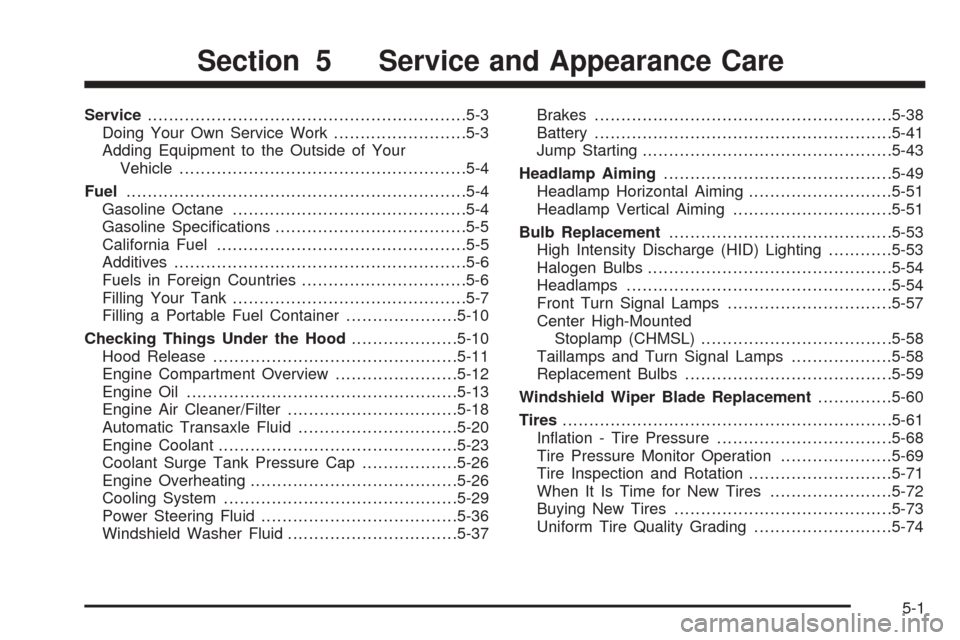
Service............................................................5-3
Doing Your Own Service Work.........................5-3
Adding Equipment to the Outside of Your
Vehicle......................................................5-4
Fuel................................................................5-4
Gasoline Octane............................................5-4
Gasoline Specifications....................................5-5
California Fuel...............................................5-5
Additives.......................................................5-6
Fuels in Foreign Countries...............................5-6
Filling Your Tank............................................5-7
Filling a Portable Fuel Container.....................5-10
Checking Things Under the Hood....................5-10
Hood Release..............................................5-11
Engine Compartment Overview.......................5-12
Engine Oil...................................................5-13
Engine Air Cleaner/Filter................................5-18
Automatic Transaxle Fluid..............................5-20
Engine Coolant.............................................5-23
Coolant Surge Tank Pressure Cap..................5-26
Engine Overheating.......................................5-26
Cooling System............................................5-29
Power Steering Fluid.....................................5-36
Windshield Washer Fluid................................5-37Brakes........................................................5-38
Battery........................................................5-41
Jump Starting...............................................5-43
Headlamp Aiming...........................................5-49
Headlamp Horizontal Aiming...........................5-51
Headlamp Vertical Aiming..............................5-51
Bulb Replacement..........................................5-53
High Intensity Discharge (HID) Lighting............5-53
Halogen Bulbs..............................................5-54
Headlamps..................................................5-54
Front Turn Signal Lamps...............................5-57
Center High-Mounted
Stoplamp (CHMSL)....................................5-58
Taillamps and Turn Signal Lamps...................5-58
Replacement Bulbs.......................................5-59
Windshield Wiper Blade Replacement..............5-60
Tires..............................................................5-61
Inflation - Tire Pressure.................................5-68
Tire Pressure Monitor Operation.....................5-69
Tire Inspection and Rotation...........................5-71
When It Is Time for New Tires.......................5-72
Buying New Tires.........................................5-73
Uniform Tire Quality Grading..........................5-74
Section 5 Service and Appearance Care
5-1
Page 273 of 410
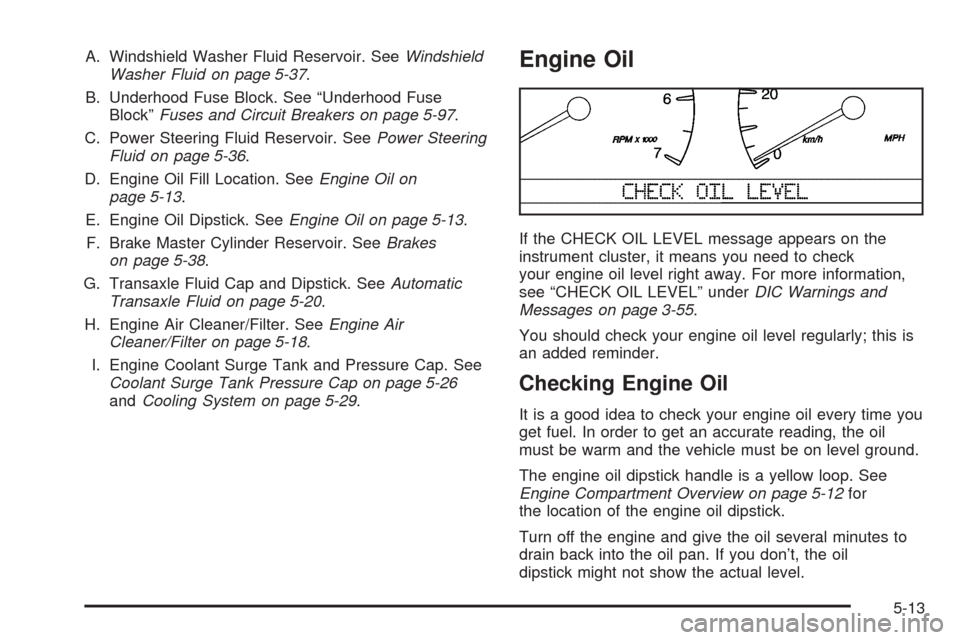
A. Windshield Washer Fluid Reservoir. SeeWindshield
Washer Fluid on page 5-37.
B. Underhood Fuse Block. See “Underhood Fuse
Block”Fuses and Circuit Breakers on page 5-97.
C. Power Steering Fluid Reservoir. SeePower Steering
Fluid on page 5-36.
D. Engine Oil Fill Location. SeeEngine Oil on
page 5-13.
E. Engine Oil Dipstick. SeeEngine Oil on page 5-13.
F. Brake Master Cylinder Reservoir. SeeBrakes
on page 5-38.
G. Transaxle Fluid Cap and Dipstick. SeeAutomatic
Transaxle Fluid on page 5-20.
H. Engine Air Cleaner/Filter. SeeEngine Air
Cleaner/Filter on page 5-18.
I. Engine Coolant Surge Tank and Pressure Cap. See
Coolant Surge Tank Pressure Cap on page 5-26
andCooling System on page 5-29.Engine Oil
If the CHECK OIL LEVEL message appears on the
instrument cluster, it means you need to check
your engine oil level right away. For more information,
see “CHECK OIL LEVEL” underDIC Warnings and
Messages on page 3-55.
You should check your engine oil level regularly; this is
an added reminder.
Checking Engine Oil
It is a good idea to check your engine oil every time you
get fuel. In order to get an accurate reading, the oil
must be warm and the vehicle must be on level ground.
The engine oil dipstick handle is a yellow loop. See
Engine Compartment Overview on page 5-12for
the location of the engine oil dipstick.
Turn off the engine and give the oil several minutes to
drain back into the oil pan. If you don’t, the oil
dipstick might not show the actual level.
5-13