tow CADILLAC SEVILLE 2004 5.G Owners Manual
[x] Cancel search | Manufacturer: CADILLAC, Model Year: 2004, Model line: SEVILLE, Model: CADILLAC SEVILLE 2004 5.GPages: 410, PDF Size: 2.64 MB
Page 1 of 410
Seats and Restraint Systems........................... 1-1
Front Seats
............................................... 1-2
Safety Belts
.............................................. 1-5
Child Restraints
.......................................1-22
Supplemental Inflatable Restraint (SIR)
........1-41
Restraint System Check
............................1-50
Features and Controls..................................... 2-1
Keys
........................................................ 2-3
Doors and Locks
....................................... 2-9
Windows
.................................................2-16
Theft-Deterrent Systems
............................2-20
Starting and Operating Your Vehicle
...........2-24
Mirrors
....................................................2-37
OnStar
®System
......................................2-42
HomeLink®Transmitter
.............................2-44
Storage Areas
.........................................2-49
Sunroof
..................................................2-50
Vehicle Personalization
.............................2-52
Instrument Panel............................................. 3-1
Instrument Panel Overview
.......................... 3-4
Climate Controls
......................................3-28
Warning Lights, Gages and Indicators
.........3-37
Driver Information Center (DIC)
..................3-52Trip Computer
.........................................3-74
Audio System(s)
.......................................3-75
Driving Your Vehicle....................................... 4-1
Your Driving, the Road, and Your Vehicle
..... 4-2
Towing
...................................................4-29
Service and Appearance Care.......................... 5-1
Service
..................................................... 5-3
Fuel
......................................................... 5-4
Checking Things Under the Hood
...............5-10
Headlamp Aiming
.....................................5-49
Bulb Replacement
....................................5-53
Windshield Wiper Blade Replacement
.........5-60
Tires
......................................................5-61
Appearance Care
.....................................5-87
Vehicle Identification
.................................5-95
Electrical System
......................................5-96
Capacities and Specifications
...................5-104
Maintenance Schedule..................................... 6-1
Maintenance Schedule
................................ 6-2
Customer Assistance and Information.............. 7-1
Customer Assistance and Information
........... 7-2
Reporting Safety Defects
...........................7-11
Index................................................................ 1
2004 Cadillac Seville Owner ManualM
Page 30 of 410
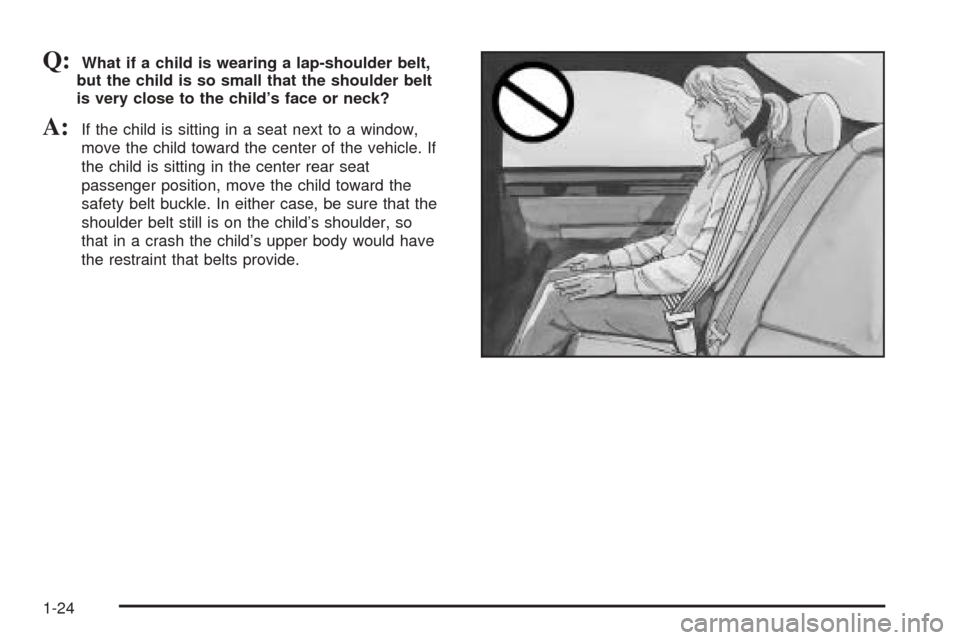
Q:What if a child is wearing a lap-shoulder belt,
but the child is so small that the shoulder belt
is very close to the child’s face or neck?
A:If the child is sitting in a seat next to a window,
move the child toward the center of the vehicle. If
the child is sitting in the center rear seat
passenger position, move the child toward the
safety belt buckle. In either case, be sure that the
shoulder belt still is on the child’s shoulder, so
that in a crash the child’s upper body would have
the restraint that belts provide.
1-24
Page 35 of 410
Child Restraint Systems
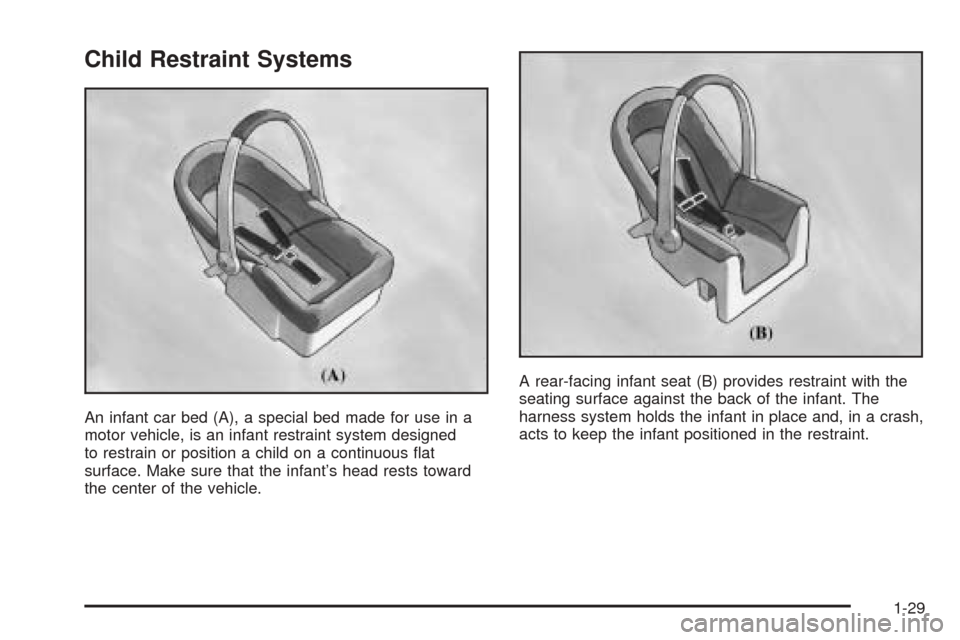
An infant car bed (A), a special bed made for use in a
motor vehicle, is an infant restraint system designed
to restrain or position a child on a continuous flat
surface. Make sure that the infant’s head rests toward
the center of the vehicle.A rear-facing infant seat (B) provides restraint with the
seating surface against the back of the infant. The
harness system holds the infant in place and, in a crash,
acts to keep the infant positioned in the restraint.
1-29
Page 54 of 410
How Does an Air Bag Restrain?
In moderate to severe frontal or near frontal collisions,
even belted occupants can contact the steering wheel or
the instrument panel. In moderate to severe side
collisions, even belted occupants can contact the inside
of the vehicle. The air bag supplements the protection
provided by safety belts. Air bags distribute the force of
the impact more evenly over the occupant’s upper
body, stopping the occupant more gradually. But the
frontal air bags would not help you in many types
of collisions, including rollovers, rear impacts, and many
side impacts, primarily because an occupant’s motion
is not toward the air bag. Side impact air bags would not
help you in many types of collisions, including frontal
or near frontal collisions, rollovers, and rear impacts,
primarily because an occupant’s motion is not toward
those air bags. Air bags should never be regarded
as anything more than a supplement to safety belts, and
then only in moderate to severe frontal or near-frontal
collisions for the driver’s and right front passenger’s
frontal air bags, and only in moderate to severe
side collisions for the driver’s and right front passenger’s
side impact air bag.
What Will You See After an Air Bag
Inflates?
After the air bag inflates, it quickly deflates, so quickly that
some people may not even realize the air bag inflated.
Some components of the air bag module – the steering
wheel hub for the driver’s air bag, the instrument panel for
the right front passenger’s bag, the side of the seatback
closest to the door for the driver and right front
passenger’s side impact air bags – will be hot for a short
time. The parts of the bag that come into contact with you
may be warm, but not too hot to touch. There will be
some smoke and dust coming from the vents in the
deflated air bags. Air bag inflation doesn’t prevent the
driver from seeing or being able to steer the vehicle, nor
does it stop people from leaving the vehicle.
{CAUTION:
When an air bag inflates, there is dust in the
air. This dust could cause breathing problems
for people with a history of asthma or other
breathing trouble.
CAUTION: (Continued)
1-48
Page 72 of 410
Trunk Lid Tie Down
{CAUTION:
Driving with the trunk lid open can allow
dangerous CO (carbon monoxide) gas to come
into your vehicle. You can not see or smell CO.
It can cause unconsciousness and even death.
If you ever need to drive with your trunk lid
open, then:
•Make sure all windows, the rear seat
pass-through and sunroof are closed.
•Turn the fan on your heating and cooling
system to its highest speed, with the
setting on AUTO and temperature between
65°F (18°C) and 85°F (29°C). This forces
fresh outside air into your vehicle.
•Open all air ducts on the instrument panel.
Do not use the trunk lid tie down if you are
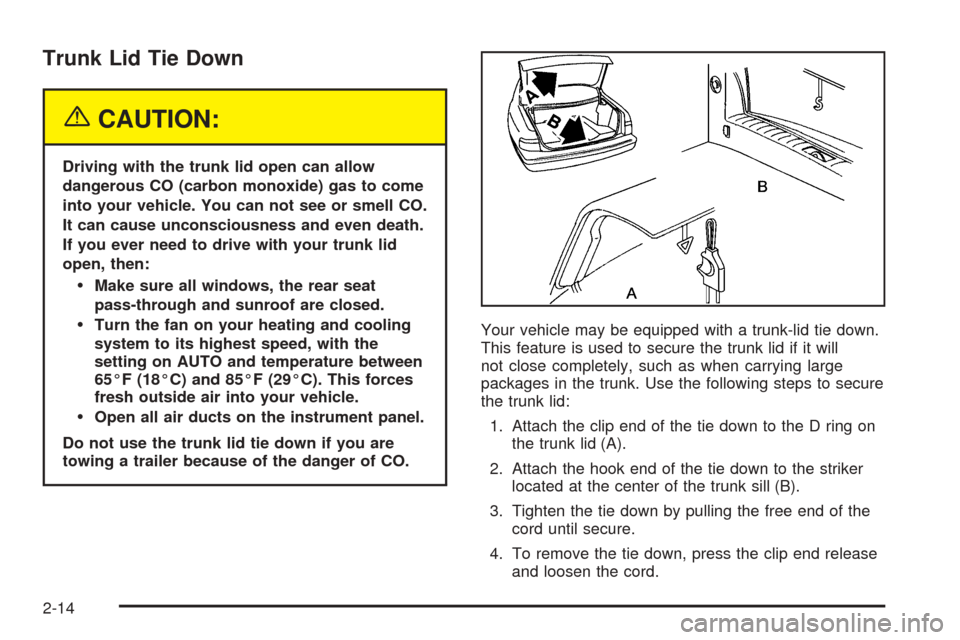
towing a trailer because of the danger of CO.Your vehicle may be equipped with a trunk-lid tie down.
This feature is used to secure the trunk lid if it will
not close completely, such as when carrying large
packages in the trunk. Use the following steps to secure
the trunk lid:
1. Attach the clip end of the tie down to the D ring on
the trunk lid (A).
2. Attach the hook end of the tie down to the striker
located at the center of the trunk sill (B).
3. Tighten the tie down by pulling the free end of the
cord until secure.
4. To remove the tie down, press the clip end release
and loosen the cord.
2-14
Page 82 of 410
If you are ever driving and the SECURITY light comes
on and stays on, you will be able to restart your
engine if you turn it off. Your PASS- Key
®III system,
however, is not working properly and must be serviced
by your dealer. Your vehicle is not protected by the
PASS-Key
®III system at this time.
If you lose or damage a PASS-Key
®III key, contact
your dealer to have a new key made.
In an emergency, contact Cadillac Roadside Assistance.
SeeRoadside Service on page 7-6.
Starting and Operating Your
Vehicle
New Vehicle Break-In
Notice:Your vehicle does not need an elaborate
“break-in.” But it will perform better in the long run
if you follow these guidelines:
•Do not drive at any one speed — fast or
slow — for the first 500 miles (805 km). Do not
make full-throttle starts.
•Avoid making hard stops for the first 200 miles
(322 km) or so. During this time your new brake
linings are not yet broken in. Hard stops with new
linings can mean premature wear and earlier
replacement. Follow this breaking-in guideline
every time you get new brake linings.
•Do not tow a trailer during break-in. SeeTowing a
Trailer on page 4-37for more information.
2-24
Page 83 of 410
Ignition Positions
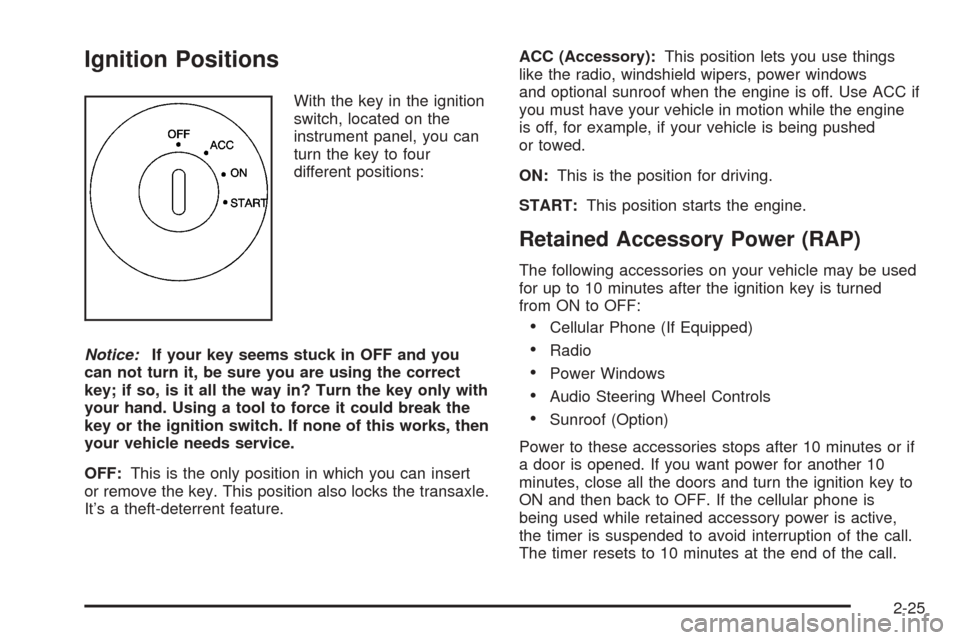
With the key in the ignition
switch, located on the
instrument panel, you can
turn the key to four
different positions:
Notice:If your key seems stuck in OFF and you
can not turn it, be sure you are using the correct
key; if so, is it all the way in? Turn the key only with
your hand. Using a tool to force it could break the
key or the ignition switch. If none of this works, then
your vehicle needs service.
OFF:This is the only position in which you can insert
or remove the key. This position also locks the transaxle.
It’s a theft-deterrent feature.ACC (Accessory):This position lets you use things
like the radio, windshield wipers, power windows
and optional sunroof when the engine is off. Use ACC if
you must have your vehicle in motion while the engine
is off, for example, if your vehicle is being pushed
or towed.
ON:This is the position for driving.
START:This position starts the engine.
Retained Accessory Power (RAP)
The following accessories on your vehicle may be used
for up to 10 minutes after the ignition key is turned
from ON to OFF:
•Cellular Phone (If Equipped)
•Radio
•Power Windows
•Audio Steering Wheel Controls
•Sunroof (Option)
Power to these accessories stops after 10 minutes or if
a door is opened. If you want power for another 10
minutes, close all the doors and turn the ignition key to
ON and then back to OFF. If the cellular phone is
being used while retained accessory power is active,
the timer is suspended to avoid interruption of the call.
The timer resets to 10 minutes at the end of the call.
2-25
Page 87 of 410
{CAUTION:
It is dangerous to get out of your vehicle if the
shift lever is not fully in PARK (P) with the
parking brake firmly set. Your vehicle can roll.
Do not leave your vehicle when the engine is
running unless you have to. If you have left the
engine running, the vehicle can move
suddenly. You or others could be injured. To
be sure your vehicle will not move, even when
you are on fairly level ground, always set your
parking brake and move the shift lever to
PARK (P). SeeShifting Into Park (P) on
page 2-32. If you are pulling a trailer, see
Towing a Trailer on page 4-37.Ensure the shift lever is fully in PARK (P) before starting
the engine. Your vehicle has an automatic transaxle
shift lock control system. You have to fully apply
your regular brakes before you can shift from PARK (P)
while the ignition key is in ON. If you cannot shift the
shift lever all the way into PARK (P), ease pressure on
the shift lever and push the shift lever all the way
into PARK (P) as you maintain brake application. Then
move the shift lever into the gear you wish. See
Shifting Out of Park (P) on page 2-34.
REVERSE (R):Use this gear to backup.
Notice:Shifting to REVERSE (R) while your vehicle
is moving forward could damage the transaxle.
The repairs would not be covered by your warranty.
Shift to REVERSE (R) only after your vehicle is
stopped.
Also use this gear to rock your vehicle back and forth to
get out of snow, ice or sand without damaging your
transaxle. SeeIf You Are Stuck: In Sand, Mud, Ice or
Snow on page 4-28for additional information.
2-29
Page 88 of 410
NEUTRAL (N):In this position, the engine does not
connect with the wheels. To restart when you are
already moving, use NEUTRAL (N) only. Also use
NEUTRAL (N) when your vehicle is being towed.
{CAUTION:
Shifting into a drive gear while your engine is
running at high speed is dangerous. Unless
your foot is firmly on the brake pedal, your
vehicle could move very rapidly. You could
lose control and hit people or objects. Do not
shift into a drive gear while your engine is
running at high speed.
AUTOMATIC OVERDRIVE (
X):This position is for
normal driving. If you need more power for passing, and
you are:
•Going less than 35 mph (55 km/h), push the
accelerator pedal about halfway down.
•Going about 35 mph (55 km/h) or more, push the
accelerator all the way down.
The transaxle will shift down to the next gear and
have more power.Notice:Driving your vehicle if you notice that it is
moving slowly or not shifting gears as you increase
speed may damage the transaxle. Have your vehicle
serviced right away. You can drive in SECOND (2)
when you are driving less than 35 mph (55 km/h) and
AUTOMATIC OVERDRIVE (D) for higher speeds
until then.
THIRD (3):This position is also used for normal driving,
however, it offers more power and lower fuel economy
than AUTOMATIC OVERDRIVE (
X).
Here are examples for using THIRD (3) instead of
AUTOMATIC OVERDRIVE (
X):
•When driving on hilly, winding roads.
•When going down a steep hill.
SECOND (2):This position gives you more power. You
can use SECOND (2) on hills. It can help control your
speed as you go down steep mountain roads, but then
you would also want to use your brakes off and on.
Notice:Do not shift into SECOND (2) unless you
are going slower than 65 mph (105 km/h), or you can
damage your engine.
FIRST (1):This position gives you even more power
than SECOND (2). You can use it on very steep hills, or
in deep snow or mud.
2-30
Page 89 of 410
If the traction control switch is off, your vehicle will not
go into FIRST (1) gear and the vehicle will accelerate
from stop more slowly. This can help in deep snow
or mud conditions. When the traction control is turned
off, a message will light up on the Driver Information
Center (DIC).
Notice:Spinning the tires or holding the vehicle in
one place on a hill using only the accelerator
pedal may damage the transaxle. If you are stuck,
do not spin the tires. When stopping on a hill,
use the brakes to hold the vehicle in place.
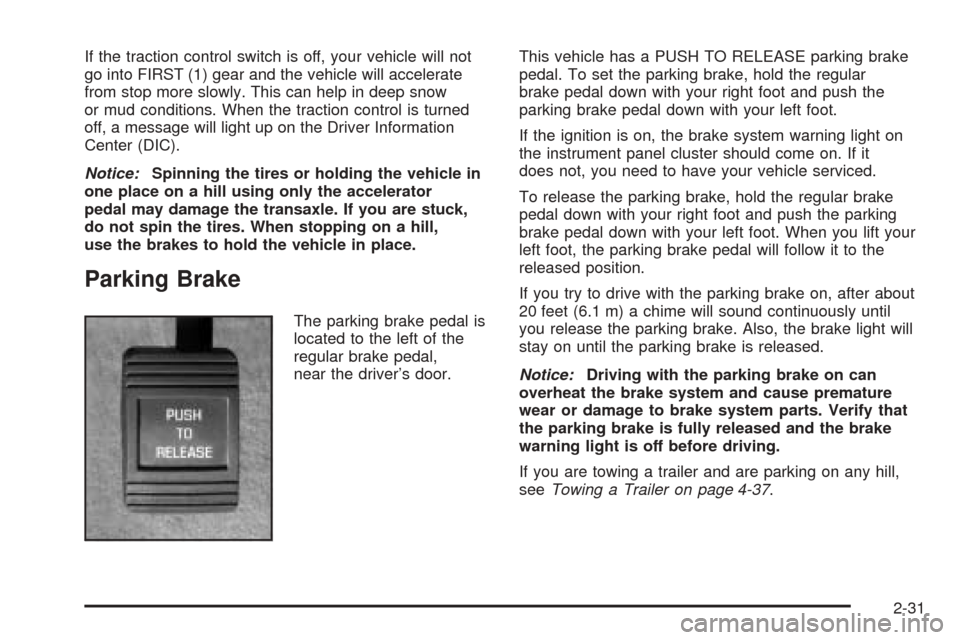
Parking Brake
The parking brake pedal is
located to the left of the
regular brake pedal,
near the driver’s door.This vehicle has a PUSH TO RELEASE parking brake
pedal. To set the parking brake, hold the regular
brake pedal down with your right foot and push the
parking brake pedal down with your left foot.
If the ignition is on, the brake system warning light on
the instrument panel cluster should come on. If it
does not, you need to have your vehicle serviced.
To release the parking brake, hold the regular brake
pedal down with your right foot and push the parking
brake pedal down with your left foot. When you lift your
left foot, the parking brake pedal will follow it to the
released position.
If you try to drive with the parking brake on, after about
20 feet (6.1 m) a chime will sound continuously until
you release the parking brake. Also, the brake light will
stay on until the parking brake is released.
Notice:Driving with the parking brake on can
overheat the brake system and cause premature
wear or damage to brake system parts. Verify that
the parking brake is fully released and the brake
warning light is off before driving.
If you are towing a trailer and are parking on any hill,
seeTowing a Trailer on page 4-37.
2-31