display CADILLAC SRX 2006 1.G Repair Manual
[x] Cancel search | Manufacturer: CADILLAC, Model Year: 2006, Model line: SRX, Model: CADILLAC SRX 2006 1.GPages: 456, PDF Size: 2.55 MB
Page 234 of 456
Ejecting a Disc
Press the eject button on the DVD player faceplate to
eject the disc. There is not an eject button on the remote
control.
If a disc is ejected from the player, but is not removed,
the DVD player will reload the disc within 25 to
30 seconds. The disc will be stored in the DVD player.
The DVD player will not resume play of the disc
automatically.
DVD Messages
The following errors may be displayed on the video
screen:
Disc Format Error:This message will be displayed
if a disc is inserted upside down, if the disc is not
readable, or if the disc format is not compatible. The
disc will be automatically ejected from the
DVD player.
Load/Eject Error:This message will be displayed if
the disc is not properly loaded or ejected.
Disc Play Error:This message will be displayed if
the DVD player cannot play the disc. Severely
scratched or damaged discs will cause this error.
The disc will be automatically ejected from the
DVD player.
Region Code Error:This message will be
displayed if the region code of the DVD is not
compatible with the DVD player. The disc will be
automatically ejected from the DVD player.
No Disc:This message will be displayed if the
PLAY button is pressed and no disc is in the player.
Parental Control Button:This button is located on the
navigation system screen. Press this button while a
DVD or CD is playing to freeze the video and mute the
audio. The video screen will display Parental Control
ON and the power indicator light on the DVD player will
�ash. It will also disable all other button operations
from the remote control and the DVD player, with the
exception of the eject button. The driver will then be able
to gain the attention of the rear seat passengers.
Press this button again to restore normal operation of
the DVD player.
This button may also be used to turn the DVD player
power on and automatically resume play if the vehicle is
in an enabled power mode.
3-106
Page 236 of 456
y(Menu):Press this button to access the DVD
main menu.
z(Display):Press this button to switch the video
screen display features: color, contrast, brightness, tint,
and display mode (normal, full, and zoom). Normal
means the horizontal image is not stretched and
the borders at the left and right of the picture are blank.
Full means the horizontal image is stretched across
the display and all of the vertical lines are displayed. No
borders are present. Zoom means the horizontal
image is stretched up and down the display and the
image tends to be stretched at the borders instead of at
the middle. Borders are not displayed. Press the left
or right navigation keys up or down to select the display
mode. Use the Enter key to enter and select
adjustments.
q(Return):Press this button to exit the current
active menu and return to the previous menu. This
button will operate only when a DVD is playing and a
menu is active.
n(Up):Press this button to move up the menu list of
a DVD.
q(Down):Press this button to move down the menu
list of a DVD.
p(Left):Press this button to move to the left of the
menu list of a DVD.
o(Right):Press this button to move to the right of the
menu list of a DVD.
r(Enter):Press this button to select items within
a menu.
e(Audio):Press this button to open a menu that will
operate only when a DVD is playing. The format
and content of this function will vary for each disc.
{(Subtitle):Press this button to open a menu that
will operate only when a DVD is playing. The format and
content of this function will vary for each disc.
3-108
Page 238 of 456
Battery Replacement
To change the batteries, do the following:
1. Remove the battery compartment door located on
the bottom of the remote control.
2. Replace the two AA batteries in the compartment.
Make sure that they are installed correctly, using
the diagram on the inside of the battery
compartment.
3. Close the battery door securely.
If the remote control is to be stored for a long period of
time, remove the batteries and keep them in a cool,
dry place.
Tips and Troubleshooting Chart
Problem Recommended Action
No power. The ignition might not be
in on or accessory.
The parental control
button might have been
turned on. The power
indicator light will �ash.
Disc will not play. The system might be off.
The parental control
button might have been
turned on. The power
indicator light will �ash.
The system might be in
auxiliary source mode.
Press the MODE button
to switch between the
DVD player and the
auxiliary source.
The disc is upside down
or is not compatible.
The picture does not �ll
the screen. There are
black borders on the
top and bottom or on
both sides or it looks
stretched out.Press the DISP button on
the DVD player or on the
remote control. Change
the display mode.
3-110
Page 243 of 456
FM Stereo
FM stereo will give the best sound, but FM signals will
reach only about 10 to 40 miles (16 to 65 km). Tall
buildings or hills can interfere with FM signals, causing
the sound to fade in and out.
XM™ Satellite Radio Service
XM™ Satellite Radio Service gives digital radio
reception from coast-to-coast in the 48 contiguous
United States, and in Canada (if available). Just as with
FM, tall buildings or hills can interfere with satellite
radio signals, causing the sound to fade in and out. In
addition, traveling or standing under heavy foliage,
bridges, garages, or tunnels may cause loss of
XM signal for a period of time. The radio may display
NO XM SIGNAL to indicate interference.
Cellular Phone Usage
Cellular phone usage may cause interference with your
vehicle’s radio. This interference may occur when
making or receiving phone calls, charging the phone’s
battery, or simply having the phone on. This interference
is an increased level of static while listening to the
radio. If static is received while listening to the radio,
unplug the cellular phone and turn it off.
Care of Your CDs and DVDs
Handle CDs carefully. Store them in their original cases
or other protective cases and away from direct
sunlight and dust. The CD player scans the bottom
surface of the disc. If the surface of a CD is damaged,
such as cracked, broken, or scratched, the CD will
not play properly or not at all. If the surface of a CD is
soiled, take a soft, lint free cloth or dampen a clean, soft
cloth in a mild, neutral detergent solution mixed with
water, and clean it. Make sure the wiping process starts
from the center to the edge.
Do not touch the bottom side of a CD while handling it;
this could damage the surface. Pick up CDs by
grasping the outer edges or the edge of the hole and
the outer edge.
Care of the CD and DVD Player
The use of CD lens cleaners for CDs is not advised,
due to the risk of contaminating the lens of the CD optics
with lubricants internal to the CD mechanism.
3-115
Page 254 of 456
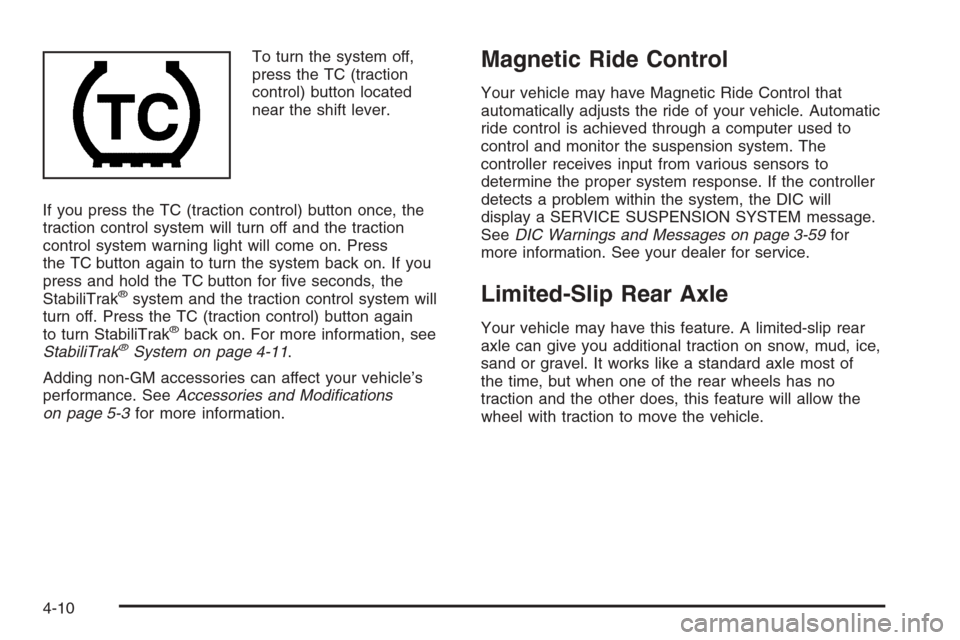
To turn the system off,
press the TC (traction
control) button located
near the shift lever.
If you press the TC (traction control) button once, the
traction control system will turn off and the traction
control system warning light will come on. Press
the TC button again to turn the system back on. If you
press and hold the TC button for �ve seconds, the
StabiliTrak
®system and the traction control system will
turn off. Press the TC (traction control) button again
to turn StabiliTrak
®back on. For more information, see
StabiliTrak®System on page 4-11.
Adding non-GM accessories can affect your vehicle’s
performance. SeeAccessories and Modi�cations
on page 5-3for more information.
Magnetic Ride Control
Your vehicle may have Magnetic Ride Control that
automatically adjusts the ride of your vehicle. Automatic
ride control is achieved through a computer used to
control and monitor the suspension system. The
controller receives input from various sensors to
determine the proper system response. If the controller
detects a problem within the system, the DIC will
display a SERVICE SUSPENSION SYSTEM message.
SeeDIC Warnings and Messages on page 3-59for
more information. See your dealer for service.
Limited-Slip Rear Axle
Your vehicle may have this feature. A limited-slip rear
axle can give you additional traction on snow, mud, ice,
sand or gravel. It works like a standard axle most of
the time, but when one of the rear wheels has no
traction and the other does, this feature will allow the
wheel with traction to move the vehicle.
4-10
Page 255 of 456
StabiliTrak®System
Your vehicle is equipped with a vehicle stability
enhancement system called StabiliTrak®.Itisan
advanced computer controlled system that assists
you with directional control of the vehicle in difficult
driving conditions.
StabiliTrak
®activates when the computer senses a
discrepancy between your intended path and the
direction the vehicle is actually traveling. StabiliTrak
®
selectively applies braking pressure at any one of
the vehicle’s brakes to help steer the vehicle in the
direction which you are steering.
When the system activates, a Stability System Engaged
message will be displayed on the Driver Information
Center. SeeDIC Warnings and Messages on page 3-59.
You may also hear a noise or feel vibration in the
brake pedal. This is normal. Continue to steer the
vehicle in the direction you want it to go.
If there is a problem detected with StabiliTrak
®,a
Service Stability System message will be displayed on
the Driver Information Center. SeeDIC Warnings
and Messages on page 3-59. When this message is
displayed, the system is not operational. Driving should
be adjusted accordingly.StabiliTrak
®comes on automatically whenever you
start your vehicle. To help assist you with directional
control of the vehicle, you should always leave the
system on. You can turn StabiliTrak
®off if you ever need
to through the TC (traction control) on/off button. See
Traction Control System (TCS) on page 4-9.
If your vehicle is in cruise control when the StabiliTrak
®
activates, the cruise control will automatically
disengage. When road conditions allow you to safely
use it again, you may reengage the cruise control. See
Cruise Control on page 3-12for more information.
Panic Brake Assist
Your vehicle has a panic brake assist system that
monitors the intention of the driver while braking. If the
system senses that the driver has applied hard/fast
pressure to the brake pedal, the system will generate
additional pressure, making it easier for the driver
to maintain brake application. When this happens the
brake pedal will feel easier to push. Just hold the brake
pedal down �rmly and let the system work for you.
You may feel the brakes vibrate, or you may notice
some noise but this is normal. The brakes will return to
normal operation after the brake pedal has been
released.
4-11
Page 313 of 456
While refueling, hang the tethered fuel cap from the
hook on the fuel door.
{CAUTION:
If you spill fuel and then something ignites it,
you could be badly burned. Fuel can spray out
on you if you open the fuel cap too quickly.
This spray can happen if your tank is nearly
full, and is more likely in hot weather. Open
the fuel cap slowly and wait for any hiss noise
to stop. Then unscrew the cap all the way.
Be careful not to spill fuel. Do not top off or over�ll the
tank, and wait a few seconds after you have �nished
pumping before removing the nozzle. Clean fuel
from painted surfaces as soon as possible. See
Washing Your Vehicle on page 5-88.
When replacing the fuel cap, turn it clockwise until it
clicks. Make sure the cap is fully installed. The
diagnostic system can determine if the fuel cap has
been left off or improperly installed. This would allow
fuel to evaporate into the atmosphere. SeeMalfunction
Indicator Lamp on page 3-43.The CHECK GAS CAP message will appear on the
Driver Information Center (DIC) display if the fuel cap is
not reinstalled properly. SeeDIC Warnings and
Messages on page 3-59for more information.{CAUTION:
If a �re starts while you are refueling, do not
remove the nozzle. Shut off the �ow of fuel
by shutting off the pump or by notifying the
station attendant. Leave the area immediately.
Notice:If you need a new fuel cap, be sure to get the
right type. Your dealer can get one for you. If you get
the wrong type, it may not �t properly. This may
cause your malfunction indicator lamp to light and
may damage your fuel tank and emissions system.
SeeMalfunction Indicator Lamp on page 3-43.
5-9
Page 324 of 456

When the system has calculated that oil life has been
diminished, it will indicate that an oil change is
necessary. A Change Engine Oil message in the DIC
will come on. Change your oil as soon as possible within
the next 600 miles (1 000 km). It is possible that, if
you are driving under the best conditions, the oil
life system may not indicate that an oil change is
necessary for over a year. However, your engine oil and
�lter must be changed at least once a year and at
this time the system must be reset. Your dealer has
GM-trained service people who will perform this
work using genuine GM parts and reset the system. It is
also important to check your oil regularly and keep it
at the proper level.
If the system is ever reset accidentally, you must
change your oil at 3,000 miles (5 000 km) since your
last oil change. Remember to reset the oil life system
whenever the oil is changed.
After the oil has been changed, the Change Engine Oil
message and the oil life indicator must be reset.How to Reset the Engine Oil Life
System and the Oil Life Indicator
The Engine Oil Life System calculates when to change
your engine oil and �lter based on vehicle use.
Anytime your oil is changed, reset the system so it can
calculate when the next oil change is required. If a
situation occurs where you change your oil prior to a
Change Engine Oil Message in the DIC being turned on,
reset the system.
Base Audio System
Press the CLR button located to the right of the DIC
display to acknowledge the Change Engine Oil
message. This will clear the message from the display
and reset it.
5-20
Page 325 of 456

To reset the oil life indicator, use the following steps:
1. Press the up or down arrow on the INFO button
located to the right of the DIC display to access
the DIC menu.
2. Once XXX% ENGINE OIL LIFE menu item is
highlighted, press and hold the CLR button.
The percentage will return to 100, and the oil life
indicator will be reset.
3. Turn the key to OFF.
If the Change Engine Oil message comes back on
when you start your vehicle or the percentage does not
return to 100, the engine oil life system has not reset.
Repeat the procedure.
Navigation System
If you have the navigation system, see “Vehicle
Customization” in the SRX Navigation System Owner
Supplement for how to reset the oil life indicator.
What to Do with Used Oil
Used engine oil contains certain elements that may be
unhealthy for your skin and could even cause cancer.
Do not let used oil stay on your skin for very long. Clean
your skin and nails with soap and water, or a good
hand cleaner. Wash or properly dispose of clothing or
rags containing used engine oil. See the manufacturer’s
warnings about the use and disposal of oil products.
Used oil can be a threat to the environment. If you
change your own oil, be sure to drain all the oil from the
�lter before disposal. Never dispose of oil by putting it
in the trash, pouring it on the ground, into sewers, or into
streams or bodies of water. Instead, recycle it by
taking it to a place that collects used oil. If you have a
problem properly disposing of your used oil, ask
your dealer, a service station or a local recycling center
for help.
5-21
Page 328 of 456
How to Reset the Change Transmission
Fluid Message and the Transmission
Fluid Indicator
After the transmission �uid has been changed, the
Change Trans Fluid message and the transmission �uid
life indicator must be reset. To reset the message
and indicator, use one of the following procedures:
Base Audio System
Press the CLR (Clear) button located to the right of the
Driver Information Center (DIC) display to acknowledge
the CHANGE TRANS FLUID message. This will
clear the message from the display and reset it.
To reset the transmission �uid life indicator, use the
following steps:
1. Press the up or down arrow on the INFO
(Information) button located to the right of the DIC
display to access the DIC menu.
2. Once the XXX% TRANS FLUID LIFE menu item is
highlighted, press and hold the CLR button.
The percentage will return to 100, and the
transmission �uid life indicator will be reset.
3. Repeat the steps if the percentage does not
return to 100.
Navigation System
If your vehicle has a navigation system, see your
navigation system supplement for instructions on how to
reset the transmission �uid life indicator.
Engine Coolant
The cooling system in your vehicle is �lled with
DEX-COOL®engine coolant. This coolant is designed
to remain in your vehicle for �ve years or 150,000 miles
(240 000 km), whichever occurs �rst, if you add only
DEX-COOL
®extended life coolant.
The following explains your cooling system and how to
add coolant when it is low. If you have a problem
with engine overheating, seeEngine Overheating on
page 5-27.
A 50/50 mixture of clean, drinkable water and
DEX-COOL
®coolant will:
Give freezing protection down to−34°F (−37°C).
Give boiling protection up to 265°F (129°C).
Protect against rust and corrosion.
Help keep the proper engine temperature.
Let the warning lights and gages work as they
should.
5-24