display CADILLAC SRX 2008 1.G Repair Manual
[x] Cancel search | Manufacturer: CADILLAC, Model Year: 2008, Model line: SRX, Model: CADILLAC SRX 2008 1.GPages: 448, PDF Size: 5.61 MB
Page 232 of 448
When a CD or DVD audio disc is playing, press this
button to go to the beginning of the CD or DVD audio.
This function is inactive, with some radios, if the front
seat passengers are listening to the CD or DVD audio.
When a disc is playing in the CD or DVD changer, press
this button to select the next disc, if multiple discs are
loaded. This function is inactive, with some radios,
if the front seat passengers are listening to the disc.
When a DVD video menu is being displayed, press the
PROG button to perform the menu function, enter.
Theft-Deterrent Feature
THEFTLOCK®is designed to discourage theft of your
vehicle’s radio. The feature works automatically by
learning a portion of the Vehicle Identi�cation Number
(VIN). If the radio is moved to a different vehicle,
it does not operate and LOC, LOCK, or LOCKED
could display.
With THEFTLOCK
®activated, the radio does not
operate if stolen.
Audio Steering Wheel Controls
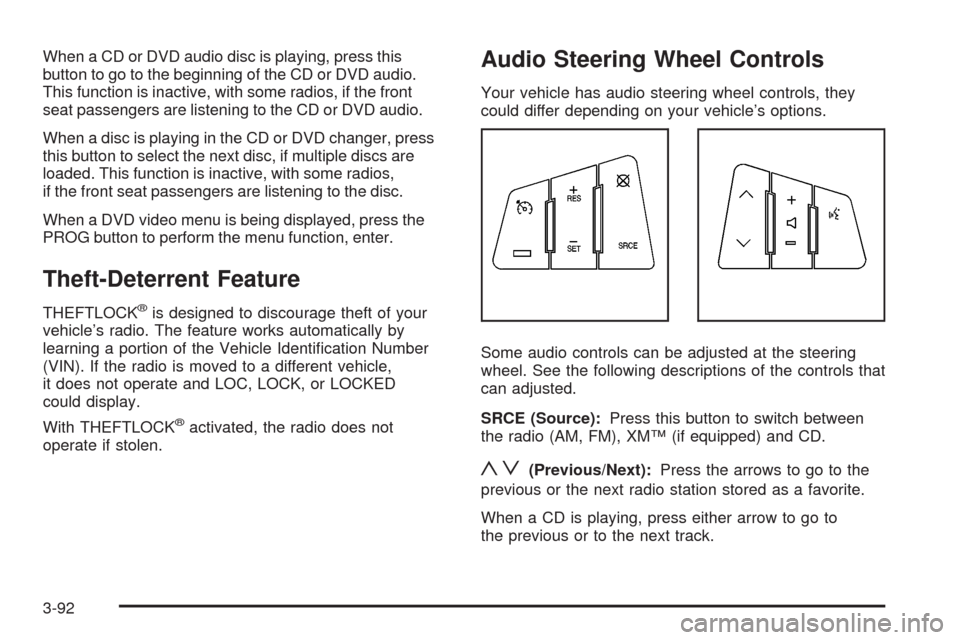
Your vehicle has audio steering wheel controls, they
could differ depending on your vehicle’s options.
Some audio controls can be adjusted at the steering
wheel. See the following descriptions of the controls that
can adjusted.
SRCE (Source):Press this button to switch between
the radio (AM, FM), XM™ (if equipped) and CD.
yz(Previous/Next):Press the arrows to go to the
previous or the next radio station stored as a favorite.
When a CD is playing, press either arrow to go to
the previous or to the next track.
3-92
Page 234 of 448
XM™ Satellite Radio Service
XM™ Satellite Radio Service gives digital radio
reception from coast-to-coast in the 48 contiguous
United States, and in Canada. Just as with FM,
tall buildings or hills can interfere with satellite radio
signals, causing the sound to fade in and out. In
addition, traveling or standing under heavy foliage,
bridges, garages, or through tunnels could cause loss
of the XM™ signal for a period of time. The radio
may display NO XM SIGNAL to indicate interference.
Rear Side Window Antenna
Your AM-FM antenna is located in the passenger rear
side windows. Make sure the inside surfaces of the rear
side windows are not scratched and that the lines on
the glass are not damaged. If the inside surfaces
are damaged, they could interfere with radio reception.
Notice:Using a razor blade or sharp object to clear
the inside of the rear side windows may affect radio
reception or damage the rear window defogger.
Repairs would not be covered by your warranty.
Do not clear the inside of the rear side windows
with sharp objects.Notice:Do not apply aftermarket glass tinting with
metallic �lm. The metallic �lm in some tinting
materials will interfere with or distort the incoming
radio reception. Any damage caused to your antenna
due to metallic tinting materials will not be covered
by your warranty.
Because this antenna is built into the rear side windows,
there is a reduced risk of damage caused by car
washes and vandals.
If you choose to add an aftermarket cellular telephone
to your vehicle, and the antenna needs to be attached
to the glass, make sure you do not damage the grid
lines for the AM-FM antennas or place the cellular
telephone antenna over the grid lines.
XM™ Satellite Radio Antenna
System
The XM™ Satellite Radio antenna is located on the roof
of your vehicle. Keep this antenna clear of snow and
ice build up for clear radio reception.
If your vehicle has a sunroof, the performance of the
XM™ system may be affected if the sunroof is open.
Loading items onto the roof of your vehicle can interfere
with the performance of the XM™ system. Make sure
the XM™ Satellite Radio antenna is not obstructed.
3-94
Page 240 of 448
Notice:Do not repeatedly brake or accelerate
heavily when the TCS is off. You could damage your
vehicle’s driveline.
When the TCS is switched off on AWD vehicles, you
may still feel the system working. This is normal
and necessary with the AWD hardware on your vehicle.
You should turn the system off if your vehicle ever
gets stuck in sand, mud or snow and rocking the vehicle
is required. SeeRocking Your Vehicle to Get It Out
on page 4-33andIf Your Vehicle is Stuck in Sand, Mud,
Ice, or Snow on page 4-32for more information. See
alsoWinter Driving on page 4-29for information
on using TCS when driving in snowy or icy conditions.
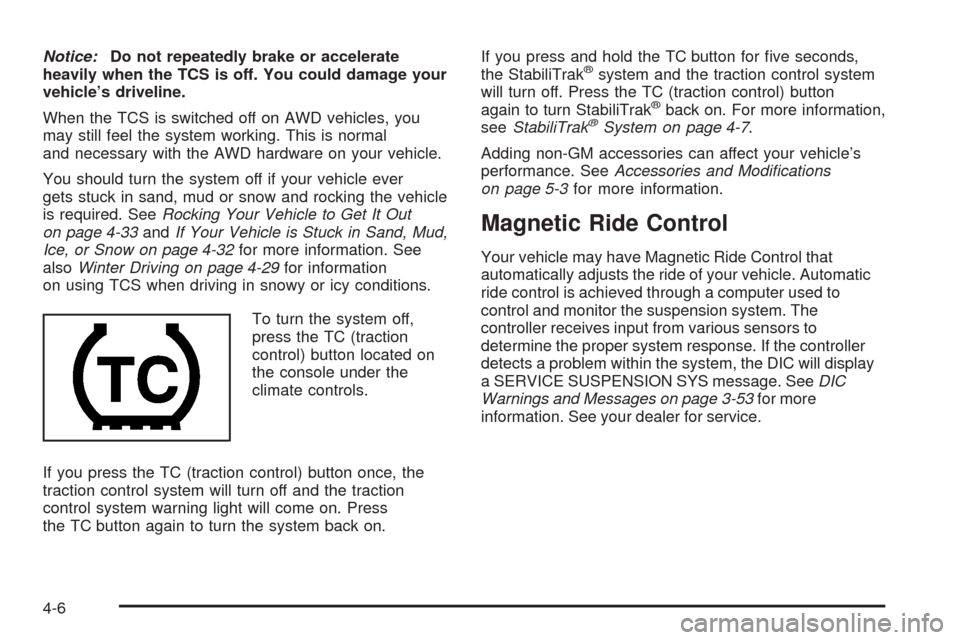
To turn the system off,
press the TC (traction
control) button located on
the console under the
climate controls.
If you press the TC (traction control) button once, the
traction control system will turn off and the traction
control system warning light will come on. Press
the TC button again to turn the system back on.If you press and hold the TC button for �ve seconds,
the StabiliTrak®system and the traction control system
will turn off. Press the TC (traction control) button
again to turn StabiliTrak
®back on. For more information,
seeStabiliTrak®System on page 4-7.
Adding non-GM accessories can affect your vehicle’s
performance. SeeAccessories and Modifications
on page 5-3for more information.
Magnetic Ride Control
Your vehicle may have Magnetic Ride Control that
automatically adjusts the ride of your vehicle. Automatic
ride control is achieved through a computer used to
control and monitor the suspension system. The
controller receives input from various sensors to
determine the proper system response. If the controller
detects a problem within the system, the DIC will display
a SERVICE SUSPENSION SYS message. SeeDIC
Warnings and Messages on page 3-53for more
information. See your dealer for service.
4-6
Page 241 of 448
Limited-Slip Rear Axle
Your vehicle may have this feature. A limited-slip rear
axle can give you additional traction on snow, mud, ice,
sand or gravel. It works like a standard axle most of
the time, but when one of the rear wheels has no
traction and the other does, this feature will allow the
wheel with traction to move the vehicle.
StabiliTrak®System
Your vehicle is equipped with a vehicle stability
enhancement system called StabiliTrak®.Itisan
advanced computer controlled system that assists
you with directional control of the vehicle in difficult
driving conditions.
StabiliTrak
®activates when the computer senses a
discrepancy between your intended path and the
direction the vehicle is actually traveling. StabiliTrak
®
selectively applies braking pressure at any one of
the vehicle’s brakes to help steer the vehicle in the
direction which you are steering.
When the stability control system activates, the
traction control system and StabiliTrak
®light will
�ash on the instrument panel cluster. This also
occurs when traction control is activated.You may also hear a noise or feel vibration in the brake
pedal. This is normal. Continue to steer the vehicle in the
direction you want it to go.
If there is a problem detected with StabiliTrak
®,a
SERVICE STABILITRAK message will be displayed on
the Driver Information Center. SeeDIC Warnings
and Messages on page 3-53. When this message is
displayed, the system is not operational. Driving should
be adjusted accordingly.
StabiliTrak
®comes on automatically whenever you start
your vehicle. To help assist you with directional control of
the vehicle, you should always leave the system on. You
can turn StabiliTrak
®off if you ever need to through the
TC (traction control) on/off button. A STABILITRAK OFF
message will appear in the DIC when it has been turned
off. SeeTraction Control System (TCS) on page 4-5.
If your vehicle is in cruise control when the StabiliTrak
®
activates, the cruise control will automatically
disengage. When road conditions allow you to safely
use it again, you may reengage the cruise control. See
Cruise Control on page 3-12for more information.
4-7
Page 293 of 448
{CAUTION:
Fuel can spray out on you if you open the fuel
cap too quickly. If you spill fuel and then
something ignites it, you could be badly burned.
This spray can happen if your tank is nearly full,
and is more likely in hot weather. Open the fuel
cap slowly and wait for any hiss noise to stop.
Then unscrew the cap all the way.
Be careful not to spill fuel. Do not top off or over�ll the
tank, and wait a few seconds after you have �nished
pumping before removing the nozzle. Clean fuel
from painted surfaces as soon as possible. See
Washing Your Vehicle on page 5-94.
When replacing the fuel cap, turn it clockwise until it
clicks. Make sure the cap is fully installed. The
diagnostic system can determine if the fuel cap has
been left off or improperly installed. This would allow fuel
to evaporate into the atmosphere. SeeMalfunction
Indicator Lamp on page 3-42.The TIGHTEN GAS CAP message will appear on the
Driver Information Center (DIC) display if the fuel cap
is not reinstalled properly. SeeDIC Warnings and
Messages on page 3-53for more information.
{CAUTION:
If a �re starts while you are refueling, do not
remove the nozzle. Shut off the �ow of fuel by
shutting off the pump or by notifying the
station attendant. Leave the area immediately.
Notice:If you need a new fuel cap, be sure to get
the right type. Your dealer/retailer can get one
for you. If you get the wrong type, it may not �t
properly. This may cause your malfunction indicator
lamp to light and may damage your fuel tank and
emissions system. SeeMalfunction Indicator Lamp
on page 3-42.
5-9
Page 304 of 448
How to Reset the Engine Oil Life
System
The Engine Oil Life System calculates when to
change the engine oil and �lter based on vehicle use.
Whenever the oil is changed, reset the system so it
can calculate when the next oil change is required.
If a situation occurs where you change the oil prior to
a CHANGE ENGINE OIL SOON message being turned
on, reset the system.
Always reset the engine oil life to 100% after every oil
change. It will not reset itself. To reset the Engine
Oil Life System:
1. Display the OIL LIFE REMAINING on the DIC.
2. Press and hold the SET/RESET button on the
DIC for more than �ve seconds. The oil life will
change to 100%.
If the CHANGE ENGINE OIL SOON message comes
back on when you start your vehicle, the Engine Oil Life
System has not reset. Repeat the procedure.
What to Do with Used Oil
Used engine oil contains certain elements that can be
unhealthy for your skin and could even cause cancer.
Do not let used oil stay on your skin for very long. Clean
your skin and nails with soap and water, or a good
hand cleaner. Wash or properly dispose of clothing or
rags containing used engine oil. See the manufacturer’s
warnings about the use and disposal of oil products.
Used oil can be a threat to the environment. If you
change your own oil, be sure to drain all the oil from
the �lter before disposal. Never dispose of oil by putting
it in the trash, pouring it on the ground, into sewers,
or into streams or bodies of water. Instead, recycle it by
taking it to a place that collects used oil. If you have
a problem properly disposing of used oil, ask your
dealer/retailer, a service station, or a local recycling
center for help.
5-20
Page 310 of 448
Adding Coolant
If more coolant is needed, add the proper DEX-COOL®
coolant mixture at the surge tank, but only when the
engine is cool.
{CAUTION:
You can be burned if you spill coolant on hot
engine parts. Coolant contains ethylene glycol,
and it will burn if the engine parts are hot
enough. Do not spill coolant on a hot engine.
When replacing the pressure cap, make sure it is
hand-tight and fully seated.
Coolant Surge Tank Pressure Cap
Notice:If the pressure cap is not tightly installed,
coolant loss and possible engine damage may
occur. Be sure the cap is properly and tightly
secured.
The coolant surge tank pressure cap must be fully
installed on the coolant surge tank. SeeEngine
Compartment Overview on page 5-12for more
information on location.
Engine Overheating
There are two engine hot messages that could be
displayed in the Driver Information Center (DIC).
SeeDIC Warnings and Messages on page 3-53for
more information.
If the engine is overheating, then you will �nd a coolant
temperature gage and a coolant warning light on the
instrument panel. SeeEngine Coolant Temperature
Gage on page 3-40andEngine Coolant Temperature
Warning Light on page 3-40for more information.
5-26
Page 347 of 448
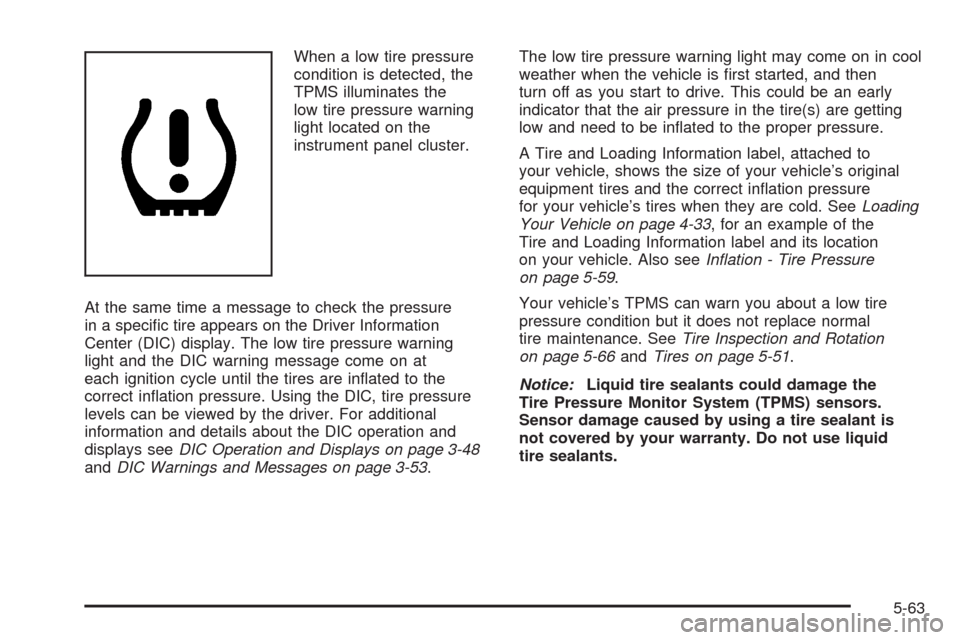
When a low tire pressure
condition is detected, the
TPMS illuminates the
low tire pressure warning
light located on the
instrument panel cluster.
At the same time a message to check the pressure
in a speci�c tire appears on the Driver Information
Center (DIC) display. The low tire pressure warning
light and the DIC warning message come on at
each ignition cycle until the tires are in�ated to the
correct in�ation pressure. Using the DIC, tire pressure
levels can be viewed by the driver. For additional
information and details about the DIC operation and
displays seeDIC Operation and Displays on page 3-48
andDIC Warnings and Messages on page 3-53.The low tire pressure warning light may come on in cool
weather when the vehicle is �rst started, and then
turn off as you start to drive. This could be an early
indicator that the air pressure in the tire(s) are getting
low and need to be in�ated to the proper pressure.
A Tire and Loading Information label, attached to
your vehicle, shows the size of your vehicle’s original
equipment tires and the correct in�ation pressure
for your vehicle’s tires when they are cold. SeeLoading
Your Vehicle on page 4-33, for an example of the
Tire and Loading Information label and its location
on your vehicle. Also seeInflation - Tire Pressure
on page 5-59.
Your vehicle’s TPMS can warn you about a low tire
pressure condition but it does not replace normal
tire maintenance. SeeTire Inspection and Rotation
on page 5-66andTires on page 5-51.
Notice:Liquid tire sealants could damage the
Tire Pressure Monitor System (TPMS) sensors.
Sensor damage caused by using a tire sealant is
not covered by your warranty. Do not use liquid
tire sealants.
5-63
Page 348 of 448
TPMS Malfunction Light and Message
The TPMS will not function properly if one or more of the
TPMS sensors are missing or inoperable. When the
system detects a malfunction, the low tire warning light
�ashes for about one minute and then stays on for
the remainder of the ignition cycle. A DIC warning
message is also displayed. The low tire warning light
and DIC warning message come on at each ignition
cycle until the problem is corrected. Some of the
conditions that can cause the malfunction light and DIC
message to come on are:
One of the road tires has been replaced with the
spare tire. The spare tire does not have a TPMS
sensor. The TPMS malfunction light and DIC
message should go off once you re-install the road
tire containing the TPMS sensor.
The TPMS sensor matching process was started
but not completed or not completed successfully
after rotating the vehicle’s tires. The DIC message
and TPMS malfunction light should go off once
the TPMS sensor matching process is performed
successfully. See “TPMS Sensor Matching Process”
later in this section.
One or more TPMS sensors are missing or
damaged. The DIC message and the TPMS
malfunction light should go off when the TPMSsensors are installed and the sensor matching
process is performed successfully. See your
dealer/retailer for service.
Replacement tires or wheels do not match your
vehicle’s original equipment tires or wheels.
Tires and wheels other than those recommended
for your vehicle could prevent the TPMS from
functioning properly. SeeBuying New Tires on
page 5-68.
Operating electronic devices or being near facilities
using radio wave frequencies similar to the TPMS
could cause the TPMS sensors to malfunction.
If the TPMS is not functioning it cannot detect or signal
a low tire condition. See your dealer/retailer for
service if the TPMS malfunction light and DIC message
comes on and stays on.
TPMS Sensor Matching Process
Each TPMS sensor has a unique identi�cation code.
Any time you rotate your vehicle’s tires or replace one or
more of the TPMS sensors, the identi�cation codes
will need to be matched to the new tire/wheel position.
The sensors are matched to the tire/wheel positions
in the following order: driver side front tire, passenger
side front tire, passenger side rear tire, and driver
side rear tire using a TPMS diagnostic tool. See your
dealer/retailer for service.
5-64
Page 349 of 448
The TPMS sensors can also be matched to each
tire/wheel position by increasing or decreasing the
tire’s air pressure. If increasing the tire’s air pressure,
do not exceed the maximum in�ation pressure indicated
on the tire’s sidewall.
To decrease air-pressure out of a tire you can use the
pointed end of the valve cap, a pencil-style air pressure
gage, or a key.
You have two minutes to match the �rst tire/wheel
position, and �ve minutes overall to match all four
tire/wheel positions. If it takes longer than two minutes,
to match the �rst tire and wheel, or more than
�ve minutes to match all four tire and wheel positions
the matching process stops and you need to start over.
The TPMS sensor matching process is outlined below:
1. Set the parking brake.
2. Turn the ignition switch to ON/RUN with the
engine off.
3. Press the Remote Keyless Entry (RKE) transmitter’s
LOCK and UNLOCK buttons at the same time for
approximately �ve seconds. The horn sounds twice
to signal the receiver is in relearn mode and
TIRE LEARNING ACTIVE message displays on
the DIC screen.
4. Start with the driver side front tire.5. Remove the valve cap from the valve cap stem.
Activate the TPMS sensor by increasing or
decreasing the tire’s air pressure for �ve seconds,
or until a horn chirp sounds. The horn chirp,
which may take up to 30 seconds to sound,
con�rms that the sensor identi�cation code has
been matched to this tire and wheel position.
6. Proceed to the passenger side front tire, and repeat
the procedure in Step 5.
7. Proceed to the passenger side rear tire, and repeat
the procedure in Step 5.
8. Proceed to the driver side rear tire, and repeat the
procedure in Step 5. The horn sounds two times to
indicate the sensor identi�cation code has been
matched to the driver side rear tire, and the TPMS
sensor matching process is no longer active.
The TIRE LEARNING ACTIVE message on the DIC
display screen goes off.
9. Turn the ignition switch to LOCK/OFF.
10. Set all four tires to the recommended air pressure
level as indicated on the Tire and Loading
Information label.
11. Put the valve caps back on the valve stems.
5-65