CADILLAC SRX 2012 2.G Owners Manual
Manufacturer: CADILLAC, Model Year: 2012, Model line: SRX, Model: CADILLAC SRX 2012 2.GPages: 502, PDF Size: 6.23 MB
Page 221 of 502
Black plate (31,1)Cadillac SRX Owner Manual (Include Mex) - 2012
Infotainment System 7-31
A Bluetooth phone with MP3
capability cannot be paired to the
vehicle as a phone and an MP3
player at the same time.
Pairing Information:
.Up to five devices can be paired
to the system.
.The pairing process is disabled
when the vehicle is moving.
.The infotainment system
automatically links with the first
available paired device in the
order the device was paired.
.Only one paired device can be
connected to the infotainment
system at a time.
.Pairing should only need to be
completed once, unless changes
to the pairing information have
been made or the device is
deleted.Bluetooth Setup Menu
The Bluetooth Setup menu can be
accessed with or without a device
attached to the USB port.
To select the Bluetooth Setup menu
when a device is attached to the
USB port and active:
1. Turn the MENU/SELECT knob
while in the iPod, Zune, PFD,
or USB device main menu.
2. Select Bluetooth Music Setup.
To select the Bluetooth Music Setup
menu when a device is not attached
to the USB port, or when a device is
attached to the USB port but not
active:
1. Press the AUX button until AUX is the active source.
2. Turn the MENU/SELECT knob.
3. Select Bluetooth Music Setup. To select the Bluetooth Music Setup
menu when a Bluetooth device is
connected and active:
1. Turn the MENU/SELECT knob.
2. Select Bluetooth Music Setup.
Pairing a Device
1. Select Connect To New Device
from the Bluetooth Music
Setup menu.
2. The system asks a series of Yes/No questions to determine
what type of device is being
paired.
3. After the system determines what type of Bluetooth device is
being paired, the Bluetooth
device will need to be put into
discovery mode.
Page 222 of 502
Black plate (32,1)Cadillac SRX Owner Manual (Include Mex) - 2012
7-32 Infotainment System
4. Some devices may require aPersonal Identification Number
(PIN) in order to complete the
pairing process. Locate the
device named “GMusicConnect”
in the list on the Bluetooth
device and follow the
instructions on the device to
enter the four‐digit PIN provided
by the infotainment system.
Connecting to a Device
Once a device is paired to the
infotainment system, it can be
connected to the infotainment
system.
To connect a paired device when no
other device is connected to the
infotainment system:
1. Select the Select Device option from the Bluetooth Music
Setup menu.
2. Select the new device. To connect a paired device when
another device is connected to the
infotainment system:
1. Select the Select Device option
from the Bluetooth Music
Setup menu.
2. Select the new device.
3. The active device is disconnected from the system
and the new device is
connected.
Removing a Device
1. Select Remove Device from the Bluetooth Music Setup menu.
2. Select the device.
3. The device is removed from the system.
Before connecting to the removed
device again, it will need to paired
to the infotainment system. Changing the Default PIN
To change the default PIN:
1. Select Change Default PIN from
the Bluetooth Music
Setup menu.
2. Select one of the pre‐defined PIN, or select Other to create
a PIN.
To create a PIN:
1. Select the length of the PIN.
2. Enter the character sequence.
Messages
The following messages may
appear on the infotainment screen.
Poor Bluetooth Signal Quality:
This message displays when the
Bluetooth signal strength is low.
This Feature is Unavailable While
Vehicle is Moving: This message
displays when an action is not
allowed while the vehicle is moving.
Page 223 of 502
Black plate (33,1)Cadillac SRX Owner Manual (Include Mex) - 2012
Infotainment System 7-33
Controlling a Bluetooth®
Device
Bluetooth devices that support
AVRCP (Audio/Video Remote
Control Profile) version 1.0 may
be able to be controlled by the
infotainment system.
Press and release
gSEEK /
lSEEK to skip tracks.
Other Information
The Bluetooth®word mark and
logos are owned by the Bluetooth®
SIG, Inc. and any use of such marks
by General Motors is under license.
Other trademarks and trade names
are those of their respective owners.
See Radio Frequency Statement on
page 13‑21 for FCC information.
Auxiliary Devices
(Radio with CD/DVD
and MEM)
The optional AUX input allows
portable devices to be connected
using the 3.5 mm (1/8 in) input jack
or the USB port.
Portable devices are controlled by
using the menu system described in
Operation on page 7‑7.
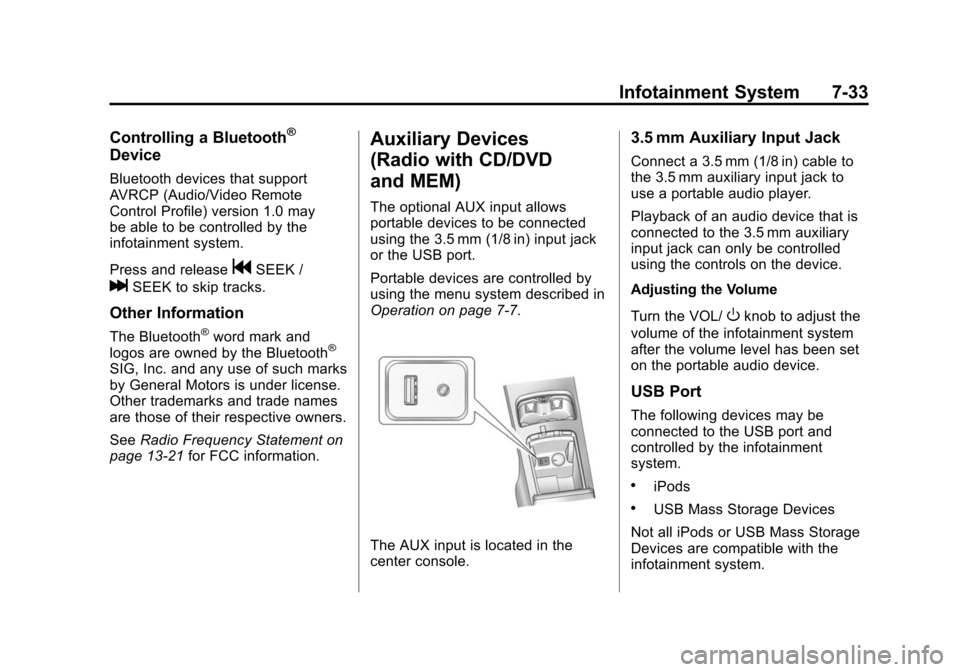
The AUX input is located in the
center console.
3.5 mm Auxiliary Input Jack
Connect a 3.5 mm (1/8 in) cable to
the 3.5 mm auxiliary input jack to
use a portable audio player.
Playback of an audio device that is
connected to the 3.5 mm auxiliary
input jack can only be controlled
using the controls on the device.
Adjusting the Volume
Turn the VOL/
Oknob to adjust the
volume of the infotainment system
after the volume level has been set
on the portable audio device.
USB Port
The following devices may be
connected to the USB port and
controlled by the infotainment
system.
.iPods
.USB Mass Storage Devices
Not all iPods or USB Mass Storage
Devices are compatible with the
infotainment system.
Page 224 of 502
Black plate (34,1)Cadillac SRX Owner Manual (Include Mex) - 2012
7-34 Infotainment System
Connecting and Controlling
an iPod®
Not all iPods can be controlled by
the infotainment system.
Connecting an iPod
Connect the iPod to the USB port.
Selecting a Track
Using the control buttons:
.PressgSEEK orlSEEK to
select the previous or next track.
.Turn the TUNE knob to select a
track in the current submenu.
The track will start to play.
Playing Tracks in Random Order
Turn the MENU/SELECT knob and
set Shuffle Songs to On or Off.
Shuffle On: Plays current tracks in
random order.
Shuffle Off: Plays current tracks in
sequential order. Searching for a Track
Tracks can be searched for by:
.Playlists
.Artists
.Albums
.Song Titles
.Genres
.Composers
.Audiobooks
The number of objects in each
category is shown in parentheses
after the category.
To search for tracks:
1. Turn the MENU/SELECT knob.
2. Select Search.
3. Select: Playlists, Artists, Albums, Song Titles, Genres,
Composers, or Audiobooks.
4. Select the track. The search rate increases if the MENU/SELECT
knob is continuously turned
while searching in a list.
Connecting and Controlling a
USB Drive
Files that are not stored in folders
are displayed in the root
directory (USB).
Connecting a USB Drive
Connect the USB drive to the
USB port.
Disconnecting a USB Drive
A USB drive should be ejected from
the USB port before disconnecting
it. To eject a USB drive:
1. Turn the MENU/SELECT knob.
2. Select USB Eject.
Playing Tracks in Random Order
Turn the MENU/SELECT knob and
then set Shuffle Songs to On.
Page 225 of 502
Black plate (35,1)Cadillac SRX Owner Manual (Include Mex) - 2012
Infotainment System 7-35
Selecting a Track
Using the control buttons:
.PressgSEEK orlSEEK to
select the previous or next track.
.Turn the TUNE knob to select a
track in the current submenu.
The track will start to play.
Selecting a track in a different
folder:
1. Turn the MENU/SELECT knob.
2. Select Folder List.
3. Select the folder.
4. Select the track.
Searching for Tracks
It is normal for the search feature
to take some time to display the
information after reading the device
due to the amount of information
stored.
Files that do not have any meta
data stored in the ID3 tag display
as Unknown. Tracks can be searched by:
.Playlists
.Artists
.Albums
.Song Titles
.Genres
The number of objects in each
category is shown in parentheses
after the category.
To search for tracks:
1. Turn the MENU/SELECT knob.
2. Select Search.
3. Select: Playlists, Artists, Albums, Song Titles, or Genres.
4. Select the track. The search rate increases if the MENU/SELECT
knob is continuously turned
while searching in a list.
Recording Tracks to MEM
See Mass Storage Media (MEM) on
page 7‑24 for more information.
Rear Seat
Infotainment
Rear Seat Entertainment
(RSE) System
The vehicle may have a DVD Rear
Seat Entertainment (RSE) system.
The RSE system works with the
vehicle's infotainment system. The
DVD player is part of the front radio.
The RSE system includes a radio
with a DVD player, two rear seat
video display screens, audio/video
jacks, two wireless headphones,
and a remote control. See CD/DVD
Player on page 7‑21 or the separate
navigation manual for more
information on the vehicle's DVD
system.
Page 226 of 502
Black plate (36,1)Cadillac SRX Owner Manual (Include Mex) - 2012
7-36 Infotainment System
Before Driving
The RSE is for rear seat
passengers only. The driver cannot
safely view the video screen while
driving.
In severe or extreme weather
conditions the RSE system may not
work until the temperature is within
the operating range. The operating
range is above−20°C (−4°F)
and below 60°C (140°F). If the
temperature is outside of this range,
heat or cool the vehicle until it is
within the operating range.
Global Off
Depending on the infotainment
system, the RSE system may have
a Global Off feature. The Global Off
feature disables all RSE system
features. Press and hold the radio
power button for more than
three seconds for Global Off to
disable the RSE features. A padlock icon may display on the
infotainment screen when the
Global Off feature is on. On some
infotainment systems, the Global Off
feature can be turned off by
performing one of the following:
.Press and hold the radio power
button for more than
three seconds.
.Insert or eject any disc.
.Insert a DVD video disc.
.Press the Remote Control power
button.
.Press the MEM/CD/AUX button
or the
kbutton when a DVD
video disc is in the player.
.Press the SRC button on the
steering wheel when a DVD
video disc is in the player.
.Cycle the ignition.
Headphones
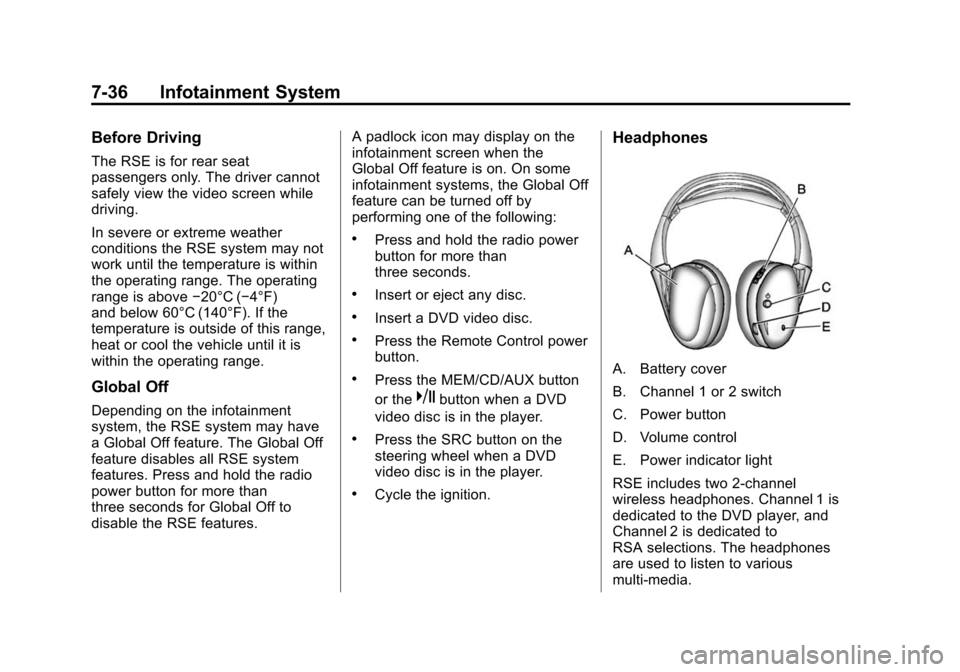
A. Battery cover
B. Channel 1 or 2 switch
C. Power button
D. Volume control
E. Power indicator light
RSE includes two 2-channel
wireless headphones. Channel 1 is
dedicated to the DVD player, and
Channel 2 is dedicated to
RSA selections. The headphones
are used to listen to various
multi‐media.
Page 227 of 502
Black plate (37,1)Cadillac SRX Owner Manual (Include Mex) - 2012
Infotainment System 7-37
If the vehicle is not equipped with
RSA, then Channel 2 is dedicated to
any external auxiliary device
connected to the rear A/V jacks.
The wireless headphones have a
power button, Channel 1 or 2
switch, and a volume control. Turn
the headphones off when not in use.
Push the power button to turn on
the headphones. A light on the
headphones comes on. If the light
does not come on, check the
batteries. Intermittent sound or static
can also indicate weak batteries.
See“Battery Replacement” later in
this section for more information.
Infrared transmitters are on the top
of the left seatback video screen.
The headphones shut off
automatically to save the battery
power if the RSE system and RSA
are shut off or if the headphones are
out of range of the transmitters for
more than three minutes. Moving too
far forward or stepping out of the
vehicle can cause the headphones
to lose the signal or have static. To adjust the volume on the
headphones, use the volume
control.
For best audio performance, the
headphones must be worn correctly,
with the headband over the top of
the head. L (Left) and R (Right) are
above the ear pads and are
indicators as to how the
headphones should be placed on
the head.
Notice:
Do not store the
headphones in heat or direct
sunlight. This could damage the
headphones and repairs will not
be covered by the warranty.
Storage in extreme cold can
weaken the batteries. Keep the
headphones stored in a cool, dry
place.
If the foam ear pads attached to the
headphones become worn or
damaged, the pads can be replaced
separately from the headphone set.
To purchase replacement ear pads,
call 1‐888‐293‐3332, then prompt
zero (0), or contact your dealer. Battery Replacement
To change the batteries:
1. Loosen the screw to the battery
door located on the left side of
the headphones.
2. Slide the battery door open.
3. Replace the two AAA batteries.
4. Replace the battery door and tighten the screw.
Remove the batteries if the
headphones are not going to be
used for a long period of time.
Audio/Video (A/V) Jacks
The A/V jacks may be located on
the rear of the floor console. They
allow audio or video cables to be
connected from an auxiliary device
such as a camcorder or a video
game system.
The A/V jacks are color coded:
.Yellow for video input.
.White for left audio input.
.Red for right audio input.
Page 228 of 502
Black plate (38,1)Cadillac SRX Owner Manual (Include Mex) - 2012
7-38 Infotainment System
Power for auxiliary devices is not
supplied by the radio system.
To use the auxiliary inputs of the
RSE system:
1. Connect the auxiliary devicecables to the A/V jacks.
2. Power on both the auxiliary device and the RSE video
screen.
Changing the Source on the Video
Display Screens
The image from the auxiliary device
can be switched between the video
display screens.
To change the display:
1. Press the AUX button on the remote control to change the
source of both video screens
from the DVD player to the
auxiliary device.
2. Press the AUX button a second time to change the left video
screen source to the DVD player
and the right video screen to the
auxiliary device. 3. Press the AUX button a third
time to change the left video
screen source to the auxiliary
device and the right video
screen to the DVD player.
4. Press the AUX button a fourth time to change the source of
both video screens to the DVD
player.
Changing the RSE Video Screen
Settings
The screen display mode,
brightness, and language can be
changed from the setup menu using
the remote control. To change a
setting:
1. Press
z.
2. Use
n,q,p,o, andrto
select the settings.
3. Press
zagain to exit the
setup menu.
Audio Output
Audio from the DVD player or
auxiliary inputs can be heard
through the following:
.Wireless headphones
.Vehicle speakers
.Vehicle wired headphone jacks
on the rear seat audio system,
if the vehicle has this feature.
The RSE system transmits the
audio signal to the wireless
headphones if an audio signal is
available. See “Headphones” earlier
in this section for more information.
Audio can be heard from the wired
headphone jacks on the RSA
system by selecting the desired
source from the RSA system, if the
vehicle has this feature.
The front seat passengers are able
to listen to playback from the A/V
jacks through the vehicle speakers
by selecting Rear A/V as the source
on the radio.
Page 229 of 502
Black plate (39,1)Cadillac SRX Owner Manual (Include Mex) - 2012
Infotainment System 7-39
Video Screens
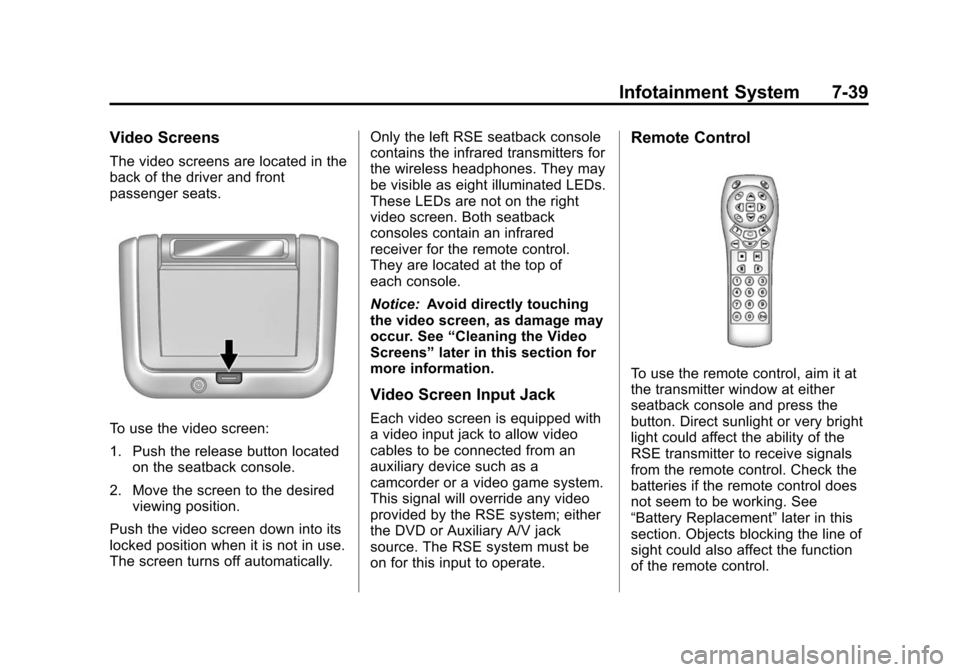
The video screens are located in the
back of the driver and front
passenger seats.
To use the video screen:
1. Push the release button locatedon the seatback console.
2. Move the screen to the desired viewing position.
Push the video screen down into its
locked position when it is not in use.
The screen turns off automatically. Only the left RSE seatback console
contains the infrared transmitters for
the wireless headphones. They may
be visible as eight illuminated LEDs.
These LEDs are not on the right
video screen. Both seatback
consoles contain an infrared
receiver for the remote control.
They are located at the top of
each console.
Notice:
Avoid directly touching
the video screen, as damage may
occur. See “Cleaning the Video
Screens” later in this section for
more information.
Video Screen Input Jack
Each video screen is equipped with
a video input jack to allow video
cables to be connected from an
auxiliary device such as a
camcorder or a video game system.
This signal will override any video
provided by the RSE system; either
the DVD or Auxiliary A/V jack
source. The RSE system must be
on for this input to operate.
Remote Control
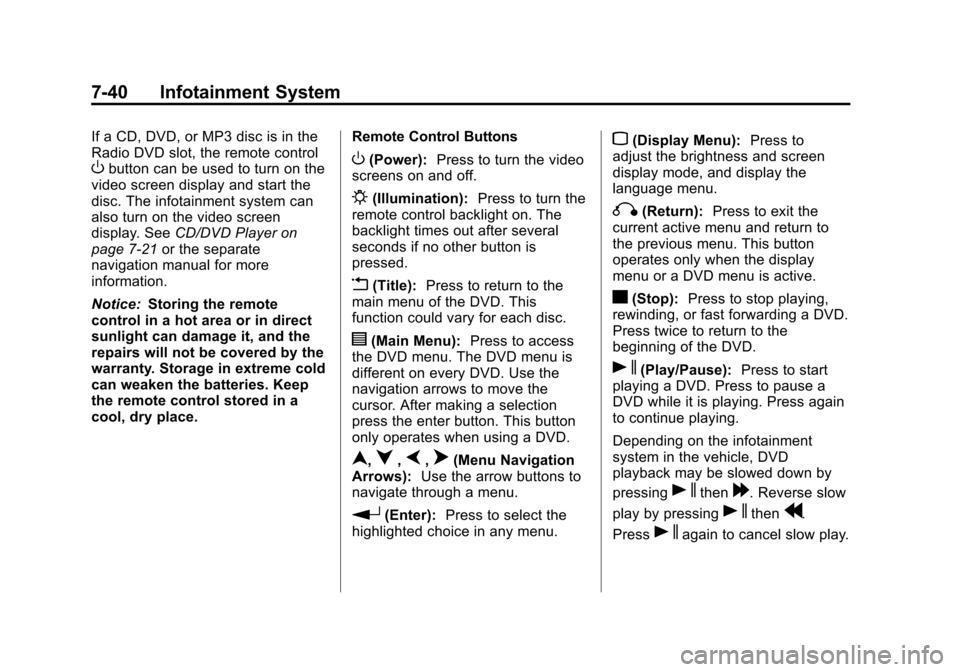
To use the remote control, aim it at
the transmitter window at either
seatback console and press the
button. Direct sunlight or very bright
light could affect the ability of the
RSE transmitter to receive signals
from the remote control. Check the
batteries if the remote control does
not seem to be working. See
“Battery Replacement” later in this
section. Objects blocking the line of
sight could also affect the function
of the remote control.
Page 230 of 502
Black plate (40,1)Cadillac SRX Owner Manual (Include Mex) - 2012
7-40 Infotainment System
If a CD, DVD, or MP3 disc is in the
Radio DVD slot, the remote control
Obutton can be used to turn on the
video screen display and start the
disc. The infotainment system can
also turn on the video screen
display. See CD/DVD Player on
page 7‑21 or the separate
navigation manual for more
information.
Notice: Storing the remote
control in a hot area or in direct
sunlight can damage it, and the
repairs will not be covered by the
warranty. Storage in extreme cold
can weaken the batteries. Keep
the remote control stored in a
cool, dry place. Remote Control ButtonsO(Power):
Press to turn the video
screens on and off.
P(Illumination): Press to turn the
remote control backlight on. The
backlight times out after several
seconds if no other button is
pressed.
v(Title): Press to return to the
main menu of the DVD. This
function could vary for each disc.
y(Main Menu): Press to access
the DVD menu. The DVD menu is
different on every DVD. Use the
navigation arrows to move the
cursor. After making a selection
press the enter button. This button
only operates when using a DVD.
n,q,p,o(Menu Navigation
Arrows): Use the arrow buttons to
navigate through a menu.
r(Enter): Press to select the
highlighted choice in any menu.
z(Display Menu): Press to
adjust the brightness and screen
display mode, and display the
language menu.
q(Return): Press to exit the
current active menu and return to
the previous menu. This button
operates only when the display
menu or a DVD menu is active.
c(Stop): Press to stop playing,
rewinding, or fast forwarding a DVD.
Press twice to return to the
beginning of the DVD.
s(Play/Pause): Press to start
playing a DVD. Press to pause a
DVD while it is playing. Press again
to continue playing.
Depending on the infotainment
system in the vehicle, DVD
playback may be slowed down by
pressing
sthen[. Reverse slow
play by pressing
sthenr.
Press
sagain to cancel slow play.