CADILLAC STS 2005 1.G Owners Manual
Manufacturer: CADILLAC, Model Year: 2005, Model line: STS, Model: CADILLAC STS 2005 1.GPages: 446, PDF Size: 2.58 MB
Page 101 of 446
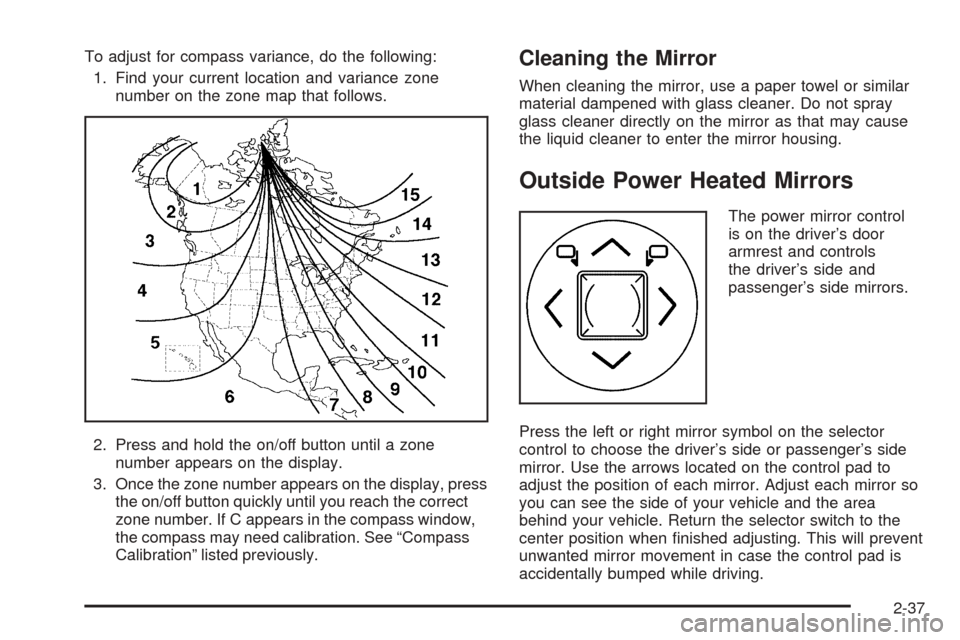
To adjust for compass variance, do the following:
1. Find your current location and variance zone
number on the zone map that follows.
2. Press and hold the on/off button until a zone
number appears on the display.
3. Once the zone number appears on the display, press
the on/off button quickly until you reach the correct
zone number. If C appears in the compass window,
the compass may need calibration. See “Compass
Calibration” listed previously.Cleaning the Mirror
When cleaning the mirror, use a paper towel or similar
material dampened with glass cleaner. Do not spray
glass cleaner directly on the mirror as that may cause
the liquid cleaner to enter the mirror housing.
Outside Power Heated Mirrors
The power mirror control
is on the driver’s door
armrest and controls
the driver’s side and
passenger’s side mirrors.
Press the left or right mirror symbol on the selector
control to choose the driver’s side or passenger’s side
mirror. Use the arrows located on the control pad to
adjust the position of each mirror. Adjust each mirror so
you can see the side of your vehicle and the area
behind your vehicle. Return the selector switch to the
center position when �nished adjusting. This will prevent
unwanted mirror movement in case the control pad is
accidentally bumped while driving.
2-37
Page 102 of 446
The preferred mirror positions can be stored with the
memory option. SeeMemory Seat, Mirrors and Steering
Wheel on page 2-65.
The mirrors can be manually folded inward to prevent
damage when going through car washes or con�ned
spaces. To fold, push the mirror toward the vehicle. To
return the mirror to its original position, push outward.
Be sure to return both mirrors to their original unfolded
position before driving.
When the rear window defogger is turned on, both
outside rear view mirrors are heated to help clear them
of ice, snow, or condensation. See “Rear Window
Defogger” underDual Climate Control System on
page 3-50.
Outside Automatic Dimming Mirror
The driver’s side mirror will adjust for the glare of
headlamps behind you. This feature is controlled by the
on and off settings on the automatic dimming rearview
mirror. SeeAutomatic Dimming Rearview Mirror
with OnStar
®on page 2-35.
Outside Convex Mirror
{CAUTION:
A convex mirror can make things (like other
vehicles) look farther away than they really are.
If you cut too sharply into the right lane, you
could hit a vehicle on your right. Check your
inside mirror or glance over your shoulder
before changing lanes.
The passenger’s side mirror is convex. A convex
mirror’s surface is curved so more can be seen from the
driver’s seat. This mirror does not have a dimming
feature.
Outside Parallel Park Assist Mirror
This feature assists the driver by improving rear obstacle
detection and is useful in viewing the curb when
parallel parking.
Press the left or right mirror symbol on the selector
control to choose the driver or passenger outside mirror.
When the vehicle is shifted into REVERSE (R), the
selected mirror will tilt to a factory programmed position.
2-38
Page 103 of 446
If further mirror adjustment is needed press the arrows
located on the outside mirror control pad. If the
outside mirror selector switch is in the middle position,
neither outside mirror will move.
When the vehicle is shifted out of REVERSE (R), and a
�ve-second delay has occurred, the mirror will return to
its original position. The delay prevents movement of
the mirror if multiple gear transitions REVERSE (R) to
AUTOMATIC OVERDRIVE (D) to REVERSE (R) occur
during a parallel parking maneuver.
OnStar®System
OnStar®uses global positioning system (GPS) satellite
technology, wireless communications, and call centers
to provide you with a wide range of safety, security,
information, and convenience services.
A complete OnStar
®user’s guide and the terms and
conditions of the OnStar®Subscription Service
Agreement are included in the vehicle’s glove box
literature. For more information, visit www.onstar.com or
www.onstarcanada.com. Contact OnStar
®at
1-888-4-ONSTAR (1-888-466-7827), or press the
OnStar
®button to speak to an OnStar®advisor
24 hours a day, 7 days a week.
Terms and conditions of the Subscription Service
Agreement can be found at www.onstar.com or
www.onstarcanada.com.
OnStar®Services
The Directions and Connections Plan is included on
new vehicles for one year from the date of purchase.
The OnStar
®subscription can be extended for time
beyond the �rst year to meet your needs. For more
information, press the OnStar
®button to speak with
an advisor.
Directions and Connections Plan
Advanced Automatic Collision Noti�cation
Automatic Noti�cation of Airbag Deployment
Emergency Services
Roadside Assistance
Stolen Vehicle Tracking
AccidentAssist
Remote Door Unlock/Vehicle Alert
Remote Diagnostics
Online Concierge
Driving Directions
RideAssist
Information and Convenience Services
2-39
Page 104 of 446
OnStar®Personal Calling
As an OnStar®subscriber, the Personal Calling
capability is an available hands-free wireless phone that
is integrated into the vehicle. Calls can be placed
nationwide using simple voice commands with no
additional contracts and no additional roaming charges.
To �nd out more about OnStar
®Personal Calling,
refer to the OnStar®user’s guide in the vehicle’s glove
box, visit www.onstar.com or www.onstarcanada.com;
or speak to an OnStar
®advisor by pressing the OnStar®
button or calling 1-888-4-ONSTAR (1-888-466-7827).
OnStar®Virtual Advisor
Virtual Advisor is a feature of OnStar®Personal Calling
that uses minutes to access up-to-date weather and
traffic reports for your area, news and sports updates,
stock quotes, entertainment, and more. Customize
your information pro�le at www.myonstar.com.
See the OnStar
®user’s guide for more information.
OnStar®Steering Wheel Controls
A steering wheel control can be used to interact with
the OnStar®personal calling feature.
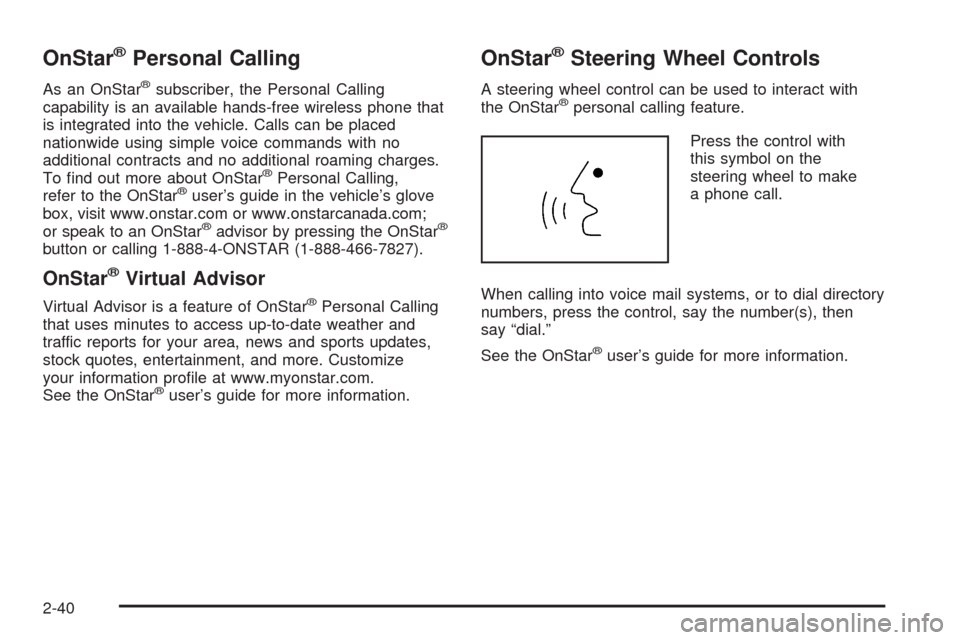
Press the control with
this symbol on the
steering wheel to make
a phone call.
When calling into voice mail systems, or to dial directory
numbers, press the control, say the number(s), then
say “dial.”
See the OnStar
®user’s guide for more information.
2-40
Page 105 of 446
HomeLink®Wireless Control
System
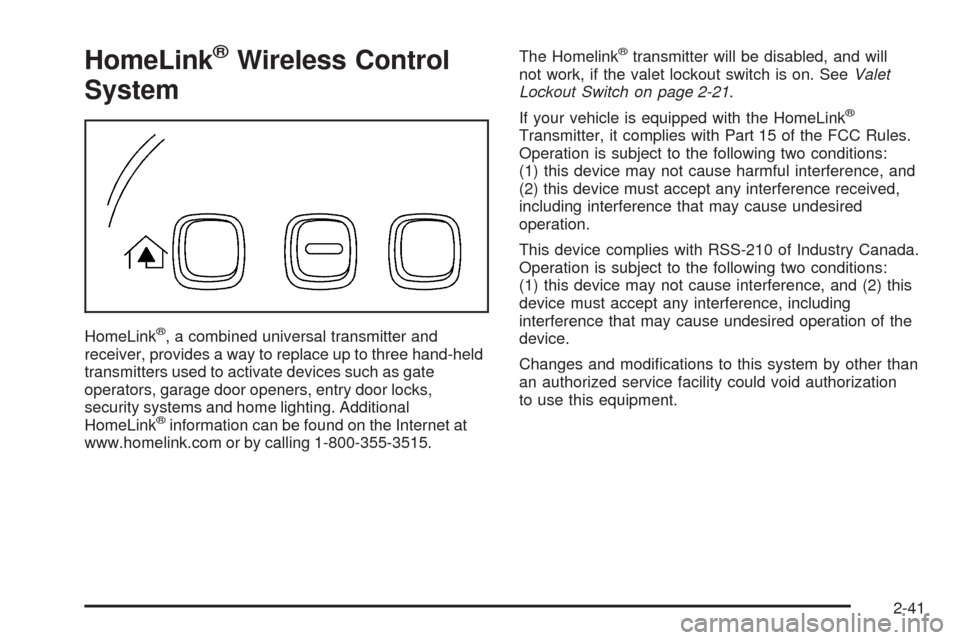
HomeLink®, a combined universal transmitter and
receiver, provides a way to replace up to three hand-held
transmitters used to activate devices such as gate
operators, garage door openers, entry door locks,
security systems and home lighting. Additional
HomeLink
®information can be found on the Internet at
www.homelink.com or by calling 1-800-355-3515.The Homelink
®transmitter will be disabled, and will
not work, if the valet lockout switch is on. SeeValet
Lockout Switch on page 2-21.
If your vehicle is equipped with the HomeLink
®
Transmitter, it complies with Part 15 of the FCC Rules.
Operation is subject to the following two conditions:
(1) this device may not cause harmful interference, and
(2) this device must accept any interference received,
including interference that may cause undesired
operation.
This device complies with RSS-210 of Industry Canada.
Operation is subject to the following two conditions:
(1) this device may not cause interference, and (2) this
device must accept any interference, including
interference that may cause undesired operation of the
device.
Changes and modi�cations to this system by other than
an authorized service facility could void authorization
to use this equipment.
2-41
Page 106 of 446
HomeLink®Wireless Control
System Operation
Do not use the HomeLink®Transmitter with any garage
door opener that does not have the “stop and reverse”
feature. This includes any garage door opener model
manufactured before April 1, 1982. If you have a newer
garage door opener with rolling codes, please be
sure to follow Steps 6 through 8 to complete the
programming of your HomeLink
®Transmitter.
Read the instructions completely before attempting to
program the HomeLink
®Transmitter. Because of
the steps involved, it may be helpful to have another
person available to assist you in programming the
transmitter.
Keep the original transmitter for use in other vehicles as
well as for future HomeLink
®programming. It is also
recommended that upon the sale of the vehicle, the
programmed HomeLink
®buttons should be erased for
security purposes. Refer to “Erasing HomeLink®Buttons”
or, for assistance, contact HomeLink®on the Internet
at: www.homelink.com or by calling 1-800-355-3515.
Be sure that people and objects are clear of the garage
door or gate operator you are programming. When
programming a garage door, it is advised to park outside
of the garage.It is recommended that a new battery be installed in
your hand-held transmitter for quicker and more
accurate transmission of the radio frequency.
Programming HomeLink®
Your vehicle’s engine should be turned off while
programming the transmitter. Follow these steps to
program up to three channels:
1. Press and hold down the two outside buttons,
releasing only when the indicator light begins to
�ash, after 20 seconds. Do not hold down the
buttons for longer than 30 seconds and do not
repeat this step to program a second and/or third
transmitter to the remaining two HomeLink
®buttons.
2. Position the end of your hand-held transmitter about
1 to 3 inches (3 to 8 cm) away from the HomeLink
®
buttons while keeping the indicator light in view.
3. Simultaneously press and hold both the desired
button on HomeLink
®and the hand-held transmitter
button. Do not release the buttons until Step 4
has been completed.
Some entry gates and garage door openers may
require you to substitute Step 3 with the procedure
noted in “Gate Operator and Canadian
Programming” later in this section.
2-42
Page 107 of 446
4. The indicator light will �ash slowly at �rst and then
rapidly after HomeLink®successfully receives the
frequency signal from the hand-held transmitter.
Release both buttons.
5. Press and hold the newly-trained HomeLink
®
button and observe the indicator light.
If the indicator light stays on constantly,
programming is complete and your device should
activate when the HomeLink
®button is pressed
and released.
To program the remaining two HomeLink
®buttons,
begin with Step 2 under “Programming HomeLink®.”
Do not repeat Step 1 as this will erase all of the
programmed channels.
If the indicator light blinks rapidly for two seconds
and then turns to a constant light, continue with
Steps 6 through 8 following to complete the
programming of a rolling-code equipped device
(most commonly, a garage door opener).
6. Locate in the garage, the garage door opener
receiver (motor-head unit). Locate the “Learn”
or “Smart” button. This can usually be found
where the hanging antenna wire is attached to
the motor-head unit.7. Firmly press and release the “Learn” or “Smart”
button. The name and color of the button may
vary by manufacturer.
You will have 30 seconds to start Step 8.
8. Return to the vehicle. Firmly press and hold the
programmed HomeLink
®button for two seconds,
then release. Repeat the press/hold/release
sequence a second time, and depending on the
brand of the garage door opener (or other rolling
code device), repeat this sequence a third time
to complete the programming.
HomeLink
®should now activate your rolling-code
equipped device.
To program the remaining two HomeLink
®buttons,
begin with Step 2 of “Programming HomeLink®.”
You do not want to repeat Step 1, as this will erase
all previous programming.
2-43
Page 108 of 446
Gate Operator and Canadian
Programming
Canadian radio-frequency laws require transmitter
signals to “time out” or quit after several seconds of
transmission. This may not be long enough for
HomeLink
®to pick up the signal during programming.
Similarly, some U.S. gate operators are manufactured
to “time out” in the same manner.
If you live in Canada, or you are having difficulty
programming a gate operator by using the
“Programming HomeLink
®” procedures (regardless of
where you live), replace Step 3 under “Programming
HomeLink
®” with the following:
Continue to press and hold the HomeLink
®button
while you press and release every two seconds (cycle)
your hand-held transmitter until the frequency signal
has been successfully accepted by HomeLink
®.
The indicator light will �ash slowly at �rst and then
rapidly. Proceed with Step 4 under “Programming
HomeLink
®” to complete.
Using HomeLink®
Press and hold the appropriate HomeLink®button for
at least half of a second. The indicator light will come
on while the signal is being transmitted.
Erasing HomeLink®Buttons
To erase programming from the three buttons do the
following:
1. Press and hold down the two outside buttons until
the indicator light begins to �ash, after 20 seconds.
Do not hold the two outside buttons for longer
than 30 seconds.
2. Release both buttons.
HomeLink
®is now in the train (learning) mode and can
be programmed at any time beginning with Step 2
under “Programming HomeLink
®” shown earlier in this
section.
Individual buttons cannot be erased, but they can
be reprogrammed. See “Reprogramming a Single
HomeLink
®Button” following this section.
2-44
Page 109 of 446
Reprogramming a Single HomeLink®
Button
To program a device to HomeLink®using a HomeLink®
button previously trained, follow these steps:
1. Press and hold the desired HomeLink
®button.
Do not release the button.
2. The indicator light will begin to �ash after
20 seconds. While still holding the HomeLink
®
button, proceed with Step 2 under “Programming
HomeLink®” shown earlier in this section.
Resetting Defaults
To reset HomeLink®to default settings do the following:
1. Hold down the two outside buttons for about
20 seconds until the indicator light begins to �ash.
2. Continue to hold both buttons until the HomeLink
®
indicator light turns off.
3. Release both buttons.
For questions or comments, contact HomeLink
®
at 1-800-355-3515, or on the Internet at
www.homelink.com.
Storage Areas
Glove Box
To open the glove box, lift up on the lever. The glove
box has a light inside.
Cupholder(s)
Your vehicle has two cupholders in the center
console area.
Center Console Storage Area
Your vehicle has a center console storage area located
between the front seats. It includes storage areas, and
accessory power outlet(s) on the rear of the console.
Convenience Net
If your vehicle has a convenience net, the convenience
net attaches to the �oor or back wall of the rear of
the vehicle using six anchor points. The net can be used
like a hammock across the rear of the vehicle or
hooked on the �oor. Put small loads, like grocery bags,
behind the net. It can help keep them from falling
over during sharp turns or quick starts and stops.
The net is not for larger, heavier loads. Store them in
the rear of the vehicle as far forward as you can.
2-45
Page 110 of 446
Sunroof
The vehicle may have a power sunroof.
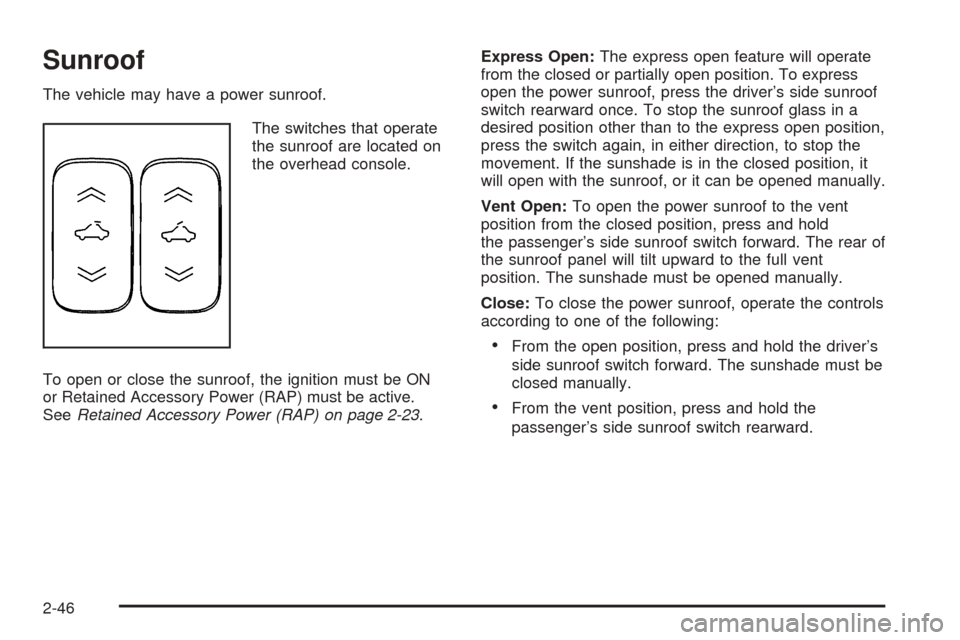
The switches that operate
the sunroof are located on
the overhead console.
To open or close the sunroof, the ignition must be ON
or Retained Accessory Power (RAP) must be active.
SeeRetained Accessory Power (RAP) on page 2-23.Express Open:The express open feature will operate
from the closed or partially open position. To express
open the power sunroof, press the driver’s side sunroof
switch rearward once. To stop the sunroof glass in a
desired position other than to the express open position,
press the switch again, in either direction, to stop the
movement. If the sunshade is in the closed position, it
will open with the sunroof, or it can be opened manually.
Vent Open:To open the power sunroof to the vent
position from the closed position, press and hold
the passenger’s side sunroof switch forward. The rear of
the sunroof panel will tilt upward to the full vent
position. The sunshade must be opened manually.
Close:To close the power sunroof, operate the controls
according to one of the following:
From the open position, press and hold the driver’s
side sunroof switch forward. The sunshade must be
closed manually.
From the vent position, press and hold the
passenger’s side sunroof switch rearward.
2-46