rear view mirror CADILLAC STS 2005 1.G User Guide
[x] Cancel search | Manufacturer: CADILLAC, Model Year: 2005, Model line: STS, Model: CADILLAC STS 2005 1.GPages: 446, PDF Size: 2.58 MB
Page 169 of 446

To enable the Intellibeam™ System, turn the exterior
lamp control to AUTO, with the turn signal/multifunction
lever in its neutral position. The High-Beam On Light
will appear on the instrument panel cluster when
the high-beams are on. SeeHighbeam On Light on
page 3-72. Your vehicle is equipped with variable
intensity high-beams. The high-beam indicator on the
instrument panel will illuminate as soon as the
high-beams start to come on, and will remain on until
the high-beams have completely turned off. All
Intellibeam™ equipped vehicles, however, will quickly
turn off the high-beams if the system detects the sudden
presence of vehicle lights ahead.
Driving with Intellibeam™
Intellibeam™ will only activate your high-beams when
driving over 20 mph (32 km/h).
The high-beam headlamps will remain on, under the
control of Intellibeam™, until any of the following
situations occur:
The system detects an approaching vehicle’s
headlamps.
The system detects a preceding vehicle’s taillamps.
The outside light is bright enough that high-beam
headlamps are not required.
The high-beam headlamps are manually turned on
or you use the �ash-to-pass feature. SeeHeadlamp
High/Low-Beam Changer on page 3-9and
Flash-to-Pass on page 3-13.
When either of these conditions occur, the
Intellibeam™ feature will be temporarily disabled
until the high-beam stalk is returned to the neutral
position.
The exterior lamp control is turned to any setting
except AUTO.
When this occurs, Intellibeam™ will be disabled
until the control is turned back to the AUTO position
and the AUTOMATIC LIGHTS ON message is
displayed on the DIC.
The Intellibeam™ system is turned off at the inside
rearview mirror.
The vehicle’s speed drops below 15 mph (24 km/h).
Intellibeam™ may not turn off the high-beams if the
system cannot detect other vehicle’s lamps because of
any of the following:
The others vehicle’s lamp(s) are missing, damaged,
obstructed from view or otherwise undetected.
The other vehicle’s lamp(s) are covered with dirt,
snow and/or road spray.
3-35
Page 170 of 446

The other vehicle’s lamp(s) cannot be detected due
to dense exhaust, smoke, fog, snow, road spray,
mist or other airborne obstructions.
Your vehicle’s windshield is dirty, cracked or
obstructed by something that blocks the view of the
Intellibeam™ light sensor.
Your vehicle’s windshield is covered with ice, dirt,
haze or other obstructions.
Your vehicle is loaded such that the front end of the
vehicle points upward, causing the Intellibeam™
sensor to aim high and not detect headlamps
and taillamps.
You are driving on winding or hilly roads.
You may need to manually disable or cancel the
high-beam headlamps by turning the low-beam
headlamps on, if any of the above conditions exist.
Disabling and Resetting Intellibeam™
at the Rearview Mirror
Intellibeam™ can be disabled and reset to the original
factory setting by using the controls on the inside
rearview mirror.
O(On/Off):To disable the system, press and hold
this button on the inside rearview mirror for three
seconds and release it after the indicator on the inside
rearview mirror �ashes two times. This lets you
know that Intellibeam™ has been turned off and will not
come back on until the system has been reset.
To reset the system, quickly press and release this
button on the inside rearview mirror. The indicator on the
inside rearview mirror will �ash one time to indicate
that Intellibeam™ has been reset.
A different sensitivity setting is available for dealer
diagnostics. This is done by pushing and holding this
button for 20 seconds until the light �ashes three times.
If you accidentally activate this, the vehicle’s setting
will automatically be reset each time the ignition
is turned off and then on again; otherwise, refer to the
text above for resetting the system.
3-36
Page 171 of 446

Cleaning the Intellibeam™ Light Sensor
The light sensor is located
on the inside of the vehicle
in front of the inside
rearview mirror.
Clean the light sensor window, periodically, using glass
cleaner on a soft cloth. Gently wipe the sensor
window. Do not spray glass cleaner directly on the
surface of the sensor window.
Wiper Activated Headlamps
This feature activates the headlamps and parking lamps
after the windshield wipers have been in use for
about six seconds. For this feature to work, automatic
lighting must be enabled. SeeHeadlamps on page 3-33
for additional information.
When the ignition is turned off, the wiper-activated
headlamps will immediately turn off. They will also turn
off if the windshield wiper control is turned off.
Headlamps on Reminder
A warning chime will sound if the exterior lamp control
is left on in either the headlamp or parking lamp position
and the driver’s door is opened with the ignition off.
SeeLights On Reminder on page 3-71for additional
information.
3-37
Page 182 of 446

The URPA display is
located inside the vehicle,
above the rear window.
It has three color-coded
lights that can be seen
through the rearview mirror
or by turning around.
How the System Works
URPA comes on automatically when the shift lever is
moved into REVERSE (R) and the vehicle speed is less
than 3 mph (5 km/h). When the system turns on, the
three lights on the display will illuminate for one and
a half seconds to let you know that the system is
working. If your vehicle is moving in REVERSE (R) at
a speed greater than 3 mph (5 km/h), the red light
will �ash to remind you that the system does not work
at a speed greater than 3 mph (5 km/h).If an object is detected at a REVERSE (R) speed of
less than 3 mph (5 km/h), one of the following will occur:
Description English Metric
Amber light 5 ft 1.5 m
Amber/amber lights 40 in 1.0 m
Amber/amber/red lights &
continuous chime20 in 0.5 m
Amber/amber/red lights
�ashing & continuous
chime1 ft 0.3 m
A chime will sound the �rst time an object is detected
between 20 inches (0.5 m) and 5 feet (1.5 m) away.
URPA cannot detect objects that are above trunk level.
In order for the rear sensors to recognize an object,
it must be within detection range behind the vehicle.
When the System Does Not Seem to Work
Properly
The light may �ash red when the vehicle is in
REVERSE (R), if the ultrasonic sensors are not kept
clean. So be sure to keep your rear bumper free of mud,
dirt, snow, ice and slush. Other conditions that may affect
system performance include things like the vibrations
from a jackhammer or the compression of air brakes on a
very large truck. If after cleaning the rear bumper and
then driving forward at least 15 mph (25 km/h), the
display continues to �ash red, see your dealer.
3-48
Page 190 of 446

The rear window defogger will turn off about 10 minutes
after the button is pressed, or if the vehicle’s speed
is above 30 mph (48 km/h), the rear defogger will stay
on continuously. If turned on again, the defogger
will only run for about �ve minutes before turning off.
The defogger can also be turned off by pressing
the button again or by turning off the engine.
The heated outside rearview mirrors will heat to help
clear fog or frost from the surface of the mirror when
the rear window defogger button is on.
Notice:Using a razor blade or sharp object to
clear the inside rear window may damage the rear
window defogger. Repairs would not be covered
by your warranty. Do not clear the inside of the rear
window with sharp objects.
Outlet Adjustment
Use the lever located in the center of each outlet to
change the direction of the air�ow, either side-to-side or
up and down. Use the thumbwheels to open or close
the outlets to adjust the air�ow.Turn the thumbwheel to the right to open the outlets
completely and allow the maximum amount of air
to enter your vehicle. Turn the thumbwheel to the left to
close the outlets and minimize the amount of air
entering the vehicle.
Operation Tips
Clear away any ice, snow or leaves from the air
inlets at the base of the windshield that may
block the �ow of air into your vehicle.
Use of non-GM approved hood de�ectors may
adversely affect the performance of the system.
Keep the path under the front seats clear of objects
to help circulate the air inside of your vehicle more
effectively.
If the air�ow seems low when the fan speed is at
the highest setting, the passenger compartment
air �lter may need to be replaced. For more
information, seePassenger Compartment Air Filter
on page 3-58.
3-56
Page 275 of 446

Highway Hypnosis
Is there actually such a condition as highway hypnosis?
Or is it just plain falling asleep at the wheel? Call it
highway hypnosis, lack of awareness, or whatever.
There is something about an easy stretch of road with
the same scenery, along with the hum of the tires on
the road, the drone of the engine, and the rush of
the wind against the vehicle that can make you sleepy.
Do not let it happen to you! If it does, your vehicle
can leave the road in less than a second, and you
could crash and be injured.
What can you do about highway hypnosis? First, be
aware that it can happen.
Then here are some tips:
Make sure your vehicle is well ventilated, with a
comfortably cool interior.
Keep your eyes moving. Scan the road ahead and
to the sides. Check your rearview mirrors and your
instruments frequently.
If you get sleepy, pull off the road into a rest,
service, or parking area and take a nap, get some
exercise, or both. For safety, treat drowsiness
on the highway as an emergency.
Hill and Mountain Roads
Driving on steep hills or mountains is different from
driving in �at or rolling terrain.
4-23
Page 399 of 446

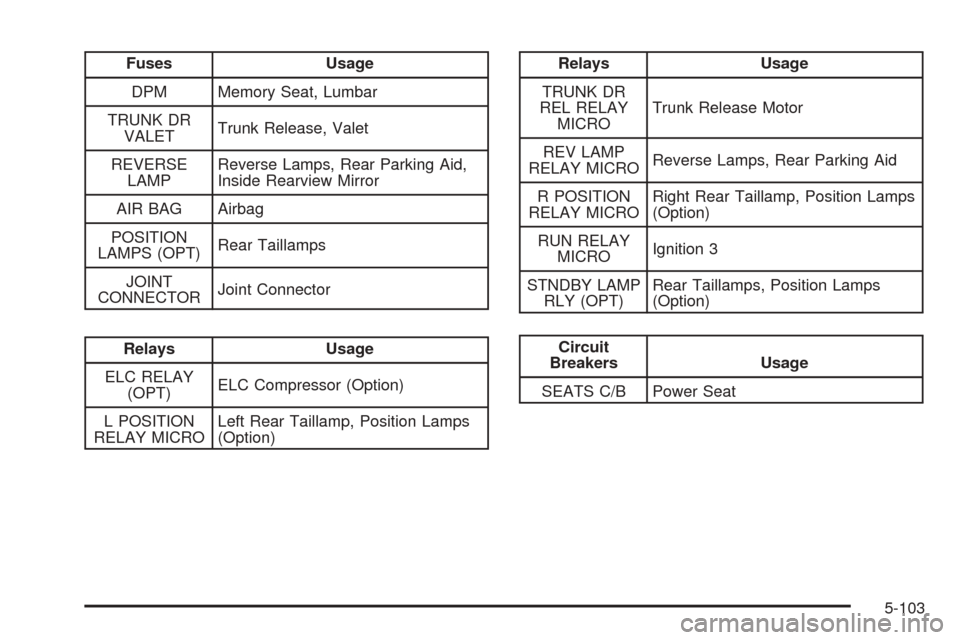
Fuses Usage
DPM Memory Seat, Lumbar
TRUNK DR
VALETTrunk Release, Valet
REVERSE
LAMPReverse Lamps, Rear Parking Aid,
Inside Rearview Mirror
AIR BAG Airbag
POSITION
LAMPS (OPT)Rear Taillamps
JOINT
CONNECTORJoint Connector
Relays Usage
ELC RELAY
(OPT)ELC Compressor (Option)
L POSITION
RELAY MICROLeft Rear Taillamp, Position Lamps
(Option)
Relays Usage
TRUNK DR
REL RELAY
MICROTrunk Release Motor
REV LAMP
RELAY MICROReverse Lamps, Rear Parking Aid
R POSITION
RELAY MICRORight Rear Taillamp, Position Lamps
(Option)
RUN RELAY
MICROIgnition 3
STNDBY LAMP
RLY (OPT)Rear Taillamps, Position Lamps
(Option)
Circuit
Breakers Usage
SEATS C/B Power Seat
5-103
Page 440 of 446

M
Magnetic Ride Control....................................... 4-9
Maintenance Schedule
Additional Required Services........................... 6-6
At Each Fuel Fill........................................... 6-9
At Least Once a Month.................................. 6-9
At Least Once a Year..................................6-10
Introduction.................................................. 6-2
Maintenance Footnotes.................................. 6-7
Maintenance Record....................................6-15
Maintenance Requirements............................. 6-2
Normal Maintenance Replacement Parts.........6-14
Owner Checks and Services........................... 6-9
Recommended Fluids and Lubricants.............6-12
Scheduled Maintenance................................. 6-4
Using.......................................................... 6-2
Your Vehicle and the Environment................... 6-2
Malfunction Indicator Light................................3-68
Memory Mirrors..............................................2-65
Memory Seat.................................................2-65
Memory Steering Wheel Controls......................2-65
Message
DIC Warnings and Messages........................3-78
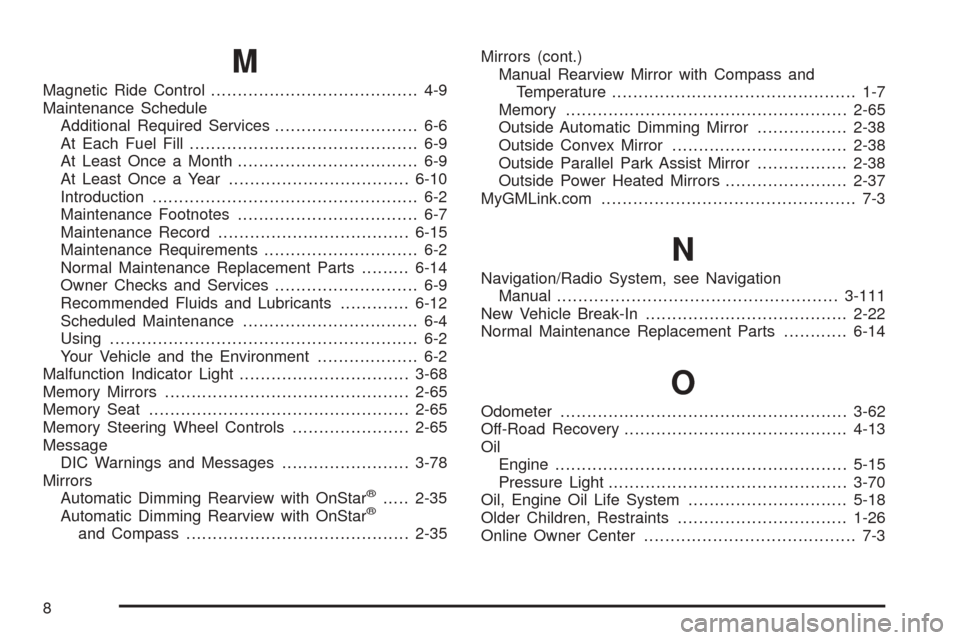
Mirrors
Automatic Dimming Rearview with OnStar
®.....2-35
Automatic Dimming Rearview with OnStar®
and Compass..........................................2-35Mirrors (cont.)
Manual Rearview Mirror with Compass and
Temperature.............................................. 1-7
Memory.....................................................2-65
Outside Automatic Dimming Mirror.................2-38
Outside Convex Mirror.................................2-38
Outside Parallel Park Assist Mirror.................2-38
Outside Power Heated Mirrors.......................2-37
MyGMLink.com................................................ 7-3
N
Navigation/Radio System, see Navigation
Manual.....................................................3-111
New Vehicle Break-In......................................2-22
Normal Maintenance Replacement Parts............6-14
O
Odometer......................................................3-62
Off-Road Recovery..........................................4-13
Oil
Engine.......................................................5-15
Pressure Light.............................................3-70
Oil, Engine Oil Life System..............................5-18
Older Children, Restraints................................1-26
Online Owner Center........................................ 7-3
8
Page 442 of 446

R
Radios..........................................................3-92
Care of Your CD Player..............................3-118
Care of Your CDs......................................3-118
Navigation/Radio System, see Navigation
Manual.................................................3-111
Radio Personalization.................................3-112
Radio with CD............................................3-94
Setting the Time..........................................3-93
Theft-Deterrent..........................................3-115
Understanding Reception............................3-117
Rainsense™ II Wipers.....................................3-14
Reading Lamps..............................................3-42
Rear Axle......................................................5-44
Limited-Slip.................................................. 4-9
Rear Climate Control System............................3-57
Rear Door Security Locks................................2-12
Rear Heated Seats........................................... 1-7
Rear Safety Belt Comfort Guides......................1-23
Rear Seat Passengers, Safety Belts..................1-21
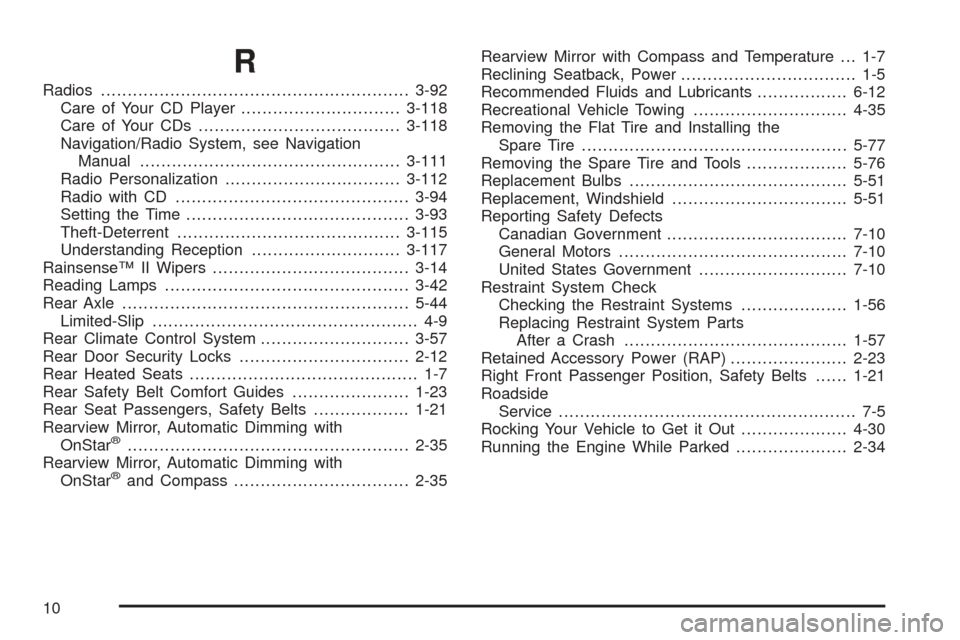
Rearview Mirror, Automatic Dimming with
OnStar
®.....................................................2-35
Rearview Mirror, Automatic Dimming with
OnStar
®and Compass.................................2-35Rearview Mirror with Compass and Temperature . . . 1-7
Reclining Seatback, Power................................. 1-5
Recommended Fluids and Lubricants.................6-12
Recreational Vehicle Towing.............................4-35
Removing the Flat Tire and Installing the
Spare Tire..................................................5-77
Removing the Spare Tire and Tools...................5-76
Replacement Bulbs.........................................5-51
Replacement, Windshield.................................5-51
Reporting Safety Defects
Canadian Government..................................7-10
General Motors...........................................7-10
United States Government............................7-10
Restraint System Check
Checking the Restraint Systems....................1-56
Replacing Restraint System Parts
After a Crash..........................................1-57
Retained Accessory Power (RAP)......................2-23
Right Front Passenger Position, Safety Belts......1-21
Roadside
Service........................................................ 7-5
Rocking Your Vehicle to Get it Out....................4-30
Running the Engine While Parked.....................2-34
10