clock CADILLAC STS 2006 1.G User Guide
[x] Cancel search | Manufacturer: CADILLAC, Model Year: 2006, Model line: STS, Model: CADILLAC STS 2006 1.GPages: 480, PDF Size: 2.74 MB
Page 349 of 480

{CAUTION:
You can be burned if you spill coolant on hot
engine parts. Coolant contains ethylene glycol
and it will burn if the engine parts are hot
enough. Do not spill coolant on a hot engine.
If no coolant is visible in the surge tank, add coolant
as follows:
1. You can remove the coolant surge tank pressure
cap when the cooling system, including the coolant
surge tank pressure cap and upper radiator
hose, is no longer hot. Turn the pressure cap slowly
counterclockwise about one-quarter of a turn. If
you hear a hiss, wait for that to stop. A hiss means
there is still some pressure left.2. Then keep turning the pressure cap slowly, and
remove it.
5-35
Page 352 of 480

{CAUTION:
You can be burned if you spill coolant on hot
engine parts. Coolant contains ethylene glycol
and it will burn if the engine parts are hot
enough. Do not spill coolant on a hot engine.
1. You can remove the Intercooler System pressure
cap when the Intercooler System, including the
upper intercooler hoses, are no longer hot.Turn the pressure cap slowly counterclockwise
about one-quarter of a turn. If you hear a hiss, wait
for that to stop. This will allow any pressure still
left to be vented.
2. Then keep turning the pressure cap slowly, and
remove it.
3. Add the proper DEX-COOL
®coolant mixture to the
�ll neck, until the coolant reaches the COLD FILL
line on the �ll neck.
4. With the Intercooler System pressure cap off, start
the engine and let it run for a couple of minutes.
Then turn the engine off. By this time, the coolant
level inside the �ll neck may be lower. If the
level drops to where coolant is no longer visible
in the horizontal tube section of the �ll neck, with the
engine off add more of the DEX-COOL
®coolant
mixture to the �ll neck until the level is again visible
in the horizontal tube section.
5. Then replace the pressure cap. Be sure the
pressure cap is hand-tight and fully seated.
If the coolant is not at the proper level when the
system cools down again, see your dealer.
5-38
Page 368 of 480
Back-Up Lamps
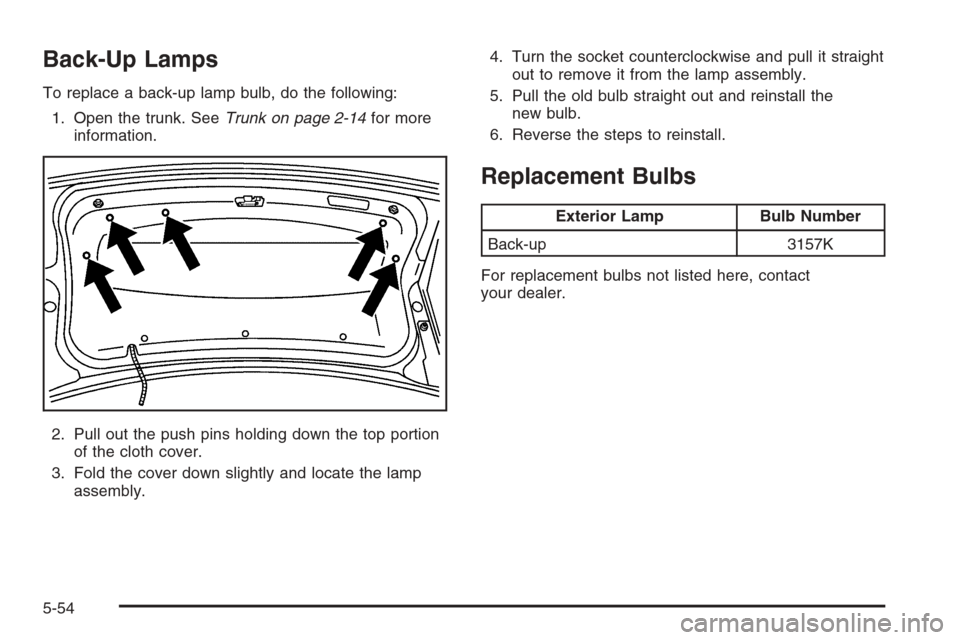
To replace a back-up lamp bulb, do the following:
1. Open the trunk. SeeTrunk on page 2-14for more
information.
2. Pull out the push pins holding down the top portion
of the cloth cover.
3. Fold the cover down slightly and locate the lamp
assembly.4. Turn the socket counterclockwise and pull it straight
out to remove it from the lamp assembly.
5. Pull the old bulb straight out and reinstall the
new bulb.
6. Reverse the steps to reinstall.
Replacement Bulbs
Exterior Lamp Bulb Number
Back-up 3157K
For replacement bulbs not listed here, contact
your dealer.
5-54
Page 399 of 480
Removing the Spare Tire and Tools
(STS Only)
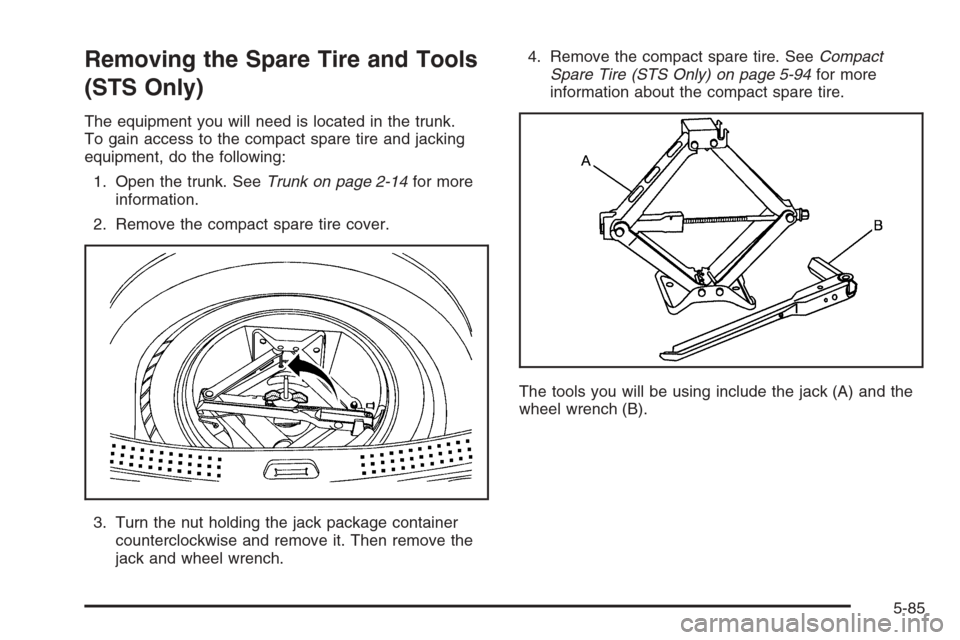
The equipment you will need is located in the trunk.
To gain access to the compact spare tire and jacking
equipment, do the following:
1. Open the trunk. SeeTrunk on page 2-14for more
information.
2. Remove the compact spare tire cover.
3. Turn the nut holding the jack package container
counterclockwise and remove it. Then remove the
jack and wheel wrench.4. Remove the compact spare tire. SeeCompact
Spare Tire (STS Only) on page 5-94for more
information about the compact spare tire.
The tools you will be using include the jack (A) and the
wheel wrench (B).
5-85
Page 400 of 480
Removing the Flat Tire and
Installing the Spare Tire (STS Only)
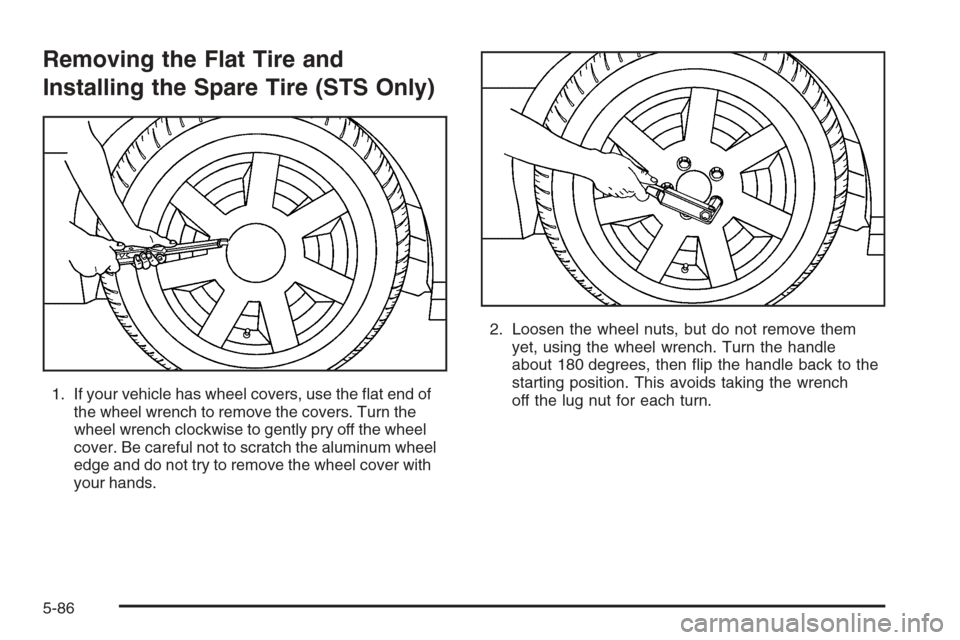
1. If your vehicle has wheel covers, use the �at end of
the wheel wrench to remove the covers. Turn the
wheel wrench clockwise to gently pry off the wheel
cover. Be careful not to scratch the aluminum wheel
edge and do not try to remove the wheel cover with
your hands.2. Loosen the wheel nuts, but do not remove them
yet, using the wheel wrench. Turn the handle
about 180 degrees, then �ip the handle back to the
starting position. This avoids taking the wrench
off the lug nut for each turn.
5-86
Page 402 of 480
{CAUTION:
Lifting a vehicle and getting under it to do
maintenance or repairs is dangerous without
the appropriate safety equipment and training.
The jack provided with your vehicle is
designed only for changing a �at tire. If it is
used for anything else, you or others could be
badly injured or killed if the vehicle slips off
the jack. Use the jack provided with your
vehicle only for changing a �at tire.
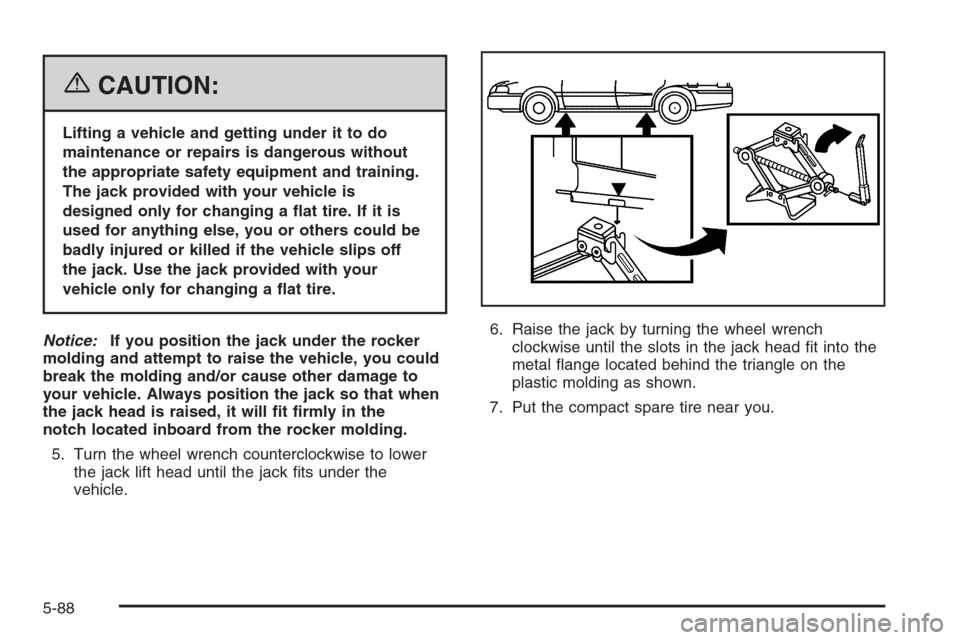
Notice:If you position the jack under the rocker
molding and attempt to raise the vehicle, you could
break the molding and/or cause other damage to
your vehicle. Always position the jack so that when
the jack head is raised, it will �t �rmly in the
notch located inboard from the rocker molding.
5. Turn the wheel wrench counterclockwise to lower
the jack lift head until the jack �ts under the
vehicle.6. Raise the jack by turning the wheel wrench
clockwise until the slots in the jack head �t into the
metal �ange located behind the triangle on the
plastic molding as shown.
7. Put the compact spare tire near you.
5-88
Page 403 of 480
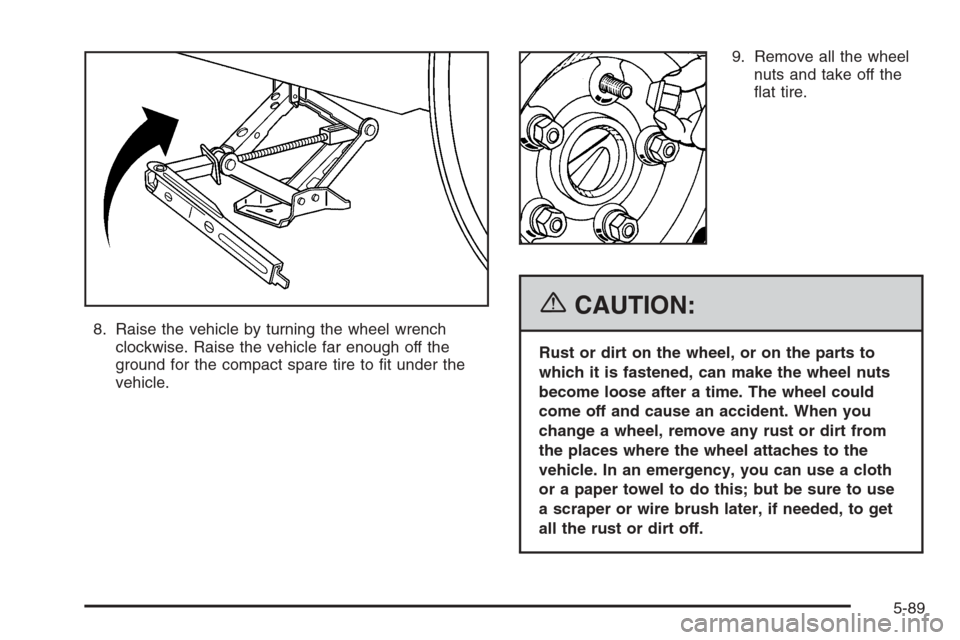
8. Raise the vehicle by turning the wheel wrench
clockwise. Raise the vehicle far enough off the
ground for the compact spare tire to �t under the
vehicle.9. Remove all the wheel
nuts and take off the
�at tire.
{CAUTION:
Rust or dirt on the wheel, or on the parts to
which it is fastened, can make the wheel nuts
become loose after a time. The wheel could
come off and cause an accident. When you
change a wheel, remove any rust or dirt from
the places where the wheel attaches to the
vehicle. In an emergency, you can use a cloth
or a paper towel to do this; but be sure to use
a scraper or wire brush later, if needed, to get
all the rust or dirt off.
5-89
Page 404 of 480
{CAUTION:
Never use oil or grease on studs or nuts. If
you do, the nuts might come loose. Your wheel
could fall off, causing a serious accident.
10. Remove any rust or dirt
from the wheel bolts,
mounting surfaces, and
spare wheel.
11. Install the spare tire.
12. Put the wheel nuts back on with the rounded end of
the nuts toward the wheel.
13. Tighten each wheel nut by turning it clockwise with
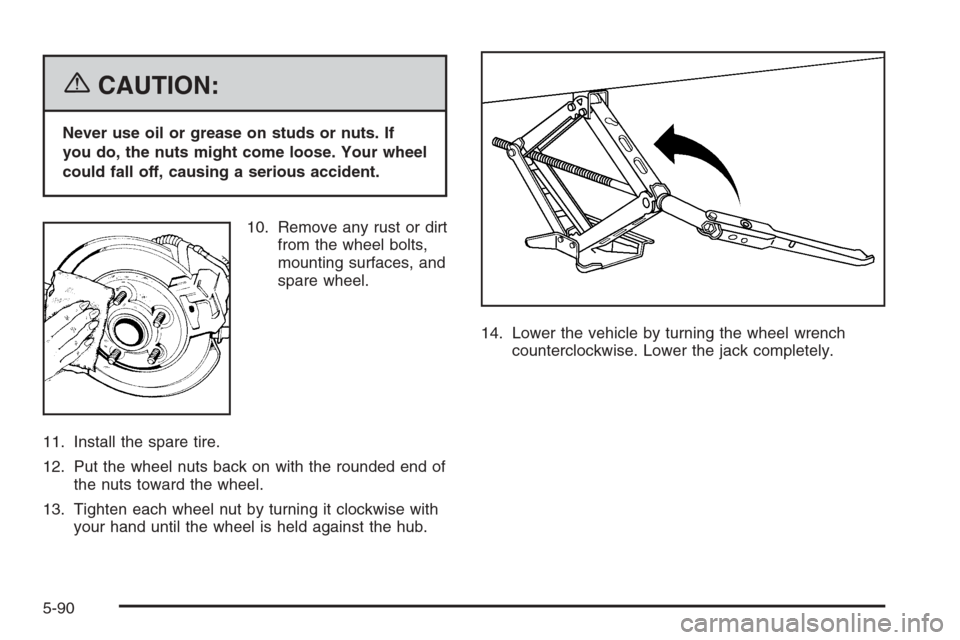
your hand until the wheel is held against the hub.14. Lower the vehicle by turning the wheel wrench
counterclockwise. Lower the jack completely.
5-90