CADILLAC STS 2011 1.G Owners Manual
Manufacturer: CADILLAC, Model Year: 2011, Model line: STS, Model: CADILLAC STS 2011 1.GPages: 528, PDF Size: 4.96 MB
Page 221 of 528
Black plate (35,1)Cadillac STS Owner Manual - 2011
Twilight Sentinel also provides exterior illumination as
you leave the vehicle. If Twilight Sentinel has turned on
the lamps when you turn off the ignition, the lamps will
remain on until:
.The exterior lamp switch is moved from off to the
parking lamp position.
.A delay time that you select has elapsed.
See Vehicle Personalization
on page 3‑59to select the
delay time needed. You can also select no delay time.
If the ignition is turned off with the exterior lamp switch
in the parking lamp or headlamp position, the Twilight
Sentinel delay will not occur. The lamps will turn off as
soon as the switch is turned off.
As with any vehicle, the regular headlamp system
should be turned on when needed.
Exterior Lighting Battery Saver
If the parking lamps or headlamps have been left on,
the exterior lamps will turn off about 10 minutes after the
ignition is turned off. This protects against draining the
battery in case you have accidentally left the headlamps
or parking lamps on. The battery saver does not work if
the headlamps are turned on after the ignition is
turned off. If you need to leave the lamps on for more than
10 minutes, use the exterior lamp control to turn the
lamps back on.
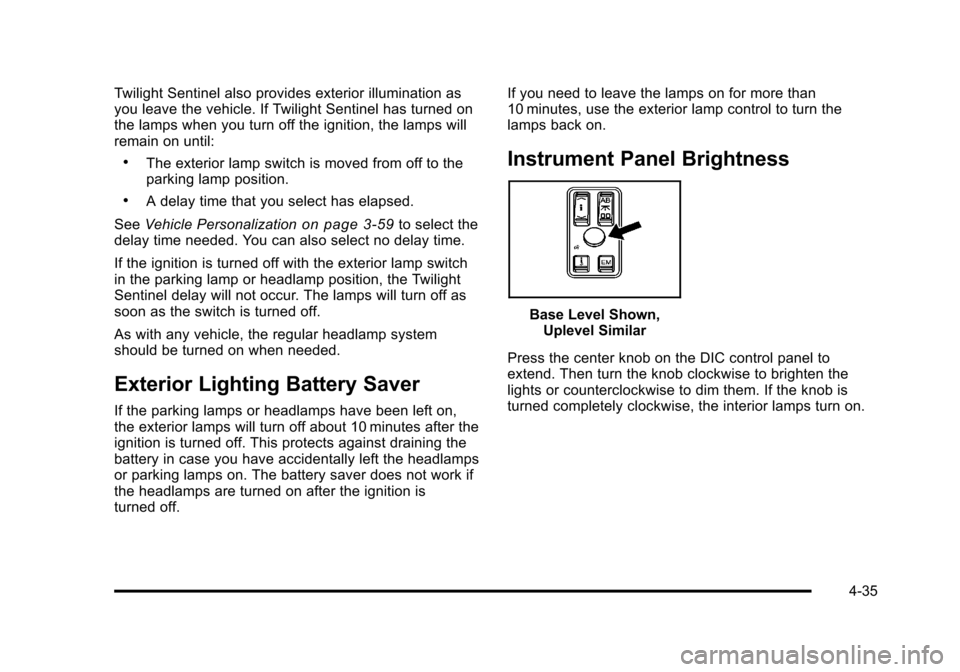
Instrument Panel Brightness
Base Level Shown,
Uplevel Similar
Press the center knob on the DIC control panel to
extend. Then turn the knob clockwise to brighten the
lights or counterclockwise to dim them. If the knob is
turned completely clockwise, the interior lamps turn on.
4-35
Page 222 of 528
Black plate (36,1)Cadillac STS Owner Manual - 2011
Entry Lighting
The entry lighting system turns on the reading and
dome lamps and the backlighting to the exterior lamp
control when a door is opened or if you press the
remote keyless entry transmitter unlock button.
If activated by the transmitter, the lighting will remain
active for about 25 seconds. The entry lighting system
uses the light sensor; it must be dark outside in order
for the lamps to turn on. The lamps turn off about
25 seconds after the last door is closed. They will dim
to off if the ignition is on, or immediately deactivate if
the power locks are activated.
Parade Dimming
This feature prohibits dimming of the instrument panel
displays and backlighting during daylight hours when
the key is in the ignition and the headlamps are on.
This feature operates with the light sensor and is fully
automatic. When the light sensor reads darkness
outside and the parking lamps are active, the
instrument panel displays can be adjusted by turning
the instrument panel brightness knob. SeeInstrument
Panel Brightness
on page 4‑35for additional
information.
Reading Lamps
The reading lamps are located on the overhead
console. These lamps come on automatically when any
door is opened.
For manual operation, press the button next to each
lamp to turn it on or off.
If the reading lamps are left on, they automatically shut
off 10 minutes after the ignition has been turned off.
Battery Load Management
The battery load management feature is designed to
monitor the vehicle's electrical load and determine when
the battery is in a heavy discharge condition. During
times of high electrical loading, the engine may idle at a
higher revolutions per minute (rpm) setting than normal
to make sure the battery charges. High electrical loads
may occur when several of the following are on:
headlamps, high beams, fog lamps, rear window
defogger, the climate control fan at high speeds, heated
seats and engine cooling fans.
If the battery continues to discharge, even with the
engine idling at a higher rpm setting, some electrical
loads will automatically be reduced. When this occurs,
the rear window defogger may take slightly longer to
clear the glass and the fan may cut back to a lower
4-36
Page 223 of 528

Black plate (37,1)Cadillac STS Owner Manual - 2011
speed. For more battery saving information, see
“Battery Saver Active Message”underDIC Warnings
and Messages on page 4‑76.
Electric Power Management
The vehicle has Electric Power Management (EPM) that
estimates the battery's temperature and state of charge.
It then adjusts the voltage for best performance and
extended life of the battery.
When the battery's state of charge is low, the voltage is
raised slightly to quickly bring the charge back up.
When the state of charge is high, the voltage is lowered
slightly to prevent overcharging. If the vehicle has a
voltmeter gauge or a voltage display on the Driver
Information Center (DIC), you may see the voltage
move up or down. This is normal. If there is a problem,
an alert will be displayed.
The battery can be discharged at idle if the electrical
loads are very high. This is true for all vehicles. This is
because the generator (alternator) may not be spinning
fast enough at idle to produce all the power that is
needed for very high electrical loads.
A high electrical load occurs when several of the
following are on, such as: headlamps, high beams, fog
lamps, rear window defogger, climate control fan at high
speed, heated seats, engine cooling fans, trailer loads,
and loads plugged into accessory power outlets. EPM works to prevent excessive discharge of the
battery. It does this by balancing the generator's output
and the vehicle's electrical needs. It can increase
engine idle speed to generate more power, whenever
needed. It can temporarily reduce the power demands
of some accessories.
Normally, these actions occur in steps or levels, without
being noticeable. In rare cases at the highest levels of
corrective action, this action may be noticeable to the
driver. If so, a Driver Information Center (DIC) message
might be displayed, such as BATTERY SAVER ACTIVE
or BATTERY VOLTAGE LOW. If this message is
displayed, it is recommended that the driver reduce the
electrical loads as much as possible. See
DIC Warnings
and Messages on page 4‑76.
Inadvertent Power Battery Saver
This feature is designed to protect the vehicle's battery
against drainage from the interior lamps, trunk lamp,
glove box lamp, or the garage door opener. When the
ignition is turned off, the power to these features will
automatically turn off after 10 minutes (three minutes if a
new car has 24 km (15 miles) or less). Power will be
restored for an additional 10 minutes if any door is
opened, the trunk is opened or the courtesy lamp switch
is turned on.
4-37
Page 224 of 528
Black plate (38,1)Cadillac STS Owner Manual - 2011
Head-Up Display (HUD)
{WARNING:
If the HUD image is too bright, or too high in your
field of view, it may take you more time to see
things you need to see when it is dark outside. Be
sure to keep the HUD image dim and placed low
in your field of view.
For vehicles with the Head-Up Display (HUD), some of
the driver information that appears on the instrument
panel cluster is projected onto an image on the
windshield.
The information can be displayed in English or metric
units. To change from English to metric units, see DIC
Operation and Displays on page 4‑70.
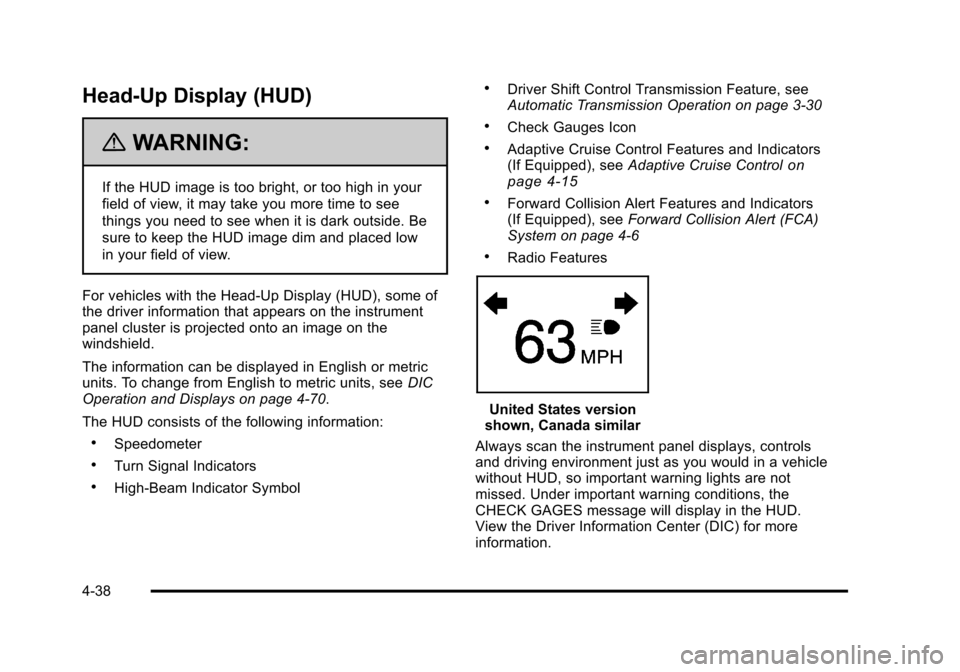
The HUD consists of the following information:
.Speedometer
.Turn Signal Indicators
.High-Beam Indicator Symbol
.Driver Shift Control Transmission Feature, see
Automatic Transmission Operation on page 3‑30
.Check Gauges Icon
.Adaptive Cruise Control Features and Indicators
(If Equipped), see Adaptive Cruise Controlon
page 4‑15
.Forward Collision Alert Features and Indicators
(If Equipped), see Forward Collision Alert (FCA)
System on page 4‑6
.Radio Features
United States version
shown, Canada similar
Always scan the instrument panel displays, controls
and driving environment just as you would in a vehicle
without HUD, so important warning lights are not
missed. Under important warning conditions, the
CHECK GAGES message will display in the HUD.
View the Driver Information Center (DIC) for more
information.
4-38
Page 225 of 528

Black plate (39,1)Cadillac STS Owner Manual - 2011
The HUD controls are located to the left of the steering
wheel on the DIC control panel.
Off:Turn the brightness control knob fully
counterclockwise to turn the HUD display off.
~ (Head-Up Display): Press to move the HUD display
up or down on the windshield. HUD cannot be adjusted
side‐to‐side. Brightness Control:
Press the knob on the center of
the DIC control panel to extend and then pull the knob
until is completely extended. Turn the knob clockwise or
counterclockwise to increase or decrease the
brightness of the HUD display.
To adjust the HUD so it can be seen properly:
1. Adjust the seat to a comfortable driving position, before adjusting the HUD position.
2. Start the engine.
3. Adjust the position and brightness of the HUD display.
The brightness of the HUD display is determined by the
light conditions in the direction the vehicle is facing and
where the HUD has been positioned on the windshield.
If the vehicle is facing a dark object or a heavily shaded
area, the HUD may begin to dim because it anticipates
the vehicle entering a dark area.
When sunlight enters the HUD it can make it difficult
to see the display. The display will return to normal
brightness when the sunlight no longer enters the HUD.
Wearing polarized sunglasses could also make the
HUD display harder to see.
4-39
Page 226 of 528
Black plate (40,1)Cadillac STS Owner Manual - 2011
The Ignition is On and the HUD Image
Cannot Be Seen
Check to see if:
.The HUD unit is covered.
.The brightness is adjusted properly.
.The HUD display is adjusted to the proper height.
.Ambient light in the direction the vehicle is facing
is low.
.A fuse is blown. SeeFuses and Circuit Breakerson page 6‑115.
The windshield is part of the HUD system. See
Windshield Replacement on page 6‑48.
The following messages may appear in the HUD:
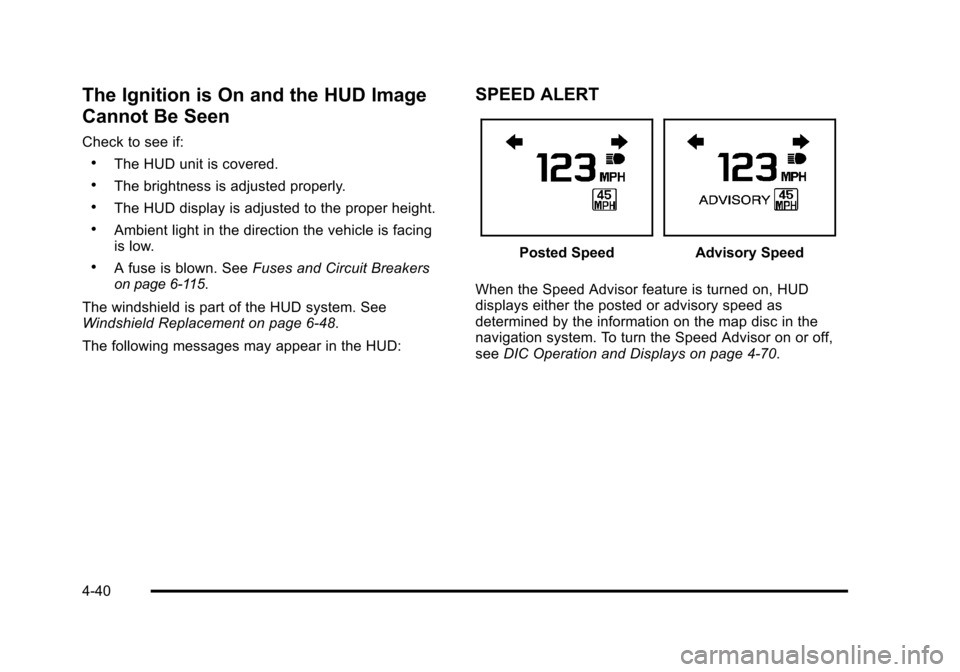
SPEED ALERT
Posted SpeedAdvisory Speed
When the Speed Advisor feature is turned on, HUD
displays either the posted or advisory speed as
determined by the information on the map disc in the
navigation system. To turn the Speed Advisor on or off,
see DIC Operation and Displays on page 4‑70.
4-40
Page 227 of 528
Black plate (41,1)Cadillac STS Owner Manual - 2011
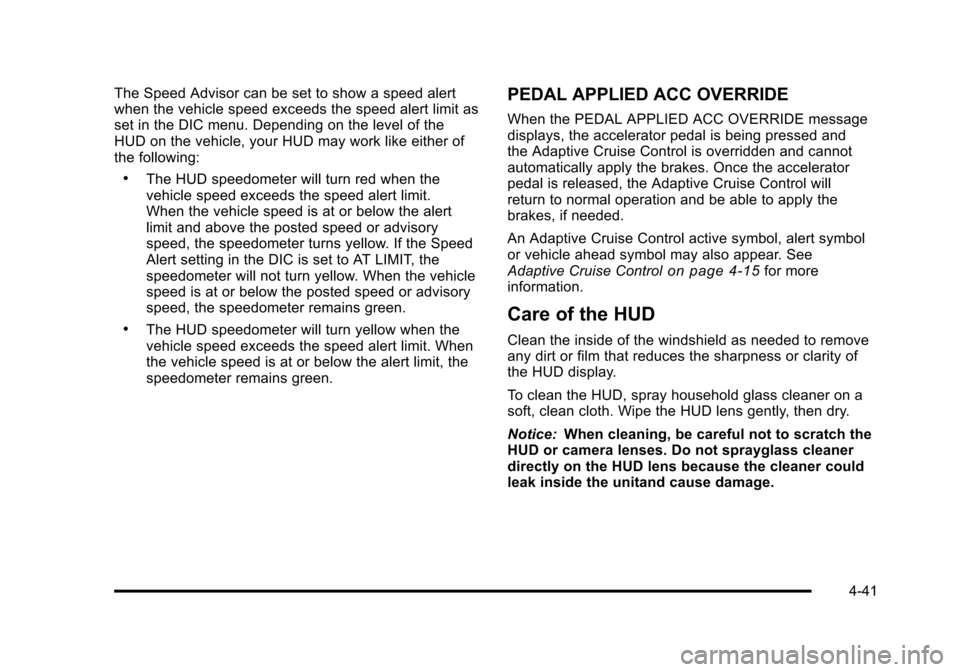
The Speed Advisor can be set to show a speed alert
when the vehicle speed exceeds the speed alert limit as
set in the DIC menu. Depending on the level of the
HUD on the vehicle, your HUD may work like either of
the following:
.The HUD speedometer will turn red when the
vehicle speed exceeds the speed alert limit.
When the vehicle speed is at or below the alert
limit and above the posted speed or advisory
speed, the speedometer turns yellow. If the Speed
Alert setting in the DIC is set to AT LIMIT, the
speedometer will not turn yellow. When the vehicle
speed is at or below the posted speed or advisory
speed, the speedometer remains green.
.The HUD speedometer will turn yellow when the
vehicle speed exceeds the speed alert limit. When
the vehicle speed is at or below the alert limit, the
speedometer remains green.
PEDAL APPLIED ACC OVERRIDE
When the PEDAL APPLIED ACC OVERRIDE message
displays, the accelerator pedal is being pressed and
the Adaptive Cruise Control is overridden and cannot
automatically apply the brakes. Once the accelerator
pedal is released, the Adaptive Cruise Control will
return to normal operation and be able to apply the
brakes, if needed.
An Adaptive Cruise Control active symbol, alert symbol
or vehicle ahead symbol may also appear. See
Adaptive Cruise Control
on page 4‑15for more
information.
Care of the HUD
Clean the inside of the windshield as needed to remove
any dirt or film that reduces the sharpness or clarity of
the HUD display.
To clean the HUD, spray household glass cleaner on a
soft, clean cloth. Wipe the HUD lens gently, then dry.
Notice: When cleaning, be careful not to scratch the
HUD or camera lenses. Do not sprayglass cleaner
directly on the HUD lens because the cleaner could
leak inside the unitand cause damage.
4-41
Page 228 of 528
Black plate (42,1)Cadillac STS Owner Manual - 2011
Accessory Power Outlet(s)
Accessory power outlets can be used to plug in
electrical equipment, such as a cell phone or MP3
player.
The vehicle has one outlet in front of the center
console, one in the center console lid and there may be
an additional outlet in the rear of the center console.
The vehicle may have a small cap that must be
removed to access the accessory power outlet.
Replace the cap when not in use. use.
{WARNING:
Power is always supplied to the outlets. Do not
leave electrical equipment plugged in when the
vehicle is not in use because the vehicle could
catch fire and cause injury or death.Notice:
Leaving electrical equipment plugged in for
an extended period of time while the vehicle is off
will drain the battery. Always unplug electrical
equipment when not in use and do not plug in
equipment that exceeds the maximum 20 ampere
rating.
Certain accessory power plugs may not be compatible
to the accessory power outlet and could overload
vehicle and adapter fuses. If a problem is experienced,
see your dealer.
When adding electrical equipment, be sure to follow
the proper installation instructions included with the
equipment. See Add-On Electrical Equipment
on
page 6‑114.
Notice: Hanging heavy equipment from the power
outlet can cause damage not covered by the vehicle
warranty. The power outlets are designed for
accessory power plugs only, such as cell phone
charge cords.
4-42
Page 229 of 528
Black plate (43,1)Cadillac STS Owner Manual - 2011
Climate Controls
Dual Climate Control System
The heating, cooling, and ventilation can be controlled
for the vehicle with this system.
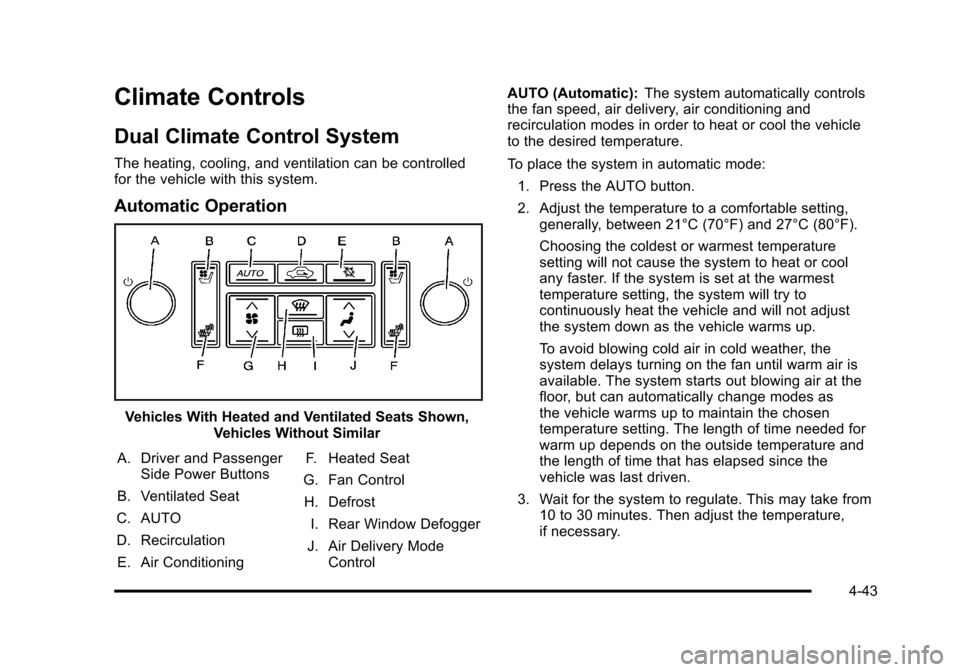
Automatic Operation
Vehicles With Heated and Ventilated Seats Shown,Vehicles Without Similar
A. Driver and Passenger Side Power Buttons
B. Ventilated Seat
C. AUTO
D. Recirculation E. Air Conditioning F. Heated Seat
G. Fan Control H. Defrost I. Rear Window Defogger
J. Air Delivery Mode Control AUTO (Automatic):
The system automatically controls
the fan speed, air delivery, air conditioning and
recirculation modes in order to heat or cool the vehicle
to the desired temperature.
To place the system in automatic mode:
1. Press the AUTO button.
2. Adjust the temperature to a comfortable setting, generally, between 21°C (70°F) and 27°C (80°F).
Choosing the coldest or warmest temperature
setting will not cause the system to heat or cool
any faster. If the system is set at the warmest
temperature setting, the system will try to
continuously heat the vehicle and will not adjust
the system down as the vehicle warms up.
To avoid blowing cold air in cold weather, the
system delays turning on the fan until warm air is
available. The system starts out blowing air at the
floor, but can automatically change modes as
the vehicle warms up to maintain the chosen
temperature setting. The length of time needed for
warm up depends on the outside temperature and
the length of time that has elapsed since the
vehicle was last driven.
3. Wait for the system to regulate. This may take from 10 to 30 minutes. Then adjust the temperature,
if necessary.
4-43
Page 230 of 528
Black plate (44,1)Cadillac STS Owner Manual - 2011
The display can be changed from English to metric
units through the Driver Information Center (DIC). See
DIC Operation and Displays on page 4‑70.
Manual Operation
O(Driver's Temperature Control): Press to turn the
entire climate control system on or off. Turn the knob to
increase or decrease the temperature inside the
vehicle.
O (Passenger's Temperature Control): Press to turn
the passenger climate control system on. Turn the knob
to increase or decrease the temperature for the front
passenger only. The passenger side power button does
not turn off the climate control system. The system is
set to the same setting as the driver.
y A z (Fan Control): Press to increase or decrease
the fan speed. This cancels automatic operation and
lets the amount of airflow be adjusted manually. Press
AUTO to return to automatic operation.
If the airflow seems low when the fan speed is at the
highest setting, the passenger compartment air filter
may need to be replaced. For more information, see
Passenger Compartment Air Filter
on page 4‑50and
Scheduled Maintenance on page 7‑3. yN
z(Air Delivery Mode): Press to change the
direction of the airflow in the vehicle. This cancels
automatic operation and lets the air delivery mode be
adjusted manually. Press AUTO to return to automatic
operation.
The outboard air outlets always receive airflow
regardless of the mode selected. See Outlet Adjustment
on page 4‑48to change this airflow from the outboard
outlets.
To change the current mode, select one of the following:
Y (Vent): Air is directed to the instrument panel outlets.
\ (Bi-Level): Air is divided between the instrument
panel outlets and the floor outlets. In automatic
operation, cooler air is directed to the upper outlets
and warmer air to the floor outlets.
[ (Floor): Air is directed to the floor outlets, with some
air directed to the windshield and side windows.
4-44