light CADILLAC STS V 2007 1.G Owners Manual
[x] Cancel search | Manufacturer: CADILLAC, Model Year: 2007, Model line: STS V, Model: CADILLAC STS V 2007 1.GPages: 560, PDF Size: 2.92 MB
Page 395 of 560
If you get the overheat warning with no sign of
steam, try this for a minute or so:
1. In heavy traffic, let the engine idle in
NEUTRAL (N) while stopped. If it is safe to do
so, pull off the road, shift to PARK (P) or
NEUTRAL (N) and let the engine idle.
2. Set the climate controls to the highest heat
setting and fan speed and open the windows,
as necessary.
If the coolant warning light is not on or the coolant
temperature gage does not indicate the engine
is overheating, you can drive. Just to be safe, drive
slower for about 10 minutes. If the warnings do
not come back on, drive normally.
If the warnings continue and you have not stopped,
pull over, stop, and park the vehicle right away.
If there is still no sign of steam, idle the engine for
three minutes while parked. If the warnings are
still indicated, turn off the engine and get everyone
out of the vehicle until it cools down. Also, see
“Overheated Engine Protection Operating Mode”
later in this section.
You might decide not to lift the hood but to get
service help right away.Overheated Engine Protection
Operating Mode
This operating mode allows your vehicle to be
driven to a safe place in an emergency. Should an
overheated engine condition exist, an overheat
protection mode which alternates �ring groups of
cylinders helps prevent engine damage. In this
mode, you will notice a loss in power and engine
performance. An engine overheat warning will
indicate that an overheat condition exists. Driving
extended miles (km) and/or towing a trailer in
the overheat protection mode should be avoided.
Notice:After driving in the overheated
engine protection operating mode, to avoid
engine damage, allow the engine to cool before
attempting any repair. The engine oil will be
severely degraded. Repair the cause of coolant
loss and change the oil. SeeEngine Oil on
page 380.
395
Page 396 of 560
Cooling System
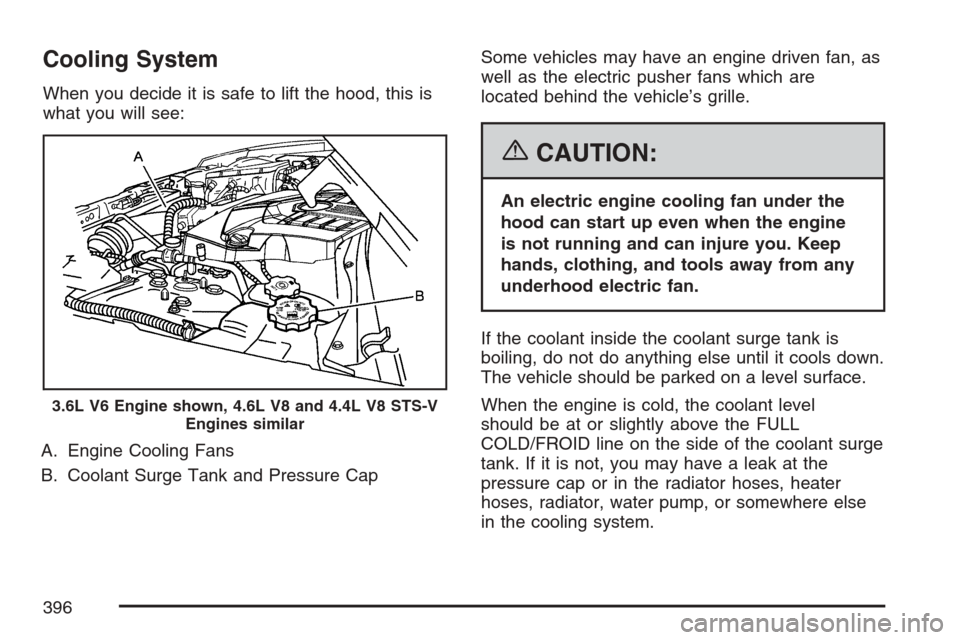
When you decide it is safe to lift the hood, this is
what you will see:
A. Engine Cooling Fans
B. Coolant Surge Tank and Pressure CapSome vehicles may have an engine driven fan, as
well as the electric pusher fans which are
located behind the vehicle’s grille.
{CAUTION:
An electric engine cooling fan under the
hood can start up even when the engine
is not running and can injure you. Keep
hands, clothing, and tools away from any
underhood electric fan.
If the coolant inside the coolant surge tank is
boiling, do not do anything else until it cools down.
The vehicle should be parked on a level surface.
When the engine is cold, the coolant level
should be at or slightly above the FULL
COLD/FROID line on the side of the coolant surge
tank. If it is not, you may have a leak at the
pressure cap or in the radiator hoses, heater
hoses, radiator, water pump, or somewhere else
in the cooling system.
3.6L V6 Engine shown, 4.6L V8 and 4.4L V8 STS-V
Engines similar
396
Page 400 of 560
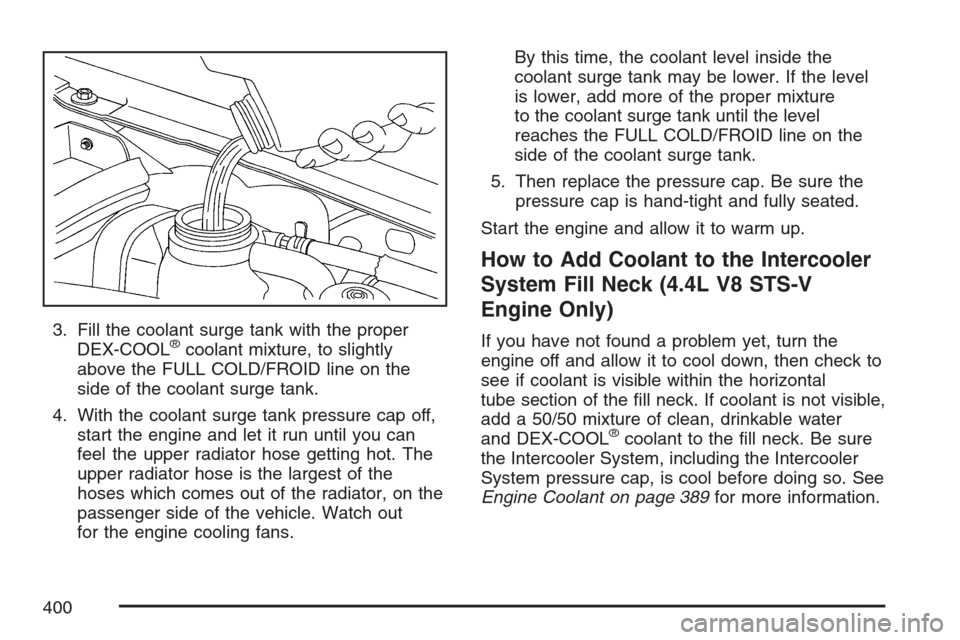
3. Fill the coolant surge tank with the proper
DEX-COOL®coolant mixture, to slightly
above the FULL COLD/FROID line on the
side of the coolant surge tank.
4. With the coolant surge tank pressure cap off,
start the engine and let it run until you can
feel the upper radiator hose getting hot. The
upper radiator hose is the largest of the
hoses which comes out of the radiator, on the
passenger side of the vehicle. Watch out
for the engine cooling fans.By this time, the coolant level inside the
coolant surge tank may be lower. If the level
is lower, add more of the proper mixture
to the coolant surge tank until the level
reaches the FULL COLD/FROID line on the
side of the coolant surge tank.
5. Then replace the pressure cap. Be sure the
pressure cap is hand-tight and fully seated.
Start the engine and allow it to warm up.
How to Add Coolant to the Intercooler
System Fill Neck (4.4L V8 STS-V
Engine Only)
If you have not found a problem yet, turn the
engine off and allow it to cool down, then check to
see if coolant is visible within the horizontal
tube section of the �ll neck. If coolant is not visible,
add a 50/50 mixture of clean, drinkable water
and DEX-COOL
®coolant to the �ll neck. Be sure
the Intercooler System, including the Intercooler
System pressure cap, is cool before doing so. See
Engine Coolant on page 389for more information.
400
Page 407 of 560
{CAUTION:
The brake wear warning sound means that
soon the brakes will not work well. That
could lead to an accident. When you hear
the brake wear warning sound, have your
vehicle serviced.
Notice:Continuing to drive with worn-out
brake pads could result in costly brake repair.
Some driving conditions or climates may cause
a brake squeal when the brakes are �rst applied or
lightly applied. This does not mean something is
wrong with your brakes.
Properly torqued wheel nuts are necessary to help
prevent brake pulsation. When tires are rotated,
inspect brake pads for wear and evenly tighten
wheel nuts in the proper sequence to GM torque
speci�cations.
Brake linings should always be replaced as
complete axle sets.
Brake Pedal Travel
See your dealer if the brake pedal does not return
to normal height, or if there is a rapid increase in
pedal travel. This could be a sign of brake trouble.
Brake Adjustment
Every time you apply the brakes, with or without
the vehicle moving, your brakes adjust for wear.
Replacing Brake System Parts
The braking system on a vehicle is complex. Its
many parts have to be of top quality and work well
together if the vehicle is to have really good
braking. Your vehicle was designed and tested with
top-quality GM brake parts. When you replace parts
of your braking system — for example, when your
brake linings wear down and you need new ones
put in — be sure you get new approved
replacement parts. If you do not, your brakes may
no longer work properly. For example, if someone
puts in brake linings that are wrong for your vehicle,
the balance between your front and rear brakes can
change — for the worse. The braking performance
you have come to expect can change in many other
ways if someone puts in the wrong replacement
brake parts.
407
Page 410 of 560
Notice:If you leave your radio or other
accessories on during the jump starting
procedure, they could be damaged. The repairs
would not be covered by your warranty.
Always turn off your radio and other
accessories when jump starting your vehicle.
3. Turn off the ignition on both vehicles.
Unplug unnecessary accessories plugged into
the cigarette lighter or the accessory power
outlets. Turn off the radio and all lamps
that are not needed. This will avoid sparks
and help save both batteries. And it could
save the radio.4. Open the hoods and locate the positive (+)
and negative (−) terminal locations of the
other vehicle, as well as the positive (+)
terminal location on your vehicle’s battery.
SeeEngine Compartment Overview on
page 373for more information on the location
of the battery.
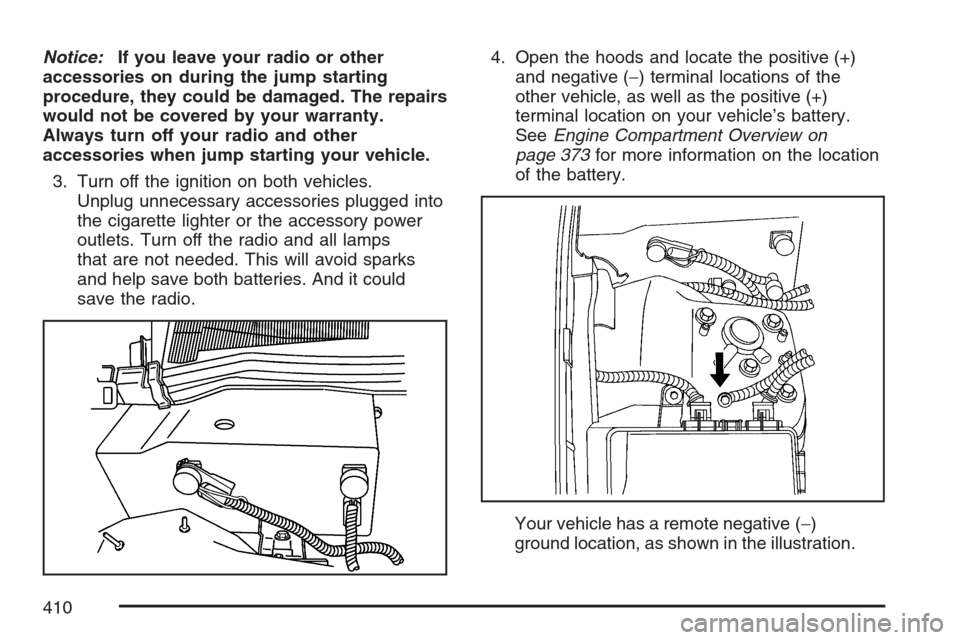
Your vehicle has a remote negative (−)
ground location, as shown in the illustration.
410
Page 411 of 560
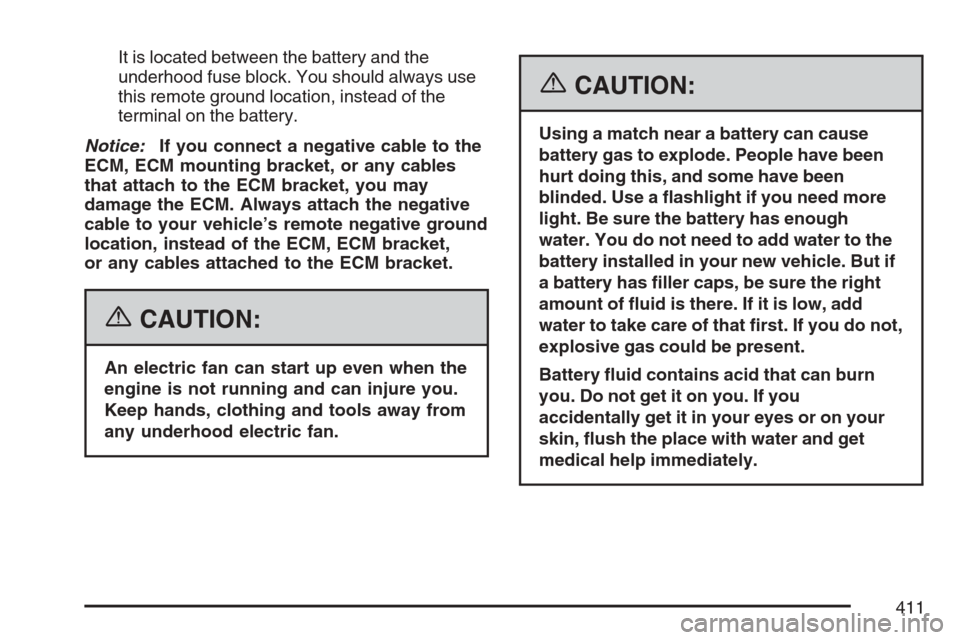
It is located between the battery and the
underhood fuse block. You should always use
this remote ground location, instead of the
terminal on the battery.
Notice:If you connect a negative cable to the
ECM, ECM mounting bracket, or any cables
that attach to the ECM bracket, you may
damage the ECM. Always attach the negative
cable to your vehicle’s remote negative ground
location, instead of the ECM, ECM bracket,
or any cables attached to the ECM bracket.
{CAUTION:
An electric fan can start up even when the
engine is not running and can injure you.
Keep hands, clothing and tools away from
any underhood electric fan.
{CAUTION:
Using a match near a battery can cause
battery gas to explode. People have been
hurt doing this, and some have been
blinded. Use a �ashlight if you need more
light. Be sure the battery has enough
water. You do not need to add water to the
battery installed in your new vehicle. But if
a battery has �ller caps, be sure the right
amount of �uid is there. If it is low, add
water to take care of that �rst. If you do not,
explosive gas could be present.
Battery �uid contains acid that can burn
you. Do not get it on you. If you
accidentally get it in your eyes or on your
skin, �ush the place with water and get
medical help immediately.
411
Page 418 of 560
High Intensity Discharge (HID)
Lighting
{CAUTION:
The low beam high intensity discharge
lighting system operates at a very high
voltage. If you try to service any of the
system components, you could be
seriously injured. Have your dealer or a
quali�ed technician service them.
Your vehicle has HID headlamps. After your
vehicle’s HID headlamp bulb has been replaced,
you may notice that the beam is a slightly different
shade than it was originally. This is normal.
Halogen Bulbs
{CAUTION:
Halogen bulbs have pressurized gas
inside and can burst if you drop or
scratch the bulb. You or others could be
injured. Be sure to read and follow the
instructions on the bulb package.
Back-Up Lamps
To replace a back-up lamp bulb, do the following:
1. Open the trunk. SeeTrunk on page 101
for more information.
418
Page 419 of 560
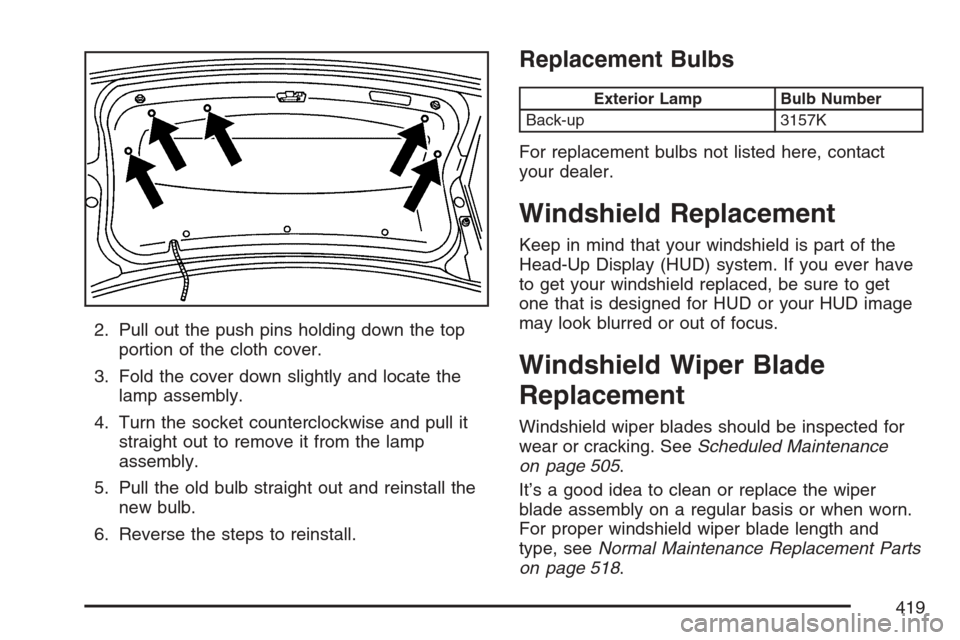
2. Pull out the push pins holding down the top
portion of the cloth cover.
3. Fold the cover down slightly and locate the
lamp assembly.
4. Turn the socket counterclockwise and pull it
straight out to remove it from the lamp
assembly.
5. Pull the old bulb straight out and reinstall the
new bulb.
6. Reverse the steps to reinstall.
Replacement Bulbs
Exterior Lamp Bulb Number
Back-up 3157K
For replacement bulbs not listed here, contact
your dealer.
Windshield Replacement
Keep in mind that your windshield is part of the
Head-Up Display (HUD) system. If you ever have
to get your windshield replaced, be sure to get
one that is designed for HUD or your HUD image
may look blurred or out of focus.
Windshield Wiper Blade
Replacement
Windshield wiper blades should be inspected for
wear or cracking. SeeScheduled Maintenance
on page 505.
It’s a good idea to clean or replace the wiper
blade assembly on a regular basis or when worn.
For proper windshield wiper blade length and
type, seeNormal Maintenance Replacement Parts
on page 518.
419
Page 427 of 560
Cold Tire Pressure:The amount of air pressure
in a tire, measured in pounds per square inch
(psi) or kilopascals (kPa) before a tire has built up
heat from driving. SeeIn�ation - Tire Pressure
on page 431.
Curb Weight:This means the weight of a motor
vehicle with standard and optional equipment
including the maximum capacity of fuel, oil, and
coolant, but without passengers and cargo.
DOT Markings:A code molded into the sidewall
of a tire signifying that the tire is in compliance
with the U.S. Department of Transportation (DOT)
motor vehicle safety standards. The DOT code
includes the Tire Identi�cation Number (TIN),
an alphanumeric designator which can also identify
the tire manufacturer, production plant, brand,
and date of production.
GVWR:Gross Vehicle Weight Rating. See
Loading Your Vehicle on page 349.
GAWR FRT:Gross Axle Weight Rating for the
front axle. SeeLoading Your Vehicle on page 349.GAWR RR:Gross Axle Weight Rating for the rear
axle. SeeLoading Your Vehicle on page 349.
Intended Outboard Sidewall:The side of
an asymmetrical tire, that must always face
outward when mounted on a vehicle.
Kilopascal (kPa):The metric unit for air pressure.
Light Truck (LT-Metric) Tire:A tire used on
light duty trucks and some multipurpose passenger
vehicles.
Load Index:An assigned number ranging from
1 to 279 that corresponds to the load carrying
capacity of a tire.
Maximum In�ation Pressure:The maximum air
pressure to which a cold tire may be in�ated.
The maximum air pressure is molded onto
the sidewall.
Maximum Load Rating:The load rating for a tire
at the maximum permissible in�ation pressure
for that tire.
427
Page 428 of 560
Maximum Loaded Vehicle Weight:The sum of
curb weight, accessory weight, vehicle capacity
weight, and production options weight.
Normal Occupant Weight:The number of
occupants a vehicle is designed to seat multiplied
by 150 lbs (68 kg). SeeLoading Your Vehicle
on page 349.
Occupant Distribution:Designated seating
positions.
Outward Facing Sidewall:The side of an
asymmetrical tire that has a particular side that
faces outward when mounted on a vehicle.
The side of the tire that contains a whitewall, bears
white lettering, or bears manufacturer, brand,
and/or model name molding that is higher
or deeper than the same moldings on the other
sidewall of the tire.
Passenger (P-Metric) Tire:A tire used on
passenger cars and some light duty trucks and
multipurpose vehicles.Recommended In�ation Pressure:Vehicle
manufacturer’s recommended tire in�ation
pressure as shown on the tire placard. See
In�ation - Tire Pressure on page 431andLoading
Your Vehicle on page 349.
Radial Ply Tire:A pneumatic tire in which the ply
cords that extend to the beads are laid at 90
degrees to the centerline of the tread.
Rim:A metal support for a tire and upon which
the tire beads are seated.
Sidewall:The portion of a tire between the tread
and the bead.
Speed Rating:An alphanumeric code assigned
to a tire indicating the maximum speed at
which a tire can operate.
Traction:The friction between the tire and the
road surface. The amount of grip provided.
Tread:The portion of a tire that comes into
contact with the road.
428