brake light CADILLAC XLR 2008 1.G Owners Manual
[x] Cancel search | Manufacturer: CADILLAC, Model Year: 2008, Model line: XLR, Model: CADILLAC XLR 2008 1.GPages: 470, PDF Size: 8.39 MB
Page 72 of 470

Power Door Locks
The power door lock switches are located on the doors.
There is an indicator light on the rear of the door
near the window.
K(Unlock):Press to unlock the doors.
When pressed, a beep sounds. If the door is closed
when pressed, the light �ashes twice. If the door is
open when pressed, the light �ashes.
Q(Lock):Press to lock the doors.
When pressed, a beep sounds. If the door is closed
when pressed, the light comes on for a few seconds,
then turns off. If the door is open when pressed,
the light stays on.
Automatic Door Lock
Your vehicle is programmed so that, when the doors are
closed, the ignition is on and the shift lever is moved
out of PARK (P), all the doors will lock.
If someone needs to get out while the vehicle is not in
PARK (P), have the person use the power door unlock
switch. When the door is closed again, the doors will lock
either when your foot is removed from the brake or the
vehicle speed becomes faster than 8 mph (13 km/h).
Programmable Automatic
Door Unlock
Your vehicle is programmed so that, when the shift
lever is moved into PARK (P), both doors will unlock.
With the vehicle in PARK (P) and the engine running,
door unlocking can be programmed through prompts
displayed on the Driver Information Center (DIC).
These prompts allow the driver to choose various
unlock settings. For programming information,
seeDIC Vehicle Personalization on page 3-76.
Lockout Protection
Your vehicle can be programmed to sound the horn
three times and unlock the driver’s door when both
doors are closed and there is a keyless access
transmitter inside the vehicle. When the driver’s door
is opened, a reminder chime will sound continuously.
The vehicle will remain locked only when at least
one transmitter has been removed from the vehicle
and both doors are closed. SeeDIC Vehicle
Personalization on page 3-76.
2-12
Page 90 of 470

Some automatic downshifts can occur to maintain
minimum engine speed. This only happens if the vehicle
is left in too high of a gear for the vehicle’s speed.
For example, if you have been driving in sixth gear
range and come to a stop without manually
downshifting, the transmission automatically downshifts
to �rst gear and displays �rst gear on the HUD. As
you begin to drive and accelerate, the transmission
remains in �rst gear until the driver selects an upshift.
DSC can be used while using cruise control, but
transmission shifting is different while the cruise control
is on. This is not a malfunction and is necessary to
let proper operation of the cruise control.
To return to fully automatic operation, move the shift
lever to the right and back into DRIVE (D).
When accelerating your vehicle from a stop in snowy
and icy conditions, you may want to shift into second
gear. A higher gear lets you gain more traction on
slippery surfaces.
In higher gears, on the XLR only, an automatic downshift
occurs if you press the accelerator pedal to the �oor.
This feature provides adequate acceleration capabilities
if you forget to downshift manually. Tap the shifter
forward and the vehicle upshifts.Parking Brake
The parking brake pedal is
located to the left of the
regular brake pedal,
near the driver’s door.
To set the parking brake, hold the regular brake pedal
down with your right foot and push the parking brake
pedal down with your left foot.
If the ignition is on, the parking brake indicator light
on the instrument panel cluster should come on.
If it does not, you need to have your vehicle serviced.
2-30
Page 91 of 470

When you move out of PARK (P) or NEUTRAL (N)
and the engine is running, the parking brake should
release. If the parking brake has not been fully released
and you try to drive off with the parking brake on, the
parking brake indicator light will come on and stay on.
If the parking brake does not fully release, you can
manually release the pedal.
{CAUTION:
Always shift to PARK (P) before pulling the
manual release lever. If your hand or arm is in
the way of the pedal you could be hurt. The
pedal springs back quickly. Keep your hand
and arm away when you use the manual
release lever.
Before releasing the manual parking brake, be sure to
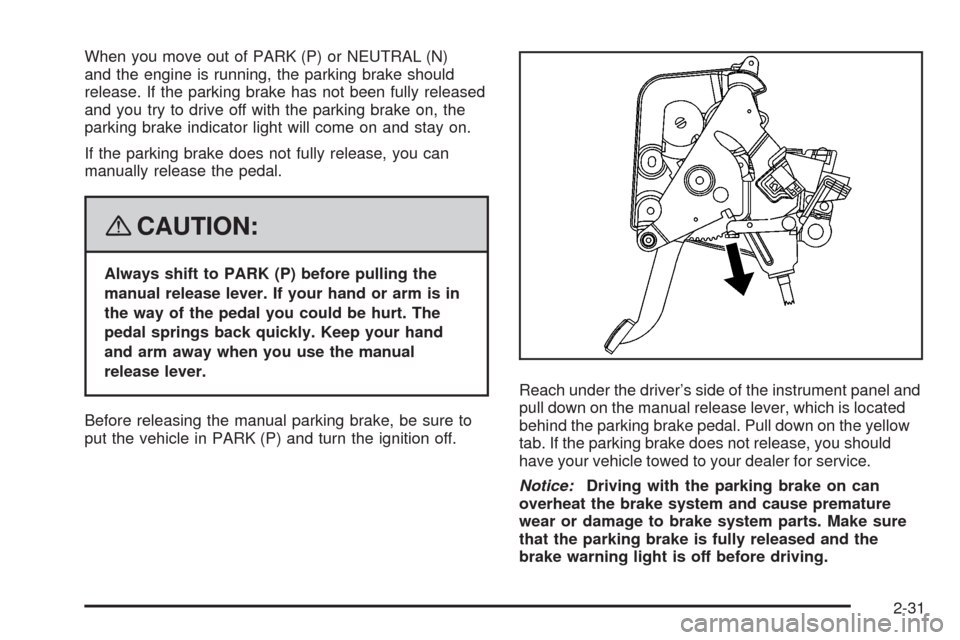
put the vehicle in PARK (P) and turn the ignition off.Reach under the driver’s side of the instrument panel and
pull down on the manual release lever, which is located
behind the parking brake pedal. Pull down on the yellow
tab. If the parking brake does not release, you should
have your vehicle towed to your dealer for service.
Notice:Driving with the parking brake on can
overheat the brake system and cause premature
wear or damage to brake system parts. Make sure
that the parking brake is fully released and the
brake warning light is off before driving.
2-31
Page 100 of 470

To be detected, objects must be at least 10 inches
(25.4 cm) off the ground and below trunk level.
Objects must also be within 5 feet (1.5 m) from your
rear bumper. This distance may be less during warmer
or humid weather.
A single beep will sound the �rst time an object is
detected between 20 inches (0.5 m) and 5 feet (1.5 m)
away. Repeated beeping will occur when you are
closer than 20 inches (0.5 m) from the object.
The following describes what will occur with the URPA
display as you get closer to a detected object:
Description English Metric
amber light 5 ft 1.5 m
amber/amber lights 40 in 1.0 m
amber/amber/red
lights/continuous beep20 in 0.5 m
amber/amber/red
lights �ashing and
continuous beep1 ft 0.3 m
When the System Does Not Seem to
Work Properly
The ultrasonic sensors are not clean, a red URPA
display light may illuminate when the vehicle is in
REVERSE (R). Keep your rear bumper free of mud,
dirt, snow, ice and slush. For cleaning instructions,
seeWashing Your Vehicle on page 6-83.
A trailer was attached to your vehicle, or a bicycle
or an object was hanging out of your trunk during
your last drive cycle, the red light may illuminate.
Once the attached object is removed, URPA
will return to normal operation.
The vehicle’s bumper is damaged. Take the vehicle
to your dealer/retailer to repair the system.
Other conditions may affect system performance,
such as vibrations from a jackhammer or the
compression of air brakes on a very large truck.
If the system is still disabled, after driving forward at
least 15 mph (25 km/h), take your vehicle to your
dealer/retailer.
2-40
Page 124 of 470

Voltmeter Gage............................................3-50
Brake System Warning Light..........................3-50
Antilock Brake System
Warning Light...........................................3-51
Traction Control System (TCS)
Warning Light...........................................3-52
Engine Coolant Temperature Gage..................3-53
Tire Pressure Light.......................................3-53
Malfunction Indicator Lamp.............................3-54
Engine Oil Pressure Gage.............................3-57
Security Light...............................................3-58
Fog Lamp Light............................................3-58
Lights On Reminder......................................3-58
Highbeam On Light.......................................3-58
Fuel Gage...................................................3-59Driver Information Center (DIC).......................3-60
DIC Operation and Displays...........................3-60
DIC Warnings and Messages.........................3-63
Other Messages...........................................3-74
DIC Vehicle Personalization............................3-76
Trip Computer................................................3-80
Oil Life Indicator...........................................3-80
Audio System(s).............................................3-81
Theft-Deterrent Feature..................................3-82
Audio Steering Wheel Controls.......................3-82
Radio Reception...........................................3-84
Care of Your CDs.........................................3-85
Care of the CD Player...................................3-85
Diversity Antenna System..............................3-85
XM™ Satellite Radio Antenna System.............3-85
Section 3 Instrument Panel
3-2
Page 137 of 470

Using Cruise Control on Hills
How well your cruise control works on hills depends upon
your speed, load and the steepness of the hills. When
going up steep hills, you might have to step on the
accelerator pedal to maintain your speed. When going
downhill, you might have to brake or shift to a lower gear
to keep your vehicle’s speed down. Of course, applying
the brake turns off the cruise control. Many drivers �nd
this to be too much trouble and do not use cruise control
on steep hills.
Ending Cruise Control
There are two ways to turn off the cruise control:
Step lightly on the brake pedal
Move the cruise control switch to off
Erasing Speed Memory
Turning off the cruise control or the ignition, will erase
your cruise control set speed memory.
Adaptive Cruise Control
If your vehicle has this feature, be sure to read this
entire section before using it.
The system operates on a radio frequency subject to
Federal Communications Commission (FCC) Rules and
with Industry Canada.
This device complies with Part 15 of the FCC Rules.
Operation is subject to the following two conditions:
1. This device may not cause interference.
2. This device must accept any interference received,
including interference that may cause undesired
operation of the device.
This device complies with RSS-210 of Industry Canada.
Operation is subject to the following two conditions:
1. This device may not cause interference.
2. This device must accept any interference received,
including interference that may cause undesired
operation of the device.
Changes or modi�cations to this system by other than
an authorized service facility could void authorization to
use this equipment.
3-15
Page 144 of 470

Approaching and Following a Vehicle
The vehicle ahead symbol
only appears on the HUD
when a vehicle ahead
is detected in your path.
If this symbol does not appear, or disappears brie�y,
Adaptive Cruise Control will not respond to vehicles
you may see ahead.{CAUTION:
When the Adaptive Cruise Control radar is
blocked by snow, ice, or dirt, it may not detect
a vehicle ahead. Adaptive Cruise Control may
not have time to slow your vehicle enough to
avoid a collision. Do not use Adaptive Cruise
Control when the radar is blocked by snow,
ice, or dirt. Keep your radar clean. See
“Cleaning the System” later in this section.
Adaptive Cruise Control automatically slows your
vehicle down when approaching a slower moving vehicle.
It then adjusts your speed to follow the vehicle in front at
the selected following distance. Your speed increases
or decreases to follow the vehicle in front of you, but will
not exceed the set speed. It may apply limited braking,
if necessary. When braking is active, your brake lights
come on. It may feel or sound different than if you were
applying the brakes yourself. This is normal.
3-22
Page 150 of 470

Exterior Lamps
The exterior lamp control is located to the left of the
steering wheel on the multifunction lever.
O(Exterior Lamp Control):Turn the band with this
symbol on it to operate the exterior lamps.
The exterior lamp band has four positions:
O(Off):Turning the band to this position turns off
all lamps.
AUTO (Automatic):Turning the band to this position
sets the exterior lamps in automatic mode. AUTO mode
will turn the exterior lamps on and off depending on how
much light is available outside the vehicle.Turning the band to AUTO mode also enables the
Adaptive Forward Lighting system. SeeAdaptive Forward
Lighting System on page 3-30.
To override AUTO mode, turn the control to off.
To reset to AUTO mode turn the control to exterior lamps
and then back to AUTO. Automatic mode will also reset
when your vehicle is turned off and then back on again
when the control is left in the AUTO position.
SeeTwilight Sentinel
®on page 3-31.
;(Parking Lamp):Turning the band to this position
turns on the parking lamps together with the following:
Sidemarker Lamps
Taillamps
License Plate Lamps
Instrument Panel Lights
The parking brake indicator light will come on and stay
on when the parking lamps are on with the engine
off and the ignition to Acc.
5(Headlamps):Turning the control to this position
turns on the headlamps, together with the previously
listed lamps and lights.
3-28
Page 172 of 470

Voltmeter Gage
When the vehicle is in
accessory mode, the
voltmeter shows the
voltage output of your
battery. When the engine
is running, it shows
the voltage output of
the charging system.
The reading will change as the rate of charge changes
(with engine speed, for example), but if the voltmeter
reads at 9 volts or below, your instrument panel
cluster and other systems may shut down. The Driver
Information Center (DIC) will read LOW VOLTAGE when
your vehicle is at 10 volts or below. Have it checked
right away. Driving with the voltmeter reading at
10 volts or below could drain your battery and disable
your vehicle.
Brake System Warning Light
Your vehicle’s hydraulic brake system is divided into
two parts. If one part is not working, the other part can
still work and stop you. For good braking, though,
you need both parts working well.
This light should come on when you start the engine.
If it does not come on then, have it �xed so it will
be ready to warn you if there is a problem.
If this warning light stays on after you start the engine,
the parking brake may still be set or there could be
a brake problem. Refer toParking Brake on page 2-30
to see if it is set. If the parking brake is not set, have
your brake system inspected right away.
United StatesCanada
3-50
Page 173 of 470

If the light comes on while you are driving and you have
a LOW BRAKE FLUID message showing on the DIC,
pull off the road and stop carefully. You may notice
that the pedal is harder to push. Or, the pedal may
go closer to the �oor. It may take longer to stop.
If the light is still on, have the vehicle towed for service.
SeeTowing Your Vehicle on page 5-27.
{CAUTION:
Your brake system may not be working
properly if the brake system warning light is
on. Driving with the brake system warning
light on can lead to an accident. If the light
is still on after you have pulled off the road
and stopped carefully, have the vehicle towed
for service.
Antilock Brake System
Warning Light
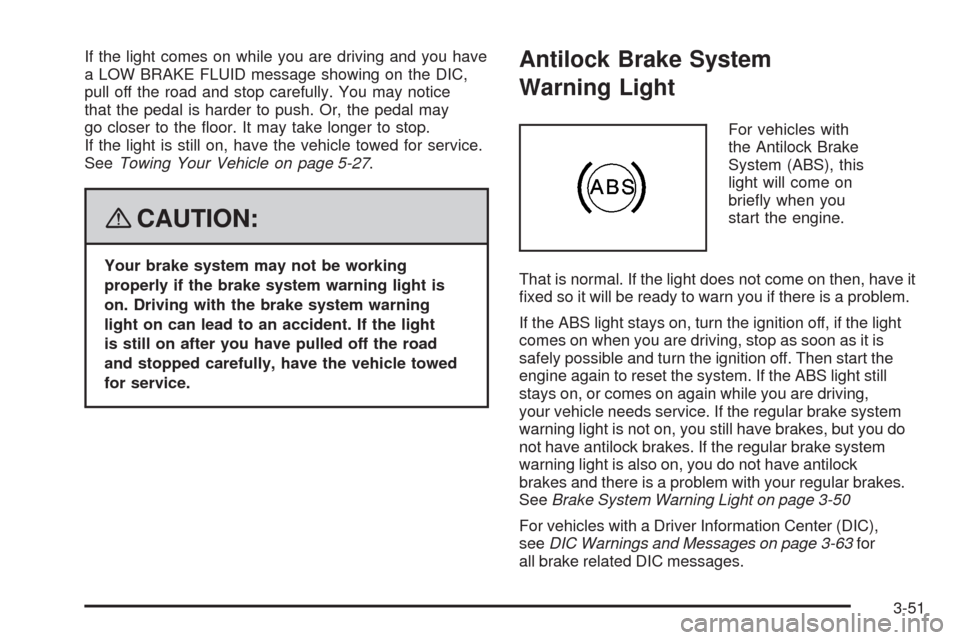
For vehicles with
the Antilock Brake
System (ABS), this
light will come on
brie�y when you
start the engine.
That is normal. If the light does not come on then, have it
�xed so it will be ready to warn you if there is a problem.
If the ABS light stays on, turn the ignition off, if the light
comes on when you are driving, stop as soon as it is
safely possible and turn the ignition off. Then start the
engine again to reset the system. If the ABS light still
stays on, or comes on again while you are driving,
your vehicle needs service. If the regular brake system
warning light is not on, you still have brakes, but you do
not have antilock brakes. If the regular brake system
warning light is also on, you do not have antilock
brakes and there is a problem with your regular brakes.
SeeBrake System Warning Light on page 3-50
For vehicles with a Driver Information Center (DIC),
seeDIC Warnings and Messages on page 3-63for
all brake related DIC messages.
3-51