headlamp CADILLAC XLR 2009 1.G Owners Manual
[x] Cancel search | Manufacturer: CADILLAC, Model Year: 2009, Model line: XLR, Model: CADILLAC XLR 2009 1.GPages: 462, PDF Size: 3.72 MB
Page 2 of 462

Service and Appearance Care.......................... 6-1
Service
..................................................... 6-3
Fuel
......................................................... 6-5
Checking Things Under the Hood
...............6-10
Rear Axle
...............................................6-41
Headlamp Aiming
.....................................6-42
Bulb Replacement
....................................6-45
Windshield Replacement
...........................6-45
Windshield Wiper Blade Replacement
.........6-45
Tires
......................................................6-46
Appearance Care
.....................................6-74Vehicle Identi�cation
.................................6-81
Electrical System
......................................6-82
Capacities and Speci�cations
.....................6-90
Maintenance Schedule..................................... 7-1
Maintenance Schedule
................................ 7-2
Customer Assistance Information.................... 8-1
Customer Assistance and Information
........... 8-2
Reporting Safety Defects
...........................8-14
Vehicle Data Recording and Privacy
...........8-16
Index................................................................ 1
Page 97 of 462
Outside Automatic Dimming Mirror
The driver’s side mirror adjusts for the glare of
headlamps behind you. This feature is controlled by the
on and off settings on the inside automatic dimming
rearview mirror. SeeAutomatic Dimming Rearview
Mirror on page 2-38for more information.
Park Assist Mirror
Vehicles with the memory package are capable of having
the passenger mirror tilt to a preselected position when
the vehicle is in R (Reverse). This feature lets the driver
view the curb when parallel parking. If further adjustment
is needed after the mirror is tilted, the mirror switch may
be used. The mirror then returns to this new position
when the vehicle is shifted into R (Reverse).
When the vehicle is shifted out of R (Reverse) and a
�ve-second delay has occurred, the passenger
side mirror returns to its original position.
Turn this feature on or off through the Driver Information
Center (DIC). SeeDIC Vehicle Personalization on
page 3-72for more information.
Outside Convex Mirror
{CAUTION:
A convex mirror can make things (like other
vehicles) look farther away than they really are.
If you cut too sharply into the right lane, you could
hit a vehicle on the right. Check the inside mirror or
glance over your shoulder before changing lanes.
The passenger side mirror is convex shaped. A convex
mirror’s surface is curved so more can be seen from
the driver’s seat.
Outside Heated Mirrors
<(Rear Window Defogger):Press to heat the
mirrors. See “Rear Window Defogger” underDual
Climate Control System on page 3-36.
Store the preferred mirror position by using the memory
option. SeeMemory Seat, Mirrors and Steering
Wheel on page 1-3.
2-39
Page 123 of 462

Instrument Panel Overview...............................3-4
Hazard Warning Flashers................................3-6
Horn .............................................................3-6
Power Tilt Wheel and Telescopic Steering
Column......................................................3-6
Heated Steering Wheel...................................3-7
Turn Signal/Multifunction Lever.........................3-7
Turn and Lane-Change Signals........................3-7
Headlamp High/Low-Beam Changer..................3-8
Flash-to-Pass.................................................3-8
Windshield Wipers..........................................3-8
Rainsense™ Wipers.......................................3-9
Windshield Washer.......................................3-10
Headlamp Washer........................................3-11
Cruise Control..............................................3-11
Adaptive Cruise Control.................................3-14
Exterior Lamps.............................................3-26
Wiper Activated Headlamps............................3-27Headlamps on Reminder................................3-27
Daytime Running Lamps (DRL).......................3-27
Adaptive Forward Lighting System...................3-28
Fog Lamps ..................................................3-28
Twilight Sentinel
®..........................................3-29
Exterior Lighting Battery Saver........................3-30
Instrument Panel Brightness...........................3-30
Courtesy Lamps...........................................3-30
Entry/Exit Lighting.........................................3-30
Reading Lamps............................................3-30
Battery Run-Down Protection..........................3-31
Head-Up Display (HUD).................................3-31
Accessory Power Outlet(s).............................3-34
Ashtray(s) and Cigarette Lighter......................3-35
Climate Controls............................................3-36
Dual Climate Control System..........................3-36
Outlet Adjustment.........................................3-40
Passenger Compartment Air Filter...................3-41
Section 3 Instrument Panel
3-1
Page 129 of 462
Heated Steering Wheel
For vehicles with a heated steering wheel, the button for
this feature is located on the steering wheel.
(:Press to turn the heated steering wheel on or off.
A light on the button displays when the feature is
turned on.
The steering wheel takes about three minutes to start
heating.
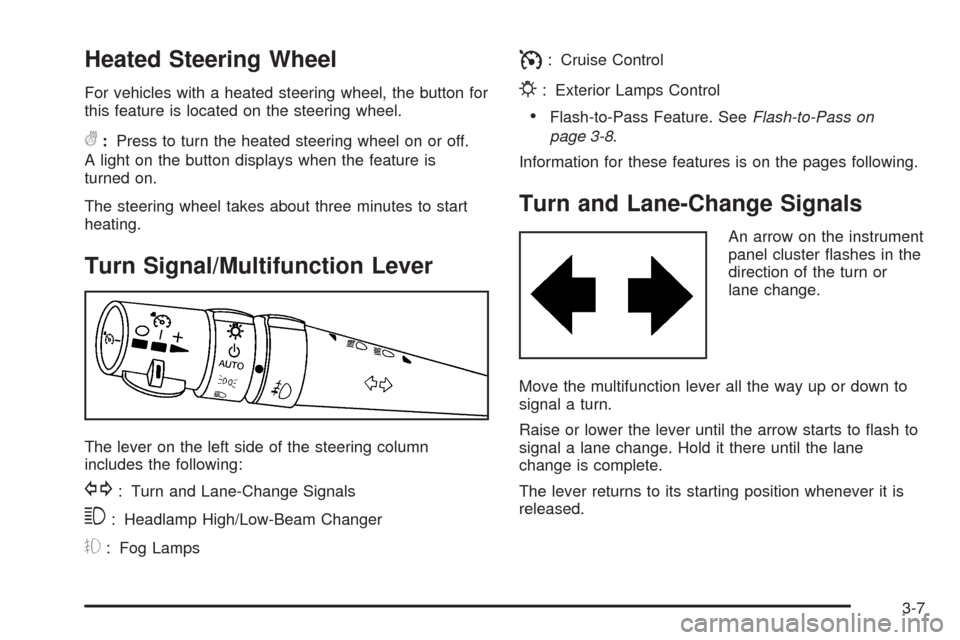
Turn Signal/Multifunction Lever
The lever on the left side of the steering column
includes the following:
G: Turn and Lane-Change Signals
3: Headlamp High/Low-Beam Changer
#: Fog Lamps
I: Cruise Control
P: Exterior Lamps Control
Flash-to-Pass Feature. SeeFlash-to-Pass on
page 3-8.
Information for these features is on the pages following.
Turn and Lane-Change Signals
An arrow on the instrument
panel cluster �ashes in the
direction of the turn or
lane change.
Move the multifunction lever all the way up or down to
signal a turn.
Raise or lower the lever until the arrow starts to �ash to
signal a lane change. Hold it there until the lane
change is complete.
The lever returns to its starting position whenever it is
released.
3-7
Page 130 of 462
If after signaling a turn or a lane change the arrows
�ash rapidly or do not come on, a signal bulb could be
burned out.
Have the bulbs replaced. If the bulb is not burned out,
check the fuses. SeeFuses and Circuit Breakers
on page 6-83.
Turn Signal on Chime
A chime will remind you if the turn signal is left on for
more than 3/4 mile (1.2 km) of driving.
If you need to leave the turn signal on for more than
3/4 mile (1.2 km), turn off the signal and then turn it
back on.
Headlamp High/Low-Beam Changer
Push the turn signal lever all the way forward to
change the headlamps from low beam to high beam.
When the high beams are on, this light
$appears on
the instrument panel cluster.
Pull the lever rearward to change the headlamps back
to low beam.
Flash-to-Pass
This feature lets you use the high-beam headlamps to
signal the driver in front of you that you want to pass.
Pull and hold the turn signal lever toward you to use.
When you do, the following will occur:
If the low-beam headlamps are on, the high-beam
headlamps will turn on. They will stay on as long as
you hold the lever there. Release the lever to turn
them off.
If the headlamps are on high-beam, they will switch
to low-beam. To return to high beam, push the lever
away from you.
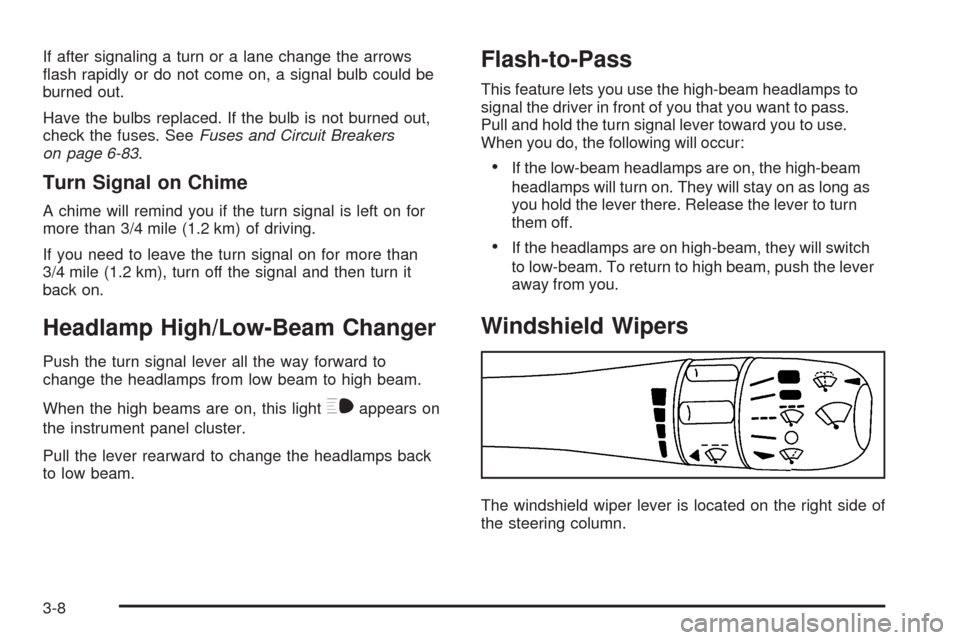
Windshield Wipers
The windshield wiper lever is located on the right side of
the steering column.
3-8
Page 132 of 462
The top position is the highest sensitivity setting, level
�ve. A single wipe will occur each time the delay adjust
band is turned to a higher sensitivity level to indicate
that the sensitivity level has been increased.
Notice:Going through an automatic car wash with
the wipers on can damage them. Turn the wipers
off when going through an automatic car wash.
The mist and wash cycles operate as normal and are
not affected by the Rainsense function. The Rainsense
system can be overridden at any time by manually
changing the wiper control to low or high speed.
When Rainsense is active, the headlamps will turn
on automatically. If it is dark, they will remain on.
See “Wiper-Activated Headlamps” underExterior
Lamps on page 3-26for more information.
Notice:Do not place stickers or other items on
the exterior glass surface directly in front of
the moisture sensor. Doing this could cause the
moisture sensor to malfunction.Windshield Washer
K(Washer Fluid):The lever on the right side of the
steering column also controls the windshield washer.
There is a button at the end of the lever. To spray
washer �uid on the windshield, press the button and
hold it. The washer will spray until you release the
button. The wipers will continue to clear the window
for about six seconds after the button is released and
then stop or return to your preset speed.
{CAUTION:
In freezing weather, do not use your washer until
the windshield is warmed. Otherwise the washer
�uid can form ice on the windshield, blocking your
vision.
If the �uid in the windshield washer �uid reservoir is
low, the message LOW WASHER FLUID will appear
on the Driver Information Center (DIC) display. It
will take 60 seconds after the bottle is re�lled for this
message to turn off. For information on the correct
washer �uid mixture to use, seeWindshield Washer
Fluid on page 6-31andRecommended Fluids and
Lubricants on page 7-11.
3-10
Page 133 of 462
Headlamp Washer
The headlamps washer only functions every fourth time
the washer button is pressed and if the headlamps
are on.
Cruise Control
With cruise control, a speed of about 25 mph (40 km/h)
or more can be maintained without keeping your foot
on the accelerator. Cruise control does not work
at speeds below about 25 mph (40 km/h).
Cruise control will not work if the parking brake is set, or
if the master cylinder brake �uid level is low.
{CAUTION:
Cruise control can be dangerous where you cannot
drive safely at a steady speed. So, do not use the
cruise control on winding roads or in heavy traffic.
Cruise control can be dangerous on slippery roads.
On such roads, fast changes in tire traction can
cause excessive wheel slip, and you could lose
control. Do not use cruise control on slippery roads.If the vehicle has the traction control system and it
begins to limit wheel spin while cruise control is on,
the cruise control will automatically disengage.
SeeTraction Control System (TCS) on page 5-8.
When road conditions allow cruise control to be safely
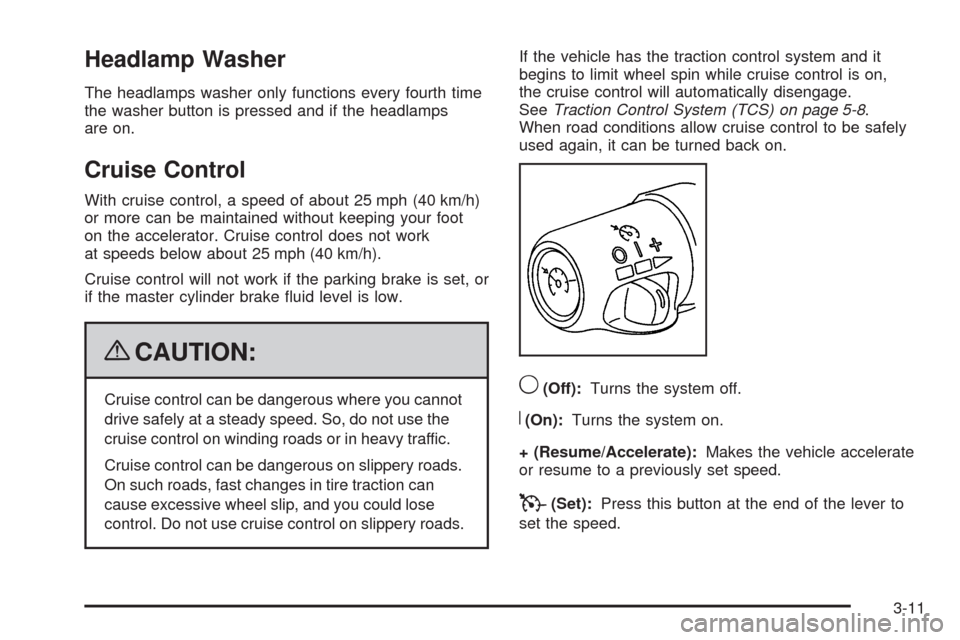
used again, it can be turned back on.9(Off):Turns the system off.
R(On):Turns the system on.
+ (Resume/Accelerate):Makes the vehicle accelerate
or resume to a previously set speed.
T(Set):Press this button at the end of the lever to
set the speed.
3-11
Page 148 of 462
Exterior Lamps
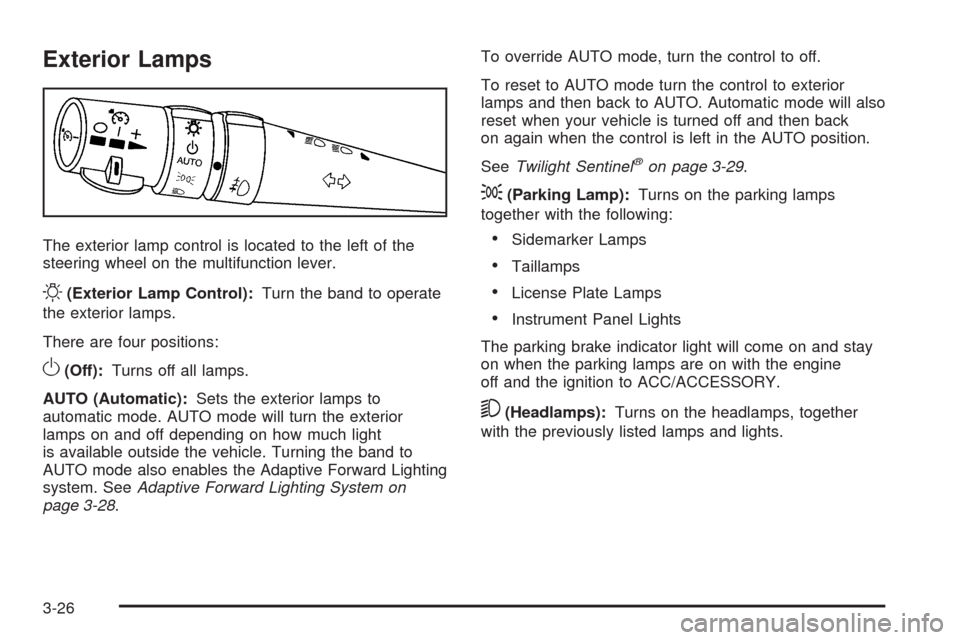
The exterior lamp control is located to the left of the
steering wheel on the multifunction lever.
O(Exterior Lamp Control):Turn the band to operate
the exterior lamps.
There are four positions:
O(Off):Turns off all lamps.
AUTO (Automatic):Sets the exterior lamps to
automatic mode. AUTO mode will turn the exterior
lamps on and off depending on how much light
is available outside the vehicle. Turning the band to
AUTO mode also enables the Adaptive Forward Lighting
system. SeeAdaptive Forward Lighting System on
page 3-28.To override AUTO mode, turn the control to off.
To reset to AUTO mode turn the control to exterior
lamps and then back to AUTO. Automatic mode will also
reset when your vehicle is turned off and then back
on again when the control is left in the AUTO position.
SeeTwilight Sentinel
®on page 3-29.
;(Parking Lamp):Turns on the parking lamps
together with the following:
Sidemarker Lamps
Taillamps
License Plate Lamps
Instrument Panel Lights
The parking brake indicator light will come on and stay
on when the parking lamps are on with the engine
off and the ignition to ACC/ACCESSORY.
5(Headlamps):Turns on the headlamps, together
with the previously listed lamps and lights.
3-26
Page 149 of 462
Wiper Activated Headlamps
This feature activates the headlamps and parking lamps
after the windshield wipers have been in use for
approximately six seconds and the multifunction lever is
in the AUTO position. SeeExterior Lamps on page 3-26.
When the exterior lamp control has been turned off or is
in the parking lamp position and the wiper control is
on delay, low speed or high speed, the HEADLAMPS
SUGGESTED message will appear on the Driver
Information Center (DIC).
When the ignition is turned off, the wiper-activated
headlamps will immediately turn off.
Headlamps on Reminder
A warning chime will sound if the exterior lamp control
is left on in either the headlamp or parking lamp position
and the driver’s door is opened with the ignition off.
Daytime Running Lamps (DRL)
Daytime Running Lamps (DRL) can make it easier for
others to see the front of your vehicle during the
day. Fully functional DRL are required on all vehicles
�rst sold in Canada.The DRL system comes on when the following
conditions are met:
It is still daylight and the ignition is on.
The exterior lamp control is in the off position.
The transmission is not in P (Park).
When DRL are on, only the front turn signal lamps are
on. No other exterior lamps such as the parking
lamps, taillamps, etc. are on when the DRL are used.
The instrument panel is not be lit up either.
When it is dark enough outside, the front turn signal
lamps turn off and normal low-beam headlamps turn on.
When it is bright enough outside, the regular lamps
go off, and the front turn signal lamps take over. If the
vehicle is started in a dark garage, the automatic
headlamp system comes on immediately. Once the
vehicle leaves the garage, it takes about one minute for
the automatic headlamp system to change to DRL if
it is light outside. During that delay, the instrument panel
cluster might not be as bright as usual. Make sure the
instrument panel brightness knob is in the full bright
position. SeeInstrument Panel Brightness on page 3-30
for more information.
3-27
Page 150 of 462
If it is dark enough outside and the exterior lamp control
is off, a HEADLAMPS SUGGESTED message displays
on the Driver’s Information Center (DIC). This message
informs the driver that turning on the exterior lamps is
recommended. SeeDIC Warnings and Messages on
page 3-60.
Turn the exterior lamp control off a second time,
or turn on the headlamps to turn off the HEADLAMPS
SUGGESTED message in the DIC. If the parking
lamps or the fog lamps were turned on instead, the
HEADLAMPS SUGGESTED message continues to
display.
The regular headlamp system should be turned on
when needed.
Adaptive Forward Lighting System
The Adaptive Forward Lighting System (AFS) swivels
the headlamps horizontally to provide greater road
illumination while turning. AFS will operate when the
vehicle speed is greater than 2 mph (3 km/h). AFS will
not operate when the transmission is in R (Reverse).
AFS is not immediately operable after starting the
vehicle; driving a short distance is required to calibratethe AFS. To enable AFS, set the exterior lamp switch
on the multifunction lever to the AUTO position.
Moving the switch out of the AUTO position will
deactivate the system. SeeExterior Lamps on
page 3-26.
Fog Lamps
Use fog lamps for better vision in foggy or misty
conditions.
The fog lamps control is located on the multifunction
lever next to the exterior lamp control.
#(Fog Lamps):Turn the band to turn the fog lamps on.
The fog lamp light appears on the instrument panel
cluster to indicate that the fog lamps and the parking
lamps are on.
If you turn the high-beam headlamps on, the fog lamps
will turn off. They will turn on again when you switch
to low-beam headlamps.
The ignition must be on for the fog lamps to operate.
The fog lamps will turn off when the ignition is turned off.
Some localities have laws that require the headlamps
to be on along with the fog lamps.
3-28