warning light CADILLAC XLR 2009 1.G Owners Manual
[x] Cancel search | Manufacturer: CADILLAC, Model Year: 2009, Model line: XLR, Model: CADILLAC XLR 2009 1.GPages: 462, PDF Size: 3.72 MB
Page 1 of 462
Seats and Restraint System............................. 1-1
Front Seats
............................................... 1-2
Safety Belts
.............................................. 1-6
Child Restraints
.......................................1-23
Airbag System
.........................................1-38
Restraint System Check
............................1-52
Features and Controls..................................... 2-1
Keys
........................................................ 2-3
Doors and Locks
......................................2-10
Windows
.................................................2-17
Theft-Deterrent Systems
............................2-20
Starting and Operating Your Vehicle
...........2-24
Mirrors
....................................................2-38
Object Detection Systems
..........................2-40
OnStar
®System
......................................2-42
Universal Home Remote System
................2-45
Storage Areas
.........................................2-53
Retractable Hardtop
..................................2-54Instrument Panel............................................. 3-1
Instrument Panel Overview
.......................... 3-4
Climate Controls
......................................3-36
Warning Lights, Gages, and Indicators
........3-41
Driver Information Center (DIC)
..................3-57
Trip Computer
.........................................3-76
Audio System(s)
.......................................3-76
Navigation System.......................................... 4-1
Overview
.................................................. 4-2
Features and Controls
..............................4-10
Navigation Audio System
...........................4-52
Voice Recognition
....................................4-74
Driving Your Vehicle....................................... 5-1
Your Driving, the Road, and the Vehicle
....... 5-2
Towing
...................................................5-26
2009 Cadillac XLR/XLR-V Owner ManualM
Page 81 of 462
Immobilizer Operation
The vehicle has a passive theft-deterrent system.
The system is automatically armed when the ignition is
turned off.
The immobilization system is disarmed when the ignition
is turned to OFF/ACCESSORY or START and a valid
transmitter is found in the vehicle.
You do not have to manually arm or disarm the system.
The security light comes on if there is a problem with
arming or disarming the theft-deterrent system.
The system has one or more keyless access transmitters
that are matched to an immobilizer control unit in the
vehicle. Only a correctly matched keyless access
transmitter starts the vehicle. The vehicle may not
start if the keyless access transmitter is damaged.
If the engine does not start and the security light comes
on, there may be a problem with the immobilizer system.
Press the START button again.If the vehicle does not start and the keyless access
transmitter appears to be undamaged, try another
keyless access transmitter. Or, place the transmitter in
the transmitter pocket. See “NO FOBS DETECTED”
underDIC Warnings and Messages on page 3-60for
additional information. Check the fuse. SeeFuses and
Circuit Breakers on page 6-83. If the engine still does not
start with the other transmitter, the vehicle needs service.
If the engine does start, the �rst transmitter may be faulty.
See your dealer/retailer or have a new keyless access
transmitter programmed to the vehicle.
The immobilizer system can learn new or replacement
keyless access transmitters. Up to four keyless access
transmitters can be programmed for the vehicle.
To program additional transmitters, see “Matching
transmitter(s) to Your Vehicle” underKeyless Access
System Operation on page 2-5.
Do not leave the key or device that disarms or
deactivates the theft deterrent system in the vehicle.
2-23
Page 91 of 462
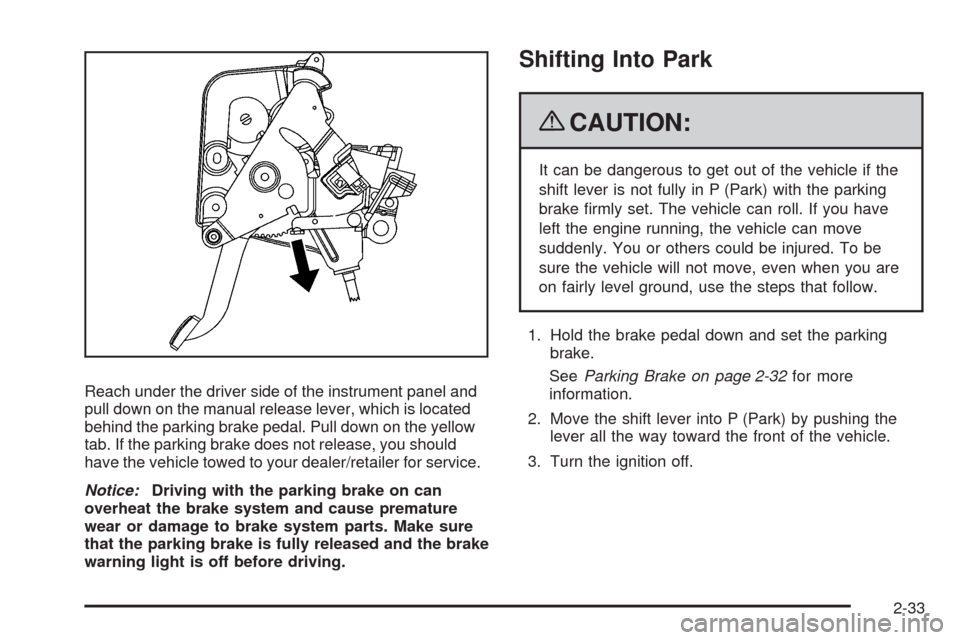
Reach under the driver side of the instrument panel and
pull down on the manual release lever, which is located
behind the parking brake pedal. Pull down on the yellow
tab. If the parking brake does not release, you should
have the vehicle towed to your dealer/retailer for service.
Notice:Driving with the parking brake on can
overheat the brake system and cause premature
wear or damage to brake system parts. Make sure
that the parking brake is fully released and the brake
warning light is off before driving.
Shifting Into Park
{CAUTION:
It can be dangerous to get out of the vehicle if the
shift lever is not fully in P (Park) with the parking
brake �rmly set. The vehicle can roll. If you have
left the engine running, the vehicle can move
suddenly. You or others could be injured. To be
sure the vehicle will not move, even when you are
on fairly level ground, use the steps that follow.
1. Hold the brake pedal down and set the parking
brake.
SeeParking Brake on page 2-32for more
information.
2. Move the shift lever into P (Park) by pushing the
lever all the way toward the front of the vehicle.
3. Turn the ignition off.
2-33
Page 123 of 462

Instrument Panel Overview...............................3-4
Hazard Warning Flashers................................3-6
Horn .............................................................3-6
Power Tilt Wheel and Telescopic Steering
Column......................................................3-6
Heated Steering Wheel...................................3-7
Turn Signal/Multifunction Lever.........................3-7
Turn and Lane-Change Signals........................3-7
Headlamp High/Low-Beam Changer..................3-8
Flash-to-Pass.................................................3-8
Windshield Wipers..........................................3-8
Rainsense™ Wipers.......................................3-9
Windshield Washer.......................................3-10
Headlamp Washer........................................3-11
Cruise Control..............................................3-11
Adaptive Cruise Control.................................3-14
Exterior Lamps.............................................3-26
Wiper Activated Headlamps............................3-27Headlamps on Reminder................................3-27
Daytime Running Lamps (DRL).......................3-27
Adaptive Forward Lighting System...................3-28
Fog Lamps ..................................................3-28
Twilight Sentinel
®..........................................3-29
Exterior Lighting Battery Saver........................3-30
Instrument Panel Brightness...........................3-30
Courtesy Lamps...........................................3-30
Entry/Exit Lighting.........................................3-30
Reading Lamps............................................3-30
Battery Run-Down Protection..........................3-31
Head-Up Display (HUD).................................3-31
Accessory Power Outlet(s).............................3-34
Ashtray(s) and Cigarette Lighter......................3-35
Climate Controls............................................3-36
Dual Climate Control System..........................3-36
Outlet Adjustment.........................................3-40
Passenger Compartment Air Filter...................3-41
Section 3 Instrument Panel
3-1
Page 124 of 462
Warning Lights, Gages, and Indicators............3-41
Instrument Panel Cluster................................3-42
Speedometer and Odometer...........................3-43
Trip Odometer..............................................3-43
Tachometer.................................................3-43
Safety Belt Reminders...................................3-44
Airbag Readiness Light..................................3-44
Passenger Airbag Status Indicator...................3-45
Charging System Light..................................3-46
Voltmeter Gage............................................3-46
Brake System Warning Light..........................3-47
Antilock Brake System (ABS) Warning Light.....3-48
StabiliTrak
®/Traction Control System (TCS)
Warning Light...........................................3-48
Engine Coolant Temperature Gage..................3-49
Tire Pressure Light.......................................3-50
Malfunction Indicator Lamp.............................3-50
Engine Oil Pressure Gage.............................3-54
Security Light...............................................3-55
Fog Lamp Light............................................3-55Lights On Reminder......................................3-55
Highbeam On Light.......................................3-55
Fuel Gage...................................................3-56
Driver Information Center (DIC).......................3-57
DIC Operation and Displays...........................3-57
DIC Warnings and Messages.........................3-60
Other Messages...........................................3-70
DIC Vehicle Personalization............................3-72
Trip Computer................................................3-76
Oil Life Indicator...........................................3-76
Audio System(s).............................................3-76
Bluetooth®...................................................3-77
Theft-Deterrent Feature..................................3-88
Audio Steering Wheel Controls.......................3-88
Radio Reception...........................................3-90
Care of Your CDs.........................................3-91
Care of the CD Player...................................3-91
Diversity Antenna System..............................3-91
XM™ Satellite Radio Antenna System.............3-91
Section 3 Instrument Panel
3-2
Page 127 of 462
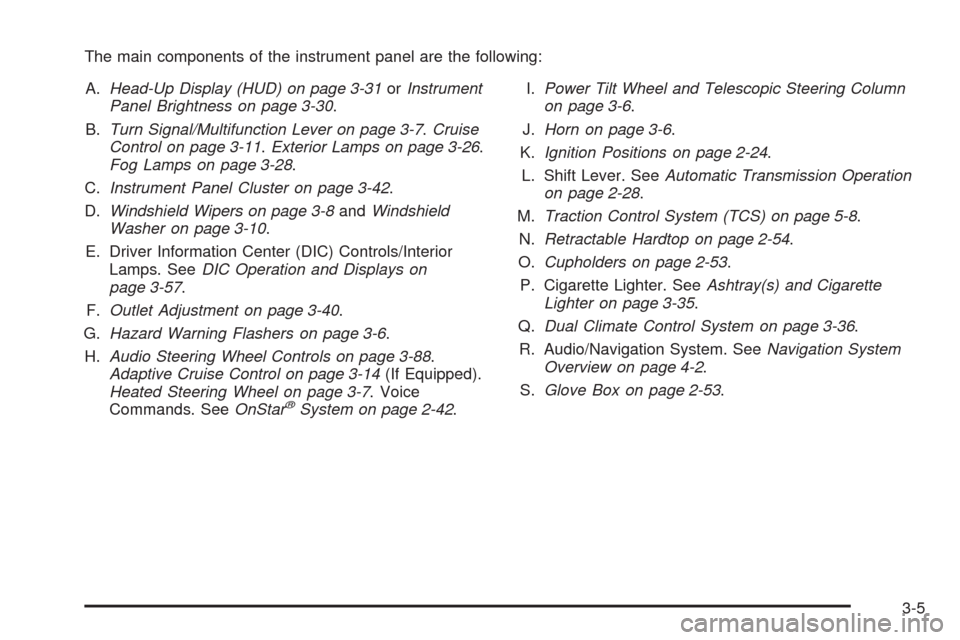
The main components of the instrument panel are the following:
A.Head-Up Display (HUD) on page 3-31orInstrument
Panel Brightness on page 3-30.
B.Turn Signal/Multifunction Lever on page 3-7.Cruise
Control on page 3-11.Exterior Lamps on page 3-26.
Fog Lamps on page 3-28.
C.Instrument Panel Cluster on page 3-42.
D.Windshield Wipers on page 3-8andWindshield
Washer on page 3-10.
E. Driver Information Center (DIC) Controls/Interior
Lamps. SeeDIC Operation and Displays on
page 3-57.
F.Outlet Adjustment on page 3-40.
G.Hazard Warning Flashers on page 3-6.
H.Audio Steering Wheel Controls on page 3-88.
Adaptive Cruise Control on page 3-14(If Equipped).
Heated Steering Wheel on page 3-7. Voice
Commands. SeeOnStar
®System on page 2-42.I.Power Tilt Wheel and Telescopic Steering Column
on page 3-6.
J.Horn on page 3-6.
K.Ignition Positions on page 2-24.
L. Shift Lever. SeeAutomatic Transmission Operation
on page 2-28.
M.Traction Control System (TCS) on page 5-8.
N.Retractable Hardtop on page 2-54.
O.Cupholders on page 2-53.
P. Cigarette Lighter. SeeAshtray(s) and Cigarette
Lighter on page 3-35.
Q.Dual Climate Control System on page 3-36.
R. Audio/Navigation System. SeeNavigation System
Overview on page 4-2.
S.Glove Box on page 2-53.
3-5
Page 149 of 462
Wiper Activated Headlamps
This feature activates the headlamps and parking lamps
after the windshield wipers have been in use for
approximately six seconds and the multifunction lever is
in the AUTO position. SeeExterior Lamps on page 3-26.
When the exterior lamp control has been turned off or is
in the parking lamp position and the wiper control is
on delay, low speed or high speed, the HEADLAMPS
SUGGESTED message will appear on the Driver
Information Center (DIC).
When the ignition is turned off, the wiper-activated
headlamps will immediately turn off.
Headlamps on Reminder
A warning chime will sound if the exterior lamp control
is left on in either the headlamp or parking lamp position
and the driver’s door is opened with the ignition off.
Daytime Running Lamps (DRL)
Daytime Running Lamps (DRL) can make it easier for
others to see the front of your vehicle during the
day. Fully functional DRL are required on all vehicles
�rst sold in Canada.The DRL system comes on when the following
conditions are met:
It is still daylight and the ignition is on.
The exterior lamp control is in the off position.
The transmission is not in P (Park).
When DRL are on, only the front turn signal lamps are
on. No other exterior lamps such as the parking
lamps, taillamps, etc. are on when the DRL are used.
The instrument panel is not be lit up either.
When it is dark enough outside, the front turn signal
lamps turn off and normal low-beam headlamps turn on.
When it is bright enough outside, the regular lamps
go off, and the front turn signal lamps take over. If the
vehicle is started in a dark garage, the automatic
headlamp system comes on immediately. Once the
vehicle leaves the garage, it takes about one minute for
the automatic headlamp system to change to DRL if
it is light outside. During that delay, the instrument panel
cluster might not be as bright as usual. Make sure the
instrument panel brightness knob is in the full bright
position. SeeInstrument Panel Brightness on page 3-30
for more information.
3-27
Page 150 of 462
If it is dark enough outside and the exterior lamp control
is off, a HEADLAMPS SUGGESTED message displays
on the Driver’s Information Center (DIC). This message
informs the driver that turning on the exterior lamps is
recommended. SeeDIC Warnings and Messages on
page 3-60.
Turn the exterior lamp control off a second time,
or turn on the headlamps to turn off the HEADLAMPS
SUGGESTED message in the DIC. If the parking
lamps or the fog lamps were turned on instead, the
HEADLAMPS SUGGESTED message continues to
display.
The regular headlamp system should be turned on
when needed.
Adaptive Forward Lighting System
The Adaptive Forward Lighting System (AFS) swivels
the headlamps horizontally to provide greater road
illumination while turning. AFS will operate when the
vehicle speed is greater than 2 mph (3 km/h). AFS will
not operate when the transmission is in R (Reverse).
AFS is not immediately operable after starting the
vehicle; driving a short distance is required to calibratethe AFS. To enable AFS, set the exterior lamp switch
on the multifunction lever to the AUTO position.
Moving the switch out of the AUTO position will
deactivate the system. SeeExterior Lamps on
page 3-26.
Fog Lamps
Use fog lamps for better vision in foggy or misty
conditions.
The fog lamps control is located on the multifunction
lever next to the exterior lamp control.
#(Fog Lamps):Turn the band to turn the fog lamps on.
The fog lamp light appears on the instrument panel
cluster to indicate that the fog lamps and the parking
lamps are on.
If you turn the high-beam headlamps on, the fog lamps
will turn off. They will turn on again when you switch
to low-beam headlamps.
The ignition must be on for the fog lamps to operate.
The fog lamps will turn off when the ignition is turned off.
Some localities have laws that require the headlamps
to be on along with the fog lamps.
3-28
Page 154 of 462

Continue to scan the displays, controls and driving
environment just as you would in a vehicle without HUD.
Check the instrument panel cluster, to be sure you do
not miss something important, such as a warning
light. Under important warning conditions, the CHECK
GAGES message will display in the HUD. View the
Driver Information Center (DIC) for more information.The HUD controls are
located to the left of the
steering wheel.
+
!- (Brightness):Use to adjust the brightness of the
HUD and the instrument panel cluster.
DIMMER:Use to select the HUD or the instrument
panel cluster to adjust the brightness.
HUD:Use to adjust the vertical position of the HUD
display.
3-32
Page 163 of 462
Passenger Compartment Air Filter
The passenger compartment air �lter removes certain
particles from the air, including pollen and dust particles.
Reductions in air�ow, which may occur more often in
dusty areas, indicate that the �lter may need to be
replaced early.
The �lter should be replaced as part of the routine
scheduled maintenance. SeeScheduled Maintenance
on page 7-4for more information.
To check or replace the air �lter, do the following:
1. With the hood open, unlatch and remove the
access panel.
The passenger compartment air �lter and access
panel are located on the passenger side of the
engine compartment near the battery. SeeEngine
Compartment Overview on page 6-12for more
information on location.
2. Pull the old �lter out of the housing.
3. Insert the new �lter into the housing.
4. Reinstall the air �lter access panel.
Warning Lights, Gages, and
Indicators
Warning lights and gages can signal that something is
wrong before it becomes serious enough to cause
an expensive repair or replacement. Paying attention
to the warning lights and gages could prevent injury.
Warning lights come on when there may be or is
a problem with one of the vehicle’s functions. Some
warning lights come on brie�y when the engine is started
to indicate they are working.
Gages can indicate when there may be or is a problem
with one of the vehicle’s functions. Often gages and
warning lights work together to indicate a problem with
the vehicle.
When one of the warning lights comes on and stays on
while driving, or when one of the gages shows there
may be a problem, check the section that explains
what to do. Follow this manual’s advice. Waiting to
do repairs can be costly and even dangerous.
3-41