stop start CADILLAC XLR V 2006 1.G Owners Manual
[x] Cancel search | Manufacturer: CADILLAC, Model Year: 2006, Model line: XLR V, Model: CADILLAC XLR V 2006 1.GPages: 456, PDF Size: 3.74 MB
Page 71 of 456
Arming the System
Use one of the three following items listed here to
arm the system:
Press the lock button on the keyless access
transmitter.
Open the door. Lock the door with the power door
lock switch. The security light should �ash.
Remove the keyless access transmitter from the
interior of the vehicle and close the door. The
security light will stop �ashing and stay on. After
30 seconds, the light should turn off.
The vehicle can be programmed to automatically
lock the doors and arm the system when you exit
the vehicle. SeeDIC Vehicle Personalization
on page 3-78.
Now, if a door or the trunk lid is opened without the
keyless access transmitter, the alarm will go off.
Your horn will sound for two minutes, then it will go
off to save battery power. And, your vehicle will not
start without a keyless transmitter present.
The theft-deterrent system will not arm if you lock the
driver’s door with the power door lock switch after
the doors are closed.
If your passenger stays in the vehicle when you leave
with the keyless access transmitter, have the passenger
lock the vehicle after the doors are closed. This way the
alarm will not arm, and your passenger will not set it off.
Testing the Alarm
Do the following to test the system:
1. Make sure the trunk lid is latched.
2. Lower the window on the driver’s door.
3. Manually arm the system.
4. Close the doors and wait 30 seconds.
5. Reach through the open window and manually pull
the release lever on the �oor.
6. Turn off the alarm by pressing the unlock button on
the transmitter.
If the alarm is inoperative, check to see if the horn
works. If not, check the horn fuse. SeeFuses and Circuit
Breakers on page 6-86. If the horn works, but the
alarm doesn’t go off, see your dealer.
Disarming the System
Always use your keyless access transmitter to unlock
a door either by pressing the unlock button on the
transmitter or by squeezing the door handle sensor while
you have the transmitter with you. Unlocking a door any
other way will set off the alarm. If your alarm sounds,
press the unlock button on the keyless access transmitter
to disarm it.
2-19
Page 72 of 456
Valet Lockout Switch
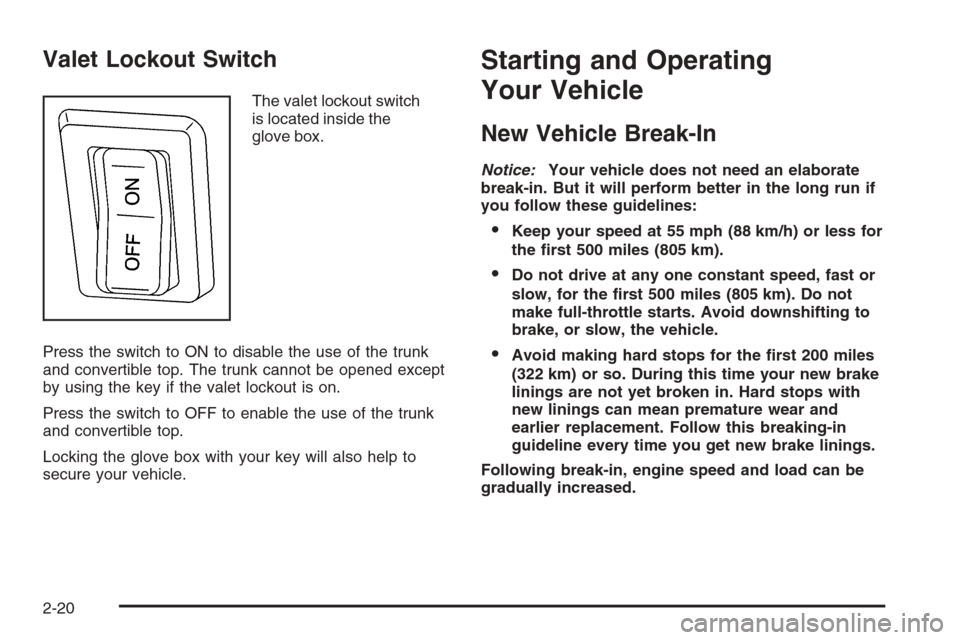
The valet lockout switch
is located inside the
glove box.
Press the switch to ON to disable the use of the trunk
and convertible top. The trunk cannot be opened except
by using the key if the valet lockout is on.
Press the switch to OFF to enable the use of the trunk
and convertible top.
Locking the glove box with your key will also help to
secure your vehicle.
Starting and Operating
Your Vehicle
New Vehicle Break-In
Notice:Your vehicle does not need an elaborate
break-in. But it will perform better in the long run if
you follow these guidelines:
Keep your speed at 55 mph (88 km/h) or less for
the �rst 500 miles (805 km).
Do not drive at any one constant speed, fast or
slow, for the �rst 500 miles (805 km). Do not
make full-throttle starts. Avoid downshifting to
brake, or slow, the vehicle.
Avoid making hard stops for the �rst 200 miles
(322 km) or so. During this time your new brake
linings are not yet broken in. Hard stops with
new linings can mean premature wear and
earlier replacement. Follow this breaking-in
guideline every time you get new brake linings.
Following break-in, engine speed and load can be
gradually increased.
2-20
Page 74 of 456
Retained Accessory Power (RAP)
The following accessories on your vehicle may be used
for up to 10 minutes after the engine is turned off:
Radio
Power Windows
Audio Steering Wheel Controls
Power to these accessories stops after 10 minutes
or if a door is opened. If you want power for
another 10 minutes, close all the doors and press
the ACC button to place the vehicle in accessory
mode. Press the button again and the vehicle will
return to RAP.
Starting the Engine
Move your shift lever to PARK (P) or NEUTRAL (N).
Your engine will not start in any other position — that is
a safety feature. To restart when you are already
moving, use NEUTRAL (N) only.
The keyless access transmitter must be in the vehicle
for the ignition to work.
Notice:Do not try to shift to PARK (P) if your
vehicle is moving. If you do, you could damage the
transmission. Shift to PARK (P) only when your
vehicle is stopped.
1. With your foot on the brake pedal, press the
START button located on the instrument panel.
If there is not a keyless access transmitter present
or if there is something causing interference
with it, the DIC will display NO FOB DETECTED.
SeeDIC Warnings and Messages on page 3-67
for more information. When the engine begins
cranking, let go of the button. The idle speed will go
down as your engine gets warm.
If the battery in the keyless access transmitter is
weak, the DIC will display FOB BATTERY
LOW. You can still drive the vehicle. See “Battery
Replacement” underKeyless Access System
Operation on page 2-5for more information.
2-22
Page 75 of 456
Notice:Holding the button in for longer than
15 seconds at a time will cause the vehicle’s battery
to be drained much sooner. This can also cause
damage to the starter motor. Wait 15 seconds
between each try to avoid draining your vehicle’s
battery or damaging the starter.
2. If the engine does not start and no DIC message is
displayed, wait 15 seconds before trying again.
Notice:Your engine is designed to work with the
electronics in your vehicle. If you add electrical
parts or accessories, you could change the way the
engine operates. Before adding electrical equipment,
check with your dealer. If you do not, your engine
might not perform properly. Any resulting damage
would not be covered by your vehicle’s warranty.Stopping Your Engine
Move the shift lever to PARK (P) and press the ACC
button located on the instrument panel. If the shifter is
not in PARK (P), the vehicle will go into the accessory
mode, the engine will turn off and the DIC will display
SHIFT TO PARK. When the shifter is moved to
PARK (P), the vehicle will go into the RAP mode, if all
doors are closed. The ignition mode will change to OFF,
if a front door is opened. SeeRetained Accessory
Power (RAP) on page 2-22for more information.
If the keyless access transmitter is not detected
while going to off, the DIC will display
NO FOB – OFF OR RUN?
SeeDIC Warnings and Messages on page 3-67for
more information.
2-23
Page 78 of 456
You have to fully apply your regular brakes before you
can shift from PARK (P) when the vehicle is running.
If you cannot shift out of PARK (P), ease pressure
on the shift lever and push the shift lever all the way
into PARK (P) as you maintain brake application.
Then move the shift lever into the gear desired.
SeeShifting Out of Park (P) on page 2-32.
REVERSE (R):Use this gear to back up.
Notice:Shifting to REVERSE (R) while your vehicle
is moving forward could damage the transmission.
The repairs would not be covered by your warranty.
Shift to REVERSE (R) only after your vehicle is
stopped.
To rock your vehicle back and forth to get out of snow,
ice, or sand without damaging your transmission,
seeIf Your Vehicle is Stuck in Sand, Mud, Ice, or Snow
on page 5-32.
NEUTRAL (N):In this position, your engine does not
connect with the wheels. To restart when you are
already moving, use NEUTRAL (N) only. Also, use
NEUTRAL (N) when your vehicle is being towed.
Use Neutral (N) if the car must be moved with the
engine off for short distances. Please seeTowing
Your Vehicle on page 5-37
{CAUTION:
Shifting into a drive gear while your engine is
running at high speed is dangerous. Unless
your foot is �rmly on the brake pedal, your
vehicle could move very rapidly. You could
lose control and hit people or objects. Do not
shift into a drive gear while your engine is
running at high speed.
Notice:Shifting out of PARK (P) or NEUTRAL (N)
with the engine running at high speed may damage
the transmission. The repairs would not be covered
by your warranty. Be sure the engine is not running
at high speed when shifting your vehicle.
AUTOMATIC OVERDRIVE (D):This position is for
normal driving.
Notice:Spinning the tires or holding the vehicle in
one place on a hill using only the accelerator pedal
may damage the transmission. If you are stuck, do
not spin the tires. When stopping on a hill, use the
brakes to hold the vehicle in place.
Maximum engine speed is limited to protect driveline
components from improper operation.
2-26
Page 109 of 456
Use the following steps to program each button:
1. Adjust the driver’s seat including the seatback
recliner, lumbar and head restraint, both outside
mirrors and the steering wheel to a comfortable
position.
2. Press and hold button 1 until two beeps are heard,
then release the button.
A second mirror, seating and steering wheel position
can be programmed by repeating the above steps and
pressing button 2 (for driver 2). Each time a memory
button is pressed and released, a single beep will sound.
Each time button 1 or 2 is pressed and released while
the vehicle is in PARK (P), the memory positions will be
recalled after a brief delay. If the vehicle is not in
PARK (P), three beeps will be heard and the memory
position will not be recalled.
When the engine is started, the seat, mirrors, and
steering wheel may automatically adjust to their
programmed positions.
To stop recall movement of the memory feature at
any time, press one of the power seat controls,
power mirror control buttons, memory buttons,
or power steering column control.Two personalized exit positions can be set by �rst
recalling the driving position (by pressing 1 or 2), then
positioning the steering wheel and seat in the desired
exit positions and then pressing and holding the
exit button until two beeps are heard. The exit button
is located between buttons 1 and 2. With the vehicle
in PARK (P), the exit position for the previously
set driver can be recalled by pressing the exit button.
When you use the keyless access transmitter to unlock
your vehicle, automatic seat and steering wheel
movement to the exit position may occur. The numbers
on the back of the transmitter, 1 and 2, corresponds
to the numbers on the memory buttons.
Further programming for automatic seat and mirror
movement can be done using the Driver Information
Center (DIC).
For programming information, seeDIC Vehicle
Personalization on page 3-78.
2-57
Page 164 of 456
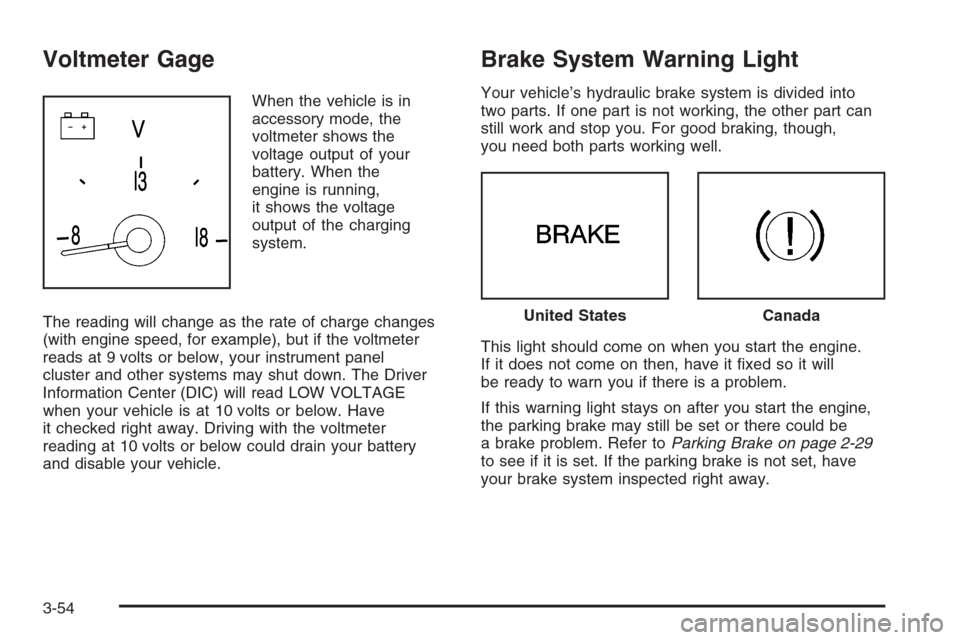
Voltmeter Gage
When the vehicle is in
accessory mode, the
voltmeter shows the
voltage output of your
battery. When the
engine is running,
it shows the voltage
output of the charging
system.
The reading will change as the rate of charge changes
(with engine speed, for example), but if the voltmeter
reads at 9 volts or below, your instrument panel
cluster and other systems may shut down. The Driver
Information Center (DIC) will read LOW VOLTAGE
when your vehicle is at 10 volts or below. Have
it checked right away. Driving with the voltmeter
reading at 10 volts or below could drain your battery
and disable your vehicle.
Brake System Warning Light
Your vehicle’s hydraulic brake system is divided into
two parts. If one part is not working, the other part can
still work and stop you. For good braking, though,
you need both parts working well.
This light should come on when you start the engine.
If it does not come on then, have it �xed so it will
be ready to warn you if there is a problem.
If this warning light stays on after you start the engine,
the parking brake may still be set or there could be
a brake problem. Refer toParking Brake on page 2-29
to see if it is set. If the parking brake is not set, have
your brake system inspected right away.
United StatesCanada
3-54
Page 165 of 456
If the light comes on while you are driving and you have
a LOW BRAKE FLUID message showing on the DIC,
pull off the road and stop carefully. You may notice
that the pedal is harder to push. Or, the pedal may go
closer to the �oor. It may take longer to stop. If the
light is still on, have the vehicle towed for service.
SeeTowing Your Vehicle on page 5-37.
{CAUTION:
Your brake system may not be working properly
if the brake system warning light is on. Driving
with the brake system warning light on can lead
to an accident. If the light is still on after you
have pulled off the road and stopped carefully,
have the vehicle towed for service.
Anti-Lock Brake System
Warning Light
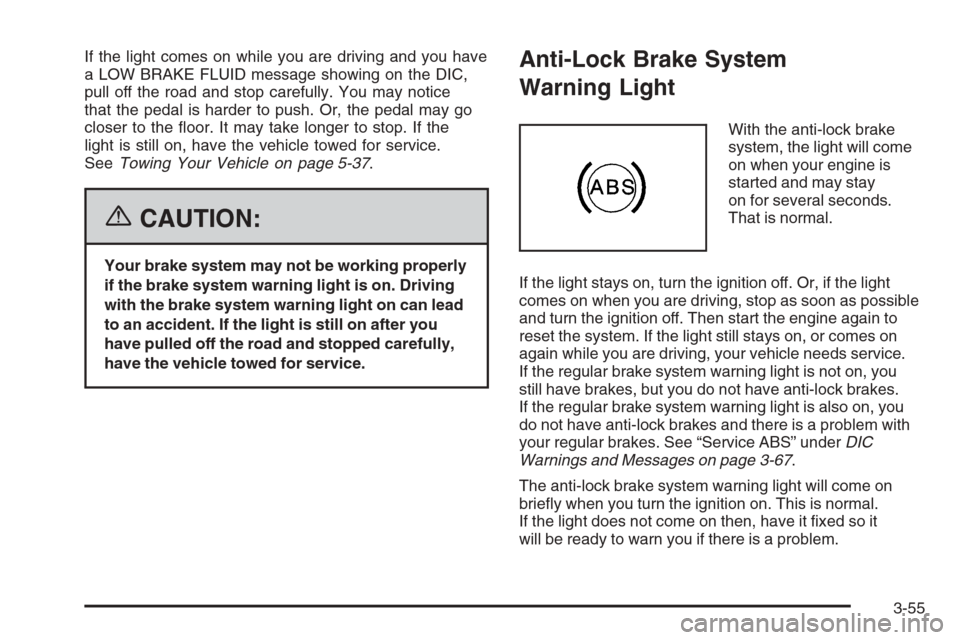
With the anti-lock brake
system, the light will come
on when your engine is
started and may stay
on for several seconds.
That is normal.
If the light stays on, turn the ignition off. Or, if the light
comes on when you are driving, stop as soon as possible
and turn the ignition off. Then start the engine again to
reset the system. If the light still stays on, or comes on
again while you are driving, your vehicle needs service.
If the regular brake system warning light is not on, you
still have brakes, but you do not have anti-lock brakes.
If the regular brake system warning light is also on, you
do not have anti-lock brakes and there is a problem with
your regular brakes. See “Service ABS” underDIC
Warnings and Messages on page 3-67.
The anti-lock brake system warning light will come on
brie�y when you turn the ignition on. This is normal.
If the light does not come on then, have it �xed so it
will be ready to warn you if there is a problem.
3-55
Page 169 of 456
If the Light Is Flashing
The following may prevent more serious damage
to your vehicle:
Reducing vehicle speed
Avoiding hard accelerations
Avoiding steep uphill grades
If the light stops �ashing and remains on steady,
see “If the Light Is On Steady” following.
If the light continues to �ash, when it is safe to do so,
stop the vehicle. Find a safe place to park your vehicle.
Turn the engine off, wait at least 10 seconds and
restart the engine. If the light remains on steady, see
“If the Light Is On Steady” following. If the light is
still �ashing, follow the previous steps, and see your
dealer for service as soon as possible.
If the Light Is On Steady
You also may be able to correct the emission system
malfunction by considering the following:
Did you recently put fuel into your vehicle?
If so, reinstall the fuel cap, making sure to fully
install the cap. SeeFilling the Tank on page 6-7.
The diagnostic system can determine if the fuel cap
has been left off or improperly installed.A loose or missing fuel cap will allow fuel to evaporate
into the atmosphere. A few driving trips with the cap
properly installed should turn the light off.
Did you just drive through a deep puddle of water?
If so, your electrical system may be wet. The condition
will usually be corrected when the electrical system
dries out. A few driving trips should turn the light off.
Have you recently changed brands of fuel?
If so, be sure to fuel your vehicle with quality fuel. See
Gasoline Octane on page 6-5. Poor fuel quality will
cause your engine not to run as efficiently as designed.
You may notice this as stalling after start-up, stalling
when you put the vehicle into gear, mis�ring, hesitation
on acceleration, or stumbling on acceleration. (These
conditions may go away once the engine is warmed up.)
This will be detected by the system and cause the
light to turn on.
If you experience one or more of these conditions,
change the fuel brand you use. It will require at least
one full tank of the proper fuel to turn the light off.
If none of the above steps have made the light turn off,
your dealer can check the vehicle. Your dealer has
the proper test equipment and diagnostic tools to �x
any mechanical or electrical problems that may
have developed.
3-59
Page 176 of 456
AVERAGE SPEED:This feature shows the average
speed the vehicle has traveled since the last time
the value was reset. To reset the value, press the
information button to display AVERAGE SPEED, then
press and hold the RESET button until AVERAGE
SPEED 00.0 is displayed.
ELAPSED TIME:This feature is like a stopwatch, in
that you can clock the time it takes to get from one point
to another.
To operate, press the information button to display
ELAPSED TIME. Each of the �elds for the hours,
minutes, and seconds are two numeric digits.
Once ELAPSED TIME 00:00:00 is displayed, press the
RESET button to start the timing feature. Press the
RESET button again to stop it. If you will be starting and
stopping your vehicle, during a trip for instance, the
ELAPSED TIME feature will automatically start timing
where it left off when you last stopped. To reset it, press
and hold the RESET button until the display reads
ELAPSED TIME 00:00:00. Press the information button
to exit from the ELAPSED TIME display.FRONT Lxx Rxx PSI:This feature shows the tire
pressure for the front left and right tires.
REAR Lxx Rxx PSI:This feature shows the tire
pressure for the rear left and right tires.
OIL LIFE:This feature shows the estimated oil life
remaining. SeeOil Life Indicator on page 3-82for more
information. To reset the engine oil life system, see
Engine Oil Life System on page 6-18. This only needs
to be reset after you have had the oil changed.
In addition to the engine oil life system monitoring oil
life, additional maintenance is recommended in the
Maintenance Schedule in this manual. SeeScheduled
Maintenance on page 7-4andEngine Oil on page 6-15
for more information.
ENG/METRIC (English/Metric):This feature allows
you to switch the DIC displays between English
and Metric. Press the RESET button to switch the
display between English and Metric. There will be an
arrow next to the option that is selected.
3-66