mirror CADILLAC XT5 2018 Convenience & Personalization Guide
[x] Cancel search | Manufacturer: CADILLAC, Model Year: 2018, Model line: XT5, Model: CADILLAC XT5 2018Pages: 20, PDF Size: 2.47 MB
Page 2 of 20
2
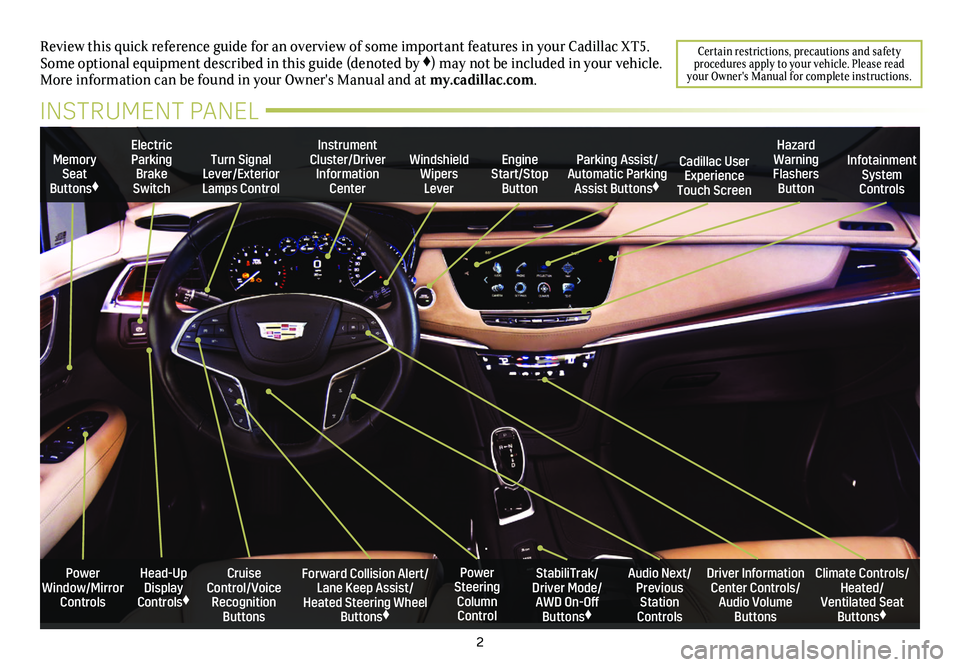
Power Window/Mirror Controls
Memory Seat Buttons♦
Turn Signal Lever/Exterior Lamps Control
Windshield Wipers Lever
Forward Collision Alert/Lane Keep Assist/Heated Steering Wheel Buttons♦
Cruise Control/Voice Recognition Buttons
Instrument Cluster/Driver Information Center
Power Steering Column Control
Electric Parking Brake Switch
Review this quick reference guide for an overview of some important feat\
ures in your Cadillac XT5. Some optional equipment described in this guide (denoted by ♦) may not be included in your vehicle. More information can be found in your Owner's Manual and at my.cadillac.com.
INSTRUMENT PANEL
Parking Assist/Automatic Parking Assist Buttons♦
StabiliTrak/Driver Mode/AWD On-Off Buttons♦
Driver Information Center Controls/Audio Volume Buttons
Climate Controls/Heated/Ventilated Seat Buttons♦
Audio Next/Previous Station Controls
Engine Start/Stop Button
Hazard Warning Flashers Button
Cadillac User Experience Touch Screen
Infotainment System Controls
Head-Up Display Controls♦
Certain restrictions, precautions and safety procedures apply to your vehicle. Please read your Owner's Manual for complete instructions.
Page 3 of 20
3
REMOTE KEYLESS
ENTRY TRANSMITTER
KEYLESS ACCESS SYSTEM
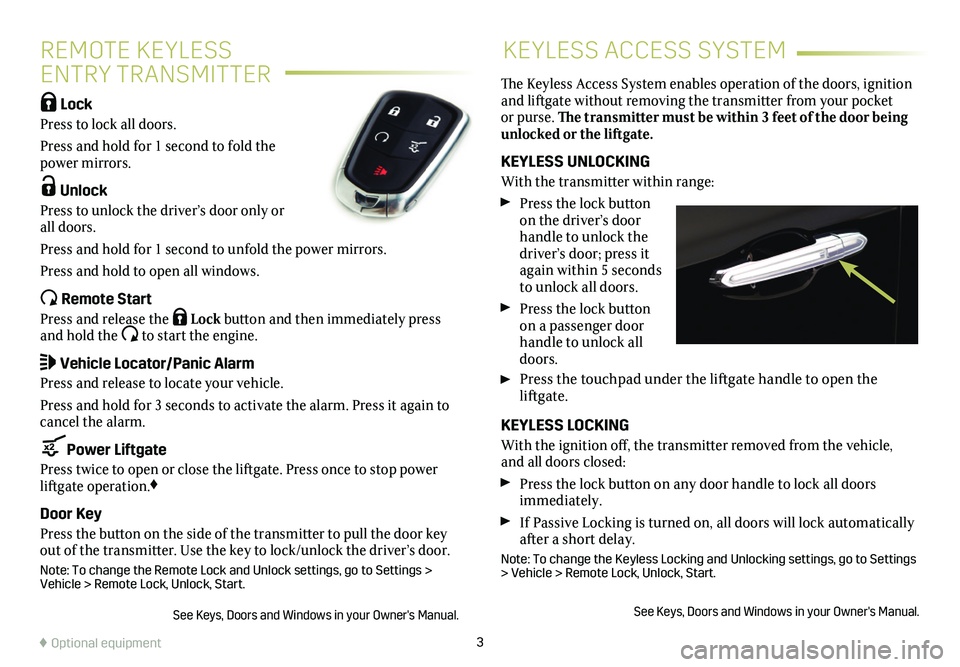
Lock
Press to lock all doors.
Press and hold for 1 second to fold the power mirrors.
Unlock
Press to unlock the driver’s door only or all doors.
Press and hold for 1 second to unfold the power mirrors.
Press and hold to open all windows.
Remote Start
Press and release the Lock button and then immediately press and hold the to start the engine.
Vehicle Locator/Panic Alarm
Press and release to locate your vehicle.
Press and hold for 3 seconds to activate the alarm. Press it again to cancel the alarm.
Power Liftgate
Press twice to open or close the liftgate. Press once to stop power liftgate operation.♦
Door Key
Press the button on the side of the transmitter to pull the door key out of the transmitter. Use the key to lock/unlock the driver’s door.
Note: To change the Remote Lock and Unlock settings, go to Settings > Vehicle > Remote Lock, Unlock, Start.
See Keys, Doors and Windows in your Owner's Manual.
The Keyless Access System enables operation of the doors, ignition and liftgate without removing the transmitter from your pocket or purse. The transmitter must be within 3 feet of the door being unlocked or the liftgate.
KEYLESS UNLOCKING
With the transmitter within range:
Press the lock button on the driver’s door handle to unlock the driver’s door; press it again within 5 seconds to unlock all doors.
Press the lock button on a passenger door handle to unlock all doors.
Press the touchpad under the liftgate handle to open the
liftgate.
KEYLESS LOCKING
With the ignition off, the transmitter removed from the vehicle, and all doors closed:
Press the lock button on any door handle to lock all doors immediately.
If Passive Locking is turned on, all doors will lock automatically after a short delay.
Note: To change the Keyless Locking and Unlocking settings, go to Settings > Vehicle > Remote Lock, Unlock, Start.
See Keys, Doors and Windows in your Owner's Manual.
♦ Optional equipment
Page 12 of 20
12
BLUETOOTH® SYSTEM
Before using a Bluetooth-enabled device in the vehicle, it must be paired with the in-vehicle Bluetooth system. Not all devices will support all functions. The pairing process is
disabled when the vehicle is moving. For more information, visit my.cadillac.com/learn.
PAIR A PHONE
1. To use voice recognition, press the Push to Talk button; after the beep, say "Pair Phone."
To use the infotainment screen, select Phone > Pair Device.
2. Start the pairing process on the phone. From your phone's Blue-tooth settings, select the name shown on the infotainment screen.
3. Confirm the codes that appear on the infotainment screen and the phone.
4. When pairing is complete, the phone screen is displayed. Your phone book may be downloaded depending on the phone.
See your Cadillac User Experience Manual.
WIRELESS CHARGING
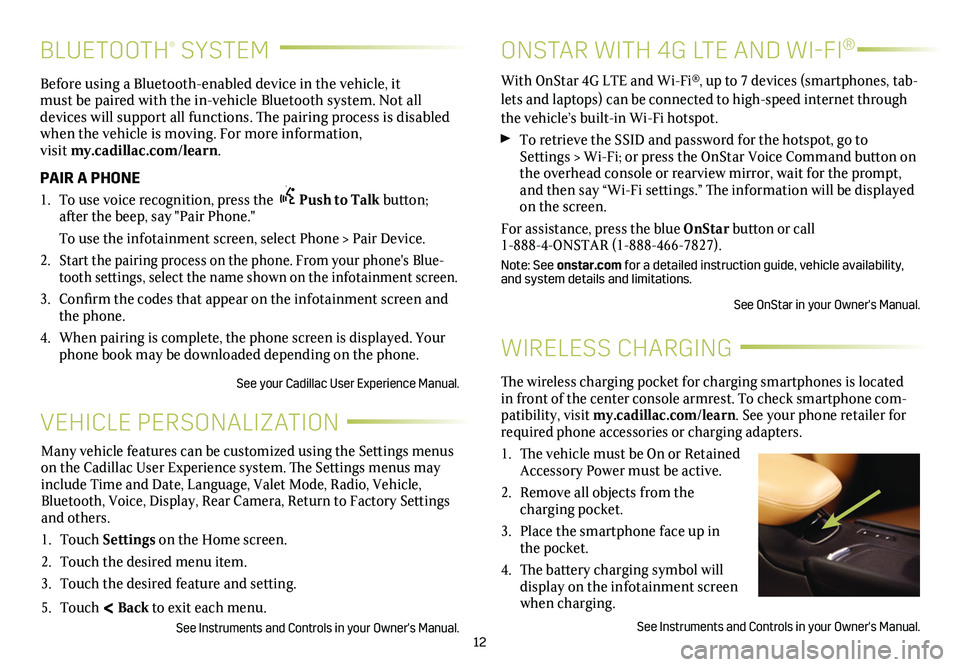
The wireless charging pocket for charging smartphones is located in front of the center console armrest. To check smartphone com-patibility, visit my.cadillac.com/learn. See your phone retailer for required phone accessories or charging adapters.
1. The vehicle must be On or Retained Accessory Power must be active.
2. Remove all objects from the charging pocket.
3. Place the smartphone face up in the pocket.
4. The battery charging symbol will display on the infotainment screen when charging.
See Instruments and Controls in your Owner's Manual.
VEHICLE PERSONALIZATION
Many vehicle features can be customized using the Settings menus on the Cadillac User Experience system. The Settings menus may include Time and Date, Language, Valet Mode, Radio, Vehicle, Bluetooth, Voice, Display, Rear Camera, Return to Factory Settings and others.
1. Touch Settings on the Home screen.
2. Touch the desired menu item.
3. Touch the desired feature and setting.
5. Touch < Back to exit each menu.
See Instruments and Controls in your Owner's Manual.
ONSTAR WITH 4G LTE AND WI-FI®
With OnStar 4G LTE and Wi-Fi®, up to 7 devices (smartphones, tab-lets and laptops) can be connected to high-speed internet through the vehicle’s built-in Wi-Fi hotspot.
To retrieve the SSID and password for the hotspot, go to Settings > Wi-Fi; or press the OnStar Voice Command button on the overhead console or rearview mirror, wait for the prompt, and then say “Wi-Fi
settings.” The information will be displayed on the screen.
For assistance, press the blue OnStar button or call 1-888-4-ONSTAR (1-888-466-7827).
Note: See onstar.com for a detailed instruction guide, vehicle availability, and system details and limitations.
See OnStar in your Owner's Manual.
Page 15 of 20
15
MEMORY SEATS♦REAR SEATS
SET MEMORY POSITIONS
With the ignition On or in Accessory mode:
1. Adjust the seat, power steering column and power outside
mirrors to the desired positions.
2. Press and release the SET button on the driver’s door. A beep will sound.
3. Immediately press and hold button 1 until two beeps sound.
Repeat these steps using button 2 for a second driver.
To store seat and power steering column positions for more clearance when exiting the vehicle, repeat steps 1 and 2 using the Exit button.
RECALL POSITIONS
Press button 1, 2 or Exit. Depending on vehicle state, the
button may need to be held down until the seat, mirrors and power steering column reach the set position.
The memory/exit positions can be programmed to be recalled automatically.
To set the Auto Memory Recall or Easy Exit options, go to the Settings > Vehicle > Comfort and Convenience menu.
See Seats and Restraints in your Owner's Manual.
REAR SEAT ADJUSTMENT
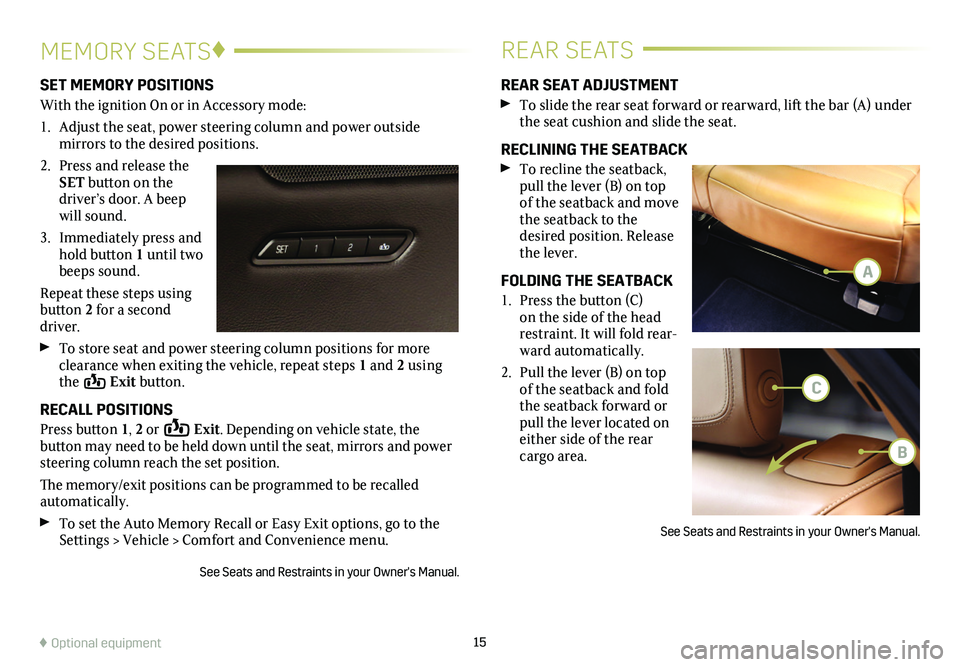
To slide the rear seat forward or rearward, lift the bar (A) under the seat cushion and slide the seat.
RECLINING THE SEATBACK
To recline the seatback, pull the lever (B) on top of the seatback and move the seatback to the desired position. Release the lever.
FOLDING THE SEATBACK
1. Press the button (C) on the side of the head restraint. It will fold rear-ward automatically.
2. Pull the lever (B) on top of the seatback and fold the seatback forward or pull the lever located on either side of the rear cargo area.
See Seats and Restraints in your Owner's Manual.
♦ Optional equipment
A
C
B
Page 16 of 20
16
DRIVER ASSISTANCE SYSTEMS
Safety Alert Seat♦ – The driver’s seat pulses — left side, right side, or simultaneously — to alert the driver of potential hazards.
Audible alerts may be selected instead of seat pulsing alerts. To change the alert settings, go to Settings > Vehicle > Collision/Detection Systems > Alert Type.
Forward Collision Alert♦ – The Vehicle Ahead indica-tor is green when a vehicle is detected and is amber when following a vehicle ahead much too closely. When approaching a vehicle directly ahead too
rapidly, a red alert flashes on the windshield and the Safety Alert Seat pulses or beeps sound (if selected).
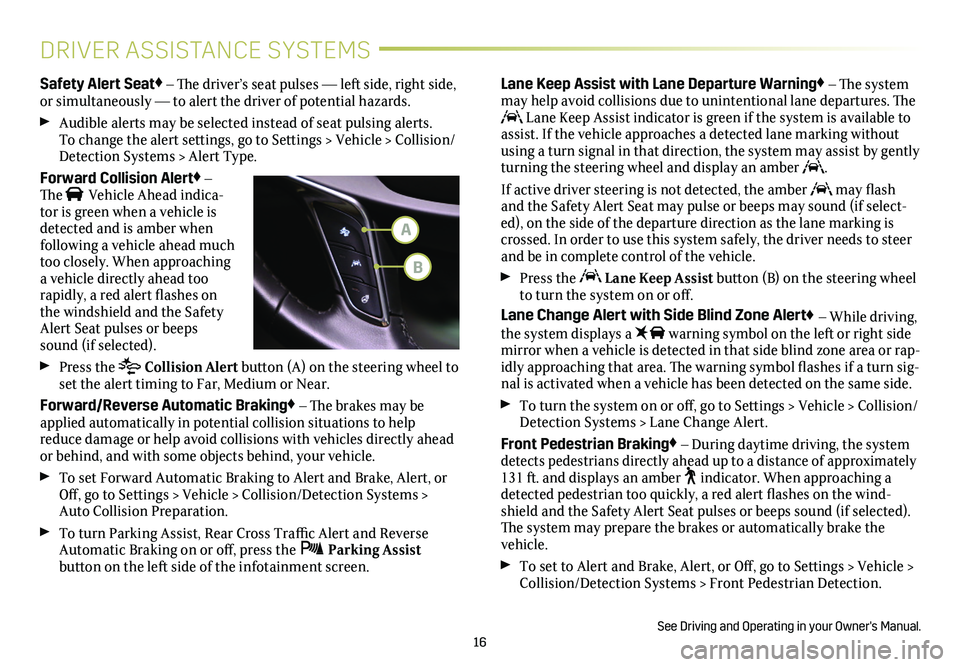
Press the Collision Alert button (A) on the steering wheel to set the alert timing to Far, Medium or Near.
Forward/Reverse Automatic Braking♦ – The brakes may be applied automatically in potential collision situations to help reduce damage or help avoid collisions with vehicles directly ahead or behind, and with some objects behind, your vehicle.
To set Forward Automatic Braking to Alert and Brake, Alert, or Off, go to Settings > Vehicle > Collision/Detection Systems > Auto Collision Preparation.
To turn Parking Assist, Rear Cross Traffic Alert and Reverse Automatic Braking on or off, press the Parking Assist
button on the left side of the infotainment screen.
Lane Keep Assist with Lane Departure Warning♦ – The system may help avoid collisions due to unintentional lane departures. The Lane Keep Assist indicator is green if the system is available to assist. If the vehicle approaches a detected lane marking without using a turn signal in that direction, the system may assist by gently turning the steering wheel and display an amber .
If active driver steering is not detected, the amber may flash and the Safety Alert Seat may pulse or beeps may sound (if select-ed), on the side of the departure direction as the lane marking is crossed. In order to use this system safely, the driver needs to steer and be in complete control of the vehicle.
Press the Lane Keep Assist button (B) on the steering wheel to turn the system on or off.
Lane Change Alert with Side Blind Zone Alert♦ – While driving, the system displays a warning symbol on the left or right side
mirror when a vehicle is detected in that side blind zone area or rap-idly approaching that area. The warning symbol flashes if a turn sig-nal is activated when a vehicle has been detected on the same side.
To turn the system on or off, go to Settings > Vehicle > Collision/Detection Systems > Lane Change Alert.
Front Pedestrian Braking♦ – During daytime driving, the system detects pedestrians directly ahead up to a distance of approximately 131 ft. and displays an amber indicator. When approaching a detected pedestrian too quickly, a red alert flashes on the wind-shield and the Safety Alert Seat pulses or beeps sound (if selected). The system may prepare the brakes or automatically brake the vehicle.
To set to Alert and Brake, Alert, or Off, go to Settings > Vehicle > Collision/Detection Systems > Front Pedestrian Detection.
See Driving and Operating in your Owner's Manual.
A
B
Page 19 of 20
19
ELECTRIC PARKING BRAKE
TIRE PRESSURE MONITOR
To apply the parking brake, press the
Parking Brake switch on the left side of the instrument panel.
To release the parking brake, turn on the
ignition, press the brake pedal, and then press the switch.
See Driving and Operating in your Owner's Manual.
The Low Tire Pressure warning light on the instrument cluster illuminates when one or more of the vehicle’s tires is significantly underinflated. Fill the tires to the proper tire pressures listed on the Tire and Loading Information label, located below the driver’s door latch. Current tire pressures can be viewed on the Driver Information Center.
See Vehicle Care in your Owner's Manual.
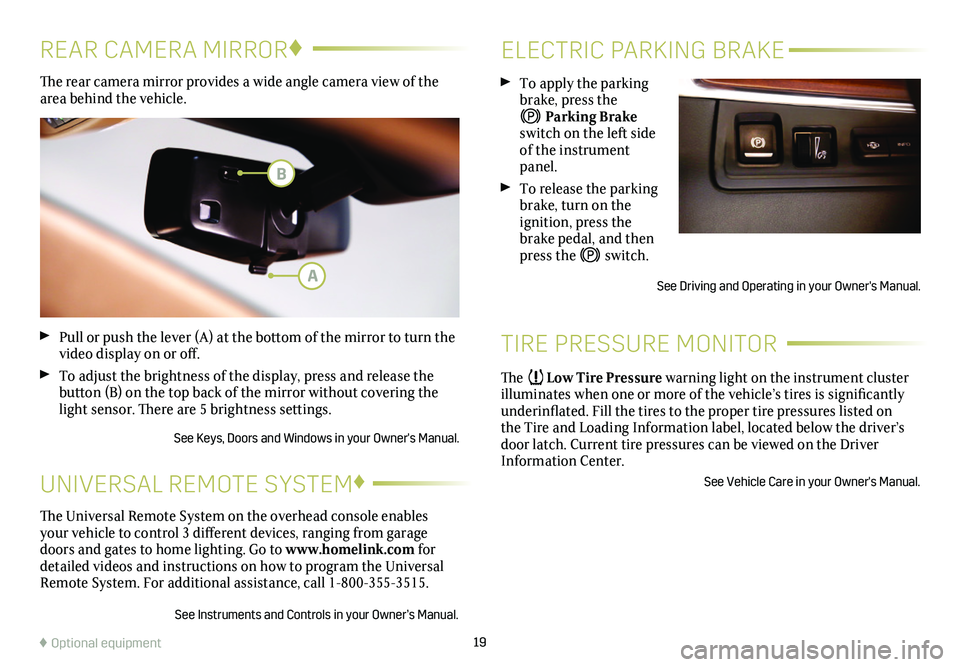
The rear camera mirror provides a wide angle camera view of the area behind the vehicle.
Pull or push the lever (A) at the bottom of the mirror to turn the video display on or off.
To adjust the brightness of the display, press and release the button (B) on the top back of the mirror without covering the light sensor. There are 5 brightness settings.
See Keys, Doors and Windows in your Owner's Manual.
REAR CAMERA MIRROR♦
♦ Optional equipment
The Universal Remote System on the overhead console enables your vehicle to control 3 different devices, ranging from garage doors and gates to home lighting. Go to www.homelink.com for detailed videos and instructions on how to program the Universal Remote System. For additional assistance, call 1-800-355-3515.
See Instruments and Controls in your Owner’s Manual.
UNIVERSAL REMOTE SYSTEM♦
A
B