light CADILLAC XT5 2019 Convenience & Personalization Guide
[x] Cancel search | Manufacturer: CADILLAC, Model Year: 2019, Model line: XT5, Model: CADILLAC XT5 2019Pages: 20, PDF Size: 2.59 MB
Page 6 of 20
6
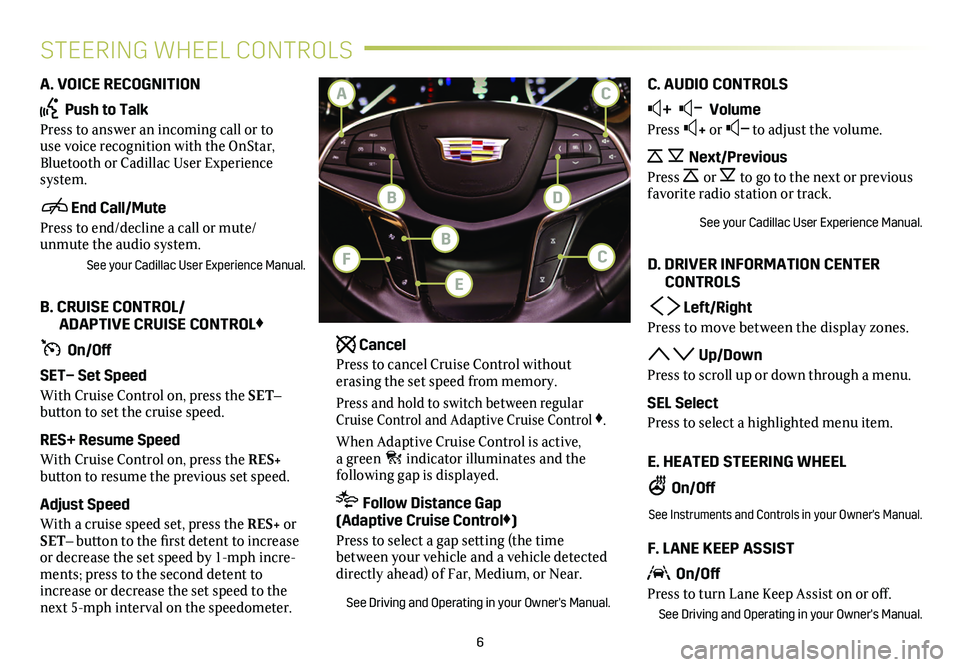
STEERING WHEEL CONTROLS
A. VOICE RECOGNITION
Push to Talk
Press to answer an incoming call or to use voice recognition with the OnStar, Bluetooth or Cadillac User Experience system.
End Call/Mute
Press to end/decline a call or mute/unmute the audio system.
See your Cadillac User Experience Manual.
B. CRUISE CONTROL/ ADAPTIVE CRUISE CONTROL♦
On/Off
SET– Set Speed
With Cruise Control on, press the SET–
button to set the cruise speed.
RES+ Resume Speed
With Cruise Control on, press the RES+
button to resume the previous set speed.
Adjust Speed
With a cruise speed set, press the RES+ or SET– button to the first detent to increase or decrease the set speed by 1-mph incre-ments; press to the second detent to increase or decrease the set speed to the next 5-mph interval on the speedometer.
Cancel
Press to cancel Cruise Control without
erasing the set speed from memory.
Press and hold to switch between regular Cruise Control and Adaptive Cruise Control ♦.
When Adaptive Cruise Control is active, a green indicator illuminates and the
following gap is displayed.
Follow Distance Gap (Adaptive Cruise Control♦)
Press to select a gap setting (the time between your vehicle and a vehicle detected directly ahead) of Far, Medium, or Near.
See Driving and Operating in your Owner's Manual.
C. AUDIO CONTROLS
+ – Volume
Press + or – to adjust the volume.
Next/Previous
Press or to go to the next or previous favorite radio station or track.
See your Cadillac User Experience Manual.
D. DRIVER INFORMATION CENTER CONTROLS
Left/Right
Press to move between the display zones.
Up/Down
Press to scroll up or down through a menu.
SEL Select
Press to select a highlighted menu item.
E. HEATED STEERING WHEEL
On/Off
See Instruments and Controls in your Owner's Manual.
F. LANE KEEP ASSIST
On/Off
Press to turn Lane Keep Assist on or off.
See Driving and Operating in your Owner's Manual.
C
DB
A
BCF
E
Page 7 of 20
7
INSTRUMENT CLUSTER
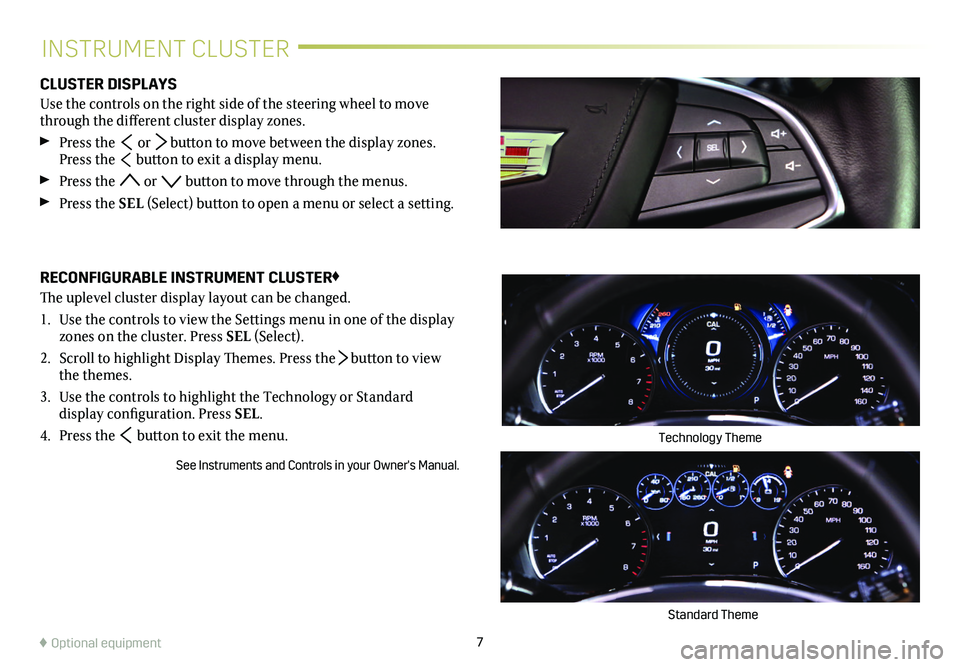
CLUSTER DISPLAYS
Use the controls on the right side of the steering wheel to move through the different
cluster display zones.
Press the or button to move between the display zones. Press the button to exit a display menu.
Press the or button to move through the menus.
Press the SEL (Select) button to open a menu or select a
setting.
RECONFIGURABLE INSTRUMENT CLUSTER♦
The uplevel cluster display layout can be changed.
1. Use the controls to view the Settings menu in one of the
display zones on the cluster. Press SEL (Select).
2. Scroll to highlight Display Themes. Press the button to view the themes.
3. Use the controls to highlight the Technology or Standard
display configuration. Press SEL.
4. Press the button to exit the menu.
See Instruments and Controls in your Owner's Manual.
Standard Theme
Technology Theme
♦ Optional equipment
Page 14 of 20
14
EXTERIOR LIGHTINGWINDSHIELD WIPERS
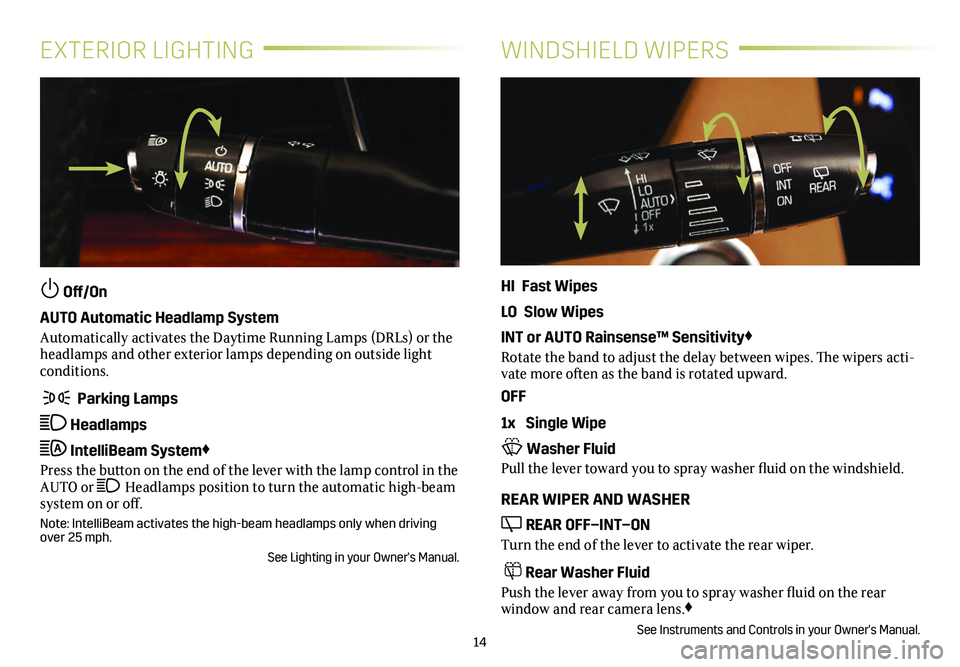
Off/On
AUTO Automatic Headlamp System
Automatically activates the Daytime Running Lamps (DRLs) or the headlamps and other exterior lamps depending on outside light conditions.
Parking Lamps
Headlamps
IntelliBeam System♦
Press the button on the end of the lever with the lamp control in the AUTO or Headlamps position to turn the automatic high-beam system on or off.
Note: IntelliBeam activates the high-beam headlamps only when driving over 25 mph.
See Lighting in your Owner's Manual.
HI Fast Wipes
LO Slow Wipes
INT or AUTO Rainsense™ Sensitivity♦
Rotate the band to adjust the delay between wipes. The wipers acti-vate more often as the band is rotated upward.
OFF
1x Single Wipe
Washer Fluid
Pull the lever toward you to spray washer fluid on the windshield.
REAR WIPER AND WASHER
REAR OFF–INT–ON
Turn the end of the lever to activate the rear wiper.
Rear Washer Fluid
Push the lever away from you to spray washer fluid on the rear
window and rear camera lens.♦
See Instruments and Controls in your Owner's Manual.
Page 17 of 20
17
DRIVER ASSISTANCE SYSTEMS
AUTOMATIC PARKING ASSIST♦
Front♦ and Rear Park Assist – During low-speed parking maneu-vers, the system provides “distance to closest object”
information on the Driver Information Center and the Safety Alert Seat pulses or a beep sounds (if selected). When an object is very close, the Safety Alert Seat pulses or 5 beeps sound (if selected).
Rear Cross Traffic Alert♦ – When the vehicle is in Reverse, the system warns of cross-traffic coming in either direction by display-ing a red alert on the infotainment screen and the left or right side of the Safety Alert Seat pulses or beeps sound (if selected).
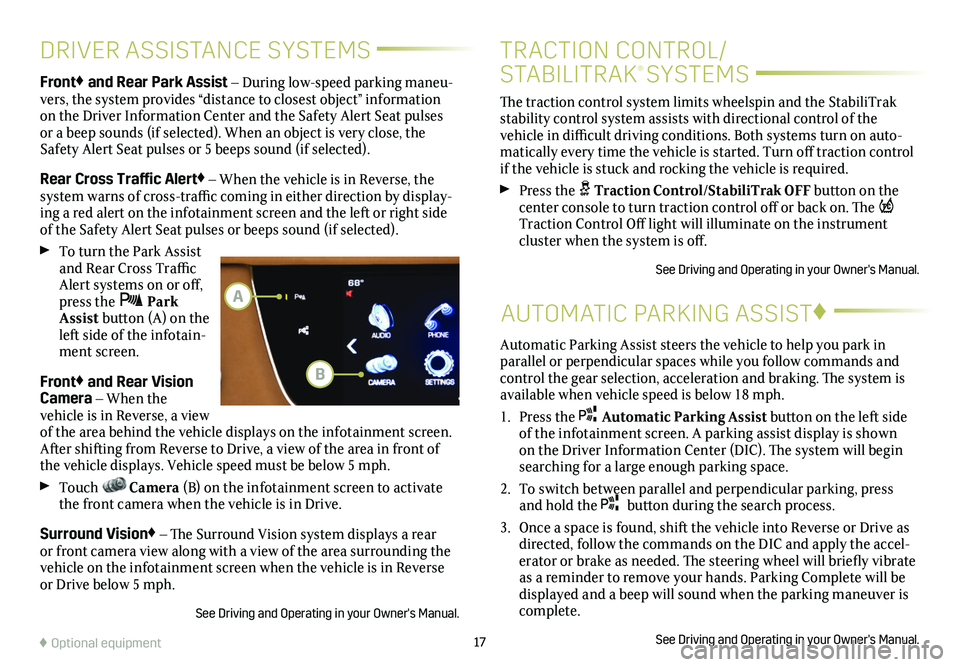
To turn the Park Assist and Rear Cross Traffic Alert systems on or off, press the Park Assist button (A) on the left side of the infotain-ment screen.
Front♦ and Rear Vision Camera – When the vehicle is in Reverse, a view of the area behind the vehicle displays on the infotainment screen. After shifting from Reverse to Drive, a view of the area in front of the vehicle displays. Vehicle speed must be below 5 mph.
Touch Camera (B) on the infotainment screen to activate the front camera when the vehicle is in Drive.
Surround Vision♦ – The Surround Vision system displays a rear or front camera view along with a view of the area surrounding the vehicle on the infotainment screen when the vehicle is in Reverse or Drive below 5 mph.
See Driving and Operating in your Owner's Manual.
♦ Optional equipment
Automatic Parking Assist steers the vehicle to help you park in parallel or perpendicular spaces while you follow commands and control the gear selection, acceleration and braking. The system is available when vehicle speed is below 18 mph.
1. Press the Automatic Parking Assist button on the left side of the infotainment screen. A parking assist
display is shown on the Driver Information Center (DIC). The system will begin searching for a large enough parking space.
2. To switch between parallel and perpendicular parking, press and hold the button during the search process.
3. Once a space is found, shift the vehicle into Reverse or Drive as directed, follow the commands on the DIC and apply the accel-erator or brake as needed. The steering wheel will briefly vibrate as a reminder to remove your hands. Parking Complete will be displayed and a beep will sound when the parking maneuver is complete.
See Driving and Operating in your Owner's Manual.
B
A
The traction control system limits wheelspin and the StabiliTrak stability control system assists with directional control of the vehicle in difficult driving conditions. Both systems turn on auto-matically every time the vehicle is started. Turn off traction control if the vehicle is stuck and rocking the vehicle is required.
Press the Traction Control/StabiliTrak OFF button on the center console to turn traction control off or back on. The Traction Control Off light will illuminate on the instrument cluster when the system is off.
See Driving and Operating in your Owner's Manual.
TRACTION CONTROL/
STABILITRAK® SYSTEMS
Page 19 of 20
19
ELECTRIC PARKING BRAKE
TIRE PRESSURE MONITOR
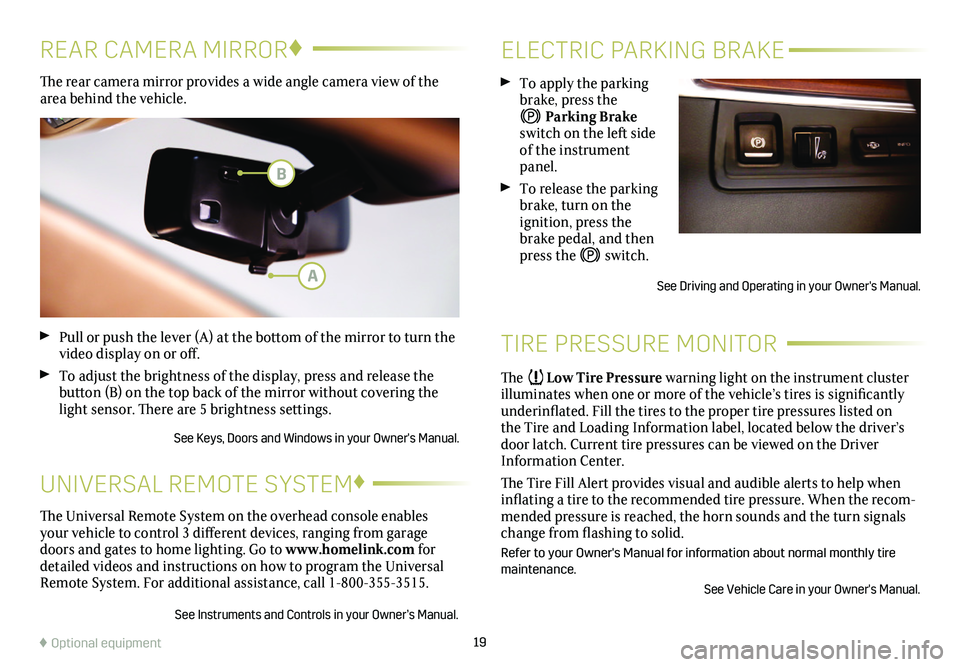
To apply the parking brake, press the
Parking Brake switch on the left side of the instrument panel.
To release the parking brake, turn on the
ignition, press the brake pedal, and then press the switch.
See Driving and Operating in your Owner's Manual.
The Low Tire Pressure warning light on the instrument cluster illuminates when one or more of the vehicle’s tires is significantly underinflated. Fill the tires to the proper tire pressures listed on the Tire and Loading Information label, located below the driver’s door latch. Current tire pressures can be viewed on the Driver Information Center.
The Tire Fill Alert provides visual and audible alerts to help when inflating a tire to the recommended tire pressure. When the recom-mended pressure is reached, the horn sounds and the turn signals change from flashing to solid.
Refer to your Owner's Manual for information about normal monthly tire maintenance.
See Vehicle Care in your Owner's Manual.
The rear camera mirror provides a wide angle camera view of the area behind the vehicle.
Pull or push the lever (A) at the bottom of the mirror to turn the video display on or off.
To adjust the brightness of the display, press and release the button (B) on the top back of the mirror without covering the light sensor. There are 5 brightness settings.
See Keys, Doors and Windows in your Owner's Manual.
REAR CAMERA MIRROR♦
♦ Optional equipment
The Universal Remote System on the overhead console enables your vehicle to control 3 different devices, ranging from garage doors and gates to home lighting. Go to www.homelink.com for detailed videos and instructions on how to program the Universal Remote System. For additional assistance, call 1-800-355-3515.
See Instruments and Controls in your Owner’s Manual.
UNIVERSAL REMOTE SYSTEM♦
A
B