garage door opener CADILLAC XT5 2019 Owner's Manual
[x] Cancel search | Manufacturer: CADILLAC, Model Year: 2019, Model line: XT5, Model: CADILLAC XT5 2019Pages: 388, PDF Size: 6.29 MB
Page 23 of 388

Cadillac XT5 Owner Manual (GMNA-Localizing-U.S./Canada/Mexico-
12146119) - 2019 - crc - 7/27/18
22 IN BRIEF
Lift the cover to access the accessory
power outlet.
SeePower Outlets 0118.
Universal Remote System
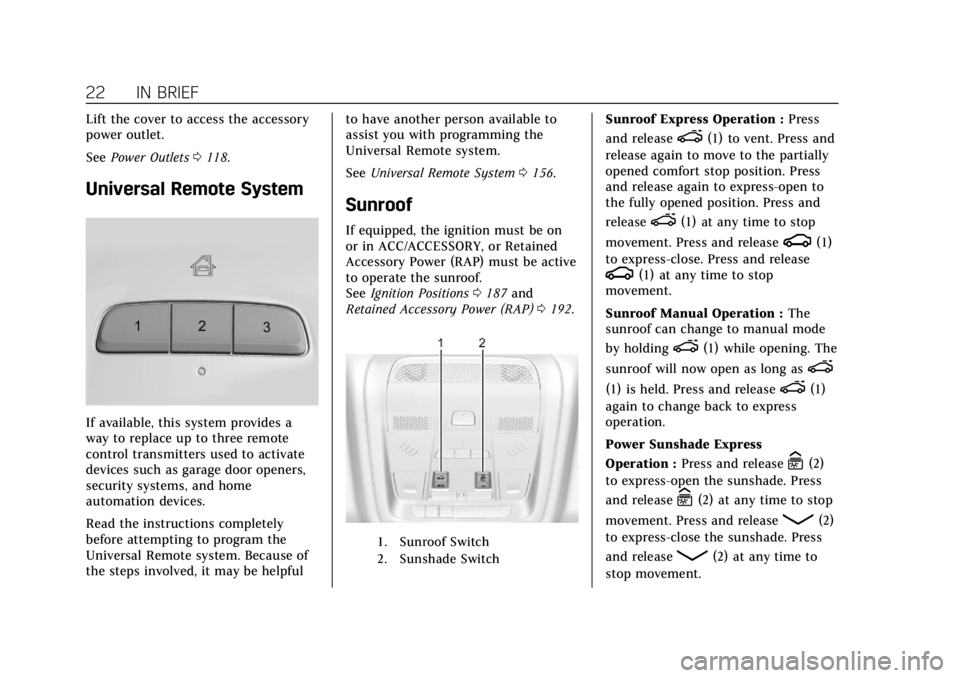
If available, this system provides a
way to replace up to three remote
control transmitters used to activate
devices such as garage door openers,
security systems, and home
automation devices.
Read the instructions completely
before attempting to program the
Universal Remote system. Because of
the steps involved, it may be helpful to have another person available to
assist you with programming the
Universal Remote system.
See
Universal Remote System 0156.
Sunroof
If equipped, the ignition must be on
or in ACC/ACCESSORY, or Retained
Accessory Power (RAP) must be active
to operate the sunroof.
See Ignition Positions 0187 and
Retained Accessory Power (RAP) 0192.
1. Sunroof Switch
2. Sunshade Switch
Sunroof Express Operation : Press
and release
e(1) to vent. Press and
release again to move to the partially
opened comfort stop position. Press
and release again to express-open to
the fully opened position. Press and
release
e(1) at any time to stop
movement. Press and release
g(1)
to express-close. Press and release
g(1) at any time to stop
movement.
Sunroof Manual Operation : The
sunroof can change to manual mode
by holding
e(1) while opening. The
sunroof will now open as long as
e
(1) is held. Press and releasee(1)
again to change back to express
operation.
Power Sunshade Express
Operation : Press and release
C(2)
to express-open the sunshade. Press
and release
C(2) at any time to stop
movement. Press and release
Q(2)
to express-close the sunshade. Press
and release
Q(2) at any time to
stop movement.
Page 157 of 388

Cadillac XT5 Owner Manual (GMNA-Localizing-U.S./Canada/Mexico-
12146119) - 2019 - crc - 7/27/18
156 INSTRUMENTS AND CONTROLS
Universal Remote
System
SeeRadio Frequency Statement 0359.
Universal Remote System
Programming
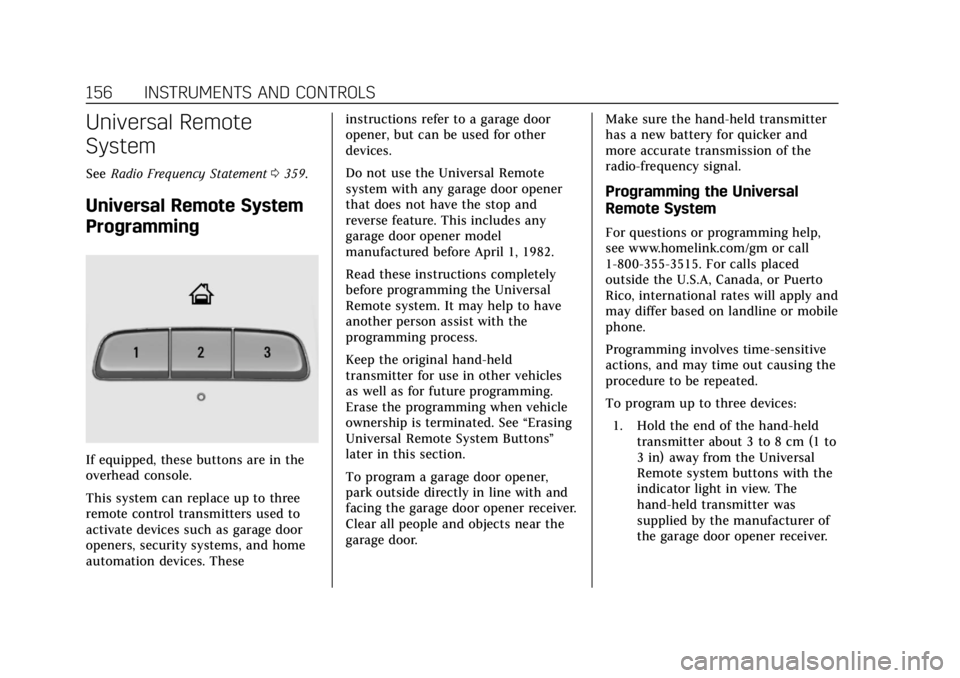
If equipped, these buttons are in the
overhead console.
This system can replace up to three
remote control transmitters used to
activate devices such as garage door
openers, security systems, and home
automation devices. These instructions refer to a garage door
opener, but can be used for other
devices.
Do not use the Universal Remote
system with any garage door opener
that does not have the stop and
reverse feature. This includes any
garage door opener model
manufactured before April 1, 1982.
Read these instructions completely
before programming the Universal
Remote system. It may help to have
another person assist with the
programming process.
Keep the original hand-held
transmitter for use in other vehicles
as well as for future programming.
Erase the programming when vehicle
ownership is terminated. See
“Erasing
Universal Remote System Buttons”
later in this section.
To program a garage door opener,
park outside directly in line with and
facing the garage door opener receiver.
Clear all people and objects near the
garage door. Make sure the hand-held transmitter
has a new battery for quicker and
more accurate transmission of the
radio-frequency signal.
Programming the Universal
Remote System
For questions or programming help,
see www.homelink.com/gm or call
1-800-355-3515. For calls placed
outside the U.S.A, Canada, or Puerto
Rico, international rates will apply and
may differ based on landline or mobile
phone.
Programming involves time-sensitive
actions, and may time out causing the
procedure to be repeated.
To program up to three devices:
1. Hold the end of the hand-held transmitter about 3 to 8 cm (1 to
3 in) away from the Universal
Remote system buttons with the
indicator light in view. The
hand-held transmitter was
supplied by the manufacturer of
the garage door opener receiver.
Page 158 of 388

Cadillac XT5 Owner Manual (GMNA-Localizing-U.S./Canada/Mexico-
12146119) - 2019 - crc - 7/27/18
INSTRUMENTS AND CONTROLS 157
2. At the same time, press and holdboth the hand-held transmitter
button and one of the three
Universal Remote system
buttons to be used to operate the
garage door. Do not release either
button until the indicator light
changes from a slow to a rapid
flash. Then release both buttons.
Some garage door openers may
require substitution of Step 2
with the procedure under “Radio
Signals for Some Gate Operators”
later in this section.
3. Press and hold the newly programmed Universal Remote
system button for five seconds
while watching the indicator
light and garage door activation.
.If the indicator light stays on
continuously or the garage
door moves when the button
is pressed, then programming
is complete. There is no need
to complete Steps 4–6. .
If the indicator light does not
come on or the garage door
does not move, a second
button press may be
required. For a second time,
press and hold the newly
programmed button for
five seconds. If the light stays
on or the garage door moves,
programming is complete.
. If the indicator light blinks
rapidly for two seconds, then
changes to a solid light and
the garage door does not
move, continue with
programming Steps 4–6.
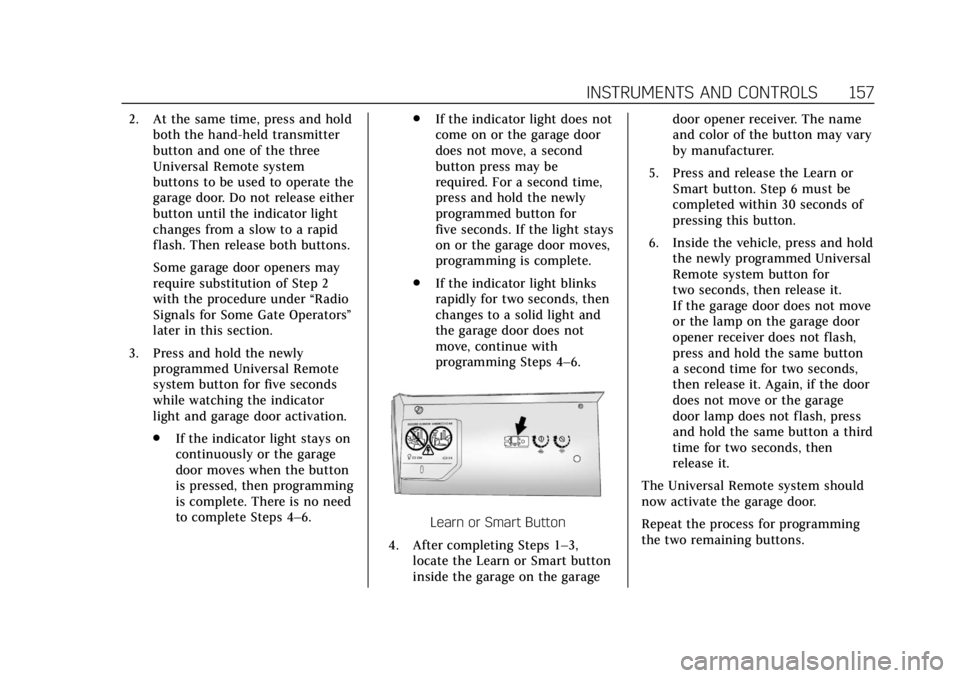
Learn or Smart Button
4. After completing Steps 1–3, locate the Learn or Smart button
inside the garage on the garage door opener receiver. The name
and color of the button may vary
by manufacturer.
5. Press and release the Learn or Smart button. Step 6 must be
completed within 30 seconds of
pressing this button.
6. Inside the vehicle, press and hold the newly programmed Universal
Remote system button for
two seconds, then release it.
If the garage door does not move
or the lamp on the garage door
opener receiver does not flash,
press and hold the same button
a second time for two seconds,
then release it. Again, if the door
does not move or the garage
door lamp does not flash, press
and hold the same button a third
time for two seconds, then
release it.
The Universal Remote system should
now activate the garage door.
Repeat the process for programming
the two remaining buttons.
Page 284 of 388

Cadillac XT5 Owner Manual (GMNA-Localizing-U.S./Canada/Mexico-
12146119) - 2019 - crc - 7/27/18
VEHICLE CARE 283
FusesUsage
F22 –
F23 –
F24 Passenger window switch
F25 –
F26 Trailer brake
F27 Driver ventilated seat/ Lumbar
F28 Passive entry/Passive start
F29 –
F30 Canister vent
F31 –
F32 Heated mirror
F33 –
F34 Liftgate module
F35 Fuel system control module
F36 Passenger ventilated seat/Lumbar
F37 – Fuses
Usage
F38 Window module
F39 Rear closure
F40 Memory seat module
F41 Automatic occupancy sensor
F42 Trailer battery 2
F43 –
F44 –
F45 Liftgate motor
F46 Rear heated seats
F47 –
F48 Glass break sensor
F49 –
F50 –
F51 –
F52 Active dampening system module
F53 Rear parking aid module/Video/USB Fuses
Usage
F54 External object calculating/Side blind
zone alert
F55 –
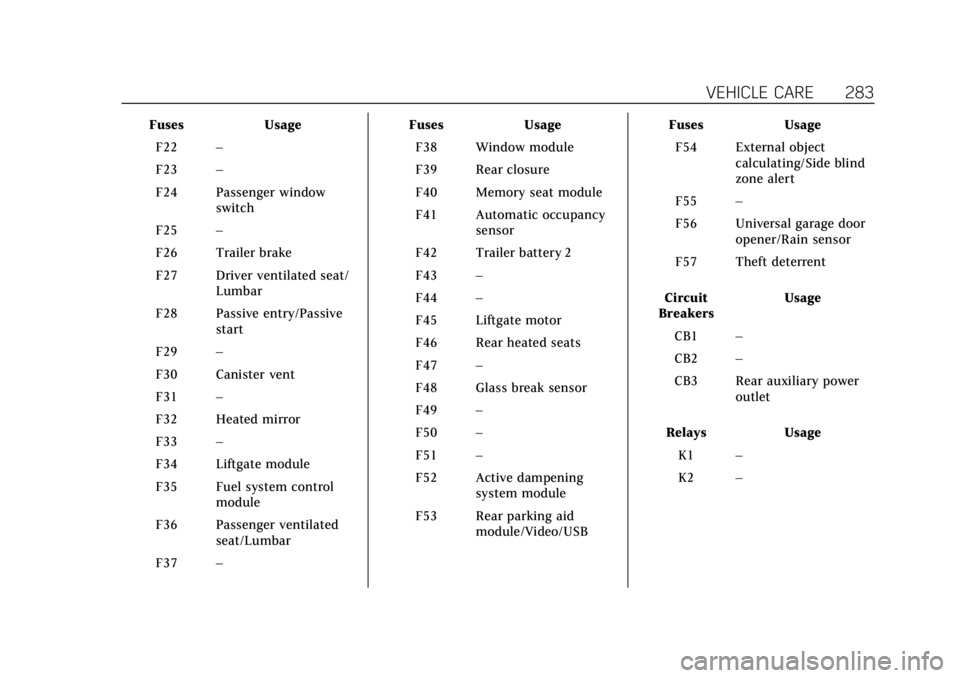
F56 Universal garage door opener/Rain sensor
F57 Theft deterrent
Circuit
Breakers Usage
CB1 –
CB2 –
CB3 Rear auxiliary power outlet
Relays Usage
K1 –
K2 –
Page 381 of 388

Cadillac XT5 Owner Manual (GMNA-Localizing-U.S./Canada/Mexico-
12146119) - 2019 - crc - 7/27/18
380 INDEX
Fuel (cont'd)Top Tier . . . . . . . . . . . . . . . . . . . . . . . . . . . 237
Fuses Engine Compartment Fuse
Block . . . . . . . . . . . . . . . . . . . . . . . . . . . . . 276
Fuses and Circuit Breakers . . . . . . . 275
Instrument Panel Fuse Block . . . . 279
Rear Compartment Fuse Block . . . . . . . . . . . . . . . . . . . . . . . . . . . . . 282
G
Garage Door Opener . . . . . . . . . . . . . . . . 156
Programming . . . . . . . . . . . . . . . . . . . . . . 156
Gas Strut(s) . . . . . . . . . . . . . . . . . . . . . . . . . 272
Gauges
Engine Coolant Temperature . . . . 128
Engine Oil Pressure . . . . . . . . . . . . . . . 127
Fuel . . . . . . . . . . . . . . . . . . . . . . . . . . . . . . . . 126
Odometer . . . . . . . . . . . . . . . . . . . . . . . . . . 126
Speedometer . . . . . . . . . . . . . . . . . . . . . . 126
Tachometer . . . . . . . . . . . . . . . . . . . . . . . 126
Trip Odometer . . . . . . . . . . . . . . . . . . . . 126
Voltmeter . . . . . . . . . . . . . . . . . . . . . . . . . . 129
Warning Lights andIndicators . . . . . . . . . . . . . . . . . . . . . . . . 121
General Information Service and Maintenance . . . . . . . . 333
Towing . . . . . . . . . . . . . . . . . . . . . . . . . . . . 240 General Information (cont'd)
Vehicle Care . . . . . . . . . . . . . . . . . . . . . . . 254
Glove Box . . . . . . . . . . . . . . . . . . . . . . . . . . . 106
GM Mobility Reimbursement Program . . . . . . . . . . . . . . . . . . . . . . . . . . . . 353
H
Halogen Bulbs . . . . . . . . . . . . . . . . . . . . . . 274
Hazard Warning Flashers . . . . . . . . . . 162
Head Restraints . . . . . . . . . . . . . . . . . . . . . . 57
Head-up Display . . . . . . . . . . . . . . . . . . . . 143
HeadlampsAiming . . . . . . . . . . . . . . . . . . . . . . . . . . . . . 273
Automatic . . . . . . . . . . . . . . . . . . . . . . . . . 161
Bulb Replacement . . . . . . . . . . . . . . . . 274
Daytime RunningLamps (DRL) . . . . . . . . . . . . . . . . . . . . 161
Flash-to-Pass . . . . . . . . . . . . . . . . . . . . . . 161
High-Beam On Light . . . . . . . . . . . . . . 139
High/Low Beam Changer . . . . . . . . . 161
Lamps On Reminder . . . . . . . . . . . . . . 139
Heated Rear Seats . . . . . . . . . . . . . . . . . . . . . . . . . . . 68
Steering Wheel . . . . . . . . . . . . . . . . . . . . 113
Heated and Ventilated Front Seats . . . . . . . . . . . . . . . . . . . . . . . . . . . . . . . . 63
Heated Mirrors . . . . . . . . . . . . . . . . . . . . . . . 49 Heater
Engine . . . . . . . . . . . . . . . . . . . . . . . . . . . . . 190
Heating . . . . . . . . . . . . . . . . . . . . . . . . .167, 172
High-Beam On Light . . . . . . . . . . . . . . . . 139
High-Speed Operation . . . . . . . . . . . . . . 292
Hill and Mountain Roads . . . . . . . . . . 181
Hill Start Assist (HSA) . . . . . . . . . . . . . 204
Hood . . . . . . . . . . . . . . . . . . . . . . . . . . . . . . . . . 256
Horn . . . . . . . . . . . . . . . . . . . . . . . . . . . . . . . . . 113
How to Wear Seat Belts Properly . . . 69
HVAC . . . . . . . . . . . . . . . . . . . . . . . . . . .167, 172
I
Ignition Positions . . . . . . . . . . . . . . . . . . . 187
Immobilizer . . . . . . . . . . . . . . . . . . . . . . . . . . 46
Indicator Pedestrian Ahead . . . . . . . . . . . . . . . . . 136
Vehicle Ahead . . . . . . . . . . . . . . . . . . . . . 136
Infants and Young Children, Restraints . . . . . . . . . . . . . . . . . . . . . . . . . . . 90
Information
Publication Ordering . . . . . . . . . . . . . 359
Infotainment . . . . . . . . . . . . . . . . . . . . . . . . 166
Infotainment System . . . . . . . . . . . . . . . 363
Instrument Cluster . . . . . . . . . . . .122, 124
Instrument Panel Overview . . . . . . . . . . . 6
Interior Rearview Mirrors . . . . . . . . . . . 50
Introduction . . . . . . . . . . . . . . . . . . . . . . . . . . . . 2