instrument panel CADILLAC XT5 2020 User Guide
[x] Cancel search | Manufacturer: CADILLAC, Model Year: 2020, Model line: XT5, Model: CADILLAC XT5 2020Pages: 384, PDF Size: 6.52 MB
Page 118 of 384

INSTRUMENTS AND CONTROLS 117
If the light remains on, see your
dealer.
Emissions Inspection and
Maintenance Programs
If the vehicle requires an Emissions
Inspection/Maintenance test, the test
equipment will likely connect to the
vehicle's Data Link Connector (DLC).
The DLC is under the instrument
panel to the left of the steering wheel.
Connecting devices that are not used
to perform an Emissions Inspection/
Maintenance test or to service the
vehicle may affect vehicle operation.
SeeAdd-On Electrical Equipment 0246.
See your dealer if assistance is needed.
The vehicle may not pass
inspection if:
. The light is on when the engine is
running. .
The light does not come on when
the ignition is in Service Mode.
. Critical emission control systems
have not been completely
diagnosed. If this happens, the
vehicle would not be ready for
inspection and might require
several days of routine driving
before the system is ready for
inspection. This can happen if the
12-volt battery has recently been
replaced or run down, or if the
vehicle has been recently serviced.
See your dealer if the vehicle will not
pass or cannot be made ready for
the test.
Brake System Warning
Light
MetricEnglish This light should come on briefly
when the vehicle is turned on. If it
does not come on then, have it fixed
so it will be ready to warn you if there
is a problem.
If the light comes on and stays on at
start up, there is a brake problem.
Have the brake system inspected
right away.
If the light comes on while driving,
pull off the road and stop carefully.
The brake pedal might be harder to
push, or the brake pedal may go closer
to the floor. It could take longer to
stop. If the light is still on, have the
vehicle towed for service. See
Towing
the Vehicle 0319.
{Warning
The brake system might not be
working properly if the brake
system warning light is on. Driving
with the brake system warning light
on can lead to a crash. If the light is
still on after the vehicle has been
(Continued)
Page 128 of 384
INSTRUMENTS AND CONTROLS 127
Transmission Fluid Temperature :
Shows the temperature of the
automatic transmission fluid in either
degrees Celsius (°C) or degrees
Fahrenheit (°F).
Off Road :Displays vehicle pitch and
roll information, road wheel angle,
and four-wheel drive (4WD) status.
Engine Boost : Displays engine
manifold pressure relative to ambient
air pressure. It will display boost
pressure generated by the
turbocharging system.
Info Page Options : Scroll to choose
which info pages appear on the DIC.
Press SEL to select or deselect.
Blank Page : Allows for no
information to be displayed in the
cluster info display areas.Head-Up Display (HUD)
{Warning
If the HUD image is too bright or
too high in your field of view, it
may take you more time to see
things you need to see when it is
dark outside. Be sure to keep the
HUD image dim and placed low in
your field of view.
If equipped with HUD, some
information concerning the operation
of the vehicle is projected onto the
windshield. The image is projected
through the HUD lens on top of the
instrument panel. The information
appears as an image focused out
toward the front of the vehicle.
Caution
If you try to use the HUD image as
a parking aid, you may misjudge
the distance and damage your
vehicle. Do not use the HUD image
as a parking aid. The HUD information can be
displayed in various languages. The
speedometer reading and other
numerical values can be displayed in
either English or metric units.
The language selection is changed
through the radio and the units of
measurement is changed through the
instrument cluster. See
Vehicle
Personalization 0131 and "Options"
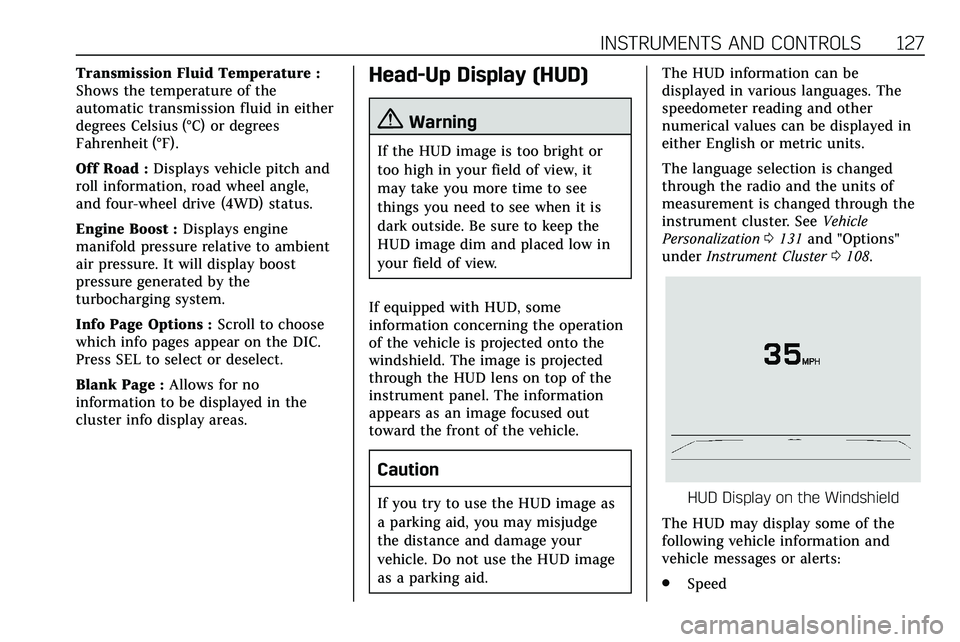
under Instrument Cluster 0108.HUD Display on the Windshield
The HUD may display some of the
following vehicle information and
vehicle messages or alerts:
. Speed
Page 141 of 384
140 LIGHTING
Lighting
Exterior Lighting
Exterior Lamp Controls . . . . . . . . . . 140
Exterior Lamps Off Reminder . . . 142
Headlamp High/Low-BeamChanger . . . . . . . . . . . . . . . . . . . . . . . . . . 142
Flash-to-Pass . . . . . . . . . . . . . . . . . . . . . 142
Daytime Running Lamps (DRL) . . . . . . . . . . . . . . . . . . . . 142
Automatic Headlamp System . . . 142
Hazard Warning Flashers . . . . . . . . 143
Turn and Lane-Change Signals . . . . . . . . . . . . . . . . . . . . . . . . . . . 143
Cornering Lamps . . . . . . . . . . . . . . . . . 144
Interior Lighting
Instrument Panel Illumination Control . . . . . . . . . . . . . . . . . . . . . . . . . . 144
Courtesy Lamps . . . . . . . . . . . . . . . . . . 144
Dome Lamps . . . . . . . . . . . . . . . . . . . . . 144
Reading Lamps . . . . . . . . . . . . . . . . . . . 145
Lighting Features
Entry Lighting . . . . . . . . . . . . . . . . . . . . 145
Exit Lighting . . . . . . . . . . . . . . . . . . . . . . 145
Battery Power Protection . . . . . . . . 146
Exterior Lighting Battery Saver . . . . . . . . . . . . . . . . . . . . . . . . . . . . . 146
Exterior Lighting
Exterior Lamp Controls
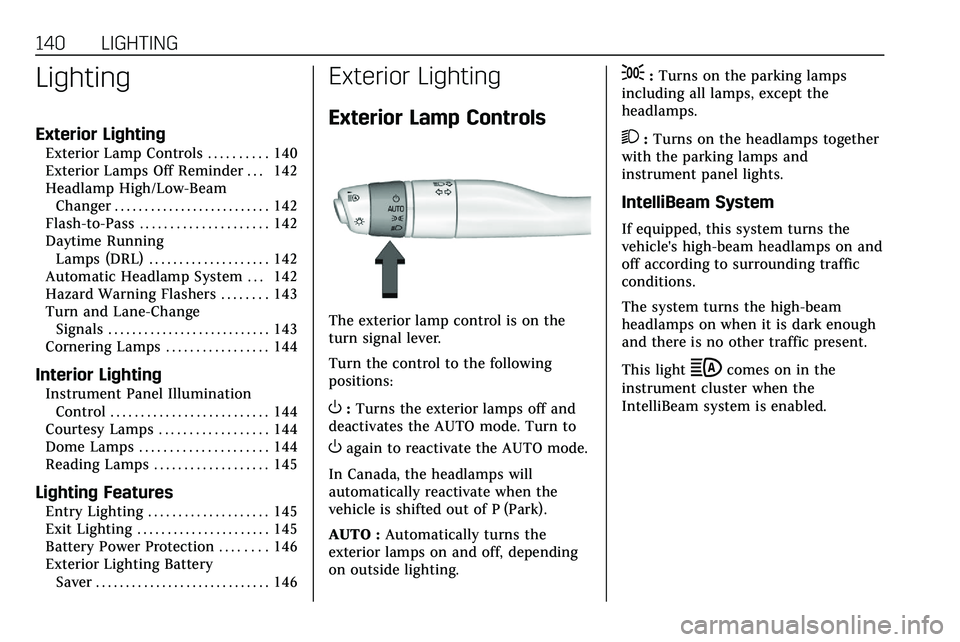
The exterior lamp control is on the
turn signal lever.
Turn the control to the following
positions:
O:Turns the exterior lamps off and
deactivates the AUTO mode. Turn to
Oagain to reactivate the AUTO mode.
In Canada, the headlamps will
automatically reactivate when the
vehicle is shifted out of P (Park).
AUTO : Automatically turns the
exterior lamps on and off, depending
on outside lighting.
;: Turns on the parking lamps
including all lamps, except the
headlamps.
2: Turns on the headlamps together
with the parking lamps and
instrument panel lights.
IntelliBeam System
If equipped, this system turns the
vehicle's high-beam headlamps on and
off according to surrounding traffic
conditions.
The system turns the high-beam
headlamps on when it is dark enough
and there is no other traffic present.
This light
bcomes on in the
instrument cluster when the
IntelliBeam system is enabled.
Page 143 of 384
142 LIGHTING
Exterior Lamps Off
Reminder
A warning chime sounds if the driver
door is opened while the ignition is off
and the exterior lamps are on.
Headlamp High/Low-Beam
Changer
3:Push the turn signal lever away
from you and release, to turn the high
beams on. To return to low beams,
push the lever again or pull it toward
you and release.
This indicator light turns on in the
instrument cluster when the
high-beam headlamps are on.
Flash-to-Pass
To flash the high beams, pull the turn
signal lever toward you, and release.
Daytime Running
Lamps (DRL)
DRL can make it easier for others to
see the front of your vehicle during
the day. Fully functional DRL are
required on all vehicles first sold in
Canada.
The dedicated DRL will come on when
all of the following conditions are met:
. The ignition is on.
. The exterior lamp control is
in AUTO.
. The light sensor determines it is
daytime.
. The parking brake is released or
the vehicle is not in P (Park).
When the DRL are on, the taillamps,
sidemarker lamps, and other lamps
will not be on.
The DRL turn off when the headlamps
are turned to
Oor the ignition is off.
For vehicles first sold in Canada, the
DRL can only be turned off when the
vehicle is parked.
Automatic Headlamp
System
When the exterior lamp control is set
to AUTO and it is dark enough
outside, the headlamps come on
automatically.
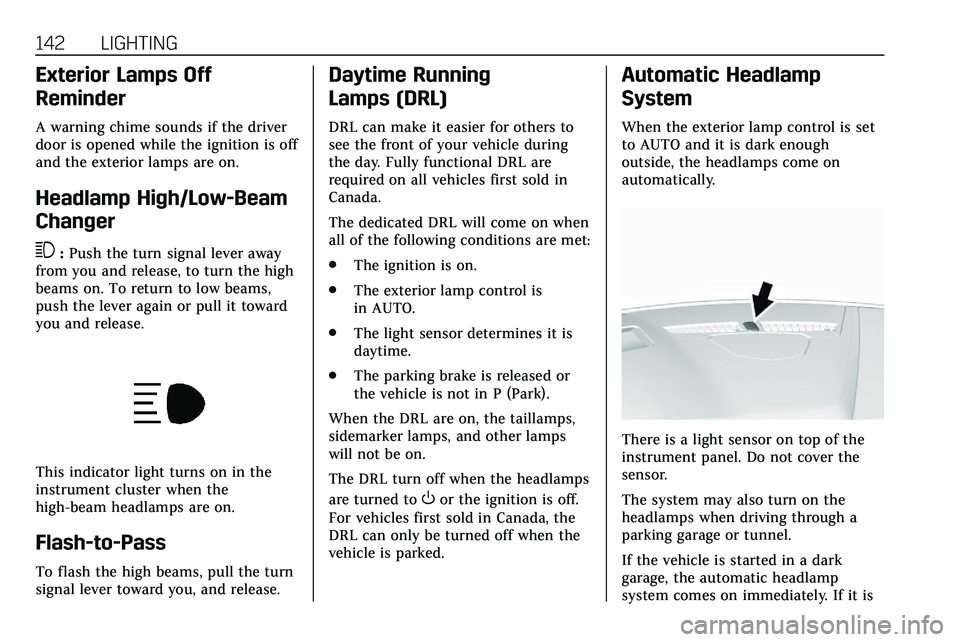
There is a light sensor on top of the
instrument panel. Do not cover the
sensor.
The system may also turn on the
headlamps when driving through a
parking garage or tunnel.
If the vehicle is started in a dark
garage, the automatic headlamp
system comes on immediately. If it is
Page 144 of 384

LIGHTING 143
light outside when the vehicle leaves
the garage, there is a slight delay
before the automatic headlamp
system changes to the Daytime
Running Lamps (DRL). During that
delay, the instrument cluster may not
be as bright as usual. Make sure the
instrument panel brightness control is
in the full bright position. See
Instrument Panel Illumination Control
0144.
When it is bright enough outside, the
headlamps will turn off or may change
to DRL.
The automatic headlamp system turns
off when the exterior lamp control is
turned to
Oor the ignition is off.
For vehicles sold in Canada, this
control only works when the
transmission is in P (Park).
Lights On with Wipers
If the windshield wipers are activated
in daylight with the engine on, and
the exterior lamp control is in AUTO,
the headlamps, parking lamps, and
other exterior lamps come on. The
transition time for the lamps coming
on varies based on wiper speed. When the wipers are not operating, these
lamps turn off. Move the exterior
lamp control to
Oor;to disable
this feature.
Hazard Warning Flashers
|: Touch|on the center stack to
make the front and rear turn signal
lamps flash on and off. Touch again to
turn the flashers off.
The hazard warning flashers turn on
automatically if the airbags deploy.
Turn and Lane-Change
Signals
Move the lever all the way up or down
to signal a turn.
An arrow on the instrument cluster
flashes in the direction of the turn or
lane change.
Raise or lower the lever until the
arrow starts to flash to signal a lane
change. Hold it there until the lane
change is completed. If the lever is
briefly pressed and released, the turn
signal flashes three times.
The turn and lane-change signal can
be turned off manually by moving the
lever back to its original position.
Page 145 of 384
144 LIGHTING
If after signaling a turn or lane
change, the arrow flashes rapidly or
does not come on, a signal bulb may
be burned out.
Replace any burned out bulbs. If a
bulb is not burned out, check the fuse.
SeeFuses and Circuit Breakers 0274.
Cornering Lamps
Cornering lamps automatically come
on when all of the following occur:
.
The low-beam headlamps are on.
. The turn signals are activated or
the steering wheel is at a turning
angle.
. The vehicle speed is below
40 km/h (25 mph).
Interior Lighting
Instrument Panel
Illumination Control
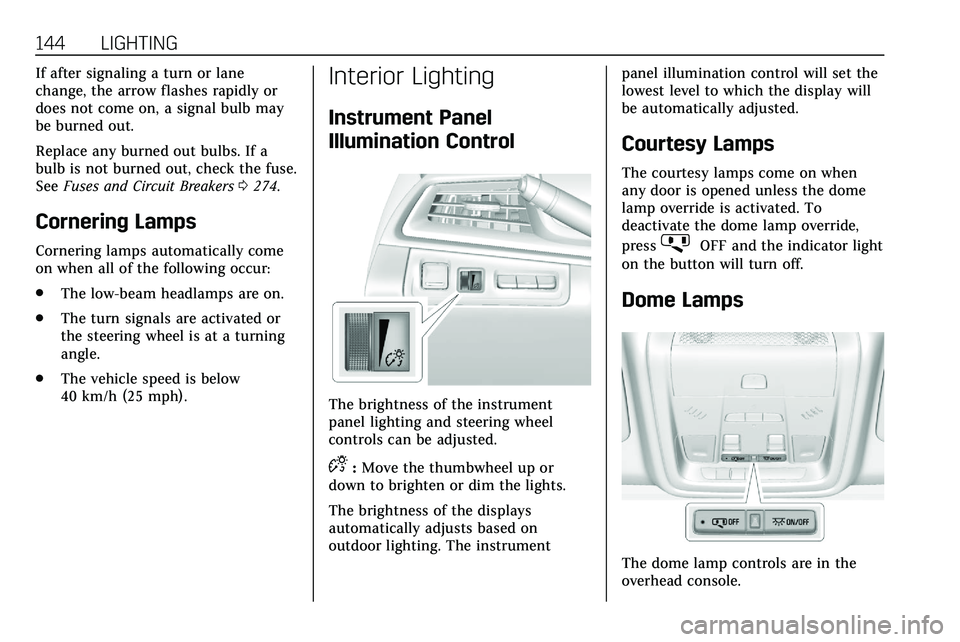
The brightness of the instrument
panel lighting and steering wheel
controls can be adjusted.
D:Move the thumbwheel up or
down to brighten or dim the lights.
The brightness of the displays
automatically adjusts based on
outdoor lighting. The instrument panel illumination control will set the
lowest level to which the display will
be automatically adjusted.
Courtesy Lamps
The courtesy lamps come on when
any door is opened unless the dome
lamp override is activated. To
deactivate the dome lamp override,
press
jOFF and the indicator light
on the button will turn off.
Dome Lamps
The dome lamp controls are in the
overhead console.
Page 151 of 384

150 CLIMATE CONTROLS
To improve fuel efficiency and to cool
the vehicle faster, recirculation may be
automatically selected in warm
weather. The recirculation light will
not come on. Press
@to select
recirculation; press it again to select
outside air.
English units can be changed to
metric units through the instrument
cluster. See “Cluster Application
Displays” underInstrument Cluster
0 108.
OFF : Press to turn the fan on or off.
The front and rear climate displays
turn off when the fan is turned off
and the system will stop air from
flowing into the cabin. If on is
selected, or any other buttons are
pressed, the climate control system
will turn on and operate at the
current setting. The temperature
control and air delivery mode can still
be adjusted.
w/x: The temperature can be
adjusted separately for the driver and
the passenger. Press to increase or
decrease the temperature. Press and
hold to rapidly increase or decrease
the temperature. The driver and passenger
temperatures can also be adjusted by
touching the buttons on the climate
control display.
SYNC :
Touch SYNC on the climate
control display to link all climate zone
settings to the driver settings. Adjust
the driver side temperature control to
change the linked temperature. When
the front or rear passenger settings
are adjusted, the SYNC indicator light
turns off when the temperatures are
unlinked.
Rear : If equipped, touch Rear on the
front climate control display to open
the rear climate control display. The
rear climate control settings can now
be adjusted from the front passenger
area. See Rear Climate Control System
0 154.
Manual Operation
Q 9 R:Press the fan controls on the
center stack or the climate control
display to increase or decrease the fan
speed. Press and hold the controls to
adjust speed more quickly. The fan
speed setting displays. Pressing either
button cancels automatic fan control and the fan can be controlled
manually. Press AUTO to return to
automatic operation. To turn off the
fan and climate control system, press
and hold the fan down control on the
center stack or the climate control
display until it goes off.
Air Delivery Mode Control :
When
the climate information is displayed,
touch the desired air delivery mode on
the climate control display to change
the direction of the airf low. The
selected air delivery mode button is
lit. Touching any of the air delivery
buttons cancels automatic air delivery
control and the direction of the
airf low can be controlled manually.
Press AUTO to return to automatic
operation.
To change the current mode, select
one of the following:Y: Air is directed to the instrument
panel outlets.
\: Air is divided between the
instrument panel outlets and the floor
outlets.
[: Air is directed to the floor
outlets.
Page 154 of 384

CLIMATE CONTROLS 153
Sensor
The solar sensor, on top of the
instrument panel near the windshield,
monitors the solar heat.
The climate control system uses the
sensor information to adjust the
temperature, fan speed, recirculation,
and air delivery mode for best
comfort.
If the sensor is covered, the automatic
climate control system may not work
properly.
Page 157 of 384
156 CLIMATE CONTROLS
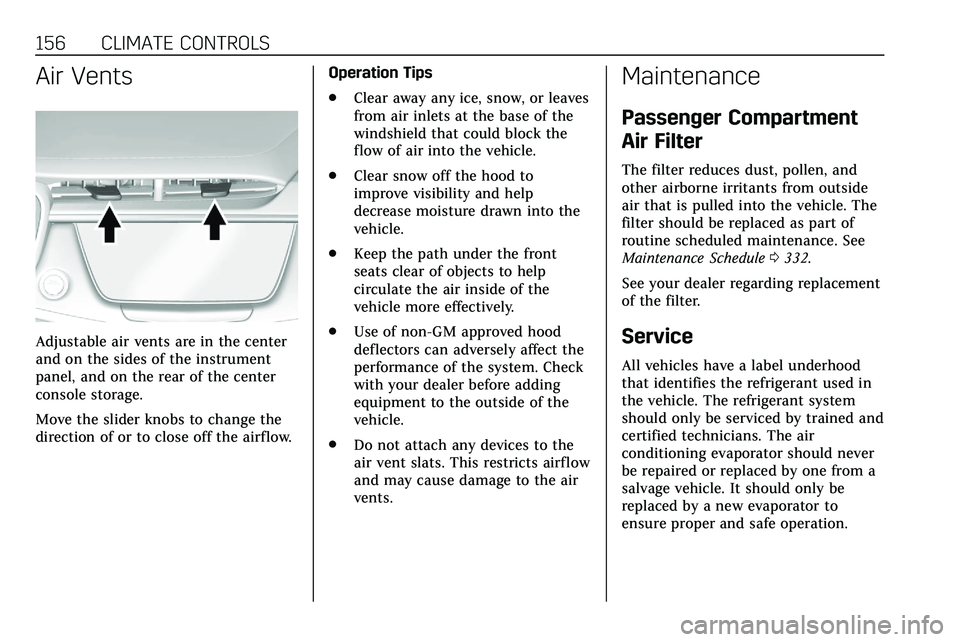
Air Vents
Adjustable air vents are in the center
and on the sides of the instrument
panel, and on the rear of the center
console storage.
Move the slider knobs to change the
direction of or to close off the airf low.Operation Tips
.
Clear away any ice, snow, or leaves
from air inlets at the base of the
windshield that could block the
flow of air into the vehicle.
. Clear snow off the hood to
improve visibility and help
decrease moisture drawn into the
vehicle.
. Keep the path under the front
seats clear of objects to help
circulate the air inside of the
vehicle more effectively.
. Use of non-GM approved hood
deflectors can adversely affect the
performance of the system. Check
with your dealer before adding
equipment to the outside of the
vehicle.
. Do not attach any devices to the
air vent slats. This restricts airflow
and may cause damage to the air
vents.
Maintenance
Passenger Compartment
Air Filter
The filter reduces dust, pollen, and
other airborne irritants from outside
air that is pulled into the vehicle. The
filter should be replaced as part of
routine scheduled maintenance. See
Maintenance Schedule 0332.
See your dealer regarding replacement
of the filter.
Service
All vehicles have a label underhood
that identifies the refrigerant used in
the vehicle. The refrigerant system
should only be serviced by trained and
certified technicians. The air
conditioning evaporator should never
be repaired or replaced by one from a
salvage vehicle. It should only be
replaced by a new evaporator to
ensure proper and safe operation.
Page 170 of 384

DRIVING AND OPERATING 169
.Turn on Traction Control. See
Traction Control/Electronic Stability
Control 0193.
. Antilock Brake System (ABS)
improves vehicle stability during
hard stops, but the brakes should
be applied sooner than when on
dry pavement. See Antilock Brake
System (ABS) 0190.
. Allow greater following distance
and watch for slippery spots. Icy
patches can occur on otherwise
clear roads in shaded areas. The
surface of a curve or an overpass
can remain icy when the
surrounding roads are clear. Avoid
sudden steering maneuvers and
braking while on ice.
. Turn off cruise control.
. Select All-Wheel Drive (AWD)
Mode for vehicles equipped with
AWD. Select Snow/Ice Mode for
FWD only vehicles. See Driver
Mode Control 0195 and
All-Wheel Drive 0190.Blizzard Conditions
Stop the vehicle in a safe place and
signal for help. Stay with the vehicle
unless there is help nearby. If possible,
use Roadside Service. See Roadside
Service 0353. To get help and keep
everyone in the vehicle safe:
. Turn on the hazard warning
flashers.
. Tie a red cloth to an outside
mirror.
{Warning
Snow can trap engine exhaust
under the vehicle. This may cause
exhaust gases to get inside. Engine
exhaust contains carbon monoxide
(CO), which cannot be seen or
smelled. It can cause
unconsciousness and even death.
If the vehicle is stuck in snow:
. Clear snow from the base of
the vehicle, especially any
blocking the exhaust pipe.
(Continued)
Warning (Continued)
.Open a window about 5 cm
(2 in) on the vehicle side that
is away from the wind, to
bring in fresh air.
. Fully open the air outlets on
or under the instrument
panel.
. Adjust the climate control
system to circulate the air
inside the vehicle and set the
fan speed to the highest
setting. See “Climate Control
Systems.”
For more information about CO, see
Engine Exhaust 0183.
To save fuel, run the engine for short
periods to warm the vehicle and then
shut the engine off and partially close
the window. Moving about to keep
warm also helps.
If it takes time for help to arrive,
when running the engine, push the
accelerator pedal slightly so the
engine runs faster than the idle speed.