belt CADILLAC XT5 2020 Service Manual
[x] Cancel search | Manufacturer: CADILLAC, Model Year: 2020, Model line: XT5, Model: CADILLAC XT5 2020Pages: 384, PDF Size: 6.52 MB
Page 100 of 384
INSTRUMENTS AND CONTROLS 99
Instruments and
Controls
Controls
Steering Wheel Adjustment . . . . . 100
Steering Wheel Controls . . . . . . . . . 100
Heated Steering Wheel . . . . . . . . . . 100
Horn . . . . . . . . . . . . . . . . . . . . . . . . . . . . . . . 100
Windshield Wiper/Washer . . . . . . . 101
Rear Window Wiper/Washer . . . . 103
Compass . . . . . . . . . . . . . . . . . . . . . . . . . . 104
Clock . . . . . . . . . . . . . . . . . . . . . . . . . . . . . . 104
Power Outlets . . . . . . . . . . . . . . . . . . . . . 104
Wireless Charging . . . . . . . . . . . . . . . . 105
Warning Lights, Gauges, and
Indicators
Warning Lights, Gauges, andIndicators . . . . . . . . . . . . . . . . . . . . . . . 107
Instrument Cluster . . . . . . . . . . . . . . . 108
Speedometer . . . . . . . . . . . . . . . . . . . . . . 111
Odometer . . . . . . . . . . . . . . . . . . . . . . . . . 111
Trip Odometer . . . . . . . . . . . . . . . . . . . . 111
Tachometer . . . . . . . . . . . . . . . . . . . . . . . 111
Fuel Gauge . . . . . . . . . . . . . . . . . . . . . . . . 112
Engine Coolant Temperature Gauge . . . . . . . . . . . . . . . . . . . . . . . . . . . . 112
Seat Belt Reminders . . . . . . . . . . . . . . 113 Airbag Readiness Light . . . . . . . . . . 114
Passenger Airbag Status
Indicator . . . . . . . . . . . . . . . . . . . . . . . . . 114
Charging System Light . . . . . . . . . . . 115
Malfunction Indicator Lamp (Check Engine Light) . . . . . . . . . . . 115
Brake System Warning Light . . . . 117
Electric Parking Brake Light . . . . . 118
Service Electric Parking Brake Light . . . . . . . . . . . . . . . . . . . . . . . . . . . . . 118
Antilock Brake System (ABS) Warning Light . . . . . . . . . . . . . . . . . . 118
Gear Shifting Light . . . . . . . . . . . . . . . 119
All-Wheel-Drive Light . . . . . . . . . . . . 119
Lane Keep Assist (LKA) Light . . . 119
Vehicle Ahead Indicator . . . . . . . . . 119
Pedestrian Ahead Indicator . . . . . . 120
Traction Off Light . . . . . . . . . . . . . . . . 120
StabiliTrak OFF Light . . . . . . . . . . . . 120
Traction Control System (TCS)/ StabiliTrak Light . . . . . . . . . . . . . . . . 121
Engine Coolant Temperature Warning Light . . . . . . . . . . . . . . . . . . 121
Driver Mode Control Light . . . . . . . 121
Tire Pressure Light . . . . . . . . . . . . . . . 122
Engine Oil Pressure Light . . . . . . . . 122
Low Fuel Warning Light . . . . . . . . . 123
Security Light . . . . . . . . . . . . . . . . . . . . . 123
High-Beam On Light . . . . . . . . . . . . . 123
Lamps On Reminder . . . . . . . . . . . . . 123 Cruise Control Light . . . . . . . . . . . . . . 124
Door Ajar Light . . . . . . . . . . . . . . . . . . . 124
Information Displays
Driver Information
Center (DIC) . . . . . . . . . . . . . . . . . . . . . 124
Head-Up Display (HUD) . . . . . . . . . 127
Vehicle Messages
Vehicle Messages . . . . . . . . . . . . . . . . . 130
Engine Power Messages . . . . . . . . . . 131
Vehicle Speed Messages . . . . . . . . . 131
Vehicle Personalization
Vehicle Personalization . . . . . . . . . . 131
Universal Remote System
Universal Remote System . . . . . . . . 137
Universal Remote System Programming . . . . . . . . . . . . . . . . . . . 137
Universal Remote System Operation . . . . . . . . . . . . . . . . . . . . . . . . 139
Page 114 of 384

INSTRUMENTS AND CONTROLS 113
Metric
This gauge measures the temperature
of the vehicle's engine.
While driving under normal operating
conditions, if the red LED is
illuminated, the engine is too hot. Pull
off the road, stop the vehicle, and turn
off the engine as soon as possible.
Seat Belt Reminders
Driver Seat Belt Reminder Light
There is a driver seat belt reminder
light on the instrument cluster.
When the vehicle is started, this light
flashes and a chime may come on to
remind the driver to fasten their seat
belt. Then the light stays on solid
until the belt is buckled. This cycle
may continue several times if the
driver remains or becomes unbuckled
while the vehicle is moving.
If the driver seat belt is buckled,
neither the light nor the chime
comes on.
Passenger Seat Belt Reminder
Light
There is a passenger seat belt
reminder light near the passenger
airbag status indicator. See Passenger
Sensing System 067.
When the vehicle is started, this light
flashes and a chime may come on to
remind passengers to fasten their seat
belt. Then the light stays on solid
until the belt is buckled. This cycle
continues several times if the
passenger remains or becomes
unbuckled while the vehicle is moving.
If the passenger seat belt is buckled,
neither the chime nor the light
comes on.
The front passenger seat belt reminder
light and chime may turn on if an
object is put on the seat such as a
briefcase, handbag, grocery bag,
laptop, or other electronic device. To
turn off the reminder light and/or
chime, remove the object from the
seat or buckle the seat belt.
Page 132 of 384
INSTRUMENTS AND CONTROLS 131
.Steering
. Ride Control Systems
. Driver Assistance Systems
. Cruise Control
. Lighting and Bulb Replacement
. Wiper/Washer Systems
. Doors and Windows
. Seat Belts
. Airbag Systems
. Engine and Transmission
. Tire Pressure
. Battery
Engine Power Messages
ENGINE POWER IS REDUCED
This message displays when the
vehicle's propulsion power is reduced.
A reduction in propulsion power can
affect the vehicle's ability to
accelerate. If this message is on, but
there is no observed reduction in
performance, proceed to your
destination. The performance may be
reduced the next time the vehicle is driven. The vehicle may be driven
while this message is on, but
maximum acceleration and speed may
be reduced. Anytime this message
stays on, or displays repeatedly, the
vehicle should be taken to your dealer
for service as soon as possible.
Under certain operating conditions,
propulsion will be disabled. Try
restarting after the vehicle has been
off for 30 seconds.
Vehicle Speed Messages
SPEED LIMITED TO XXX KM/
H (MPH)
This message shows that the vehicle
speed has been limited to the speed
displayed. The limited speed is a
protection for various propulsion and
vehicle systems, such as lubrication,
thermal, brakes, suspension, Teen
Driver if equipped, or tires.
Vehicle Personalization
The following are all possible vehicle
personalization features. Depending
on the vehicle, some may not be
available.
For System, Apps, and Personal
features and functions, see
“Settings”
in the infotainment manual.
To access the vehicle
personalization menu:
1. Touch the Settings icon on the Home Page of the infotainment
display.
2. Touch Vehicle to display a list of available options.
3. Touch to select the desired feature setting.
4. Touch
9orRto turn a feature
off or on.
5. Touch
zto go to the top level of
the Settings menu.
The menu may contain the following:
Page 161 of 384
160 DRIVING AND OPERATING
.Do not use a phone in demanding
driving situations. Use a
hands-free method to place or
receive necessary phone calls.
. Watch the road. Do not read, take
notes, or look up information on
phones or other electronic devices.
. Designate a front seat passenger
to handle potential distractions.
. Become familiar with vehicle
features before driving, such as
programming favorite radio
stations and adjusting climate
control and seat settings. Program
all trip information into any
navigation device prior to driving.
. Wait until the vehicle is parked to
retrieve items that have fallen to
the floor.
. Stop or park the vehicle to tend to
children.
. Keep pets in an appropriate carrier
or restraint.
. Avoid stressful conversations
while driving, whether with a
passenger or on a cell phone.
{Warning
Taking your eyes off the road too
long or too often could cause a
crash resulting in injury or death.
Focus your attention on driving.
Refer to the infotainment manual for
more information on using that
system and the navigation system,
if equipped, including pairing and
using a cell phone.
Defensive Driving
Defensive driving means “always
expect the unexpected.” The first step
in driving defensively is to wear the
seat belt. See Seat Belts053.
. Assume that other road users
(pedestrians, bicyclists, and other
drivers) are going to be careless
and make mistakes. Anticipate
what they may do and be ready.
. Allow enough following distance
between you and the driver in
front of you.
. Focus on the task of driving.
Drunk Driving
Death and injury associated with
drinking and driving is a global
tragedy.
{Warning
Drinking and then driving is very
dangerous. Your reflexes,
perceptions, attentiveness, and
judgment can be affected by even a
small amount of alcohol. You can
have a serious —or even fatal —
collision if you drive after drinking.
Do not drink and drive or ride with
a driver who has been drinking.
Ride home in a cab; or if you are
with a group, designate a driver
who will not drink.
Control of a Vehicle
Braking, steering, and accelerating are
important factors in helping to control
a vehicle while driving.
Page 164 of 384
DRIVING AND OPERATING 163
Defensive drivers avoid most skids by
taking reasonable care suited to
existing conditions, and by not
overdriving those conditions. But
skids are always possible.
If the vehicle starts to slide, follow
these suggestions:
.Ease your foot off the accelerator
pedal and steer the way you want
the vehicle to go. The vehicle may
straighten out. Be ready for a
second skid if it occurs.
. Slow down and adjust your driving
according to weather conditions.
Stopping distance can be longer
and vehicle control can be affected
when traction is reduced by water,
snow, ice, gravel, or other material
on the road. Learn to recognize
warning clues —such as enough
water, ice, or packed snow on the
road to make a mirrored surface
— and slow down when you have
any doubt.
. Try to avoid sudden steering,
acceleration, or braking, including
reducing vehicle speed by shifting to a lower gear. Any sudden
changes could cause the tires to
slide.
Remember: Antilock brakes help avoid
only the braking skid.
Off-Road Driving
All-Wheel Drive vehicles can be used
for off-road driving. Vehicles without
All-Wheel Drive and vehicles not
equipped with All Terrain (AT) or
On-Off Road (OOR) tires must not be
driven off-road except on a level, solid
surface. To contact the tire
manufacturer for more information
about the original equipment tires, see
the Limited Warranty and Owner
Assistance Information manual.
Controlling the vehicle is the key to
successful off-road driving. One of the
best ways to control the vehicle is to
control the speed.
{Warning
When driving off-road, bouncing
and quick changes in direction can
easily throw you out of position.
This could cause you to lose control
and crash. You and your passengers
should always wear seat belts.
Before Driving Off-Road
. Have all necessary maintenance
and service work completed.
. Fuel the vehicle, fill fluid levels,
and check inflation pressure in all
tires, including the spare,
if equipped.
. Read all the information about
All-Wheel Drive vehicles in this
manual.
. Make sure all underbody shields,
if equipped, are properly attached.
. Know the local laws that apply to
off-road driving.
Page 178 of 384
DRIVING AND OPERATING 177
the accelerator pedal all the way
to the floor and hold it there,
then press ENGINE START/STOP
for up to a maximum of
15 seconds. Wait at least
15 seconds between each try, to
allow the cranking motor to cool
down. When the engine starts,
let go of the button and the
accelerator. If the vehicle starts
briefly but then stops again, do
the same thing. This clears the
extra gasoline from the engine.
Do not race the engine
immediately after starting it.
Operate the engine and
transmission gently until the oil
warms up and lubricates all
moving parts.
Stop/Start System
The Stop/Start system will shut off
the engine to help conserve fuel.
It has components designed for the
increased number of starts.
{Warning
The automatic engine Stop/Start
feature causes the engine to shut
off while the vehicle is still on. Do
not exit the vehicle before shifting
to P (Park). The vehicle may restart
and move unexpectedly. Always
shift to P (Park), and then turn the
ignition off before exiting the
vehicle.
Auto Engine Stop/Start
When the brakes are applied and the
vehicle is at a complete stop, the
engine may turn off. When stopped,
the tachometer displays AUTO STOP.
See Tachometer 0111. When the brake
pedal is released or the accelerator
pedal is pressed, the engine will
restart.
To maintain vehicle performance,
other conditions may cause the engine
to automatically restart before the
brake pedal is released.
Auto Stops may not occur and/or Auto
Starts may occur because: .
The climate control settings
require the engine to be running
to cool or heat the vehicle interior.
. The vehicle battery charge is low.
. The vehicle battery has recently
been disconnected.
. Minimum vehicle speed has not
been reached since the last
Auto Stop.
. The accelerator pedal is pressed.
. The engine or transmission is not
at the required operating
temperature.
. The outside temperature is not in
the required operating range.
. The vehicle is in any gear other
than D (Drive).
. Driver modes have been selected.
. The vehicle is on a steep hill or
grade.
. The driver door has been opened
or the driver seat belt has been
unbuckled.
. The hood has been opened.
Page 205 of 384
204 DRIVING AND OPERATING
feel or sound different than if the
brakes were applied manually. This is
normal.
Stationary or Very Slow-Moving
Objects
{Warning
ACC may not detect and react to
stopped or slow-moving vehicles
ahead of you. For example, the
system may not brake for a vehicle
it has never detected moving. This
can occur in stop-and-go traffic or
when a vehicle suddenly appears
due to a vehicle ahead changing
lanes. Your vehicle may not stop
and could cause a crash. Use
caution when using ACC. Your
complete attention is always
required while driving and you
should be ready to take action and
apply the brakes.
ACC Automatically Disengages
ACC may automatically disengage and
the driver will need to manually apply
the brakes to slow the vehicle when: .
The sensors are blocked.
. The Traction Control System (TCS)
or StabiliTrak/ESC system has
activated or been disabled.
. There is a fault in the system.
. The radar falsely reports blockage
when driving in a desert or remote
area with no other vehicles or
roadside objects. A DIC message
may display to indicate that ACC
is temporarily unavailable.
The ACC indicator will turn white
when ACC is no longer active.
Notification to Resume ACC
ACC will maintain a follow gap behind
a detected vehicle and slow your
vehicle to a stop behind that vehicle.
If the stopped vehicle ahead has
driven away and ACC has not
resumed, the vehicle ahead indicator
will flash as a reminder to check
traffic ahead before proceeding. In
addition, the left and right sides of the
Safety Alert Seat will pulse three
times, or three beeps will sound. See
”Alert Type ”and “Adaptive Cruise Go Notifier”
in“Collision/Detection
Systems” underVehicle Personalization
0 131.
When the vehicle ahead drives away,
press RES+ or the accelerator pedal to
resume cruise control. If stopped for
more than two minutes or if the driver
door is opened and the driver seat belt
is unbuckled, the ACC automatically
applies the Electric Parking Brake
(EPB) to hold the vehicle. The EPB
status light will turn on. See Electric
Parking Brake 0191. To release the
EPB, press the accelerator pedal.
A DIC warning message may display
indicating to shift to P (Park) before
exiting the vehicle. See Vehicle
Messages 0130.
{Warning
If ACC has stopped the vehicle, and
if ACC is disengaged, turned off,
or canceled, the vehicle will no
longer be held at a stop. The vehicle
can move. When ACC is holding the
(Continued)
Page 217 of 384
216 DRIVING AND OPERATING
A progress arrow displays the status
of the parking maneuver. Depending
on the space size, additional
maneuvers may be required, and there
will be additional instructions. When
changing gears, allow the automatic
steering to complete before continuing
the parking maneuver. APA will beep
and display a PARKING COMPLETE
message. Apply the brakes and place
the vehicle in P (Park).
APA may automatically disengage if:
.The steering wheel is used by the
driver.
. The maximum allowed speed is
exceeded.
. The parking brake is applied or the
vehicle is shifted into P (Park).
. There is a failure with the APA
system.
. Electronic stability control or
antilock brakes are activated.
. A high priority vehicle message is
displayed in the DIC.
. The driver opens the door with an
unbuckled seat belt. The brake holds the vehicle until the
parking brake or brake is applied,
or the vehicle is shifted into P (Park).
To cancel APA, press
Oagain.
When the System Does Not Seem to
Work Properly
The APA system may require a short
period of driving along curves to
calibrate.
Rear Pedestrian Alert
Under certain conditions, this feature
can provide alerts for a pedestrian
within the system’s range directly
behind the vehicle. This feature only
works in R (Reverse) below 12 km/h
(8 mph), and detects pedestrians up to
8 m (26 ft) away during daytime
driving. During nighttime driving,
feature performance is very limited.
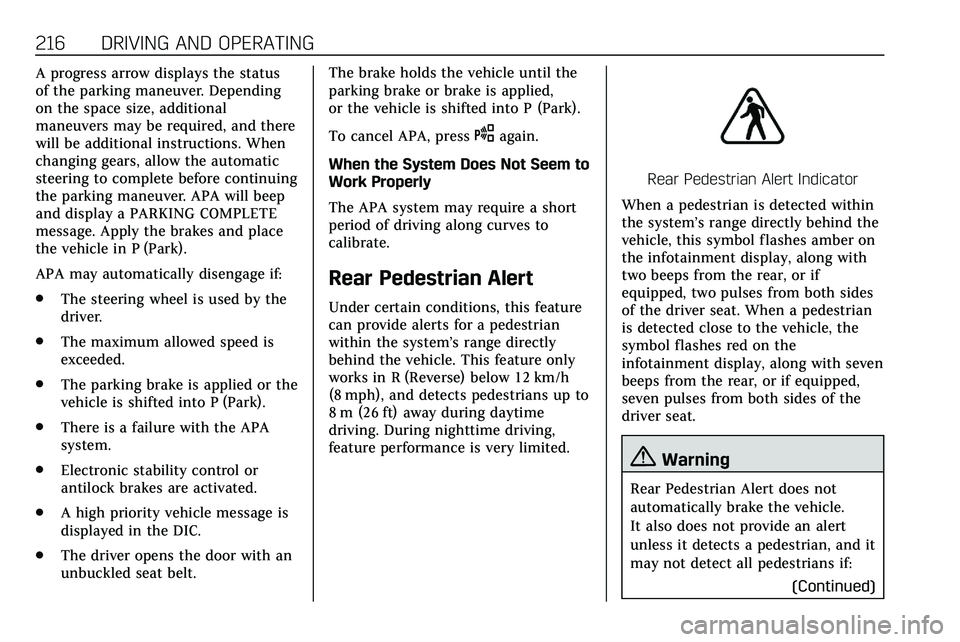
Rear Pedestrian Alert Indicator
When a pedestrian is detected within
the system’s range directly behind the
vehicle, this symbol flashes amber on
the infotainment display, along with
two beeps from the rear, or if
equipped, two pulses from both sides
of the driver seat. When a pedestrian
is detected close to the vehicle, the
symbol flashes red on the
infotainment display, along with seven
beeps from the rear, or if equipped,
seven pulses from both sides of the
driver seat.
{Warning
Rear Pedestrian Alert does not
automatically brake the vehicle.
It also does not provide an alert
unless it detects a pedestrian, and it
may not detect all pedestrians if: (Continued)
Page 238 of 384
DRIVING AND OPERATING 237
2. Have someone place chocksunder the trailer wheels.
3. When the wheel chocks are in place, gradually release the brake
pedal to allow the chocks to
absorb the load of the trailer.
4. Reapply the brake pedal. Then apply the parking brake and shift
into P (Park).
5. Release the brake pedal.
Leaving After Parking on a Hill
1. Apply and hold the brake pedal. .Start the engine.
. Shift into a gear.
. Release the parking brake.
2. Let up on the brake pedal.
3. Drive slowly until the trailer is clear of the chocks.
4. Stop and have someone pick up and store the chocks.
Maintenance When Trailer
Towing
The vehicle needs service more often
when used to tow trailers. See
Maintenance Schedule 0332. It is
especially important to check the
engine oil, axle lubricant, belts,
cooling system, and brake system
before and during each trip.
Check periodically that all nuts and
bolts on the trailer hitch are tight.
Engine Cooling When Trailer
Towing
The cooling system may temporarily
overheat during severe operating
conditions. See Engine Overheating
0 264.
Trailer Towing
Caution
Towing a trailer improperly can
damage the vehicle and result in
costly repairs not covered by the
vehicle warranty. To tow a trailer
(Continued)
Caution (Continued)
correctly, follow the directions in
this section and see your dealer for
important information about
towing a trailer with the vehicle.
Trailer Weight
{Warning
Never exceed the towing capacity
for your vehicle.
Safe trailering requires monitoring the
weight, speed, altitude, road grades,
outside temperature, dimensions of
the front of the trailer, and how
frequently the vehicle is used to tow a
trailer.
Trailer Weight Ratings
When towing a trailer, the combined
weight of the vehicle, vehicle contents,
trailer, and trailer contents must be
below all of the maximum weight
ratings for the vehicle, including:
Page 250 of 384
VEHICLE CARE 249
California Perchlorate
Materials Requirements
Certain types of automotive
applications, such as airbag initiators,
seat belt pretensioners, and lithium
batteries contained in electronic keys,
may contain perchlorate materials.
Perchlorate Material–special
handling may apply. See
www.dtsc.ca.gov/hazardouswaste/
perchlorate.
Accessories and
Modifications
Adding non-dealer accessories or
making modifications to the vehicle
can affect vehicle performance and
safety, including such things as
airbags, braking, stability, ride and
handling, emissions systems,
aerodynamics, durability, and
electronic systems like antilock
brakes, traction control, and stability
control. These accessories or
modifications could even cause
malfunction or damage not covered by
the vehicle warranty. Damage to suspension components
caused by modifying vehicle height
outside of factory settings will not be
covered by the vehicle warranty.
Damage to vehicle components
resulting from modifications or the
installation or use of non-GM certified
parts, including control module or
software modifications, is not covered
under the terms of the vehicle
warranty and may affect remaining
warranty coverage for affected parts.
GM Accessories are designed to
complement and function with other
systems on the vehicle. See your
dealer to accessorize the vehicle using
genuine GM Accessories installed by a
dealer technician.
Also, see
Adding Equipment to the
Airbag-Equipped Vehicle 071.
Vehicle Checks
Doing Your Own
Service Work
{Warning
It can be dangerous to work on
your vehicle if you do not have the
proper knowledge, service manual,
tools, or parts. Always follow
owner’s manual procedures and
consult the service manual for your
vehicle before doing any
service work.
If doing some of your own service
work, use the proper service manual.
It tells you much more about how to
service the vehicle than this manual
can. To order the proper service
manual, see Publication Ordering
Information 0358.
This vehicle has an airbag system.
Before attempting to do your own
service work, see Servicing the
Airbag-Equipped Vehicle 071.