height adjustment CADILLAC XT5 2020 Owner's Manual
[x] Cancel search | Manufacturer: CADILLAC, Model Year: 2020, Model line: XT5, Model: CADILLAC XT5 2020Pages: 384, PDF Size: 6.52 MB
Page 27 of 384

26 KEYS, DOORS, AND WINDOWS
liftgate will reverse direction and open
fully. The liftgate will remain open
until it is activated again or closed
manually.
Setting the 3/4 Mode
To change the position the liftgate
stops at when opening:1. Select MAX or 3/4 mode and power open the liftgate.
2. Stop the liftgate movement at the desired height by pressing
any liftgate button. Manually
adjust the liftgate position if
needed.
3. Press and hold
lnext to the
pull cup on the outside of the
liftgate until the turn signals
flash and a beep sounds. This
indicates the setting has been
recorded.
The liftgate cannot be set below a
minimum programmable height.
If there is no light flash or sound,
then the height adjustment may be
too low.
Manual Operation
Select OFF to manually operate the
liftgate.
Caution
Attempting to move the liftgate too
quickly and with excessive force
may result in damage to the
vehicle.
Operate the liftgate manually with a
smooth motion and moderate speed.
The system includes a feature which
limits the manual closing speed to
protect the components.
To unlock the liftgate, press
Kon the
power door lock switch or press
Kon
the Remote Keyless Entry (RKE)
transmitter twice within five seconds.
See Remote Keyless Entry (RKE) System
Operation 010.
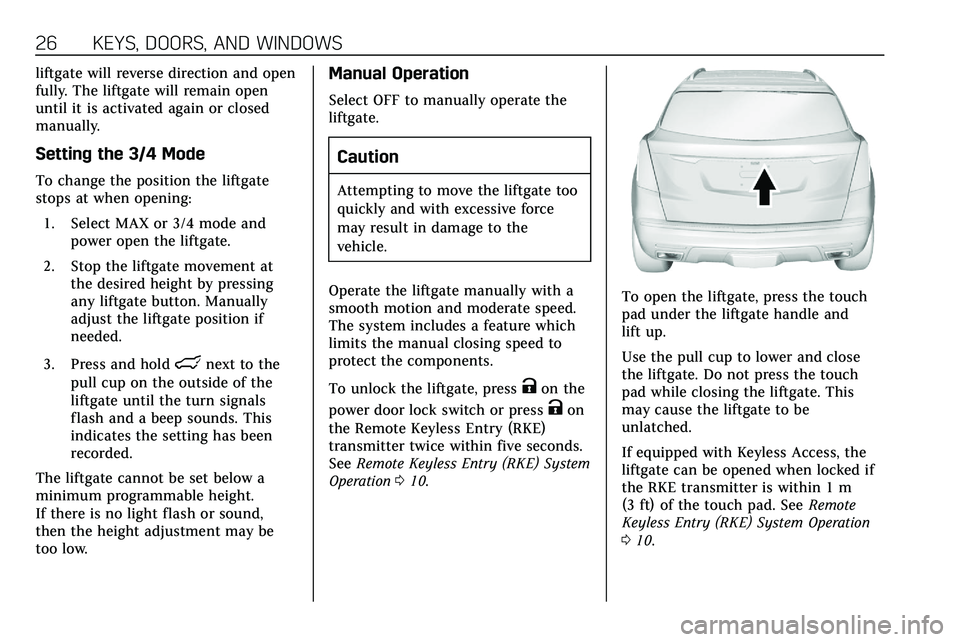
To open the liftgate, press the touch
pad under the liftgate handle and
lift up.
Use the pull cup to lower and close
the liftgate. Do not press the touch
pad while closing the liftgate. This
may cause the liftgate to be
unlatched.
If equipped with Keyless Access, the
liftgate can be opened when locked if
the RKE transmitter is within 1 m
(3 ft) of the touch pad. See Remote
Keyless Entry (RKE) System Operation
0 10.
Page 45 of 384

44 SEATS AND RESTRAINTS
Rear Seats
Rear Head Restraint Adjustment
The vehicle's rear seats have
adjustable head restraints in the
outboard seating positions.
The height of the head restraint can
be adjusted. Pull the head restraint up
to raise it. Try to move the head
restraint to make sure that it is locked
in place.
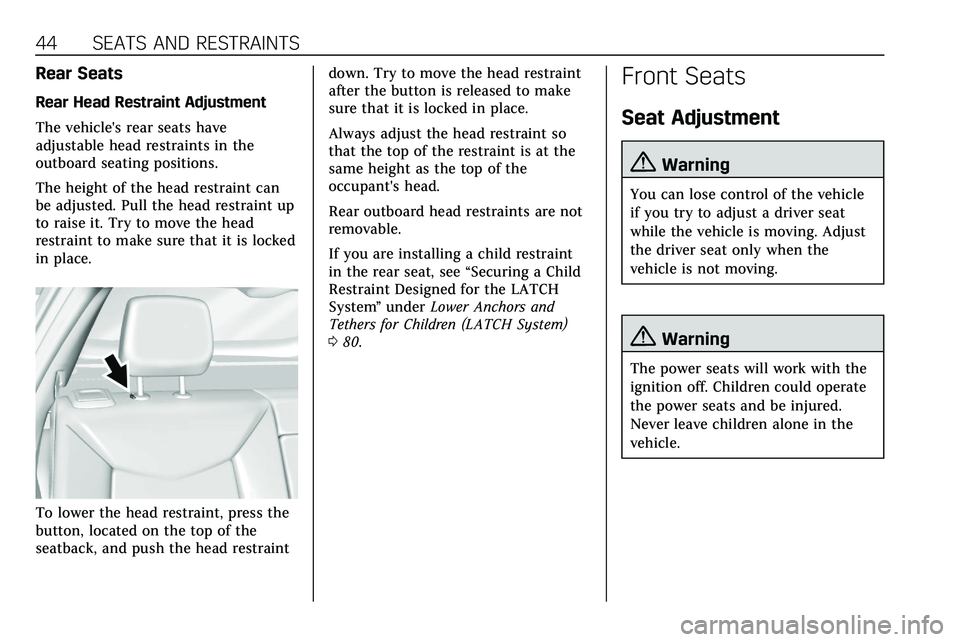
To lower the head restraint, press the
button, located on the top of the
seatback, and push the head restraintdown. Try to move the head restraint
after the button is released to make
sure that it is locked in place.
Always adjust the head restraint so
that the top of the restraint is at the
same height as the top of the
occupant's head.
Rear outboard head restraints are not
removable.
If you are installing a child restraint
in the rear seat, see
“Securing a Child
Restraint Designed for the LATCH
System ”under Lower Anchors and
Tethers for Children (LATCH System)
0 80.
Front Seats
Seat Adjustment
{Warning
You can lose control of the vehicle
if you try to adjust a driver seat
while the vehicle is moving. Adjust
the driver seat only when the
vehicle is not moving.
{Warning
The power seats will work with the
ignition off. Children could operate
the power seats and be injured.
Never leave children alone in the
vehicle.
Page 59 of 384

58 SEATS AND RESTRAINTS
later in this section for
instructions on use and
important safety information.
5. To make the lap part tight, pullup on the shoulder belt.
To unlatch the belt, push the button
on the buckle. The belt should return
to its stowed position.
Always stow the seat belt slowly. If the
seat belt webbing returns quickly to
the stowed position, the retractor may
lock and cannot be pulled out. If this
happens, pull the seat belt straight out
firmly to unlock the webbing, and
then release it. If the webbing is still
locked in the retractor, see your
dealer.
Before a door is closed, be sure the
seat belt is out of the way. If a door is
slammed against a seat belt, damage
can occur to both the seat belt and
the vehicle.
Shoulder Belt Height Adjuster
The vehicle has a shoulder belt height
adjuster for the driver and front
outboard passenger seating positions.
Adjust the height so that the shoulder
portion of the belt is on the shoulder
and not falling off of it. The belt
should be close to, but not contacting,
the neck. Improper shoulder belt
height adjustment could reduce the
effectiveness of the seat belt in a
crash. See How to Wear Seat Belts
Properly 054.
Press and hold the release button
while raising or lowering the height
adjuster to the desired position.
Page 227 of 384

226 DRIVING AND OPERATING
still looks blurry, use a soft wet cloth
to gently clean the sensor camera lens
and dry thoroughly. The sensor is
behind the lower front grille below the
driver side headlamp.
The camera must also be aligned to
work correctly. If the camera needs
adjustment, see your dealer. Do not
attempt to adjust the camera yourself.
Side Blind Zone
Alert (SBZA)
If equipped, the SBZA system is a
lane-changing aid that assists drivers
with avoiding crashes that occur with
moving vehicles in the side blind zone
(or spot) areas. When the vehicle is in
a forward gear, the left or right side
mirror display will light up if a moving
vehicle is detected in that blind zone.
If the turn signal is activated and a
vehicle is also detected on the same
side, the display will flash as an extra
warning not to change lanes. Since
this system is part of the Lane Change
Alert (LCA) system, read the entire
LCA section before using this feature.
Lane Change Alert (LCA)
If equipped, the LCA system is a
lane-changing aid that assists drivers
with avoiding lane change crashes
that occur with moving vehicles in the
side blind zone (or spot) areas or with
vehicles rapidly approaching these
areas from behind. The LCA warning
display will light up in the
corresponding outside side mirror and
will flash if the turn signal is on.
{Warning
LCA does not alert the driver to
vehicles outside of the system
detection zones, pedestrians,
bicyclists, or animals. It may not
provide alerts when changing lanes
under all driving conditions. Failure
to use proper care when changing
lanes may result in injury, death,
or vehicle damage. Before making a
lane change, always check mirrors,
glance over your shoulder, and use
the turn signals.LCA Detection Zones
1. SBZA Detection Zone
2. LCA Detection Zone
The LCA sensor covers a zone of
approximately one lane over from
both sides of the vehicle, or 3.5 m
(11 ft). The height of the zone is
approximately between 0.5 m (1.5 ft)
and 2 m (6 ft) off the ground. The Side
Blind Zone Alert (SBZA) warning area
starts at approximately the middle of
the vehicle and goes back 5 m (16 ft).
Drivers are also warned of vehicles
rapidly approaching from up to 70 m
(230 ft) behind the vehicle.
Page 243 of 384

242 DRIVING AND OPERATING
Hitch Cover
To remove hitch cover, if equipped:1. Remove the two fasteners on the lower tabs.
2. Pull the lower edge of the cover to about a 45 degree angle.
3. Pull the cover downward to disengage the upper
attachments.
To reinstall hitch cover: 1. Hold cover at a 45 degree angle to the vehicle and push the
upper tabs into the slots in the
bumper. 2. Push the bottom of the cover
forward until the lower tabs line
up with the lower slots.
3. Snap the hitch cover into place by pushing the upper corners
forward.
4. Reinstall the two fasteners on the lower tabs.
Consider using mechanical sway
controls with any trailer. Ask a
trailering professional about sway
controls or refer to the trailer
manufacturer's recommendations and
instructions.
Weight-Distributing Hitch
Adjustment
1. Front of Vehicle
2. Body to Ground Distance
When using a weight-distributing
hitch, measure the front fender height
distance (2) before connecting the
trailer. Adjust the spring bars until the
front fender height distance (2) is the
same height before the trailer was
connected. Do not reduce the front
fender height below the initial
distance (2).