stop start CADILLAC XT5 2020 Owner's Manual
[x] Cancel search | Manufacturer: CADILLAC, Model Year: 2020, Model line: XT5, Model: CADILLAC XT5 2020Pages: 384, PDF Size: 6.52 MB
Page 5 of 384
4 INTRODUCTION
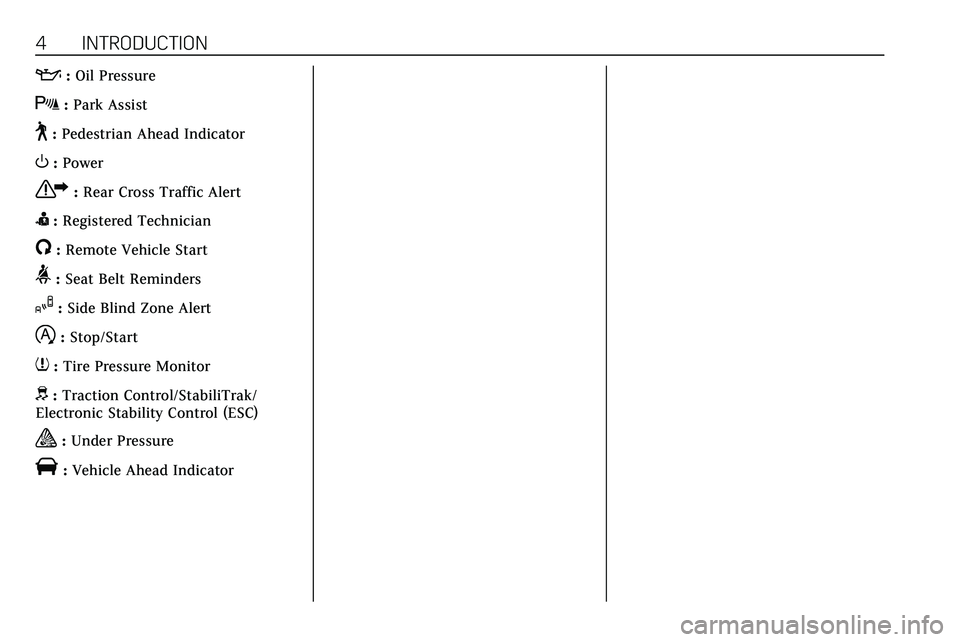
::Oil Pressure
X:Park Assist
~:Pedestrian Ahead Indicator
O:Power
7:Rear Cross Traffic Alert
I:Registered Technician
/:Remote Vehicle Start
>:Seat Belt Reminders
I:Side Blind Zone Alert
h:Stop/Start
7:Tire Pressure Monitor
d:Traction Control/StabiliTrak/
Electronic Stability Control (ESC)
a: Under Pressure
V: Vehicle Ahead Indicator
Page 7 of 384
6 INTRODUCTION
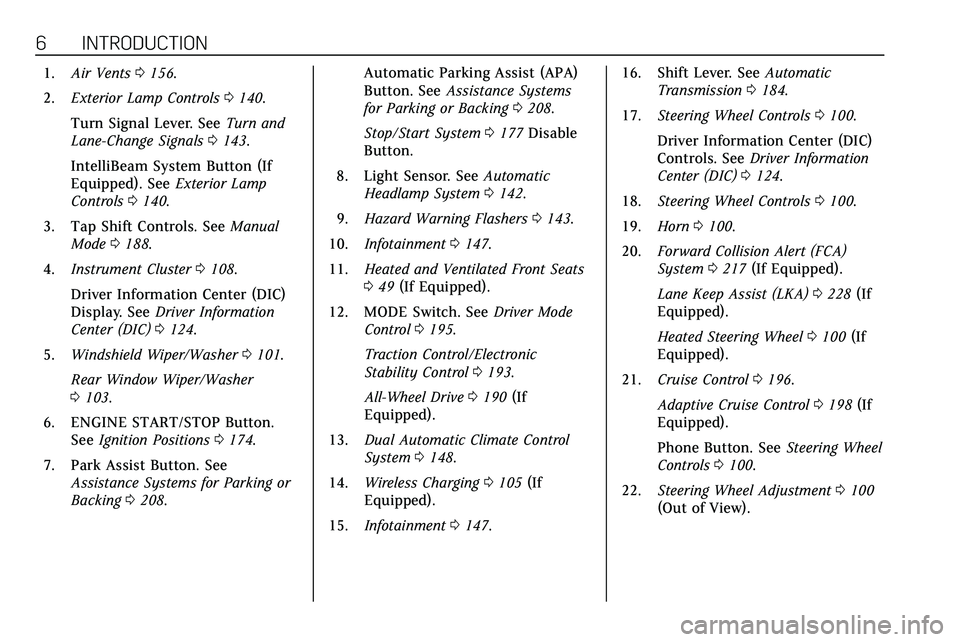
1.Air Vents 0156.
2. Exterior Lamp Controls 0140.
Turn Signal Lever. See Turn and
Lane-Change Signals 0143.
IntelliBeam System Button (If
Equipped). See Exterior Lamp
Controls 0140.
3. Tap Shift Controls. See Manual
Mode 0188.
4. Instrument Cluster 0108.
Driver Information Center (DIC)
Display. See Driver Information
Center (DIC) 0124.
5. Windshield Wiper/Washer 0101.
Rear Window Wiper/Washer
0 103.
6. ENGINE START/STOP Button. See Ignition Positions 0174.
7. Park Assist Button. See Assistance Systems for Parking or
Backing 0208. Automatic Parking Assist (APA)
Button. See
Assistance Systems
for Parking or Backing 0208.
Stop/Start System 0177 Disable
Button.
8. Light Sensor. See Automatic
Headlamp System 0142.
9. Hazard Warning Flashers 0143.
10. Infotainment 0147.
11. Heated and Ventilated Front Seats
049 (If Equipped).
12. MODE Switch. See Driver Mode
Control 0195.
Traction Control/Electronic
Stability Control 0193.
All-Wheel Drive 0190 (If
Equipped).
13. Dual Automatic Climate Control
System 0148.
14. Wireless Charging 0105 (If
Equipped).
15. Infotainment 0147. 16. Shift Lever. See
Automatic
Transmission 0184.
17. Steering Wheel Controls 0100.
Driver Information Center (DIC)
Controls. See Driver Information
Center (DIC) 0124.
18. Steering Wheel Controls 0100.
19. Horn 0100.
20. Forward Collision Alert (FCA)
System 0217 (If Equipped).
Lane Keep Assist (LKA) 0228 (If
Equipped).
Heated Steering Wheel 0100 (If
Equipped).
21. Cruise Control 0196.
Adaptive Cruise Control 0198 (If
Equipped).
Phone Button. See Steering Wheel
Controls 0100.
22. Steering Wheel Adjustment 0100
(Out of View).
Page 12 of 384
KEYS, DOORS, AND WINDOWS 11
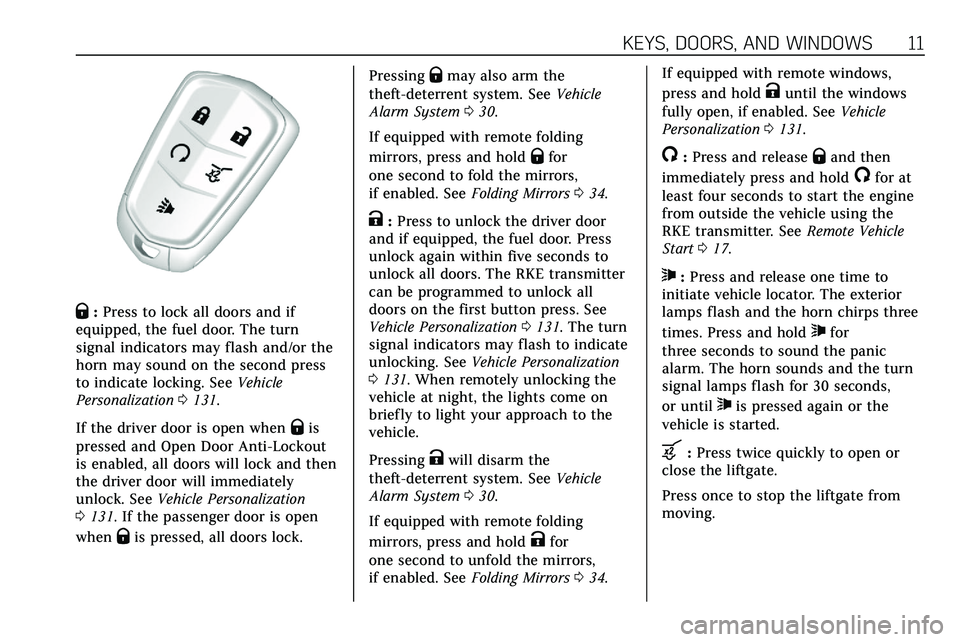
Q:Press to lock all doors and if
equipped, the fuel door. The turn
signal indicators may flash and/or the
horn may sound on the second press
to indicate locking. See Vehicle
Personalization 0131.
If the driver door is open when
Qis
pressed and Open Door Anti-Lockout
is enabled, all doors will lock and then
the driver door will immediately
unlock. See Vehicle Personalization
0 131. If the passenger door is open
when
Qis pressed, all doors lock. Pressing
Qmay also arm the
theft-deterrent system. See Vehicle
Alarm System 030.
If equipped with remote folding
mirrors, press and hold
Qfor
one second to fold the mirrors,
if enabled. See Folding Mirrors 034.
K:Press to unlock the driver door
and if equipped, the fuel door. Press
unlock again within five seconds to
unlock all doors. The RKE transmitter
can be programmed to unlock all
doors on the first button press. See
Vehicle Personalization 0131. The turn
signal indicators may flash to indicate
unlocking. See Vehicle Personalization
0 131. When remotely unlocking the
vehicle at night, the lights come on
briefly to light your approach to the
vehicle.
Pressing
Kwill disarm the
theft-deterrent system. See Vehicle
Alarm System 030.
If equipped with remote folding
mirrors, press and hold
Kfor
one second to unfold the mirrors,
if enabled. See Folding Mirrors 034. If equipped with remote windows,
press and hold
Kuntil the windows
fully open, if enabled. See Vehicle
Personalization 0131.
/:Press and releaseQand then
immediately press and hold
/for at
least four seconds to start the engine
from outside the vehicle using the
RKE transmitter. See Remote Vehicle
Start 017.
7:Press and release one time to
initiate vehicle locator. The exterior
lamps flash and the horn chirps three
times. Press and hold
7for
three seconds to sound the panic
alarm. The horn sounds and the turn
signal lamps flash for 30 seconds,
or until
7is pressed again or the
vehicle is started.
b: Press twice quickly to open or
close the liftgate.
Press once to stop the liftgate from
moving.
Page 15 of 384
14 KEYS, DOORS, AND WINDOWS
driver door and turn the key
counterclockwise, to the unlock
position, five times within
10 seconds.
The DIC displays READY FOR
REMOTE #2, 3, 4, ETC.
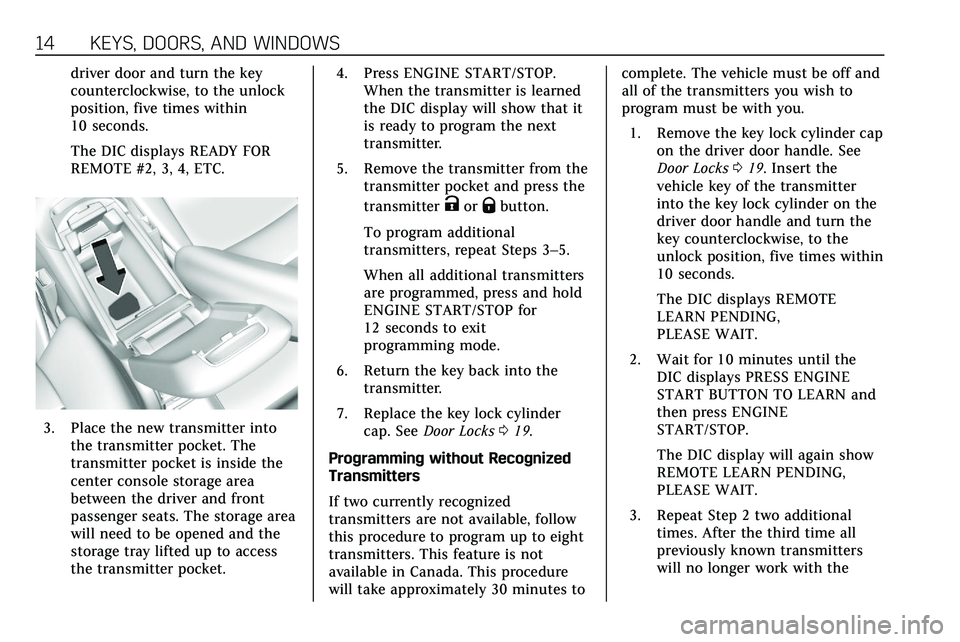
3. Place the new transmitter intothe transmitter pocket. The
transmitter pocket is inside the
center console storage area
between the driver and front
passenger seats. The storage area
will need to be opened and the
storage tray lifted up to access
the transmitter pocket. 4. Press ENGINE START/STOP.
When the transmitter is learned
the DIC display will show that it
is ready to program the next
transmitter.
5. Remove the transmitter from the transmitter pocket and press the
transmitter
KorQbutton.
To program additional
transmitters, repeat Steps 3–5.
When all additional transmitters
are programmed, press and hold
ENGINE START/STOP for
12 seconds to exit
programming mode.
6. Return the key back into the transmitter.
7. Replace the key lock cylinder cap. See Door Locks 019.
Programming without Recognized
Transmitters
If two currently recognized
transmitters are not available, follow
this procedure to program up to eight
transmitters. This feature is not
available in Canada. This procedure
will take approximately 30 minutes to complete. The vehicle must be off and
all of the transmitters you wish to
program must be with you.
1. Remove the key lock cylinder cap on the driver door handle. See
Door Locks 019. Insert the
vehicle key of the transmitter
into the key lock cylinder on the
driver door handle and turn the
key counterclockwise, to the
unlock position, five times within
10 seconds.
The DIC displays REMOTE
LEARN PENDING,
PLEASE WAIT.
2. Wait for 10 minutes until the DIC displays PRESS ENGINE
START BUTTON TO LEARN and
then press ENGINE
START/STOP.
The DIC display will again show
REMOTE LEARN PENDING,
PLEASE WAIT.
3. Repeat Step 2 two additional times. After the third time all
previously known transmitters
will no longer work with the
Page 16 of 384
KEYS, DOORS, AND WINDOWS 15
vehicle. Remaining transmitters
can be relearned during the next
steps.
The DIC display should now
show READY FOR REMOTE # 1.
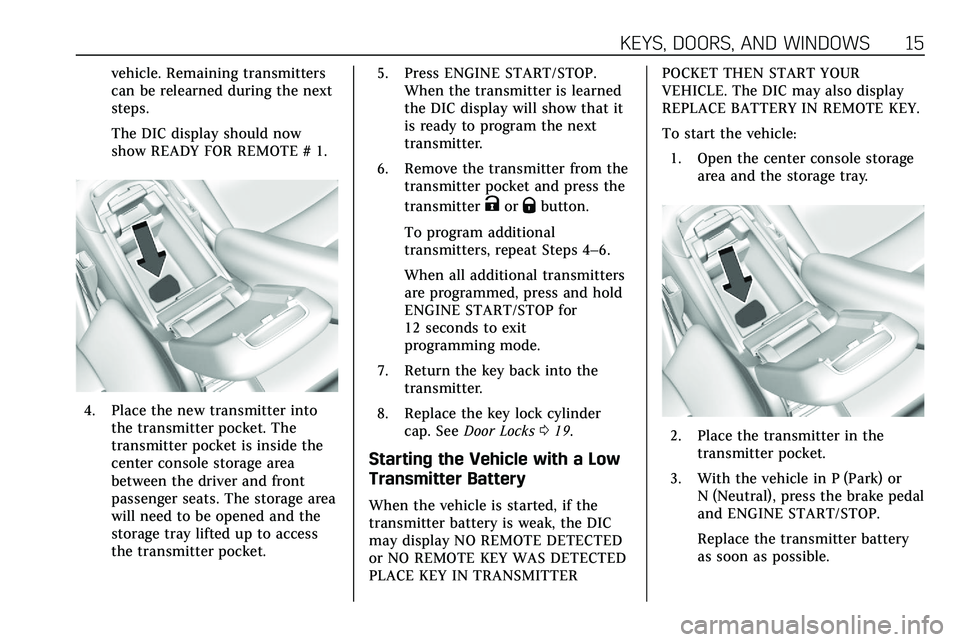
4. Place the new transmitter intothe transmitter pocket. The
transmitter pocket is inside the
center console storage area
between the driver and front
passenger seats. The storage area
will need to be opened and the
storage tray lifted up to access
the transmitter pocket. 5. Press ENGINE START/STOP.
When the transmitter is learned
the DIC display will show that it
is ready to program the next
transmitter.
6. Remove the transmitter from the transmitter pocket and press the
transmitter
KorQbutton.
To program additional
transmitters, repeat Steps 4–6.
When all additional transmitters
are programmed, press and hold
ENGINE START/STOP for
12 seconds to exit
programming mode.
7. Return the key back into the transmitter.
8. Replace the key lock cylinder cap. See Door Locks 019.
Starting the Vehicle with a Low
Transmitter Battery
When the vehicle is started, if the
transmitter battery is weak, the DIC
may display NO REMOTE DETECTED
or NO REMOTE KEY WAS DETECTED
PLACE KEY IN TRANSMITTER POCKET THEN START YOUR
VEHICLE. The DIC may also display
REPLACE BATTERY IN REMOTE KEY.
To start the vehicle:
1. Open the center console storage area and the storage tray.
2. Place the transmitter in thetransmitter pocket.
3. With the vehicle in P (Park) or N (Neutral), press the brake pedal
and ENGINE START/STOP.
Replace the transmitter battery
as soon as possible.
Page 26 of 384
KEYS, DOORS, AND WINDOWS 25
.Presslon the bottom of the
liftgate next to the pull cup to
close.
Press any liftgate button, the touch
pad, or
bon the RKE transmitter
while the liftgate is moving to stop it.
Pressing any liftgate button or
pressing
btwice quickly on the RKE
transmitter again restarts the
operation in the reverse direction.
Pressing the touch pad on the liftgate
handle will restart the motion, but
only in the opening direction.
Caution
Manually forcing the liftgate to
open or close during a power cycle
can damage the vehicle. Allow the
power cycle to complete.
The power liftgate may be temporarily
disabled under extreme low
temperatures, or after repeated power
cycling over a short period of time.
If this occurs, the liftgate can still be
operated manually. If the vehicle is shifted out of P (Park)
while the power function is in
progress, the liftgate will continue to
completion. If the vehicle is
accelerated before the liftgate has
completed moving, the liftgate may
stop or reverse direction. Check for
Driver Information Center (DIC)
messages and make sure the liftgate is
closed and latched before driving.
Falling Liftgate Detection
If the power liftgate automatically
closes after a power opening cycle, it
indicates that the system is reacting
to excess weight on the liftgate or a
possible support strut failure.
A repetitive chime will sound while
the falling liftgate detection feature is
operating. Remove any excess weight.
If the liftgate continues to
automatically close after opening, see
your dealer for service before using
the power liftgate.
Interfering with the power liftgate
motion or manually closing the
liftgate too quickly after power
opening may resemble a support strut
failure. This could also activate the
falling liftgate detection feature. Allowthe liftgate to complete its operation
and wait a few seconds before
manually closing the liftgate.
Obstacle Detection Features
If the liftgate encounters an obstacle
during a power open or close cycle,
the liftgate will automatically reverse
direction and move a short distance
away from the obstacle. After
removing the obstruction, the power
liftgate operation can be used again.
If the liftgate encounters multiple
obstacles on the same power cycle,
the power function will deactivate.
After removing the obstructions,
manually close the liftgate. This will
allow normal power operation
functions to resume.
If the vehicle is locked while the
liftgate is closing, and an obstacle is
encountered that prevents the liftgate
from completely closing, the horn will
sound as an alert that the liftgate did
not close.
Pinch sensors are on the side edges of
the liftgate. If an object is caught
between the liftgate and the vehicle
and presses against a sensor, the
Page 28 of 384
KEYS, DOORS, AND WINDOWS 27
The liftgate has an electric latch.
If the battery is disconnected or has
low voltage, the liftgate will not open.
The liftgate will resume operation
when the battery is reconnected and
charged.
Always close the liftgate before
driving.
Hands-Free Operation
If equipped, the liftgate may be
operated with a kicking motion under
the left side of the rear bumper.
The RKE transmitter must be within
1 m (3 ft) of the rear bumper to
operate the power liftgate hands-free.
The hands-free feature will not work
while the liftgate is moving. To stop
the liftgate while in motion use one of
the liftgate switches.
The hands-free feature can be
customized. SeeVehicle Personalization
0 131. Choose from the following:
On-Open and Close : The kicking
motion is activated to both open and
close the liftgate.
On-Open Only : The kicking motion is
activated to only open the liftgate. Off :
The feature is disabled.
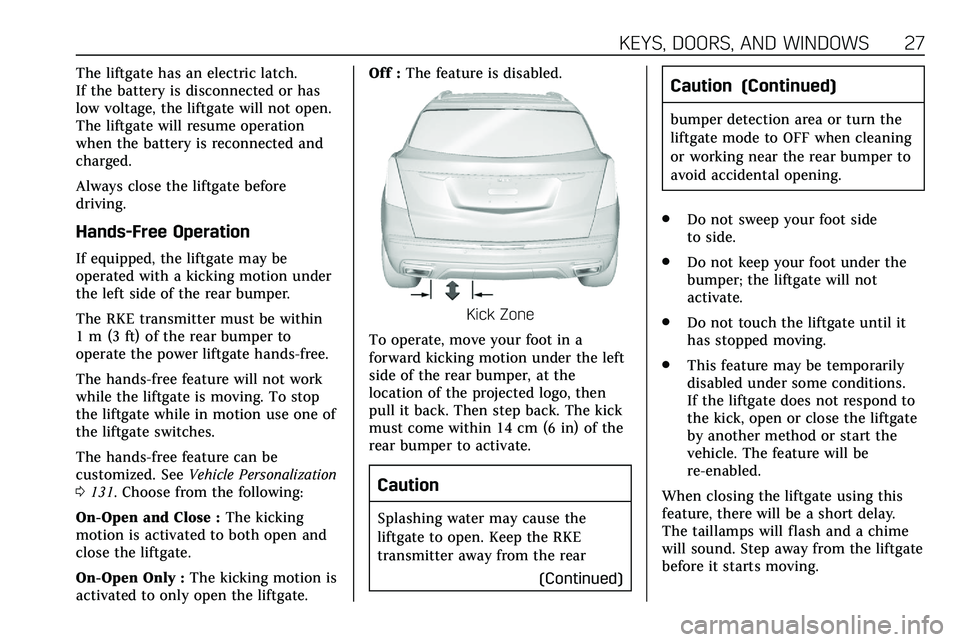
Kick Zone
To operate, move your foot in a
forward kicking motion under the left
side of the rear bumper, at the
location of the projected logo, then
pull it back. Then step back. The kick
must come within 14 cm (6 in) of the
rear bumper to activate.
Caution
Splashing water may cause the
liftgate to open. Keep the RKE
transmitter away from the rear (Continued)
Caution (Continued)
bumper detection area or turn the
liftgate mode to OFF when cleaning
or working near the rear bumper to
avoid accidental opening.
. Do not sweep your foot side
to side.
. Do not keep your foot under the
bumper; the liftgate will not
activate.
. Do not touch the liftgate until it
has stopped moving.
. This feature may be temporarily
disabled under some conditions.
If the liftgate does not respond to
the kick, open or close the liftgate
by another method or start the
vehicle. The feature will be
re-enabled.
When closing the liftgate using this
feature, there will be a short delay.
The taillamps will flash and a chime
will sound. Step away from the liftgate
before it starts moving.
Page 49 of 384
48 SEATS AND RESTRAINTS
Manually Recalling Memory
Positions
Press and hold 1, 2, or
Bto recall the
previously saved memory positions if
you are driver 1 or 2 identified in the
DIC welcome message.
To stop Manual Memory recall
movement, release 1, 2, or
Bor press
any of the following controls:
. Power seat
. Memory SET
. Power mirror, with the driver or
passenger side mirror selected
. Power steering wheel, if equipped
Seat Entry Memory
The vehicle identifies the number of
the current driver’s RKE transmitter
(1–8). See Remote Keyless Entry (RKE)
System Operation 010. If the RKE
transmitter is 1 or 2, and Seat Entry
Memory is enabled in vehicle
personalization, the positions saved to
the same memory button number 1 or
2 are automatically recalled when the
vehicle is turned on, or turned from off to ACC/ACCESSORY. RKE
transmitters 3–8 will not provide
automatic memory recalls.
To turn Seat Entry Memory on or off,
see
“Vehicle Personalization Settings”
previously in this section and Vehicle
Personalization 0131.
The shift lever must be in P (Park) to
start Seat Entry Memory. Seat Entry
Memory recall will complete if the
vehicle is shifted out of P (Park) prior
to reaching the saved memory
position.
To stop Seat Entry Memory recall
movement, turn the vehicle off or
press any of the following controls:
. Power seat
. Memory SET, 1, 2, or
B
.
Power mirror, with the driver or
passenger side mirror selected
. Power steering wheel, if equipped
If the saved memory seat position
does not automatically recall or recalls
to the wrong positions, the driver’s
RKE transmitter number (1 or 2) may
not match the memory button
number that positions were saved to. Try storing the position to the other
memory button or try the other RKE
transmitter.
Seat Exit Memory
Seat Exit Memory is not linked to an
RKE transmitter. The position saved to
Bis used for all drivers. To turn Seat
Exit Memory on or off, see "Vehicle
Personalization Settings" previously in
this section and Vehicle Personalization
0 131.
If turned on, the position saved to
B
is automatically recalled when one of
the following occurs:
. The vehicle is turned off and the
driver door is opened within a
short time.
. The vehicle is turned off with the
driver door open.
To stop Seat Exit Memory movement,
press any of the following memory
controls:
. Power seat
. Memory SET, 1, 2, or
B
.Power mirror, with the driver or
passenger side mirror selected
Page 99 of 384
98 STORAGE
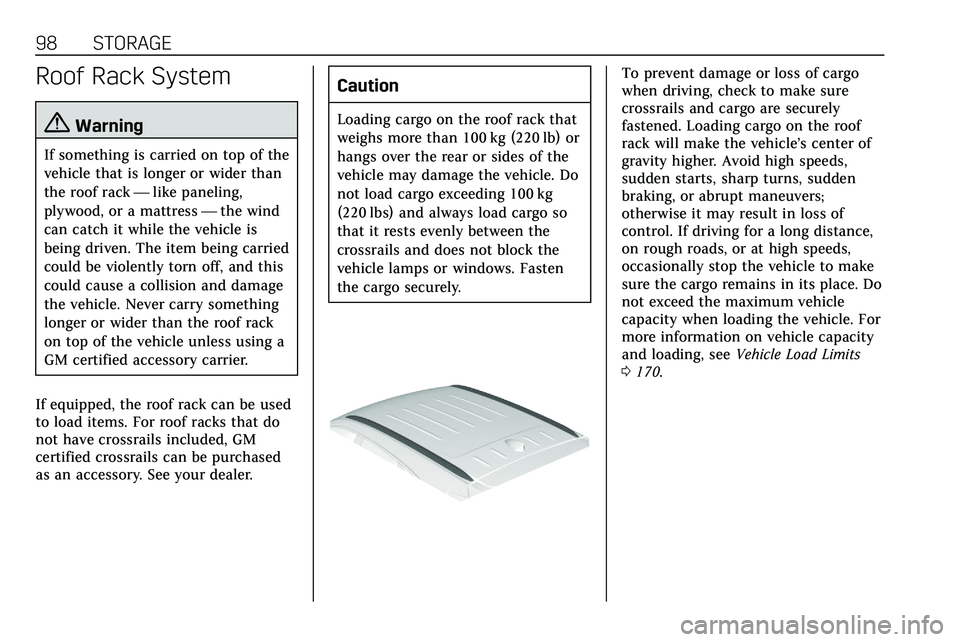
Roof Rack System
{Warning
If something is carried on top of the
vehicle that is longer or wider than
the roof rack—like paneling,
plywood, or a mattress —the wind
can catch it while the vehicle is
being driven. The item being carried
could be violently torn off, and this
could cause a collision and damage
the vehicle. Never carry something
longer or wider than the roof rack
on top of the vehicle unless using a
GM certified accessory carrier.
If equipped, the roof rack can be used
to load items. For roof racks that do
not have crossrails included, GM
certified crossrails can be purchased
as an accessory. See your dealer.
Caution
Loading cargo on the roof rack that
weighs more than 100 kg (220 lb) or
hangs over the rear or sides of the
vehicle may damage the vehicle. Do
not load cargo exceeding 100 kg
(220 lbs) and always load cargo so
that it rests evenly between the
crossrails and does not block the
vehicle lamps or windows. Fasten
the cargo securely.
To prevent damage or loss of cargo
when driving, check to make sure
crossrails and cargo are securely
fastened. Loading cargo on the roof
rack will make the vehicle’s center of
gravity higher. Avoid high speeds,
sudden starts, sharp turns, sudden
braking, or abrupt maneuvers;
otherwise it may result in loss of
control. If driving for a long distance,
on rough roads, or at high speeds,
occasionally stop the vehicle to make
sure the cargo remains in its place. Do
not exceed the maximum vehicle
capacity when loading the vehicle. For
more information on vehicle capacity
and loading, see Vehicle Load Limits
0 170.
Page 103 of 384
102 INSTRUMENTS AND CONTROLS
has been activated. SeeWasher Fluid
0 266 for information on filling the
windshield washer fluid reservoir.
{Warning
In freezing weather, do not use the
washer until the windshield is
warmed. Otherwise the washer fluid
can form ice on the windshield,
blocking your vision.
{Warning
Before driving the vehicle, always
clear snow and ice from the hood,
windshield, roof, and rear of the
vehicle, including all lamps and
windows. Reduced visibility from
snow and ice buildup could lead to
a crash.
Clear snow and ice from the wiper
blades and windshield before using
them. If frozen to the windshield, carefully loosen or thaw them.
Damaged blades should be replaced.
See
Wiper Blade Replacement 0270.
Heavy snow or ice can overload the
wiper motor. See Electrical System
Overload 0273.
Wiper Parking
If the ignition is turned off while the
wipers are on LO, HI, or AUTO with
Rainsense turned off, they will
immediately stop.
If the windshield wiper lever is then
moved to OFF before the driver door is
opened or within 10 minutes, the
wipers will restart and move to the
base of the windshield.
If the ignition is turned off while the
wipers are performing wipes due to
windshield washing or Rainsense, the
wipers continue to run until they
reach the base of the windshield.
Rainsense
If equipped with Rainsense and the
feature is turned on, a sensor near the
top center of the windshield detects
the amount of water on the windshield and controls the frequency
of the windshield wiper based on the
current sensitivity setting.
Keep this area of the windshield clear
of debris to allow for best system
performance.
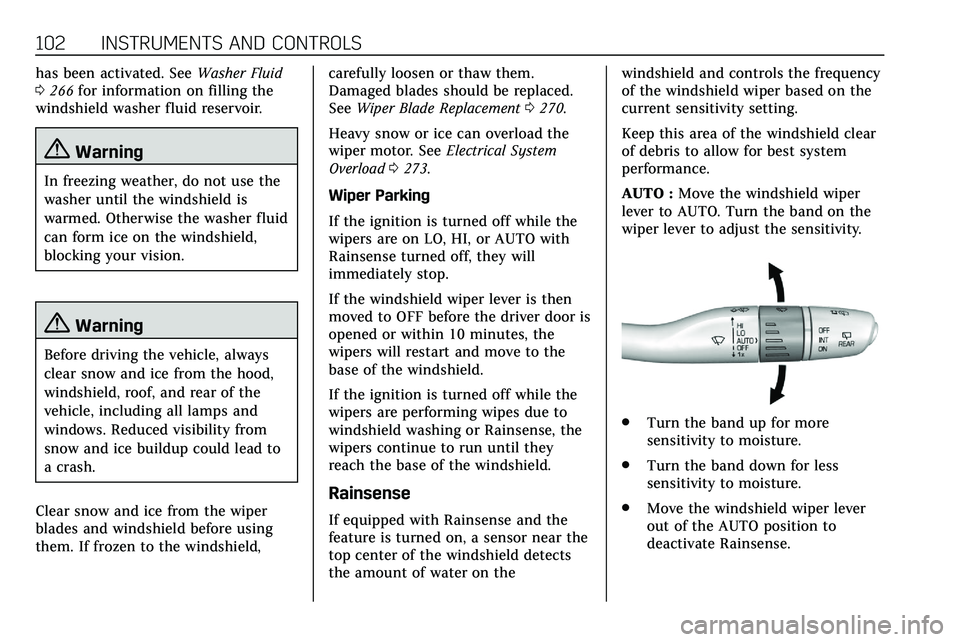
AUTO :
Move the windshield wiper
lever to AUTO. Turn the band on the
wiper lever to adjust the sensitivity.
. Turn the band up for more
sensitivity to moisture.
. Turn the band down for less
sensitivity to moisture.
. Move the windshield wiper lever
out of the AUTO position to
deactivate Rainsense.