location of CADILLAC XT5 2021 Owner's Guide
[x] Cancel search | Manufacturer: CADILLAC, Model Year: 2021, Model line: XT5, Model: CADILLAC XT5 2021Pages: 426, PDF Size: 8.73 MB
Page 226 of 426
Cadillac XT5 Owner Manual (GMNA-Localizing-U.S./Canada/Mexico-
14590481) - 2021 - CRC - 10/22/20
DRIVING AND OPERATING 225
{Warning
Turning off the vehicle while
moving may cause loss of power
assist in the brake and steering
systems and disable the airbags.
While driving, only shut the vehicle
off in an emergency.
If the vehicle must be shut off in an
emergency: 1. Brake using a firm and steady pressure. Do not pump the brakes
repeatedly. This may deplete power
assist, requiring increased brake
pedal force.
2. Shift the vehicle to N (Neutral). This can be done while the vehicle
is moving. After shifting to
N (Neutral), firmly apply the brakes
and steer the vehicle to a safe
location.
3. Come to a complete stop and shift to P (Park).
4. Set the parking brake. See Electric
Parking Brake 0238. Press ENGINE
START/STOP to turn the
vehicle off. If the vehicle cannot be pulled over
and must be shut off while driving,
press and hold ENGINE START/STOP
for longer than two seconds, or press
twice in five seconds.
ACC/ACCESSORY (Amber Indicator
Light) :
This mode allows you to use
some electrical accessories when the
engine is off.
With the ignition off, pressing
ENGINE START/STOP once without
the brake pedal applied will place the
ignition system in ACC/ACCESSORY.
The ignition will switch from ACC/
ACCESSORY to OFF after 10 minutes
to prevent battery rundown.
ON/RUN/START (Green Indicator
Light) : This mode is for driving and
starting. With the ignition off and the
brake pedal applied, pressing ENGINE
START/STOP once will place the
ignition system in ON/RUN/START.
Once engine cranking begins, release
the button. Engine cranking will
continue until the engine starts. The
ignition will then remain on. See
Starting the Engine 0225. Service Mode
This mode is available to verify the
proper operation of the malfunction
indicator lamp as may be required for
emissions inspection purposes and for
service and diagnostics. See
Automatic
Transmission 0232.
With the vehicle off, and the brake
pedal not applied, pressing and
holding ENGINE START/STOP for
more than five seconds will place the
vehicle in Service Mode. The
instruments and audio systems will
operate as they do in ON/RUN, but
the vehicle will not be able to be
driven. The engine will not start in
Service Mode. Press ENGINE START/
STOP again to turn the vehicle off.
Starting the Engine
Place the transmission in the proper
gear, P (Park) or N (Neutral). To restart
the engine when the vehicle is already
moving, use N (Neutral).
Page 260 of 426
Cadillac XT5 Owner Manual (GMNA-Localizing-U.S./Canada/Mexico-
14590481) - 2021 - CRC - 10/22/20
DRIVING AND OPERATING 259
to view the rear camera. Touch X to
exit the view or it will be removed
automatically after eight seconds.
{Warning
Use Hitch Guidance only to help
back the vehicle to a trailer hitch
or, when traveling above 12 km/h
(8 mph), to briefly check the status
of your trailer. Do not use for any
other purpose, such as making lane
change decisions. Before making a
lane change, always check the
mirrors and glance over your
shoulder. Improper use could result
in serious injury to you or others.
Park Assist
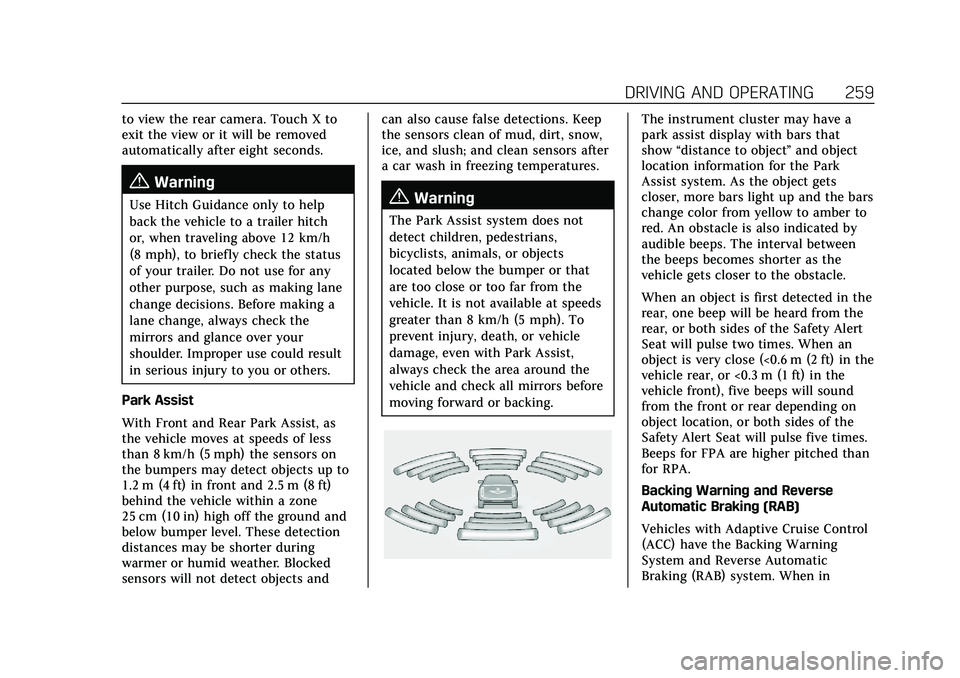
With Front and Rear Park Assist, as
the vehicle moves at speeds of less
than 8 km/h (5 mph) the sensors on
the bumpers may detect objects up to
1.2 m (4 ft) in front and 2.5 m (8 ft)
behind the vehicle within a zone
25 cm (10 in) high off the ground and
below bumper level. These detection
distances may be shorter during
warmer or humid weather. Blocked
sensors will not detect objects and can also cause false detections. Keep
the sensors clean of mud, dirt, snow,
ice, and slush; and clean sensors after
a car wash in freezing temperatures.{Warning
The Park Assist system does not
detect children, pedestrians,
bicyclists, animals, or objects
located below the bumper or that
are too close or too far from the
vehicle. It is not available at speeds
greater than 8 km/h (5 mph). To
prevent injury, death, or vehicle
damage, even with Park Assist,
always check the area around the
vehicle and check all mirrors before
moving forward or backing.
The instrument cluster may have a
park assist display with bars that
show
“distance to object ”and object
location information for the Park
Assist system. As the object gets
closer, more bars light up and the bars
change color from yellow to amber to
red. An obstacle is also indicated by
audible beeps. The interval between
the beeps becomes shorter as the
vehicle gets closer to the obstacle.
When an object is first detected in the
rear, one beep will be heard from the
rear, or both sides of the Safety Alert
Seat will pulse two times. When an
object is very close (<0.6 m (2 ft) in the
vehicle rear, or <0.3 m (1 ft) in the
vehicle front), five beeps will sound
from the front or rear depending on
object location, or both sides of the
Safety Alert Seat will pulse five times.
Beeps for FPA are higher pitched than
for RPA.
Backing Warning and Reverse
Automatic Braking (RAB)
Vehicles with Adaptive Cruise Control
(ACC) have the Backing Warning
System and Reverse Automatic
Braking (RAB) system. When in
Page 279 of 426

Cadillac XT5 Owner Manual (GMNA-Localizing-U.S./Canada/Mexico-
14590481) - 2021 - CRC - 10/22/20
278 DRIVING AND OPERATING
To open the fuel door, push and
release the rearward center edge of
the door.
The capless refueling system does not
have a fuel cap. Fully insert and latch
the fill nozzle, then begin fueling.
{Warning
Overfilling the fuel tank by more
than three clicks of a standard fill
nozzle may cause:
.Vehicle performance issues,
including engine stalling and
damage to the fuel system.
.Fuel spills.(Continued)
Warning (Continued)
.Under certain conditions, fuel
fires.
Be careful not to spill fuel. Wait
five seconds after you have finished
pumping before removing the fill
nozzle. Clean fuel from painted
surfaces as soon as possible. See
Exterior Care 0364. Push the fuel door
closed until it latches.
{Warning
If a fire starts while you are
refueling, do not remove the fill
nozzle. Shut off the flow of fuel by
shutting off the pump or by
notifying the station attendant.
Leave the area immediately.
Filling the Tank with a Portable Fuel
Container
If the vehicle runs out of fuel and
must be filled from a portable fuel
container:
1. Locate the capless funnel adapter in the rear cargo area under the
load floor tray.
2. Insert and latch the funnel into the capless fuel system.
{Warning
Attempting to refuel from a
portable fuel container without
using the funnel adapter may cause
fuel spillage and damage the
capless fuel system. This could
cause a fire. You or others could be
badly burned and the vehicle could
be damaged.
3. Remove and clean the funnel adapter and return it to the storage
location.
Page 300 of 426
Cadillac XT5 Owner Manual (GMNA-Localizing-U.S./Canada/Mexico-
14590481) - 2021 - CRC - 10/22/20
VEHICLE CARE 299
9. Windshield Washer Fluid Reservoir.See Washer Fluid 0309.
10. Engine Compartment Fuse Block
0317.
11. Remote Negative (-) Battery Terminal. See Jump Starting - North
America 0359.
Engine Oil
To ensure proper engine performance
and long life, careful attention must
be paid to engine oil. Following these
simple, but important steps will help
protect your investment:
.Use engine oil approved to the
proper specification and of the
proper viscosity grade. See
“Selecting the Right Engine Oil” in
this section.
.Check the engine oil level regularly
and maintain the proper oil level.
See “Checking Engine Oil” and
“When to Add Engine Oil” in this
section.
.Change the engine oil at the
appropriate time. See Engine Oil Life
System 0301.
.Always dispose of engine oil
properly. See “What to Do with Used
Oil” in this section.
Checking Engine Oil
Check the engine oil level regularly,
every 650 km (400 mi), especially prior
to a long trip. The engine oil dipstick
handle is a loop. See Engine
Compartment Overview 0296 for the
location.
{Warning
The engine oil dipstick handle may
be hot; it could burn you. Use a
towel or glove to touch the dipstick
handle.
If a low oil Driver Information Center
(DIC) message displays, check the oil
level.
Follow these guidelines:
.To get an accurate reading, park the
vehicle on level ground. Check the
engine oil level after the engine has
been off for at least two hours.
Checking the engine oil level on
steep grades or too soon after
engine shutoff can result in incorrect readings. Accuracy
improves when checking a cold
engine prior to starting. Remove the
dipstick and check the level.
.If unable to wait two hours, the
engine must be off for at least
15 minutes if the engine is warm,
or at least 30 minutes if the engine
is not warm. Pull out the dipstick,
wipe it with a clean paper towel or
cloth, then push it back in all the
way. Remove it again, keeping the
tip down, and check the level.
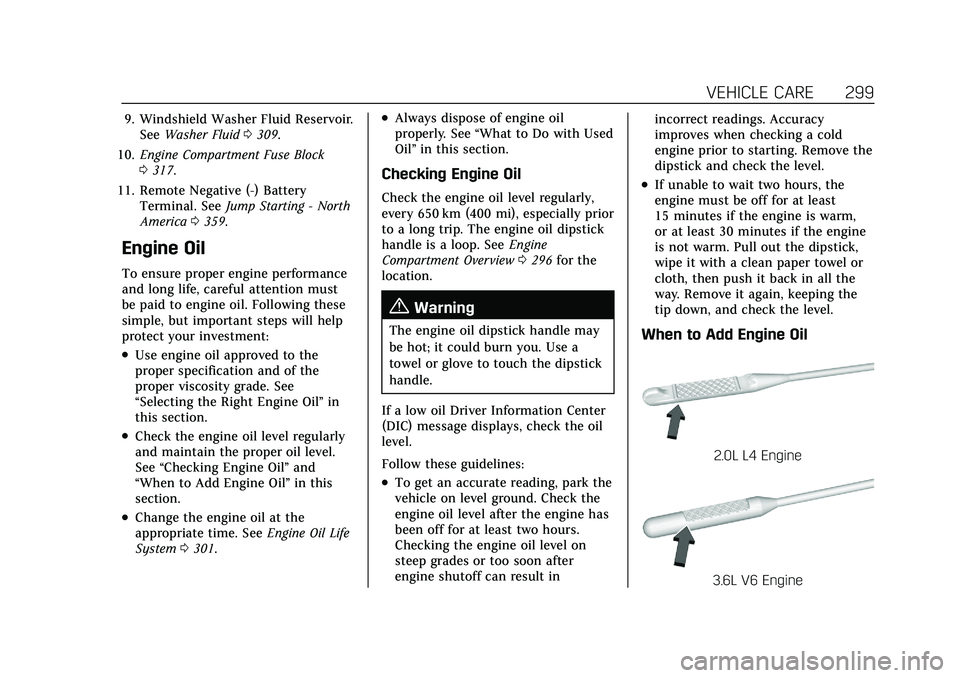
When to Add Engine Oil
2.0L L4 Engine
3.6L V6 Engine
Page 301 of 426
Cadillac XT5 Owner Manual (GMNA-Localizing-U.S./Canada/Mexico-
14590481) - 2021 - CRC - 10/22/20
300 VEHICLE CARE
If the oil is below the cross-hatched
area at the tip of the dipstick and the
engine has been off for at least
15 minutes, add 1 L (1 qt) of the
recommended oil and then recheck
the level. See“Selecting the Right
Engine Oil” later in this section for an
explanation of what kind of oil to use.
For engine oil crankcase capacity, see
Capacities and Specifications 0388.
Caution
Do not add too much oil. Oil levels
above or below the acceptable
operating range shown on the
dipstick are harmful to the engine.
If the oil level is above the
operating range (i.e., the engine has
so much oil that the oil level gets
above the cross-hatched area that
shows the proper operating range),
the engine could be damaged. Drain
the excess oil or limit driving of the
vehicle, and seek a service
professional to remove the
excess oil. See
Engine Compartment Overview
0 296 for the location of the engine oil
fill cap.
Add enough oil to put the level
somewhere in the proper operating
range. Push the dipstick all the way
back in when finished.
Selecting the Right Engine Oil
Selecting the right engine oil depends
on both the proper oil specification
and viscosity grade. See Recommended
Fluids and Lubricants 0383.
Specification
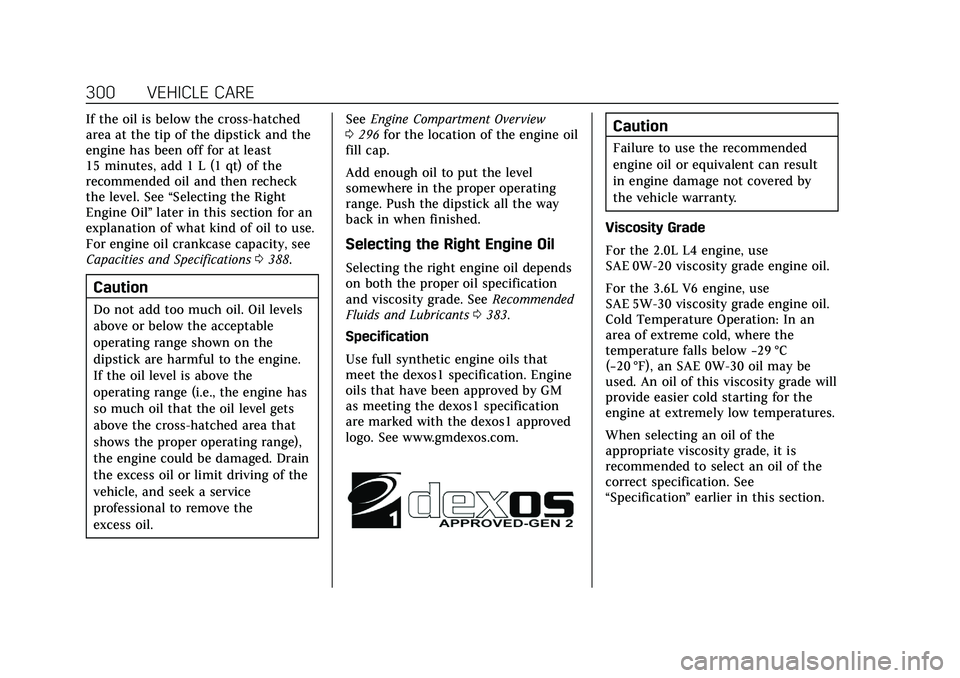
Use full synthetic engine oils that
meet the dexos1 specification. Engine
oils that have been approved by GM
as meeting the dexos1 specification
are marked with the dexos1 approved
logo. See www.gmdexos.com.
Caution
Failure to use the recommended
engine oil or equivalent can result
in engine damage not covered by
the vehicle warranty.
Viscosity Grade
For the 2.0L L4 engine, use
SAE 0W-20 viscosity grade engine oil.
For the 3.6L V6 engine, use
SAE 5W-30 viscosity grade engine oil.
Cold Temperature Operation: In an
area of extreme cold, where the
temperature falls below −29 °C
(−20 °F), an SAE 0W-30 oil may be
used. An oil of this viscosity grade will
provide easier cold starting for the
engine at extremely low temperatures.
When selecting an oil of the
appropriate viscosity grade, it is
recommended to select an oil of the
correct specification. See
“Specification ”earlier in this section.
Page 310 of 426

Cadillac XT5 Owner Manual (GMNA-Localizing-U.S./Canada/Mexico-
14590481) - 2021 - CRC - 10/22/20
VEHICLE CARE 309
If Steam Is Coming from the
Engine Compartment
{Warning
Steam and scalding liquids from a
hot cooling system are under
pressure. Turning the pressure cap,
even a little, can cause them to
come out at high speed and you
could be burned. Never turn the cap
when the cooling system, including
the pressure cap, is hot. Wait for
the cooling system and pressure
cap to cool.
If No Steam Is Coming from the
Engine Compartment
If an engine overheat warning is
displayed but no steam can be seen or
heard, the problem may not be too
serious. Sometimes the engine can get
a little too hot when the vehicle:
.Climbs a long hill on a hot day.
.Stops after high-speed driving.
.Idles for long periods in traffic.
If the overheat warning is displayed
with no sign of steam: 1. Turn the air conditioning off.
2. Turn the heater on to the highest
temperature and to the highest fan
speed. Open the windows as
necessary.
3. When it is safe to do so, pull off the road, shift to P (Park) or
N (Neutral), and let the engine idle.
If the engine coolant temperature
gauge is no longer in the overheated
area or the engine coolant
temperature warning light no longer
displays, the vehicle can be driven.
Continue to drive the vehicle slowly
for about 10 minutes. Keep a safe
distance from the vehicle in front.
If the warning does not come back on,
continue to drive normally and have
the cooling system checked for proper
fill and function.
If the warning continues, pull over,
stop, and park the vehicle right away.
If there is no sign of steam, idle the
engine for three minutes while parked.
If the warning is still displayed, turn
off the engine until it cools down.
Washer Fluid
What to Use
When windshield washer fluid is
needed, be sure to read the
manufacturer's instructions before
use. If operating the vehicle in an area
where the temperature may fall below
freezing, use a fluid that has sufficient
protection against freezing.
Adding Washer Fluid
The appropriate message will appear
in the Driver Information Center (DIC)
when the fluid level is low.
Open the cap with the washer symbol
on it. Add washer fluid until the tank
is full. See Engine Compartment
Overview 0296 for reservoir location.
Page 312 of 426

Cadillac XT5 Owner Manual (GMNA-Localizing-U.S./Canada/Mexico-
14590481) - 2021 - CRC - 10/22/20
VEHICLE CARE 311
ways if the wrong brake parts are
installed or if parts are improperly
installed.
Brake Fluid
The brake master cylinder reservoir is
filled with GM approved DOT 3 brake
fluid as indicated on the reservoir cap.
SeeEngine Compartment Overview
0 296 for the location of the reservoir.
Checking Brake Fluid
With the vehicle in P (Park) on a level
surface, the brake fluid level should be
between the minimum and maximum
marks on the brake fluid reservoir.
There are only two reasons why the
brake fluid level in the reservoir may
go down:
.Normal brake lining wear. When
new linings are installed, the fluid
level goes back up.
.A fluid leak in the brake hydraulic
system. Have the brake hydraulic
system fixed. With a leak, the
brakes will not work well.
Always clean the brake fluid reservoir
cap and the area around the cap
before removing it.
Do not top off the brake fluid. Adding
fluid does not correct a leak. If fluid is
added when the linings are worn,
there will be too much fluid when
new brake linings are installed. Add or
remove fluid, as necessary, only when
work is done on the brake hydraulic
system.
{Warning
If too much brake fluid is added, it
can spill on the engine and burn,
if the engine is hot enough. You or
others could be burned, and the
vehicle could be damaged. Add
brake fluid only when work is done
on the brake hydraulic system.
When the brake fluid falls to a low
level, the brake warning light comes
on. See Brake System Warning Light
0 110. Brake fluid absorbs water over time
which degrades the effectiveness of
the brake fluid. Replace brake fluid at
the specified intervals to prevent
increased stopping distance. See
Maintenance Schedule
0374.
What to Add
Use only GM approved DOT 3 brake
fluid from a clean, sealed container.
See Recommended Fluids and
Lubricants 0383.
{Warning
The wrong or contaminated brake
fluid could result in damage to the
brake system. This could result in
the loss of braking leading to a
possible injury. Always use the
proper GM approved brake fluid.
Caution
If brake fluid is spilled on the
vehicle's painted surfaces, the paint
finish can be damaged. Immediately
wash off any painted surface.
Page 318 of 426

Cadillac XT5 Owner Manual (GMNA-Localizing-U.S./Canada/Mexico-
14590481) - 2021 - CRC - 10/22/20
VEHICLE CARE 317
Warning (Continued)
You or others could be injured or
killed, and the vehicle could be
damaged.
See Accessories and Modifications
0 294 and
General Information 0293.
To check a fuse, look at the
silver-colored band inside the fuse.
If the band is broken or melted,
replace the fuse. Be sure to replace a
bad fuse with a new one of the
identical size and rating.
Fuses of the same amperage can be
temporarily borrowed from another
fuse location, if a fuse goes out.
Replace the fuse as soon as possible.
Engine Compartment Fuse
Block
The underhood fuse block is in the
engine compartment, on the driver
side of the vehicle.
Caution
Do not pull the engine
compartment fuse block lever, since
it is intended only for service
purposes. If pulled, vehicle
malfunction may occur.
Caution
Spilling liquid on any electrical
component on the vehicle may
damage it. Always keep the covers
on any electrical component.
To remove the fuse block cover, press
the clips on the cover and lift it
straight up.
The vehicle may not be equipped with
all of the fuses, relays, and features
shown.
Page 321 of 426

Cadillac XT5 Owner Manual (GMNA-Localizing-U.S./Canada/Mexico-
14590481) - 2021 - CRC - 10/22/20
320 VEHICLE CARE
FusesUsage
F64 Engine control module–even
F65 Engine control module powertrain 1
F66 Engine control module powertrain 2
F67 Engine control module powertrain 3
F68 –
F69 –
F70 –
F71 –
F72 –
F73 –
F74 –
F75 –
F76 –
F77 – Relays
Usage
K1 Starter 1
K2 Run/Crank
K3 Starter 3
K4 LED/Automatic headlamps
K5 –
K6 –
K7 Engine control module
K8 Air conditioning
K9 –
K10 Starter 2Instrument Panel Fuse
Block
The instrument panel fuse block is in
the center console between the driver
and passenger seats. To access the
fuses, open the fuse panel door,
or remove the panel from the
passenger side by pulling it out or see
your dealer.
To reinstall the door, push the door
back into its original location.
Page 336 of 426
Cadillac XT5 Owner Manual (GMNA-Localizing-U.S./Canada/Mexico-
14590481) - 2021 - CRC - 10/22/20
VEHICLE CARE 335
sequence will continue upon
subsequent vehicle start-ups as long
as the malfunction exists.
When the malfunction indicator is
illuminated, the system may not be
able to detect or signal low tire
pressure as intended. TPMS
malfunctions may occur for a variety
of reasons, including the installation
of replacement or alternate tires or
wheels on the vehicle that prevent the
TPMS from functioning properly.
Always check the TPMS malfunction
telltale after replacing one or more
tires or wheels on your vehicle to
ensure that the replacement or
alternate tires and wheels allow the
TPMS to continue to function
properly.
SeeTire Pressure Monitor Operation
0 335.
See Radio Frequency Statement 0401.
Tire Pressure Monitor
Operation
This vehicle may have a Tire Pressure
Monitor System (TPMS). The TPMS is
designed to warn the driver when a low tire pressure condition exists.
TPMS sensors are mounted onto each
tire and wheel assembly, excluding the
spare tire and wheel assembly. The
TPMS sensors monitor the air
pressure in the tires and transmit the
tire pressure readings to a receiver
located in the vehicle.
When a low tire pressure condition is
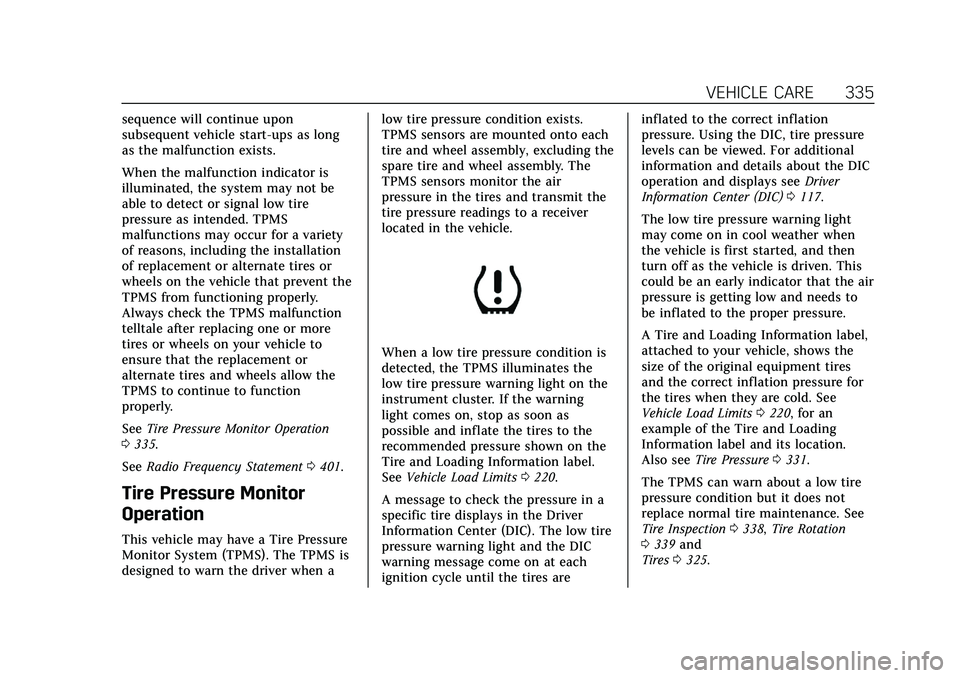
detected, the TPMS illuminates the
low tire pressure warning light on the
instrument cluster. If the warning
light comes on, stop as soon as
possible and inflate the tires to the
recommended pressure shown on the
Tire and Loading Information label.
See
Vehicle Load Limits 0220.
A message to check the pressure in a
specific tire displays in the Driver
Information Center (DIC). The low tire
pressure warning light and the DIC
warning message come on at each
ignition cycle until the tires are inflated to the correct inflation
pressure. Using the DIC, tire pressure
levels can be viewed. For additional
information and details about the DIC
operation and displays see
Driver
Information Center (DIC) 0117.
The low tire pressure warning light
may come on in cool weather when
the vehicle is first started, and then
turn off as the vehicle is driven. This
could be an early indicator that the air
pressure is getting low and needs to
be inflated to the proper pressure.
A Tire and Loading Information label,
attached to your vehicle, shows the
size of the original equipment tires
and the correct inflation pressure for
the tires when they are cold. See
Vehicle Load Limits 0220, for an
example of the Tire and Loading
Information label and its location.
Also see Tire Pressure 0331.
The TPMS can warn about a low tire
pressure condition but it does not
replace normal tire maintenance. See
Tire Inspection 0338, Tire Rotation
0 339 and
Tires 0325.