instrument panel CADILLAC XT6 2020 Convenience & Personalization Guide
[x] Cancel search | Manufacturer: CADILLAC, Model Year: 2020, Model line: XT6, Model: CADILLAC XT6 2020Pages: 20, PDF Size: 3.47 MB
Page 2 of 20
2
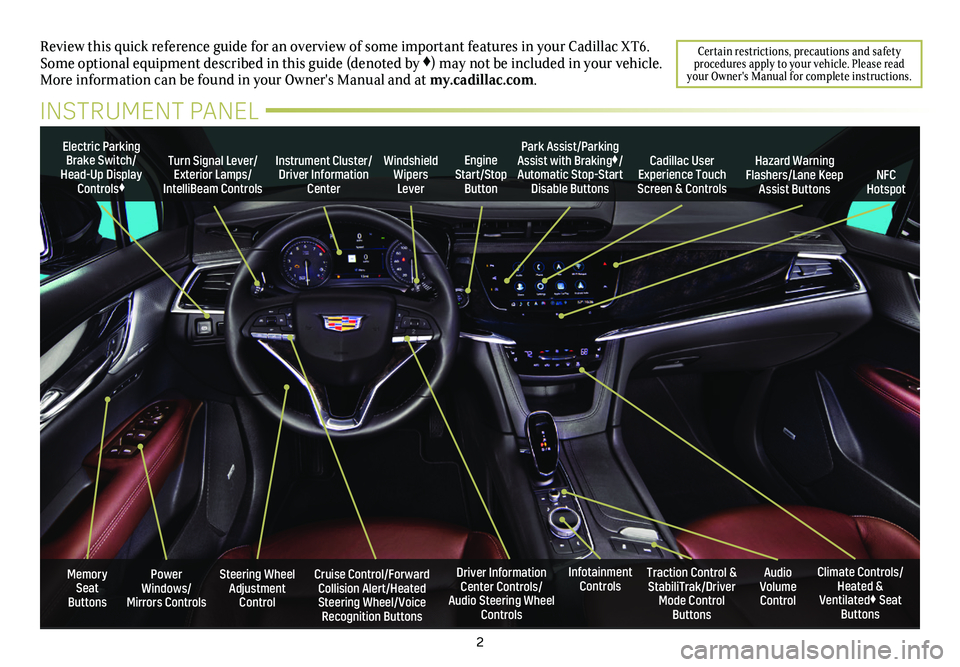
Power Windows/Mirrors Controls
Electric Parking Brake Switch/Head-Up Display Controls♦
Instrument Cluster/Driver Information Center
Engine Start/Stop Button
Steering Wheel Adjustment Control
Cruise Control/Forward Collision Alert/Heated Steering Wheel/Voice Recognition Buttons
Windshield Wipers Lever
Driver Information Center Controls/Audio Steering Wheel Controls
Turn Signal Lever/Exterior Lamps/ IntelliBeam Controls
Review this quick reference guide for an overview of some important feat\
ures in your Cadillac XT6. Some optional equipment described in this guide (denoted by ♦) may not be included in your vehicle. More information can be found in your Owner's Manual and at my.cadillac.com.
INSTRUMENT PANEL
Cadillac User Experience Touch Screen & Controls
Climate Controls/Heated & Ventilated♦ Seat Buttons
Traction Control & StabiliTrak/Driver Mode Control Buttons
Infotainment ControlsAudio Volume Control
Park Assist/Parking Assist with Braking♦/Automatic Stop-Start Disable ButtonsNFC Hotspot
Hazard Warning Flashers/Lane Keep Assist Buttons
Memory Seat Buttons
Certain restrictions, precautions and safety procedures apply to your vehicle. Please read your Owner's Manual for complete instructions.
Page 4 of 20
4
KEYLESS STARTAUTO ENGINE STOP/START
The Remote Keyless Entry (RKE) transmitter must be in the vehicle to turn on the ignition.
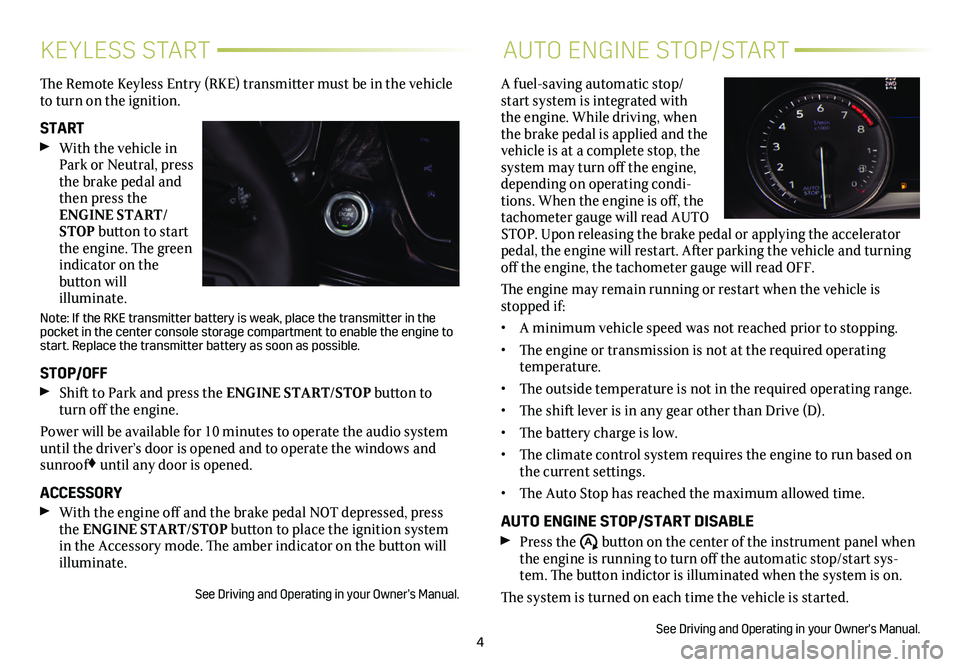
START With the vehicle in Park or Neutral, press the brake pedal and then press the ENGINE START/STOP button to start the engine. The green indicator on the
button will illuminate.
Note: If the RKE transmitter battery is weak, place the transmitter in t\
he pocket in the center console storage compartment to enable the engine to\
start. Replace the transmitter battery as soon as possible.
STOP/OFF Shift to Park and press the ENGINE START/STOP button to turn off the engine.
Power will be available for 10 minutes to operate the audio system until the driver’s door is opened and to operate the windows and sunroof♦ until any door is opened.
ACCESSORY With the engine off and the brake pedal NOT depressed, press the ENGINE START/STOP button to place the ignition system in the Accessory mode. The amber indicator on the button will illuminate.
See Driving and Operating in your Owner’s Manual.
A fuel-saving automatic stop/start system is integrated with the engine. While driving, when the brake pedal is applied and the vehicle is at a complete stop, the system may turn off the engine, depending on operating condi-tions. When the engine is off, the tachometer gauge will read AUTO STOP. Upon releasing the brake pedal or applying the accelerator pedal, the engine will restart. After parking the vehicle and turning off the engine, the tachometer gauge will read OFF.
The engine may remain running or restart when the vehicle is stopped if:
• A minimum vehicle speed was not reached prior to stopping.
• The engine or transmission is not at the required operating temperature.
• The outside temperature is not in the required operating range.
• The shift lever is in any gear other than Drive (D).
• The battery charge is low.
• The climate control system requires the engine to run based on the current settings.
• The Auto Stop has reached the maximum allowed time.
AUTO ENGINE STOP/START DISABLE Press the �$ button on the center of the instrument panel when the engine is running to turn off the automatic stop/start sys-tem. The button indictor is illuminated when the system is on.
The system is turned on each time the vehicle is started.
See Driving and Operating in your Owner's Manual.
Page 5 of 20
5
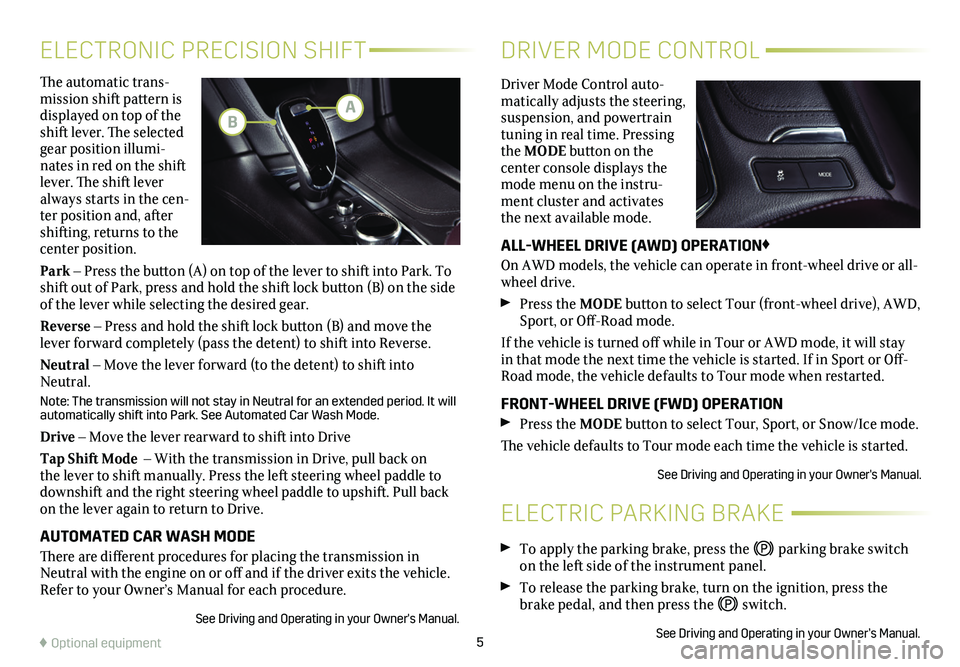
The automatic trans-mission shift pattern is displayed on top of the shift lever. The selected gear position illumi-nates in red on the shift lever. The shift lever always starts in the cen-ter position and, after shifting, returns to the center position.
Park – Press the button (A) on top of the lever to shift into Park. To shift out of Park, press and hold the shift lock button (B) on the side of the lever while selecting the desired gear.
Reverse – Press and hold the shift lock button (B) and move the lever forward completely (pass the detent) to shift into Reverse.
Neutral – Move the lever forward (to the detent) to shift into Neutral.
Note: The transmission will not stay in Neutral for an extended period. It will automatically shift into Park. See Automated Car Wash Mode.
Drive – Move the lever rearward to shift into Drive
Tap Shift Mode – With the transmission in Drive, pull back on the lever to shift manually. Press the left steering wheel paddle to downshift and the right steering wheel paddle to upshift. Pull back on the lever again to return to Drive.
AUTOMATED CAR WASH MODE
There are different procedures for placing the transmission in Neutral with the engine on or off and if the driver exits the vehicle. Refer to your Owner’s Manual for each procedure.
See Driving and Operating in your Owner's Manual.
ELECTRONIC PRECISION SHIFT
ELECTRIC PARKING BRAKE
DRIVER MODE CONTROL
Driver Mode Control auto-matically adjusts the steering, suspension, and powertrain tuning in real time. Pressing the MODE button on the
center console displays the mode menu on the instru-ment cluster and activates the next available mode.
ALL-WHEEL DRIVE (AWD) OPERATION♦
On AWD models, the vehicle can operate in front-wheel drive or all-wheel drive.
Press the MODE button to select Tour (front-wheel drive), AWD, Sport, or Off-Road mode.
If the vehicle is turned off while in Tour or AWD mode, it will stay in that mode the next time the vehicle is started. If in Sport or Off-Road mode, the vehicle defaults to Tour mode when restarted.
FRONT-WHEEL DRIVE (FWD) OPERATION Press the MODE button to select Tour, Sport, or Snow/Ice mode.
The vehicle defaults to Tour mode each time the vehicle is started.
See Driving and Operating in your Owner's Manual.
♦ Optional equipment
To apply the parking brake, press the parking brake switch on the left side of the instrument panel.
To release the parking brake, turn on the ignition, press the brake pedal, and then press the switch.
See Driving and Operating in your Owner’s Manual.
AB
Page 7 of 20
7
DRIVER INFORMATION CENTERMULTI-COLOR HEAD-UP DISPLAY♦
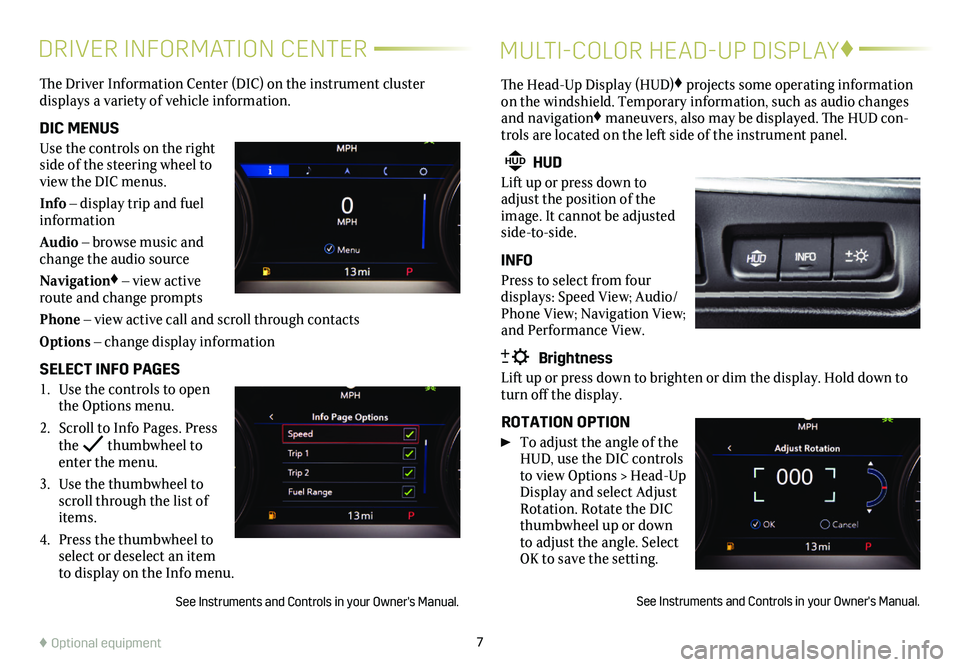
The Driver Information Center (DIC) on the instrument cluster
displays a variety of vehicle information.
DIC MENUS
Use the controls on the right side of the steering wheel to view the DIC menus.
Info – display trip and fuel information
Audio – browse music and change the audio source
Navigation♦ – view active route and change prompts
Phone – view active call and scroll through contacts
Options – change display information
SELECT INFO PAGES
1. Use the controls to open the Options menu.
2. Scroll to Info Pages. Press the thumbwheel to enter the menu.
3. Use the thumbwheel to scroll through the list of items.
4. Press the thumbwheel to select or deselect an item to display on the Info menu.
See Instruments and Controls in your Owner's Manual.
The Head-Up Display (HUD)♦ projects some operating information on the windshield. Temporary information, such as audio changes and navigation♦ maneuvers, also may be displayed. The HUD con-trols are located on the left side of the instrument panel.
HUD HUD
Lift up or press down to adjust the position of the image. It cannot be adjusted side-to-side.
INFO
Press to select from four displays: Speed View; Audio/Phone View; Navigation View; and Performance View.
Brightness
Lift up or press down to brighten or dim the display. Hold down to turn off the display.
ROTATION OPTION
To adjust the angle of the HUD, use the DIC controls to view Options > Head-Up Display and select Adjust Rotation. Rotate the DIC thumbwheel up or down to adjust the angle. Select OK to save the setting.
See Instruments and Controls in your Owner's Manual.
♦ Optional equipment
Page 16 of 20
16
DRIVER ASSISTANCE SYSTEMS
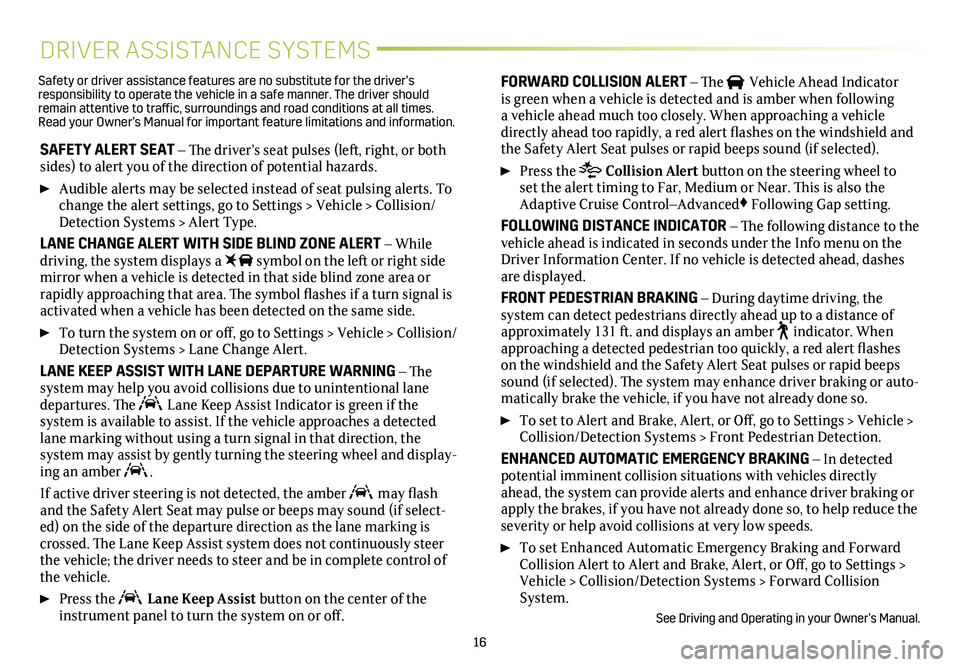
SAFETY ALERT SEAT – The driver’s seat pulses (left, right, or both sides) to alert you of the direction of potential hazards.
Audible alerts may be selected instead of seat pulsing alerts. To change the alert settings, go to Settings > Vehicle > Collision/Detection Systems > Alert Type.
LANE CHANGE ALERT WITH SIDE BLIND ZONE ALERT – While driving, the system displays a symbol on the left or right side mirror when a vehicle is detected in that side blind zone area or
rapidly approaching that area. The symbol flashes if a turn signal is activated when a vehicle has been detected on the same side.
To turn the system on or off, go to Settings > Vehicle > Collision/Detection Systems > Lane Change Alert.
LANE KEEP ASSIST WITH LANE DEPARTURE WARNING – The system may help you avoid collisions due to unintentional lane departures. The Lane Keep Assist Indicator is green if the
system is available to assist. If the vehicle approaches a detected lane marking without using a turn signal in that direction, the
system may assist by gently turning the steering wheel and display-ing an amber .
If active driver steering is not detected, the amber may flash and the Safety Alert Seat may pulse or beeps may sound (if select-ed) on the side of the departure direction as the lane marking is crossed. The Lane Keep Assist system does not continuously steer the vehicle; the driver needs to steer and be in complete control of the vehicle.
Press the Lane Keep Assist button on the center of the instrument panel to turn the system on or off.
FORWARD COLLISION ALERT – The Vehicle Ahead Indicator is green when a vehicle is detected and is amber when following a vehicle ahead much too closely. When approaching a vehicle directly ahead too rapidly, a red alert flashes on the windshield and the Safety Alert Seat pulses or rapid beeps sound (if selected).
Press the Collision Alert button on the steering wheel to set the alert timing to Far, Medium or Near. This is also the Adaptive Cruise Control–Advanced♦ Following Gap
setting.
FOLLOWING DISTANCE INDICATOR – The following distance to the vehicle ahead is indicated in seconds under the Info menu on the Driver Information Center. If no vehicle is detected ahead, dashes are displayed.
FRONT PEDESTRIAN BRAKING – During daytime driving, the
system can detect pedestrians directly ahead up to a distance of approximately 131 ft. and displays an amber indicator. When approaching a detected pedestrian too quickly, a red alert flashes on the windshield and the Safety Alert Seat pulses or rapid beeps sound (if selected). The system may enhance driver braking or auto-matically brake the vehicle, if you have not already done so.
To set to Alert and Brake, Alert, or Off, go to Settings > Vehicle > Collision/Detection Systems > Front Pedestrian Detection.
ENHANCED AUTOMATIC EMERGENCY BRAKING – In detected potential imminent collision situations with vehicles directly ahead, the system can provide alerts and enhance driver braking or apply the brakes, if you have not already done so, to help reduce the severity or help avoid collisions at very low speeds.
To set Enhanced Automatic Emergency Braking and Forward Collision Alert to Alert and Brake, Alert, or Off, go to Settings > Vehicle > Collision/Detection Systems > Forward Collision System.
See Driving and Operating in your Owner’s Manual.
Safety or driver assistance features are no substitute for the driver’s responsibility to operate the vehicle in a safe manner. The driver should remain attentive to traffic, surroundings and road conditions at all times. Read your Owner’s Manual for important feature limitations and information\
.
Page 17 of 20
17
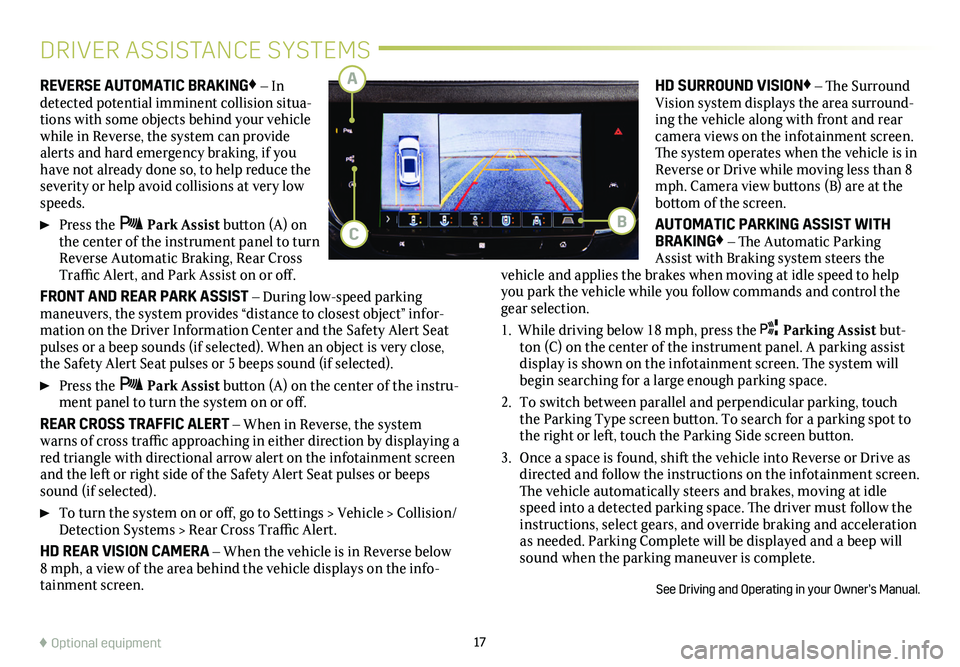
REVERSE AUTOMATIC BRAKING♦ – In detected potential imminent collision situa-tions with some objects behind your vehicle while in Reverse, the system can provide alerts and hard emergency braking, if you have not already done so, to help reduce the severity or help avoid collisions at very low speeds.
Press the Park Assist button (A) on the center of the instrument panel to turn Reverse Automatic Braking, Rear Cross Traffic Alert, and Park Assist on or off.
FRONT AND REAR PARK ASSIST – During low-speed parking maneuvers, the system provides “distance to closest object” infor-mation on the Driver Information Center and the Safety Alert Seat pulses or a beep sounds (if selected). When an object is very close, the Safety Alert Seat pulses or 5 beeps sound (if selected).
Press the Park Assist button (A) on the center of the instru-ment panel to turn the system on or off.
REAR CROSS TRAFFIC ALERT – When in Reverse, the system warns of cross traffic approaching in either direction by displaying a red triangle with directional arrow alert on the infotainment screen and the left or right side of the Safety Alert Seat pulses or beeps sound (if selected).
To turn the system on or off, go to Settings > Vehicle > Collision/Detection Systems > Rear Cross Traffic Alert.
HD REAR VISION CAMERA – When the vehicle is in Reverse below 8 mph, a view of the area behind the vehicle displays on the info-tainment screen.
DRIVER ASSISTANCE SYSTEMS
HD SURROUND VISION♦ – The Surround Vision system displays the area surround-ing the vehicle along with front and rear camera views on the infotainment screen. The system operates when the vehicle is in Reverse or Drive while moving less than 8 mph. Camera view buttons (B) are at the bottom of the screen.
AUTOMATIC PARKING ASSIST WITH BRAKING♦ – The Automatic Parking Assist with Braking system steers the vehicle and applies the brakes when moving at idle speed to help you park the vehicle while you follow commands and control the gear selection.
1. While driving below 18 mph, press the Parking Assist but-ton (C) on the center of the instrument panel. A parking assist display is shown on the infotainment screen. The
system will begin searching for a large enough parking space.
2. To switch between parallel and perpendicular parking, touch the Parking Type screen button. To search for a parking spot to the right or left, touch the Parking Side screen button.
3. Once a space is found, shift the vehicle into Reverse or Drive as directed and follow the instructions on the infotainment screen. The vehicle automatically steers and brakes, moving at idle speed into a detected parking space. The driver must follow the instructions, select gears, and override braking and acceleration as needed. Parking Complete will be displayed and a beep will sound when the parking maneuver is complete.
See Driving and Operating in your Owner’s Manual.
♦ Optional equipment
CB
A
Page 19 of 20

19
CARGO COVER INSTALLATION
1. Fold the 3rd-row seats.
2. Insert the 3rd-row seat belts into the clips (A) on the side panels.
3. Unfold the cargo cover until the center hinge of each crossbar clicks.
4. Insert the longer crossbar into the slots on each side panel near the 2nd-row seats.
5. Insert the shorter
crossbar into the slots on each side panel near the liftgate opening.
6. Attach the clips to the tie-downs (B).
CARGO COVER REMOVAL
1. Unhook the clips from the tie-downs.
2. Slide the release
button to fold the shorter cross-bar, followed by the longer crossbar.
REAR CARGO COVER♦REAR CARGO COVER♦
CENTER CONSOLE STORAGE AREA
♦ Optional equipment
3. Fold the crossbars and roll up the cover. Place the cover in the storage bag and store under the cargo floor.
See Storage in your Owner’s Manual.
A storage area is located under the front of the center console for use by front seat passengers. The storage area features an accessory power outlet for electrical equip-ment.
See Instruments and Controls in your Owner’s Manual.
A
BB