change time CADILLAC XT6 2021 Owner's Manual
[x] Cancel search | Manufacturer: CADILLAC, Model Year: 2021, Model line: XT6, Model: CADILLAC XT6 2021Pages: 431, PDF Size: 8.29 MB
Page 29 of 431
Cadillac XT6 Owner Manual (GMNA-Localizing-U.S./Canada-14574701) -
2021 - CRC - 2/8/21
28 KEYS, DOORS, AND WINDOWS
.Always unlock a door with the RKE
transmitter or use the Keyless
Access system.
Unlocking the driver door with the key
will not disarm the system or turn off
the alarm.
How to Detect a Tamper
Condition
IfKis pressed and the horn chirps
and the lights flash three times, the
alarm was activated while the alarm
system was armed.
If the alarm system has been
activated, a message will appear on
the DIC.
Power Sounder, Inclination
Sensor, and Intrusion Sensor
In addition to the standard
theft-deterrent system features, this
system may also have an inclination
sensor, an intrusion sensor, and power
sounder. The power sounder provides an
audible alarm that is different from
the vehicle’s horn. It has its own
power source, and can sound an alarm
when the vehicle’s battery is
compromised.
The inclination sensor can set off the
alarm if it senses movement of the
vehicle, such as a change in vehicle
orientation.
The intrusion sensor monitors the
vehicle interior, and can set off the
alarm if it senses an unauthorized
entry into the vehicle’s interior. Do
not allow passengers or pets to remain
in the vehicle when the intrusion
sensor is activated.
Before arming the theft-deterrent
system and activating the intrusion
sensor:.Make sure all doors and windows
are completely closed.
.Secure any loose items such as a
sunshades.
.Make sure there are no obstructions
blocking the sensors in the front
overhead console.
Inclination and Intrusion
Sensors Disable Switch
It is recommended that the inclination
and intrusion sensors be deactivated if
pets are left in the vehicle or if the
vehicle is being transported.
With the vehicle turned off, press
o
in the overhead console. The indicator
light will come on momentarily,
indicating that the sensor has been
disabled until the next time the alarm
system is armed.
Steering Column Lock
If equipped, the steering column lock
is a theft-deterrent device. This
feature locks the steering column
when the vehicle is turned off and the
driver door is opened, or when the
driver door is opened and then the
vehicle is turned off. The steering
column unlocks when the vehicle is
turned on.
Page 32 of 431
Cadillac XT6 Owner Manual (GMNA-Localizing-U.S./Canada-14574701) -
2021 - CRC - 2/8/21
KEYS, DOORS, AND WINDOWS 31
Memory Mirrors
The vehicle may have memory
mirrors. SeeMemory Seats 043.
Lane Change Alert (LCA)
The vehicle may have LCA. See Lane
Change Alert (LCA) 0281.
Folding Mirrors
Manual Folding Mirrors
If equipped, manually fold the mirrors
inward toward the vehicle to prevent
damage when going through an
automatic car wash. Push the mirror
outward to return it to the original
position.
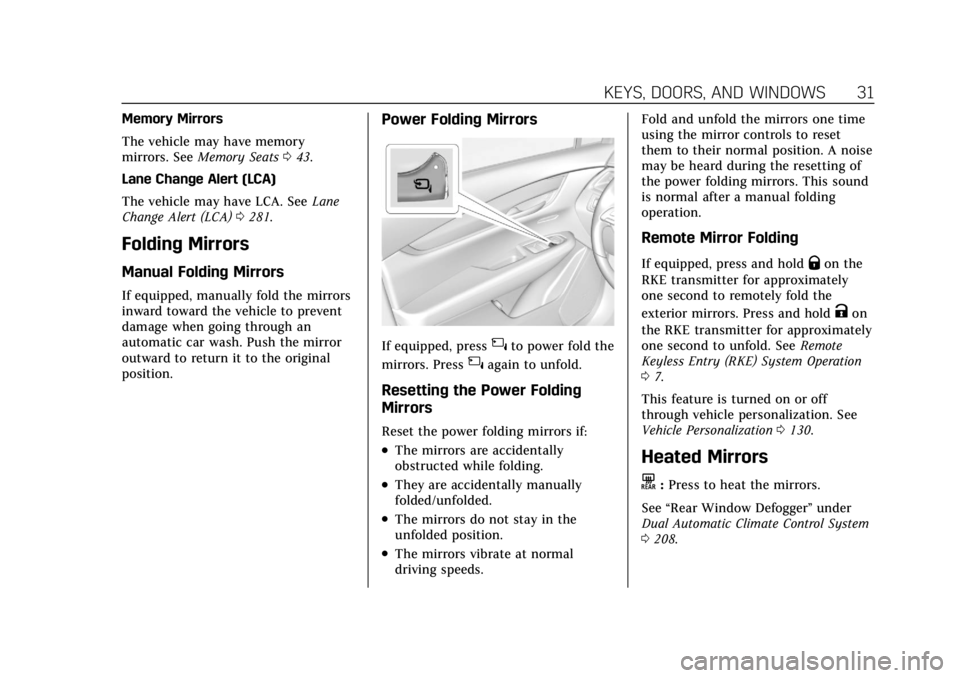
Power Folding Mirrors
If equipped, press{to power fold the
mirrors. Press
{again to unfold.
Resetting the Power Folding
Mirrors
Reset the power folding mirrors if:
.The mirrors are accidentally
obstructed while folding.
.They are accidentally manually
folded/unfolded.
.The mirrors do not stay in the
unfolded position.
.The mirrors vibrate at normal
driving speeds. Fold and unfold the mirrors one time
using the mirror controls to reset
them to their normal position. A noise
may be heard during the resetting of
the power folding mirrors. This sound
is normal after a manual folding
operation.
Remote Mirror Folding
If equipped, press and holdQon the
RKE transmitter for approximately
one second to remotely fold the
exterior mirrors. Press and hold
Kon
the RKE transmitter for approximately
one second to unfold. See Remote
Keyless Entry (RKE) System Operation
0 7.
This feature is turned on or off
through vehicle personalization. See
Vehicle Personalization 0130.
Heated Mirrors
K:Press to heat the mirrors.
See “Rear Window Defogger” under
Dual Automatic Climate Control System
0 208.
Page 38 of 431
Cadillac XT6 Owner Manual (GMNA-Localizing-U.S./Canada-14574701) -
2021 - CRC - 2/8/21
KEYS, DOORS, AND WINDOWS 37
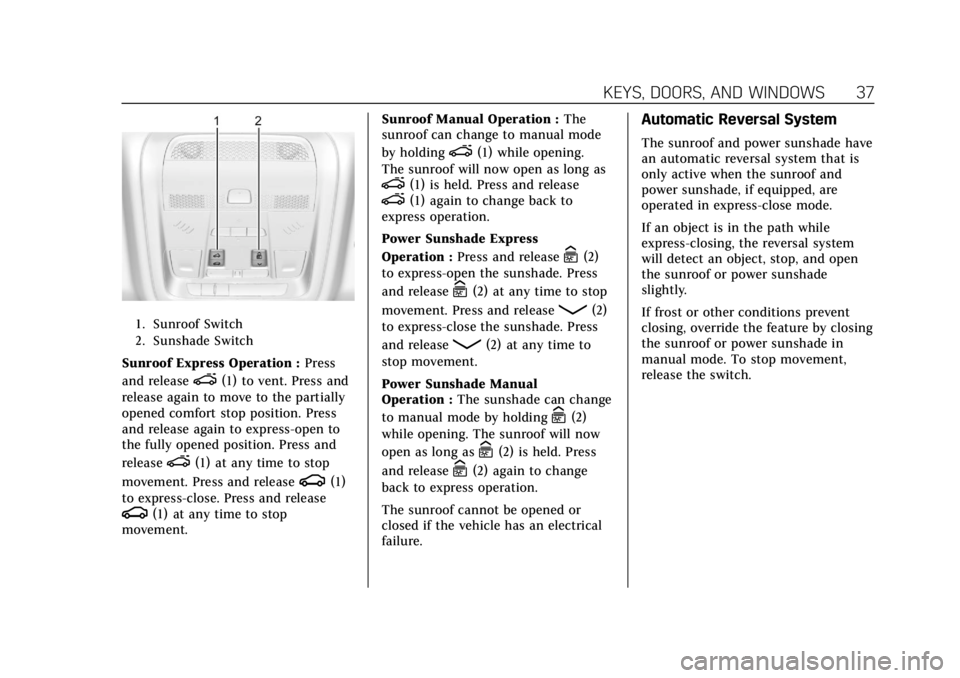
1. Sunroof Switch
2. Sunshade Switch
Sunroof Express Operation :Press
and release
e(1) to vent. Press and
release again to move to the partially
opened comfort stop position. Press
and release again to express-open to
the fully opened position. Press and
release
e(1) at any time to stop
movement. Press and release
g(1)
to express-close. Press and release
g(1) at any time to stop
movement. Sunroof Manual Operation :
The
sunroof can change to manual mode
by holding
e(1) while opening.
The sunroof will now open as long as
e(1) is held. Press and releasee(1) again to change back to
express operation.
Power Sunshade Express
Operation : Press and release
C(2)
to express-open the sunshade. Press
and release
C(2) at any time to stop
movement. Press and release
Q(2)
to express-close the sunshade. Press
and release
Q(2) at any time to
stop movement.
Power Sunshade Manual
Operation : The sunshade can change
to manual mode by holding
C(2)
while opening. The sunroof will now
open as long as
C(2) is held. Press
and release
C(2) again to change
back to express operation.
The sunroof cannot be opened or
closed if the vehicle has an electrical
failure.
Automatic Reversal System
The sunroof and power sunshade have
an automatic reversal system that is
only active when the sunroof and
power sunshade, if equipped, are
operated in express-close mode.
If an object is in the path while
express-closing, the reversal system
will detect an object, stop, and open
the sunroof or power sunshade
slightly.
If frost or other conditions prevent
closing, override the feature by closing
the sunroof or power sunshade in
manual mode. To stop movement,
release the switch.
Page 46 of 431
Cadillac XT6 Owner Manual (GMNA-Localizing-U.S./Canada-14574701) -
2021 - CRC - 2/8/21
SEATS AND RESTRAINTS 45
The shift lever must be in P (Park) to
start Seat Entry Memory. Seat Entry
Memory recall will complete if the
vehicle is shifted out of P (Park) prior
to reaching the saved memory
position.
To stop Seat Entry Memory recall
movement, turn the vehicle off or
press any of the following controls:
.Power seat
.Memory SET, 1, 2, orB
.Power mirror, with the driver or
passenger side mirror selected
.Power steering wheel, if equipped
If the saved memory seat position
does not automatically recall or recalls
to the wrong positions, the driver’s
RKE transmitter number (1 or 2) may
not match the memory button
number that positions were saved to.
Try storing the position to the other
memory button or try the other RKE
transmitter. Seat Exit Memory
Seat Exit Memory is not linked to an
RKE transmitter. The position saved to
Bis used for all drivers. To turn Seat
Exit Memory on or off, see "Vehicle
Personalization Settings" previously in
this section and Vehicle Personalization
0 130.
If turned on, the position saved to
B
is automatically recalled when one of
the following occurs:
.The vehicle is turned off and the
driver door is opened within a
short time.
.The vehicle is turned off with the
driver door open.
To stop Seat Exit Memory movement,
press any of the following memory
controls:
.Power seat
.Memory SET, 1, 2, orB
.Power mirror, with the driver or
passenger side mirror selected
.Power steering wheel, if equipped Obstructions
If something has blocked the driver
seat and/or power steering wheel
while recalling a memory position, the
recall may stop. Remove the
obstruction and try the recall again.
If the memory position still does not
recall, see your dealer.
Heated and Ventilated
Front Seats
{Warning
If temperature change or pain to
the skin cannot be felt, the seat
heater may cause burns. To reduce
the risk of burns, use care when
using the seat heater, especially for
long periods of time. Do not place
anything on the seat that insulates
against heat, such as a blanket,
cushion, cover, or similar item. This
may cause the seat heater to
overheat. An overheated seat heater
may cause a burn or may damage
the seat.
Page 74 of 431
Cadillac XT6 Owner Manual (GMNA-Localizing-U.S./Canada-14574701) -
2021 - CRC - 2/8/21
SEATS AND RESTRAINTS 73
force to the child's pelvic bones in
a crash. It should never be worn
over the abdomen, which could
cause severe or even fatal internal
injuries in a crash.
Also see “Rear Seat Belt Comfort
Guides” underLap-Shoulder Belt 056.
According to accident statistics,
children are safer when properly
restrained in a rear seating position.
In a crash, children who are not
buckled up can strike other people
who are buckled up, or can be thrown
out of the vehicle. Older children need
to use seat belts properly.
{Warning
Never allow more than one child to
wear the same seat belt. The seat
belt cannot properly spread the
impact forces. In a crash, they can
be crushed together and seriously
injured. A seat belt must be used by
only one person at a time.
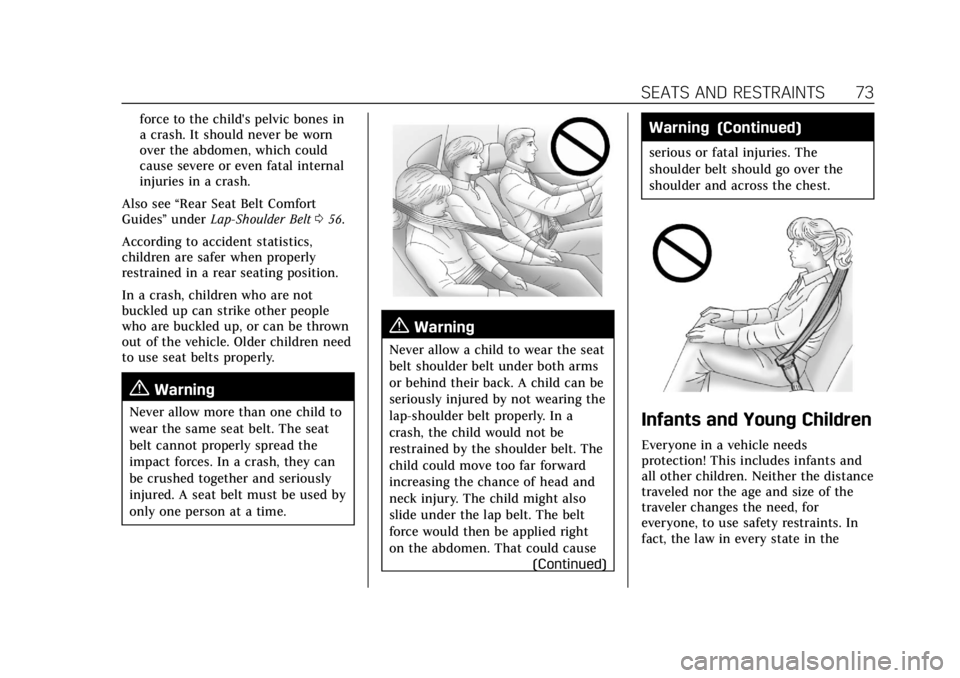
{Warning
Never allow a child to wear the seat
belt shoulder belt under both arms
or behind their back. A child can be
seriously injured by not wearing the
lap-shoulder belt properly. In a
crash, the child would not be
restrained by the shoulder belt. The
child could move too far forward
increasing the chance of head and
neck injury. The child might also
slide under the lap belt. The belt
force would then be applied right
on the abdomen. That could cause (Continued)
Warning (Continued)
serious or fatal injuries. The
shoulder belt should go over the
shoulder and across the chest.
Infants and Young Children
Everyone in a vehicle needs
protection! This includes infants and
all other children. Neither the distance
traveled nor the age and size of the
traveler changes the need, for
everyone, to use safety restraints. In
fact, the law in every state in the
Page 112 of 431
Cadillac XT6 Owner Manual (GMNA-Localizing-U.S./Canada-14574701) -
2021 - CRC - 2/8/21
INSTRUMENTS AND CONTROLS 111
.Audio
.Navigation
.Phone
.Night Vision
.Options
Audio
In the Audio menu browse for music,
select from the favorites, or change
the audio source. Use the thumbwheel
to change the station or go to the next
or previous track.
Navigation
If there is an active route, press the
thumbwheel to cancel or resume route
guidance, or turn the voice prompts
on or off.
Phone
In the Phone menu, if there is no
active phone call, view recent calls,
or scroll through contacts. If there is
an active call, mute the phone or
switch to handset operation.
Night Vision (Uplevel)
If equipped, provides an infrared night
vision image of the area beyond the
headlamps that highlights and provides alerts to detected pedestrians
or large animals. See
Night Vision
System 0278.
Options
Use the thumbwheel to scroll through
items in the Options menu.
Units : Choose English or metric units
by pressing the thumbwheel while the
desired item is highlighted.
Info Page Options : Press the
thumbwheel to select the items to be
displayed in the Info app. See Driver
Information Center (DIC) 0124.
Display : Press the thumbwheel to
enter the Display menu. Select to turn
on or off the speedometer, time, fuel
range, or, if equipped, compass or
speed sign.
Speed Warning : The Speed Warning
display allows the driver to set a
warning at a speed that they do not
want to exceed. To set the Speed
Warning press the thumbwheel when
Speed Warning is displayed. Use the
thumbwheel to adjust the value and
press to set the speed. Once the speed is set, this feature can
be turned off by pressing the
thumbwheel while viewing this page.
If the selected speed limit is exceeded,
a pop-up warning is displayed with a
chime.
Head-up Display (HUD) (Uplevel) :
If equipped, this feature allows for
adjusting the angle of the HUD image
and changing or turning off the Speed
Limit Sign.
HUD Rotation (Uplevel): Press the
thumbwheel while Adjust Rotation is
highlighted to enter Adjust Mode.
Scroll to adjust the angle of the HUD
display. Press the thumbwheel to
confirm and save the setting. This
feature may only be available in
P (Park).
Speed Sign: If equipped, press the
thumbwheel while Speed Sign is
highlighted to turn it on or off.
Software Information :
Displays open
source software information.
Page 124 of 431
Cadillac XT6 Owner Manual (GMNA-Localizing-U.S./Canada-14574701) -
2021 - CRC - 2/8/21
INSTRUMENTS AND CONTROLS 123
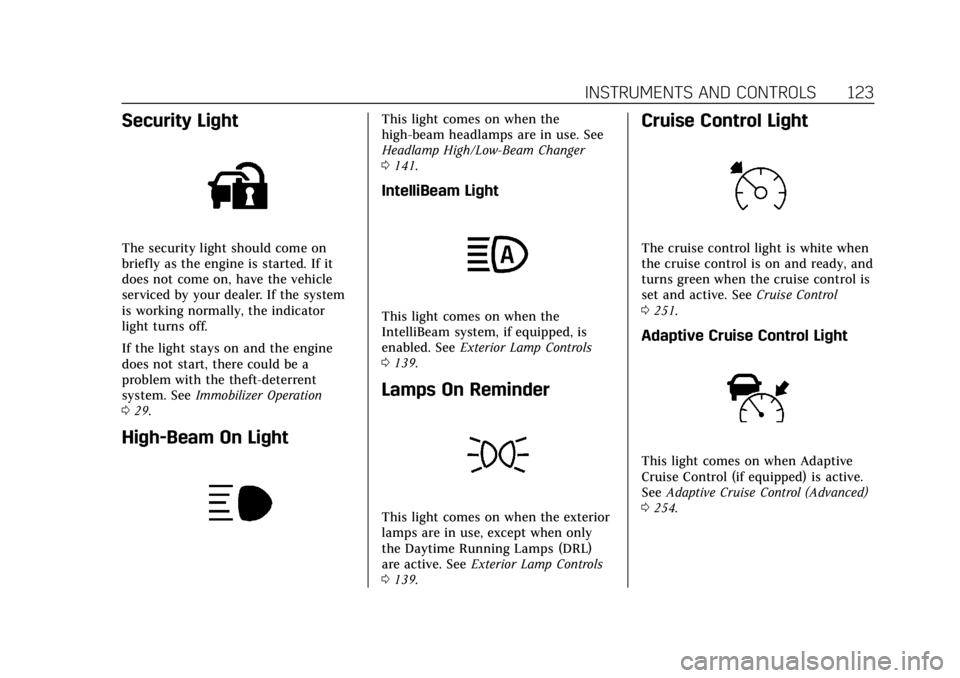
Security Light
The security light should come on
briefly as the engine is started. If it
does not come on, have the vehicle
serviced by your dealer. If the system
is working normally, the indicator
light turns off.
If the light stays on and the engine
does not start, there could be a
problem with the theft-deterrent
system. SeeImmobilizer Operation
0 29.
High-Beam On Light
This light comes on when the
high-beam headlamps are in use. See
Headlamp High/Low-Beam Changer
0141.
IntelliBeam Light
This light comes on when the
IntelliBeam system, if equipped, is
enabled. See Exterior Lamp Controls
0 139.
Lamps On Reminder
This light comes on when the exterior
lamps are in use, except when only
the Daytime Running Lamps (DRL)
are active. See Exterior Lamp Controls
0 139.
Cruise Control Light
The cruise control light is white when
the cruise control is on and ready, and
turns green when the cruise control is
set and active. See Cruise Control
0 251.
Adaptive Cruise Control Light
This light comes on when Adaptive
Cruise Control (if equipped) is active.
See Adaptive Cruise Control (Advanced)
0 254.
Page 126 of 431
Cadillac XT6 Owner Manual (GMNA-Localizing-U.S./Canada-14574701) -
2021 - CRC - 2/8/21
INSTRUMENTS AND CONTROLS 125
Trip 1 or Trip 2 and Average Fuel
Economy :The Trip display shows the
current distance traveled, in either
kilometers (km) or miles (mi), since
the trip odometer was last reset. The
trip odometer can be reset by pressing
Vand selecting yes or no while this
display is active.
Shows the approximate average liters
per 100 kilometers (L/100 km),
kilometers per liter (km/L), or miles
per gallon (mpg). This number is
calculated based on the number of
L/100 km (mpg) or km/L recorded
since the last time this menu item
was reset. This number reflects only
the approximate average fuel economy
that the vehicle has right now, and
will change as driving conditions
change. The Average Fuel Economy
can be reset by pressing
Vand
selecting yes or no while this display
is active.
Fuel Range : Shows the approximate
distance the vehicle can be driven
without refueling. LOW will be
displayed when the vehicle is low on
fuel. The fuel range estimate is based
on an average of the vehicle's fuel economy over recent driving history
and the amount of fuel remaining in
the fuel tank.
Oil Life :
Shows an estimate of the
oil's remaining useful life.
If REMAINING OIL LIFE 99% is
displayed, that means 99% of the
current oil life remains.
When the remaining oil life is low, the
CHANGE ENGINE OIL SOON message
will appear on the display. The oil
should be changed as soon as
possible. See Engine Oil0311. In
addition to the engine oil life system
monitoring the oil life, additional
maintenance is recommended. See
Maintenance Schedule 0380.
The Oil Life display must be reset
after each oil change. It will not reset
itself. Do not reset the Oil Life display
accidentally at any time other than
when the oil has just been changed.
It cannot be reset accurately until the
next oil change. To reset, see Engine
Oil Life System 0313.
Tire Pressure : Shows the
approximate pressures of all four tires.
Tire pressure is displayed in either
kilopascal (kPa) or in pounds per square inch (psi). If the pressure is
low, the value for that tire is shown in
amber. See
Tire Pressure Monitor
System 0346 and
Tire Pressure Monitor Operation 0347.
Air Filter Life : Shows an estimate of
the engine air filter’s remaining useful
life and the state of the system.
Engine Air Filter Life 95% means 95%
of the current air filter life remains.
Messages will display based on the
engine air filter life and the state of
the system. When the REPLACE AT
NEXT OIL CHANGE message displays,
the engine air filter should be replaced
at the time of the next oil change.
When the REPLACE NOW message
displays, the engine air filter should
be replaced as soon as possible.
The Air Filter Life display must be
reset after the engine air filter
replacement. To reset, see Engine Air
Filter Life System 0314.
Fuel Economy : Displays average fuel
economy, the best fuel economy over
the selected distance, and a bar graph
showing instantaneous fuel economy.
Page 137 of 431
Cadillac XT6 Owner Manual (GMNA-Localizing-U.S./Canada-14574701) -
2021 - CRC - 2/8/21
136 INSTRUMENTS AND CONTROLS
instructions refer to a garage door
opener, but can be used for other
devices.
Do not use the Universal Remote
system with any garage door opener
that does not have the stop and
reverse feature. This includes any
garage door opener model
manufactured before April 1, 1982.
Read these instructions completely
before programming the Universal
Remote system. It may help to have
another person assist with the
programming process.
Keep the original hand-held
transmitter for use in other vehicles
as well as for future programming.
Erase the programming when vehicle
ownership is terminated. See“Erasing
Universal Remote System Buttons”
later in this section.
To program a garage door opener,
park outside directly in line with and
facing the garage door opener receiver.
Clear all people and objects near the
garage door. Make sure the hand-held transmitter
has a new battery for quick and
accurate transmission of the
radio-frequency signal.
Programming the Universal
Remote System
For questions or programming help,
see www.homelink.com/gm or call
1-800-355-3515. For calls placed
outside the U.S., Canada, or Puerto
Rico, international rates will apply and
may differ based on landline or mobile
phone.
Programming involves time-sensitive
actions, and may time out causing the
procedure to be repeated.
To program up to three devices:
1. Hold the end of the hand-held transmitter about 3 to 8 cm (1 to
3 in) away from the Universal
Remote system buttons with the
indicator light in view. The
hand-held transmitter was supplied
by the manufacturer of the garage
door opener receiver.
2. Press and release one of the three Universal Remote system buttons
to be programmed. Press and hold the hand-held transmitter button.
Do not release the hand-held
transmitter button until the
indicator light changes from a slow
to a rapid flash or continuous light.
Then release the hand-held
transmitter button.
Some garage door openers may
require substitution of Step 2 with
the procedure under
“Radio Signals
for Some Gate Operators ”later in
this section.
3. Press and hold the newly programmed Universal Remote
system button for five seconds
while watching the indicator light
and garage door activation.
.If the indicator light stays on
continuously or the garage door
moves when the button is
pressed, then programming is
complete. There is no need to
complete Steps 4–6.
.If the indicator light does not
come on or the garage door does
not move, a second button press
may be required. For a second
time, press and hold the newly
programmed button for
Page 138 of 431
Cadillac XT6 Owner Manual (GMNA-Localizing-U.S./Canada-14574701) -
2021 - CRC - 2/8/21
INSTRUMENTS AND CONTROLS 137
five seconds. If the indicator
light is continuously lit, or the
garage door moves,
programming is complete.
.If the indicator light flashes
rapidly and the garage door does
not move, continue with
programming Steps 4–6.
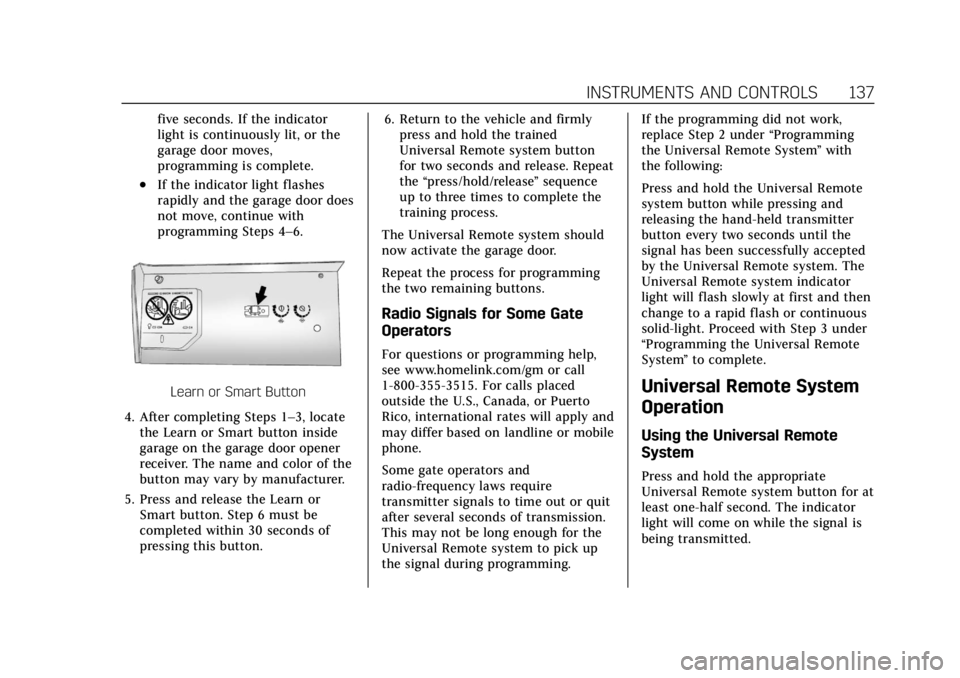
Learn or Smart Button
4. After completing Steps 1–3, locate the Learn or Smart button inside
garage on the garage door opener
receiver. The name and color of the
button may vary by manufacturer.
5. Press and release the Learn or Smart button. Step 6 must be
completed within 30 seconds of
pressing this button. 6. Return to the vehicle and firmly
press and hold the trained
Universal Remote system button
for two seconds and release. Repeat
the “press/hold/release ”sequence
up to three times to complete the
training process.
The Universal Remote system should
now activate the garage door.
Repeat the process for programming
the two remaining buttons.
Radio Signals for Some Gate
Operators
For questions or programming help,
see www.homelink.com/gm or call
1-800-355-3515. For calls placed
outside the U.S., Canada, or Puerto
Rico, international rates will apply and
may differ based on landline or mobile
phone.
Some gate operators and
radio-frequency laws require
transmitter signals to time out or quit
after several seconds of transmission.
This may not be long enough for the
Universal Remote system to pick up
the signal during programming. If the programming did not work,
replace Step 2 under
“Programming
the Universal Remote System ”with
the following:
Press and hold the Universal Remote
system button while pressing and
releasing the hand-held transmitter
button every two seconds until the
signal has been successfully accepted
by the Universal Remote system. The
Universal Remote system indicator
light will flash slowly at first and then
change to a rapid flash or continuous
solid-light. Proceed with Step 3 under
“Programming the Universal Remote
System ”to complete.
Universal Remote System
Operation
Using the Universal Remote
System
Press and hold the appropriate
Universal Remote system button for at
least one-half second. The indicator
light will come on while the signal is
being transmitted.