warning light CADILLAC XT6 2023 Owners Manual
[x] Cancel search | Manufacturer: CADILLAC, Model Year: 2023, Model line: XT6, Model: CADILLAC XT6 2023Pages: 507, PDF Size: 6.49 MB
Page 2 of 507
Cadillac XT6 Owner Manual (GMNA-Localizing-U.S./Canada-16405819) -
2023 - CRC - 3/22/22
Contents
Introduction . . . . . . . . . . . . . . . . . . . . . . . .1
Keys, Doors, and Windows . . . . .8
Seats and Restraints . . . . . . . . . .46
Storage . . . . . . . . . . . . . . . . . . . . . . . . . .108
Instruments and Controls . . . .116
Lighting . . . . . . . . . . . . . . . . . . . . . . . . . .156
Infotainment System . . . . . . . . . .164
Climate Controls . . . . . . . . . . . . . . .228
Driving and Operating . . . . . . . .238
Vehicle Care . . . . . . . . . . . . . . . . . . . .362
Service and Maintenance . . .452
Technical Data . . . . . . . . . . . . . . . . .462
Customer Information . . . . . . .466
Reporting Safety Defects . . .478
OnStar . . . . . . . . . . . . . . . . . . . . . . . . . . .482
Connected Services . . . . . . . . . .489
Index . . . . . . . . . . . . . . . . . . . . . . . . 492
Introduction
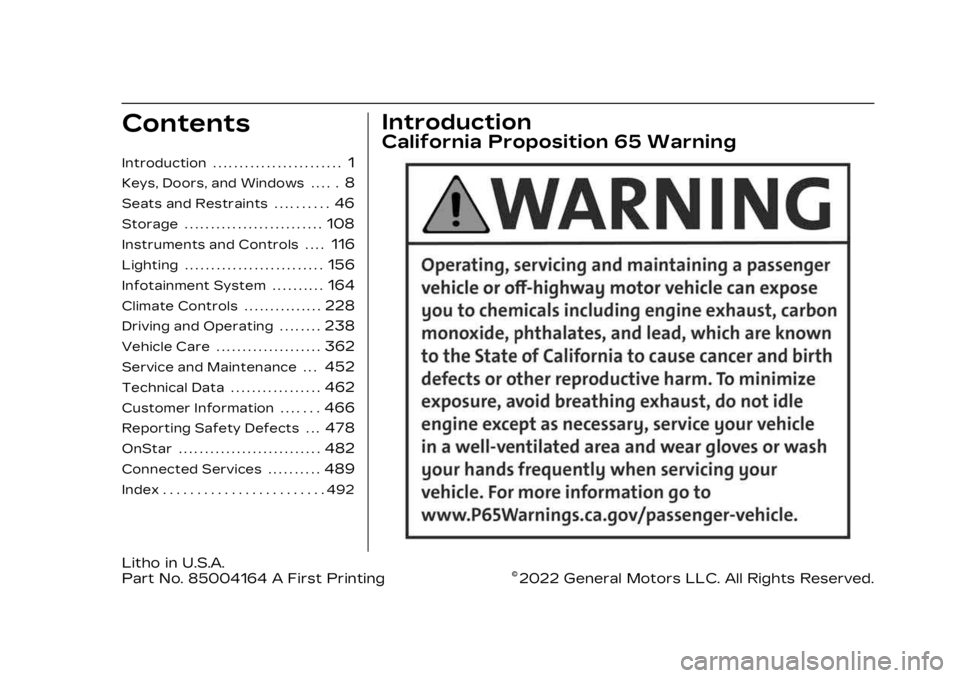
California Proposition 65 Warning
Litho in U.S.A.
Part No. 85004164 A First Printing©2022 General Motors LLC. All Rights Reserved.
Page 4 of 507
Cadillac XT6 Owner Manual (GMNA-Localizing-U.S./Canada-16405819) -
2023 - CRC - 3/22/22
Introduction 3
{Warning
Warning indicates a hazard
that could result in injury or
death.
Caution
Caution indicates a hazard
that could result in property
or vehicle damage.
A circle with a slash through it
is a safety symbol which
means“Do not,” “Do not do
this,” or“Do not let this
happen.”
Symbols
The vehicle has components
and labels that use symbols
instead of text. Symbols are
shown along with the text describing the operation or
information relating to a
specific component, control,
message, gauge, or indicator.
M:
Shown when the owner’s
manual has additional
instructions or information.
*: Shown when the service
manual has additional
instructions or information.
0: Shown when there is more
information on another page —
“see page.”
Vehicle Symbol Chart
Here are some additional
symbols that may be found on
the vehicle and what they
mean. See the features in this
manual for information.
u: Air Conditioning System
G:Air Conditioning
Refrigerant Oil
9: Airbag Readiness Light
!:Antilock Brake
System (ABS)
$: Brake System Warning
Light
9: Dispose of Used
Components Properly
P: Do Not Apply High
Pressure Water
B: Engine Coolant
Temperature
_: Flame/Fire Prohibited
H: Flammable
[:Forward Collision Alert
R:Fuse Block Cover Lock
Location
+: Fuses
j:ISOFIX/LATCH System
Child Restraints
Q: Keep Fuse Block Covers
Properly Installed
|: Lane Change Alert
@:Lane Departure Warning
A:Lane Keep Assist
Page 7 of 507

Cadillac XT6 Owner Manual (GMNA-Localizing-U.S./Canada-16405819) -
2023 - CRC - 3/22/22
6 Introduction
1. Air Vents0236.
2. Exterior Lamp Controls 0156.
Turn Signal Lever. See
Turn and Lane-Change
Signals 0160.
IntelliBeam System Button
(If Equipped). See Exterior
Lamp Controls 0156.
3. Instrument Cluster 0127.
Driver Information Center
(DIC) Display. See Driver
Information Center (DIC)
0 144.
4. Windshield Wiper/Washer 0118.
Rear Window Wiper/
Washer 0120.
5. ENGINE START/STOP Button. See Ignition
Positions 0257.
6. Park Assist Button. See Park Assist 0318.
Automatic Parking Assist
(APA) Button. See Park
Assist 0318. 7. Stop/Start Disable Switch.
See Stop/Start System
0259.
8. Light Sensor. See Automatic Headlamp
System 0159.
9. Hazard Warning Flashers 0160.
Lane Keep Assist (LKA)
0 338 (If Equipped).
10. Infotainment Controls. See Overview 0165.
11. Heated and Ventilated Front Seats 054 (If
Equipped).
12. Dual Automatic Climate Control System 0228.
13. MODE Switch. See Driver Mode Control 0278.
Traction Control/
Electronic Stability Control
0 276.
14. Infotainment Controls. See Overview 0165.
15. Shift Lever. See Automatic Transmission 0266. 16. Steering Wheel Controls
0167.
17. Steering Wheel Controls 0167.
Driver Information Center
(DIC) Controls. See Driver
Information Center (DIC)
0 144.
18. Horn 0118.
19. Steering Wheel Adjustment 0117 (Out
of View).
20. Forward Collision Alert (FCA) System 0326 (If
Equipped).
Heated Steering Wheel
0 118 (If Equipped).
21. Cruise Control 0280.
Adaptive Cruise Control
(Advanced) 0283 (If
Equipped).
Phone Button. See
Steering Wheel Controls
0 167.
Page 17 of 507

Cadillac XT6 Owner Manual (GMNA-Localizing-U.S./Canada-16405819) -
2023 - CRC - 3/23/22
16 Keys, Doors, and Windows
4. Place the new remote keyinto the remote key
pocket. The remote key
pocket is inside the center
console storage area
between the driver and
front passenger seats. The
storage area will need to
be opened and the storage
tray lifted up to access the
remote key pocket.
5. Press ENGINE START/ STOP. When the remote
key is learned the DIC
display will show that it is
ready to program the next
remote key. 6. Remove the remote key
from the remote key
pocket and press the
remote key
KorQbutton.
To program additional
remote keys, repeat
Steps 4–6.
When all additional remote
keys are programmed,
press and hold ENGINE
START/STOP for
12 seconds to exit
programming mode.
7. Return the key back into the remote key.
8. Replace the key lock cylinder cap. See Door
Locks 020.
Starting the Vehicle with a
Low Remote Key Battery
When the vehicle is started,
if the remote key battery is
depleted, there is signal
interference, or the remote
key has been idle for a while,
the DIC may display NO
REMOTE DETECTED or NO
REMOTE KEY WAS DETECTED PLACE KEY IN
TRANSMITTER POCKET
THEN START YOUR VEHICLE.
For improved vehicle security,
the remote key is equipped
with a motion sensor. First,
move the remote key slightly
and try starting the vehicle.
If the vehicle still does not
start, and the DIC displays the
same warnings above, follow
the steps shown below.
To start the vehicle:
1. Open the center console storage area and the
storage tray.
Page 38 of 507

Cadillac XT6 Owner Manual (GMNA-Localizing-U.S./Canada-16405819) -
2023 - CRC - 3/23/22
Keys, Doors, and Windows 37
Exterior Mirrors
Convex Mirrors
{Warning
A convex mirror can make
things, like other vehicles,
look farther away than they
really are. If you cut too
sharply into the right lane,
you could hit a vehicle on
the right. Check the inside
mirror or glance over your
shoulder before changing
lanes.
The passenger side mirror is
convex shaped. A convex
mirror surface is curved so
more can be seen from the
driver seat.
Power Mirrors
To adjust each mirror: 1. Press
jor|to select the
driver or passenger side
mirror. The indicator light
will illuminate.
2. Press the arrows on the control pad to move the
mirror in the desired
direction.
3. Adjust each outside mirror so that a little of the
vehicle and the area
behind it can be seen. 4. Press
jor|again to
deselect the mirror.
Memory Mirrors
The vehicle may have memory
mirrors. See Memory Seats
0 50.
Lane Change Alert (LCA)
The vehicle may have LCA.
See Lane Change Alert (LCA)
0 336.
Folding Mirrors
Manual Folding Mirrors
If equipped, manually fold the
mirrors inward toward the
vehicle to prevent damage
when going through an
automatic car wash. Push the
mirror outward to return it to
the original position.
Page 43 of 507
Cadillac XT6 Owner Manual (GMNA-Localizing-U.S./Canada-16405819) -
2023 - CRC - 3/23/22
42 Keys, Doors, and Windows
may result in a pulsing sound
when one window is down and
the other three are up. To
reduce the sound, open
another window or the
sunroof, if equipped.
Power Windows
{Warning
Children could be seriously
injured or killed if caught in
the path of a closing
window. Never leave the
remote key in a vehicle with
children. When there are
children in the rear seat, use
the window lockout switch
to prevent operation of the
windows. See Keys08.
The power windows work
when the ignition is on, in
accessory mode, or when
Retained Accessory Power
(RAP) is active. See Retained
Accessory Power (RAP) 0263.
Using the window switch,
press to open or pull to close
the window.
The windows may be
temporarily disabled if they
are used repeatedly within a
short time.
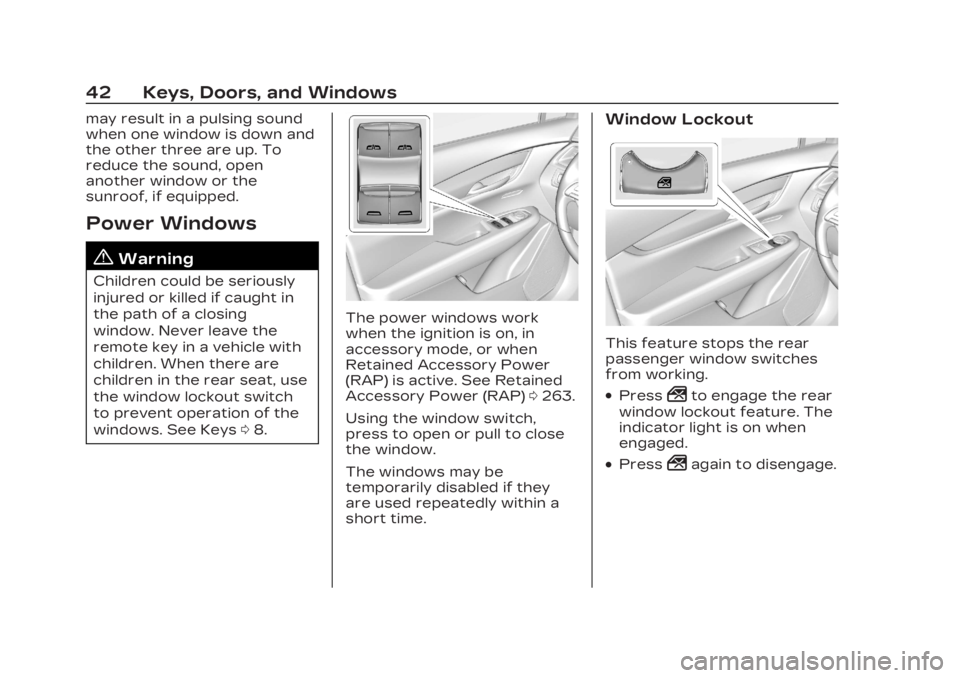
Window Lockout
This feature stops the rear
passenger window switches
from working.
.Press2to engage the rear
window lockout feature. The
indicator light is on when
engaged.
.Press2again to disengage.
Page 55 of 507

Cadillac XT6 Owner Manual (GMNA-Localizing-U.S./Canada-16405819) -
2023 - CRC - 3/22/22
54 Seats and Restraints
Heated and
Ventilated Front
Seats
{Warning
If temperature change or
pain to the skin cannot be
felt, the seat heater may
cause burns. To reduce the
risk of burns, use care when
using the seat heater,
especially for long periods of
time. Do not place anything
on the seat that insulates
against heat, such as a
blanket, cushion, cover,
or similar item. This may
cause the seat heater to
overheat. An overheated
seat heater may cause a
burn or may damage
the seat.
Heated and Ventilated Seat
Buttons Shown, Heated Seat Buttons Similar
If equipped, the buttons are
near the climate controls on
the center stack. To operate,
the engine must be running.
Press
MorLto heat the
driver or passenger seatback
and cushion.
Press
Cor{, if equipped, to
ventilate the driver or
passenger seat. A ventilated
seat has a fan that pulls or
pushes air through the seat.
The air is not cooled. When this feature is off, the
heated and ventilated seat
symbols on the buttons are
white. When a heated seat is
turned on, the symbol turns
red. When a ventilated seat is
turned on, the symbol
turns blue.
Press the button once for the
highest setting. With each
press of the button, the seat
will change to the next lower
setting, and then to the off
setting. The indicator lights
next to the buttons indicate
three for the highest setting
and one for the lowest. If the
heated seats are on high, the
level may automatically be
lowered after approximately
30 minutes.
The passenger seat may take
longer to heat up.
Auto Heated and Ventilated
Seats
If equipped, when the vehicle
is on, this feature will
automatically activate the
Page 60 of 507

Cadillac XT6 Owner Manual (GMNA-Localizing-U.S./Canada-16405819) -
2023 - CRC - 3/22/22
Seats and Restraints 59
If available, the buttons are on
the rear of the center console.
With the engine running, press
MorLto heat the left or right
outboard seat cushion. An
indicator on the climate
control display appears when
this feature is on.
This feature turns on at the
highest setting. With each
press of the button, the
heated seat changes to the
next lower setting, and then
the off setting. Three lights
indicate the highest setting,
and one light indicates the lowest. If the heated seats are
on high, the level may
automatically be lowered after
approximately 30 minutes.
Third Row Seats
{Warning
Using the third row seating
position while the second
row is folded, or pushed
forward in the entry
position, could cause injury
in a sudden stop or crash.
Be sure to return the seat to
the passenger seating
position. Push and pull on
the seat to make sure it is
locked into place.
Caution
Folding a rear seat with the
seat belts still fastened may
cause damage to the seat or
the seat belts. Always
unbuckle the seat belts and
(Continued)
Caution (Continued)
return them to their normal
stowed position before
folding a rear seat.
Power Seatback Folding
(If Equipped)
1. Remove objects on thefloor in front of or on the
second row seat, or in the
seat tracks on the floor.
2. If the second row seat is in the full rear position, adjust
it forward to allow the
third row seat to fold
fully flat.
Page 71 of 507
Cadillac XT6 Owner Manual (GMNA-Localizing-U.S./Canada-16405819) -
2023 - CRC - 3/22/22
70 Seats and Restraints
Seat Belt Extender
If the vehicle's seat belt will
fasten around you, you should
use it.
But if a seat belt is not long
enough, your dealer will order
you an extender. Only a GM
dealer issued extender should
be used. When you go in to
order it, take the heaviest coat
you will wear, so the extender
will be long enough for you. To
help avoid personal injury, do
not let someone else use it,
and use it only for the seat it is
made to fit. The extender has
been designed for adults.
Never use it for securing child
restraints. For more
information on the proper use
and fit of seat belt extenders
see the instruction sheet that
comes with the extender.
Safety System Check
Periodically check the seat
belt reminder, seat belts,
buckles, latch plates,
retractors, shoulder beltheight adjusters (if equipped),
and seat belt anchorages to
make sure they are all in
working order. Look for any
other loose or damaged seat
belt system parts that might
keep a seat belt system from
performing properly. See your
dealer to have it repaired.
Torn, frayed, or twisted seat
belts may not protect you in a
crash. Torn or frayed seat
belts can rip apart under
impact forces. If a belt is torn
or frayed, have it replaced
immediately. If a belt is
twisted, it may be possible to
untwist by reversing the latch
plate on the webbing. If the
twist cannot be corrected, ask
your dealer to fix it.
Make sure the seat belt
reminder light is working. See
Seat Belt Reminders
0132.
Keep seat belts clean and dry.
See Seat Belt Care 070.
Seat Belt Care
Keep belts clean and dry. Seat belts should be properly
cared for and maintained.
Seat belt hardware should be
kept dry and free of dust or
debris. As necessary, exterior
hard surfaces and seat belt
webbing may be lightly
cleaned with mild soap and
water. Ensure there is not
excessive dust or debris in the
mechanism. If dust or debris
exists in the system please
see the dealer. Parts may
need to be replaced to ensure
proper functionality of the
system.
{Warning
Do not bleach or dye seat
belt webbing. It may severely
weaken the webbing. In a
crash, they might not be
able to provide adequate
protection. Clean and rinse
seat belt webbing only with
mild soap and lukewarm
water. Allow the webbing
to dry.
Page 72 of 507
Cadillac XT6 Owner Manual (GMNA-Localizing-U.S./Canada-16405819) -
2023 - CRC - 3/22/22
Seats and Restraints 71
Replacing Seat Belt
System Parts after a
Crash
{Warning
A crash can damage the
seat belt system in the
vehicle. A damaged seat belt
system may not properly
protect the person using it,
resulting in serious injury or
even death in a crash. To
help make sure the seat belt
systems are working
properly after a crash, have
them inspected and any
necessary replacements
made as soon as possible.
After a minor crash,
replacement of seat belts may
not be necessary. But the seat
belt assemblies that were
used during any crash may
have been stressed or
damaged. See your dealer to
have the seat belt assemblies
inspected or replaced. New parts and repairs may be
necessary even if the seat belt
system was not being used at
the time of the crash.
Have the seat belt
pretensioners checked if the
vehicle has been in a crash,
or if the airbag readiness light
stays on after you start the
vehicle or while you are
driving. See Airbag Readiness
Light
0132.
Airbag System
The vehicle has the following
airbags:
.A frontal airbag for the
driver
.A frontal airbag for the front
outboard passenger
.A knee airbag for the driver
.A seat-mounted side impact
airbag for the driver
.A seat-mounted side impact
airbag for the front outboard
passenger
.A roof-rail airbag for the
driver and for the second
and third row passengers
seated directly behind the
driver
.A roof-rail airbag for the
front outboard passenger
and for the second and third
row passengers seated
directly behind the front
outboard passenger
All vehicle airbags have the
word AIRBAG on the trim or
on a label near the deployment
opening.
For frontal airbags, the word
AIRBAG is on the center of the
steering wheel for the driver
and on the instrument panel
for the front outboard
passenger.
For knee airbags, the word
AIRBAG is on the lower part of
the instrument panel.