display CADILLAC XTS 2014 Workshop Manual
[x] Cancel search | Manufacturer: CADILLAC, Model Year: 2014, Model line: XTS, Model: CADILLAC XTS 2014Pages: 412, PDF Size: 4.65 MB
Page 182 of 412
Black plate (2,1)Cadillac XTS Owner Manual (GMNA-Localizing-U.S./Canada-6006999) -
2014 - CRC - 9/11/13
8-2 Climate Controls
7. Rear Window Defogger
8. Recirculation
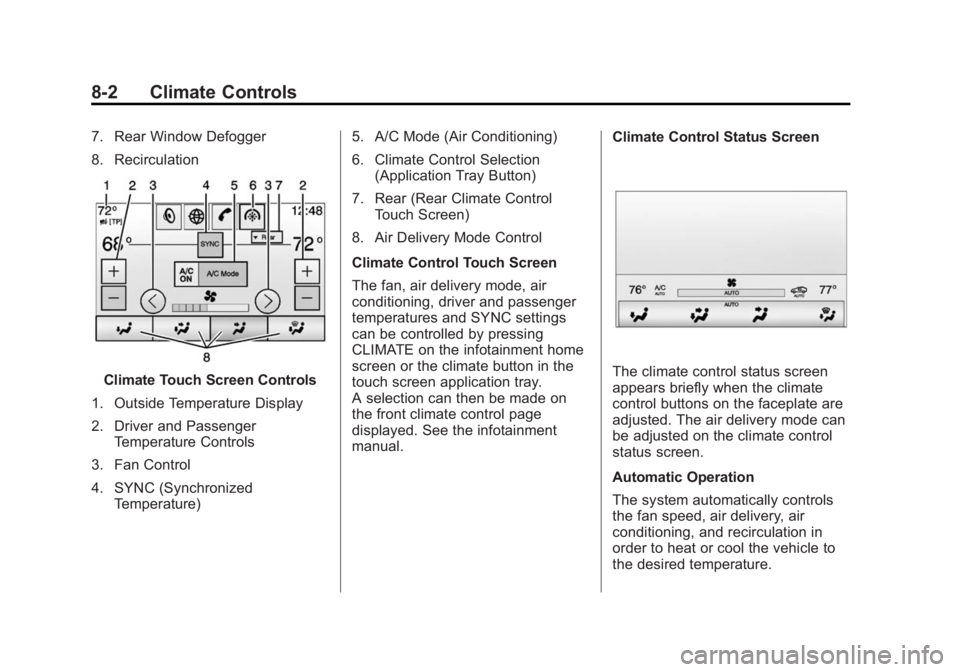
Climate Touch Screen Controls
1. Outside Temperature Display
2. Driver and Passenger Temperature Controls
3. Fan Control
4. SYNC (Synchronized Temperature) 5. A/C Mode (Air Conditioning)
6. Climate Control Selection
(Application Tray Button)
7. Rear (Rear Climate Control Touch Screen)
8. Air Delivery Mode Control
Climate Control Touch Screen
The fan, air delivery mode, air
conditioning, driver and passenger
temperatures and SYNC settings
can be controlled by pressing
CLIMATE on the infotainment home
screen or the climate button in the
touch screen application tray.
A selection can then be made on
the front climate control page
displayed. See the infotainment
manual. Climate Control Status ScreenThe climate control status screen
appears briefly when the climate
control buttons on the faceplate are
adjusted. The air delivery mode can
be adjusted on the climate control
status screen.
Automatic Operation
The system automatically controls
the fan speed, air delivery, air
conditioning, and recirculation in
order to heat or cool the vehicle to
the desired temperature.
Page 183 of 412
Black plate (3,1)Cadillac XTS Owner Manual (GMNA-Localizing-U.S./Canada-6006999) -
2014 - CRC - 9/11/13
Climate Controls 8-3
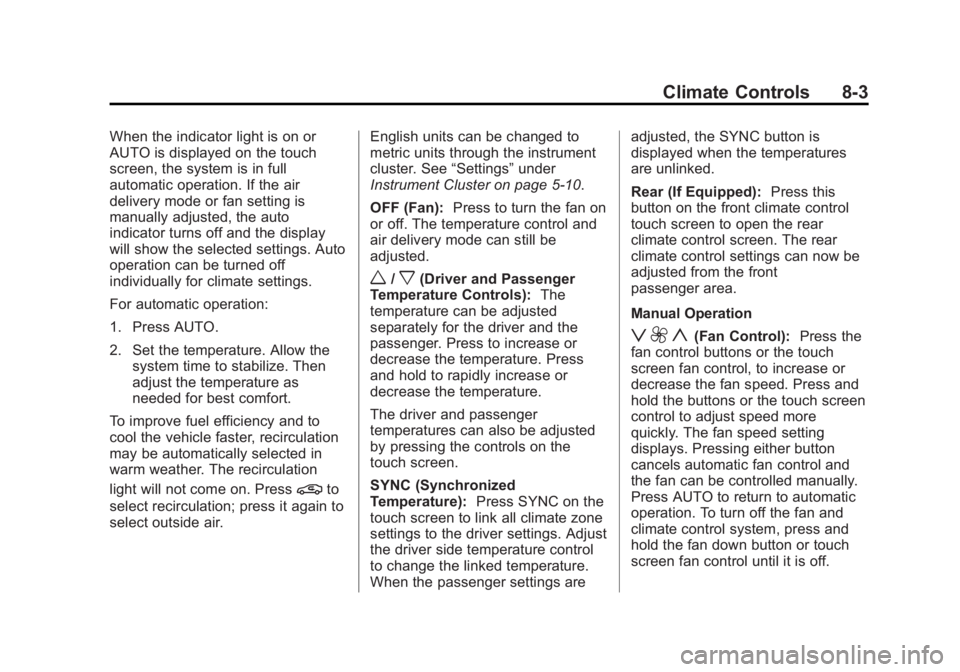
When the indicator light is on or
AUTO is displayed on the touch
screen, the system is in full
automatic operation. If the air
delivery mode or fan setting is
manually adjusted, the auto
indicator turns off and the display
will show the selected settings. Auto
operation can be turned off
individually for climate settings.
For automatic operation:
1. Press AUTO.
2. Set the temperature. Allow thesystem time to stabilize. Then
adjust the temperature as
needed for best comfort.
To improve fuel efficiency and to
cool the vehicle faster, recirculation
may be automatically selected in
warm weather. The recirculation
light will not come on. Press
@to
select recirculation; press it again to
select outside air. English units can be changed to
metric units through the instrument
cluster. See
“Settings”under
Instrument Cluster on page 5-10.
OFF (Fan): Press to turn the fan on
or off. The temperature control and
air delivery mode can still be
adjusted.
w/x(Driver and Passenger
Temperature Controls): The
temperature can be adjusted
separately for the driver and the
passenger. Press to increase or
decrease the temperature. Press
and hold to rapidly increase or
decrease the temperature.
The driver and passenger
temperatures can also be adjusted
by pressing the controls on the
touch screen.
SYNC (Synchronized
Temperature): Press SYNC on the
touch screen to link all climate zone
settings to the driver settings. Adjust
the driver side temperature control
to change the linked temperature.
When the passenger settings are adjusted, the SYNC button is
displayed when the temperatures
are unlinked.
Rear (If Equipped):
Press this
button on the front climate control
touch screen to open the rear
climate control screen. The rear
climate control settings can now be
adjusted from the front
passenger area.
Manual Operation
z 9 y(Fan Control): Press the
fan control buttons or the touch
screen fan control, to increase or
decrease the fan speed. Press and
hold the buttons or the touch screen
control to adjust speed more
quickly. The fan speed setting
displays. Pressing either button
cancels automatic fan control and
the fan can be controlled manually.
Press AUTO to return to automatic
operation. To turn off the fan and
climate control system, press and
hold the fan down button or touch
screen fan control until it is off.
Page 184 of 412
Black plate (4,1)Cadillac XTS Owner Manual (GMNA-Localizing-U.S./Canada-6006999) -
2014 - CRC - 9/11/13
8-4 Climate Controls
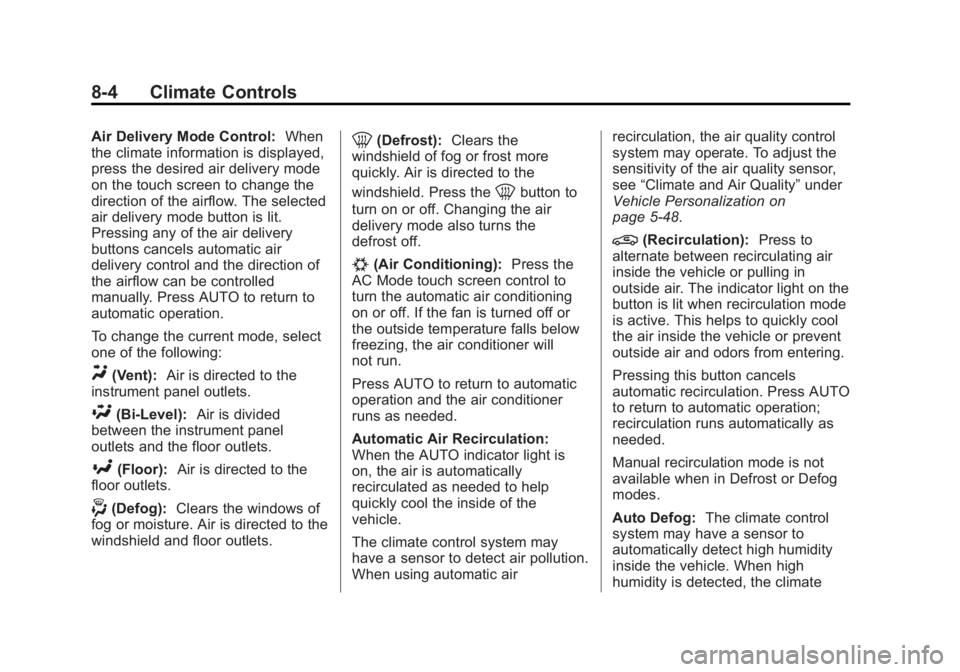
Air Delivery Mode Control:When
the climate information is displayed,
press the desired air delivery mode
on the touch screen to change the
direction of the airflow. The selected
air delivery mode button is lit.
Pressing any of the air delivery
buttons cancels automatic air
delivery control and the direction of
the airflow can be controlled
manually. Press AUTO to return to
automatic operation.
To change the current mode, select
one of the following:
Y(Vent): Air is directed to the
instrument panel outlets.
\(Bi-Level): Air is divided
between the instrument panel
outlets and the floor outlets.
[(Floor): Air is directed to the
floor outlets.
-(Defog): Clears the windows of
fog or moisture. Air is directed to the
windshield and floor outlets.
0(Defrost): Clears the
windshield of fog or frost more
quickly. Air is directed to the
windshield. Press the
0button to
turn on or off. Changing the air
delivery mode also turns the
defrost off.
#(Air Conditioning): Press the
AC Mode touch screen control to
turn the automatic air conditioning
on or off. If the fan is turned off or
the outside temperature falls below
freezing, the air conditioner will
not run.
Press AUTO to return to automatic
operation and the air conditioner
runs as needed.
Automatic Air Recirculation:
When the AUTO indicator light is
on, the air is automatically
recirculated as needed to help
quickly cool the inside of the
vehicle.
The climate control system may
have a sensor to detect air pollution.
When using automatic air recirculation, the air quality control
system may operate. To adjust the
sensitivity of the air quality sensor,
see
“Climate and Air Quality” under
Vehicle Personalization on
page 5-48.
@(Recirculation): Press to
alternate between recirculating air
inside the vehicle or pulling in
outside air. The indicator light on the
button is lit when recirculation mode
is active. This helps to quickly cool
the air inside the vehicle or prevent
outside air and odors from entering.
Pressing this button cancels
automatic recirculation. Press AUTO
to return to automatic operation;
recirculation runs automatically as
needed.
Manual recirculation mode is not
available when in Defrost or Defog
modes.
Auto Defog: The climate control
system may have a sensor to
automatically detect high humidity
inside the vehicle. When high
humidity is detected, the climate
Page 187 of 412
Black plate (7,1)Cadillac XTS Owner Manual (GMNA-Localizing-U.S./Canada-6006999) -
2014 - CRC - 9/11/13
Climate Controls 8-7
4.O(On/Off)
5. Temperature Control
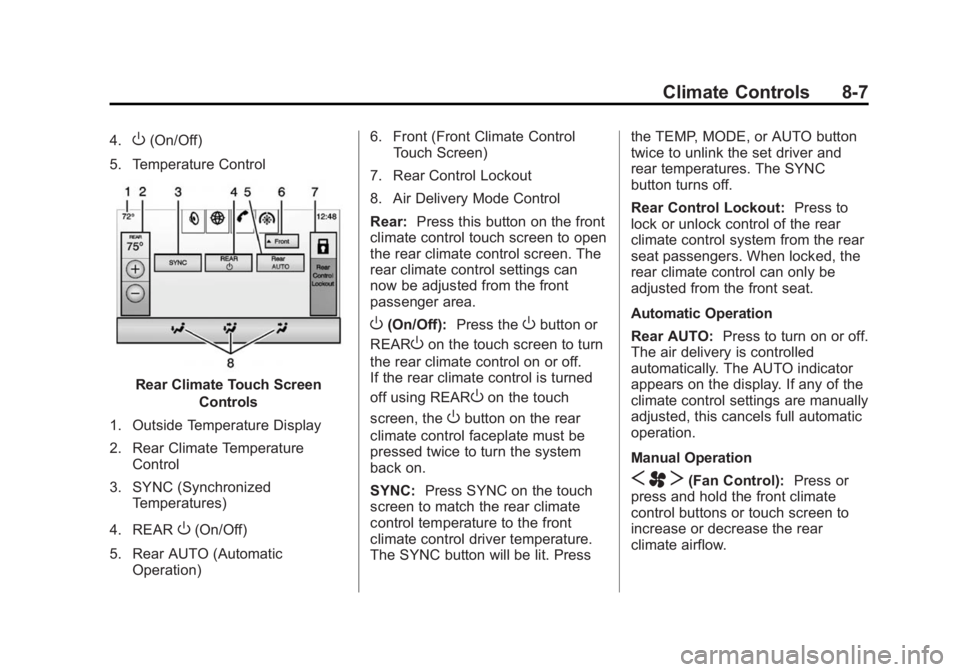
Rear Climate Touch Screen Controls
1. Outside Temperature Display
2. Rear Climate Temperature Control
3. SYNC (Synchronized Temperatures)
4. REAR
O(On/Off)
5. Rear AUTO (Automatic Operation) 6. Front (Front Climate Control
Touch Screen)
7. Rear Control Lockout
8. Air Delivery Mode Control
Rear: Press this button on the front
climate control touch screen to open
the rear climate control screen. The
rear climate control settings can
now be adjusted from the front
passenger area.
O(On/Off): Press theObutton or
REAR
Oon the touch screen to turn
the rear climate control on or off.
If the rear climate control is turned
off using REAR
Oon the touch
screen, the
Obutton on the rear
climate control faceplate must be
pressed twice to turn the system
back on.
SYNC: Press SYNC on the touch
screen to match the rear climate
control temperature to the front
climate control driver temperature.
The SYNC button will be lit. Press the TEMP, MODE, or AUTO button
twice to unlink the set driver and
rear temperatures. The SYNC
button turns off.
Rear Control Lockout:
Press to
lock or unlock control of the rear
climate control system from the rear
seat passengers. When locked, the
rear climate control can only be
adjusted from the front seat.
Automatic Operation
Rear AUTO: Press to turn on or off.
The air delivery is controlled
automatically. The AUTO indicator
appears on the display. If any of the
climate control settings are manually
adjusted, this cancels full automatic
operation.
Manual Operation
S A T(Fan Control): Press or
press and hold the front climate
control buttons or touch screen to
increase or decrease the rear
climate airflow.
Page 206 of 412
Black plate (16,1)Cadillac XTS Owner Manual (GMNA-Localizing-U.S./Canada-6006999) -
2014 - CRC - 9/11/13
9-16 Driving and Operating
Pressing the button cycles it through
three modes: ACC/ACCESSORY,
ON/RUN/START, and Stopping the
Engine/OFF.
The transmitter must be in the
vehicle for the system to operate.
If the pushbutton start is not
working, the vehicle may be near a
strong radio antenna signal causing
interference to the remote keyless
access system. SeeRemote
Keyless Entry (RKE) System
Operation on page 2-3.
To shift out of P (Park), the vehicle
must be in ON/RUN and the brake
pedal must be applied.
Stopping the Engine/OFF (No
Indicator Lights): When the
vehicle is stopped, press the
ENGINE START/STOP button once
to turn the engine off.
If the vehicle is in P (Park), the
ignition will turn off, and Retained
Accessory Power (RAP) will remain
active. See Retained Accessory
Power (RAP) on page 9-20. If the vehicle is not in P (Park), the
ignition will return to ACC/
ACCESSORY and display the
message SHIFT TO PARK in the
Driver Information Center (DIC).
See
Transmission Messages on
page 5-47. When the vehicle is
shifted into P (Park), the ignition
system will switch to OFF.
Do not turn the engine off when the
vehicle is moving. This will cause a
loss of power assist in the brake
and steering systems and disable
the airbags.
If the vehicle must be shut off in an
emergency:
1. Brake using a firm and steady pressure. Do not pump the
brakes repeatedly. This may
deplete power assist, requiring
increased brake pedal force.
2. Shift the vehicle to N (Neutral). This can be done while the
vehicle is moving. After shifting
to N (Neutral), firmly apply the
brakes and steer the vehicle to a
safe location. 3. Come to a complete stop, shift
to P (Park), and turn the ignition
off. On vehicles with an
automatic transmission, the shift
lever must be in P (Park) to turn
the ignition to the OFF position.
4. Set the parking brake. See Electric Parking Brake on
page 9-27.
{Warning
Turning off the vehicle while
moving may cause loss of power
assist in the brake and steering
systems and disable the airbags.
While driving, only shut the
vehicle off in an emergency.
If the vehicle cannot be pulled over,
and must be shut off while driving,
press and hold the ENGINE START/
STOP button for longer than
two seconds, or press twice in
five seconds.
Page 208 of 412

Black plate (18,1)Cadillac XTS Owner Manual (GMNA-Localizing-U.S./Canada-6006999) -
2014 - CRC - 9/11/13
9-18 Driving and Operating
Starting Procedure
1. With the keyless access system,the transmitter must be in the
vehicle. Put your foot on the
brake pedal and push the
ENGINE START/STOP button.
When the engine begins
cranking, let go of the button.
The idle speed will go down as
the engine gets warm. Do not
race the engine immediately
after starting it. Operate the
engine and transmission gently
to allow the oil to warm up and
lubricate all moving parts.
If the transmitter is not in the
vehicle or something is
interfering with the transmitter,
the Driver Information Center
(DIC) will display a message.
See Key and Lock Messages on
page 5-40. If the battery in the Remote
Keyless Entry (RKE) transmitter
needs replacing, the DIC will
display a message. The vehicle
can still be driven. See
“Starting
the Vehicle with a Low
Transmitter Battery” inRemote
Keyless Entry (RKE) System
Operation on page 2-3.
The vehicle has a
Computer-Controlled Cranking
System. This feature assists in
starting the engine and protects
components. If the ENGINE
START/STOP button is pressed,
and then released when the
engine begins cranking, the
engine will continue cranking for
a few seconds or until the
vehicle starts. If the engine does
not start and the button is
pressed for many seconds,
cranking will be stopped after
15 seconds to prevent cranking
motor damage. To prevent gear
damage, this system also
prevents cranking if the
engine is already running. Engine cranking can be stopped
by pressing the ENGINE
START/STOP button a
second time.
{Caution
Cranking the engine for long
periods of time, by pressing the
ENGINE START/STOP button
immediately after cranking has
ended, can overheat and damage
the cranking motor, and drain the
battery. Wait at least 15 seconds
between each try, to let the
cranking motor cool down.
2. If the engine does not start after five to 10 seconds, especially in
very cold weather (below −18°C
or 0°F), it could be flooded with
too much gasoline. Try pushing
the accelerator pedal all the way
to the floor and holding it there
as you press the ENGINE
START/STOP button, for up
to a maximum of 15 seconds.
Page 217 of 412
Black plate (27,1)Cadillac XTS Owner Manual (GMNA-Localizing-U.S./Canada-6006999) -
2014 - CRC - 9/11/13
Driving and Operating 9-27
Electric Parking Brake
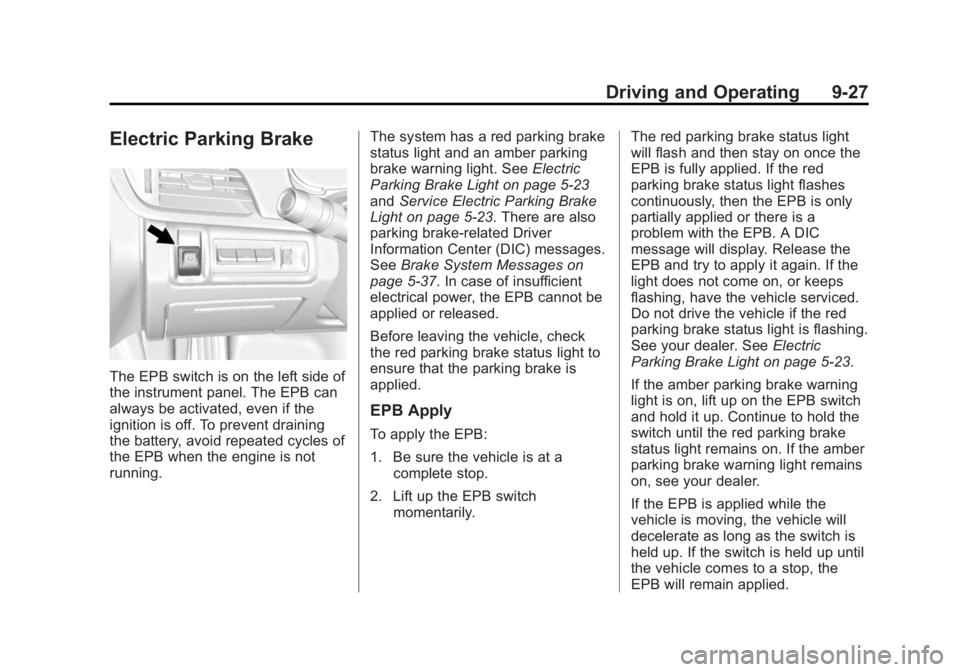
The EPB switch is on the left side of
the instrument panel. The EPB can
always be activated, even if the
ignition is off. To prevent draining
the battery, avoid repeated cycles of
the EPB when the engine is not
running.The system has a red parking brake
status light and an amber parking
brake warning light. See
Electric
Parking Brake Light on page 5-23
and Service Electric Parking Brake
Light on page 5-23. There are also
parking brake-related Driver
Information Center (DIC) messages.
See Brake System Messages on
page 5-37. In case of insufficient
electrical power, the EPB cannot be
applied or released.
Before leaving the vehicle, check
the red parking brake status light to
ensure that the parking brake is
applied.
EPB Apply
To apply the EPB:
1. Be sure the vehicle is at a complete stop.
2. Lift up the EPB switch momentarily. The red parking brake status light
will flash and then stay on once the
EPB is fully applied. If the red
parking brake status light flashes
continuously, then the EPB is only
partially applied or there is a
problem with the EPB. A DIC
message will display. Release the
EPB and try to apply it again. If the
light does not come on, or keeps
flashing, have the vehicle serviced.
Do not drive the vehicle if the red
parking brake status light is flashing.
See your dealer. See
Electric
Parking Brake Light on page 5-23.
If the amber parking brake warning
light is on, lift up on the EPB switch
and hold it up. Continue to hold the
switch until the red parking brake
status light remains on. If the amber
parking brake warning light remains
on, see your dealer.
If the EPB is applied while the
vehicle is moving, the vehicle will
decelerate as long as the switch is
held up. If the switch is held up until
the vehicle comes to a stop, the
EPB will remain applied.
Page 220 of 412
Black plate (30,1)Cadillac XTS Owner Manual (GMNA-Localizing-U.S./Canada-6006999) -
2014 - CRC - 9/11/13
9-30 Driving and Operating
It is recommended to leave both
systems on for normal driving
conditions, but it may be necessary
to turn TCS off if the vehicle gets
stuck in sand, mud, ice, or snow.
SeeIf the Vehicle Is Stuck on
page 9-10 and“Turning the
Systems Off and On” later in this
section.
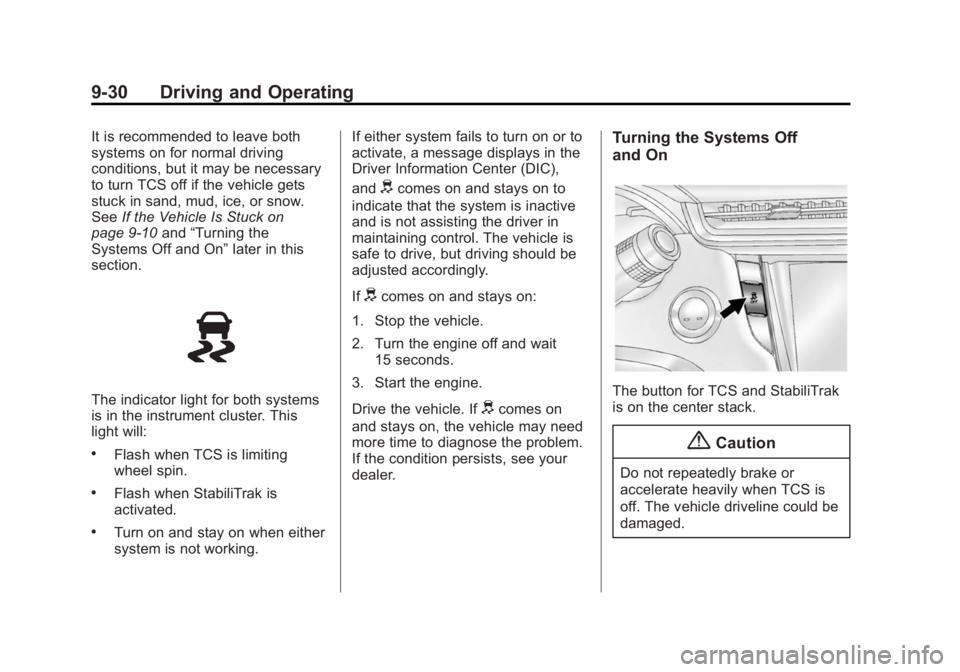
The indicator light for both systems
is in the instrument cluster. This
light will:
.Flash when TCS is limiting
wheel spin.
.Flash when StabiliTrak is
activated.
.Turn on and stay on when either
system is not working. If either system fails to turn on or to
activate, a message displays in the
Driver Information Center (DIC),
and
dcomes on and stays on to
indicate that the system is inactive
and is not assisting the driver in
maintaining control. The vehicle is
safe to drive, but driving should be
adjusted accordingly.
If
dcomes on and stays on:
1. Stop the vehicle.
2. Turn the engine off and wait 15 seconds.
3. Start the engine.
Drive the vehicle. If
dcomes on
and stays on, the vehicle may need
more time to diagnose the problem.
If the condition persists, see your
dealer.
Turning the Systems Off
and On
The button for TCS and StabiliTrak
is on the center stack.
{Caution
Do not repeatedly brake or
accelerate heavily when TCS is
off. The vehicle driveline could be
damaged.
Page 221 of 412
Black plate (31,1)Cadillac XTS Owner Manual (GMNA-Localizing-U.S./Canada-6006999) -
2014 - CRC - 9/11/13
Driving and Operating 9-31
To turn off only TCS, press and
release the
gbutton. The Traction
Off Light
idisplays in the
instrument cluster and the
appropriate DIC message is
displayed. See Ride Control System
Messages on page 5-44. To turn
TCS on again, press and release
the
gbutton. The Traction Off
Light
idisplayed in the instrument
cluster will turn off and the
appropriate DIC message is
displayed.
If TCS is limiting wheel spin when
the
gbutton is pressed, the system
will not turn off until the wheels stop
spinning.
To turn off both TCS and StabiliTrak,
press and hold the
gbutton until
the Traction Off Light
iand
StabiliTrak Off Light
gcome on and
stay on in the instrument cluster.
The appropriate DIC message is
displayed. See Ride Control System
Messages on page 5-44. To turn TCS and StabiliTrak on again, press
and release the
gbutton. The
Traction Off Light
iand StabiliTrak
Off Light
gin the instrument cluster
turn off and the appropriate DIC
message is displayed.
Adding accessories can affect the
vehicle performance. See
Accessories and Modifications on
page 10-3.
Magnetic Ride Control
The Magnetic Ride Control monitors
the suspension system.
Based on road conditions, steering
wheel angle, and vehicle speed, the
system automatically adjusts to
provide the best handling while
providing a smooth ride. The Tour
and Sport Modes will feel similar on
a smooth road.
Tour: Use for normal city and
highway driving. This setting
provides a smooth, soft ride. Sport:
Use where road conditions
or personal preference demand
more control. This setting provides
more “feel,” or response to road
conditions.
The vehicle is normally in Tour
Mode. Sport Mode is engaged when
the shift lever is placed in M
(Manual Mode). When the shift lever
is placed in D (Drive) the system will
revert back to Tour Mode.
The Driver Information Center (DIC)
briefly displays the appropriate
message on vehicle startup or when
a new mode is selected. See Ride
Control System Messages on
page 5-44.
Limited-Slip Rear Axle
Vehicles with a limited-slip rear axle
can give more traction on snow,
mud, ice, sand or gravel. When
traction is low, this feature allows
the drive wheel with the most
traction to move the vehicle.
Page 223 of 412
Black plate (33,1)Cadillac XTS Owner Manual (GMNA-Localizing-U.S./Canada-6006999) -
2014 - CRC - 9/11/13
Driving and Operating 9-33
If the Traction Control/Electronic
Stability Control system begins to
limit wheel spin while using cruise
control, the cruise control
automatically disengages. See
Traction Control/Electronic Stability
Control on page 9-29. If a collision
alert occurs when cruise control is
activated, cruise control is
disengaged. SeeForward Collision
Alert (FCA) System on page 9-50.
When road conditions allow the
cruise control to be safely used, you
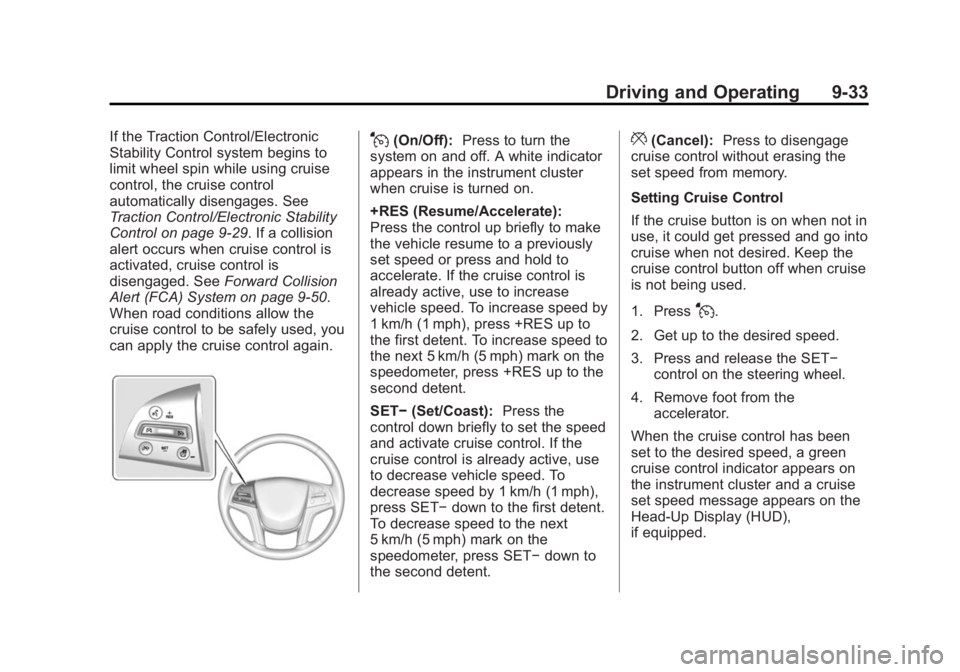
can apply the cruise control again.J(On/Off): Press to turn the
system on and off. A white indicator
appears in the instrument cluster
when cruise is turned on.
+RES (Resume/Accelerate):
Press the control up briefly to make
the vehicle resume to a previously
set speed or press and hold to
accelerate. If the cruise control is
already active, use to increase
vehicle speed. To increase speed by
1 km/h (1 mph), press +RES up to
the first detent. To increase speed to
the next 5 km/h (5 mph) mark on the
speedometer, press +RES up to the
second detent.
SET− (Set/Coast): Press the
control down briefly to set the speed
and activate cruise control. If the
cruise control is already active, use
to decrease vehicle speed. To
decrease speed by 1 km/h (1 mph),
press SET− down to the first detent.
To decrease speed to the next
5 km/h (5 mph) mark on the
speedometer, press SET− down to
the second detent.*(Cancel): Press to disengage
cruise control without erasing the
set speed from memory.
Setting Cruise Control
If the cruise button is on when not in
use, it could get pressed and go into
cruise when not desired. Keep the
cruise control button off when cruise
is not being used.
1. Press
J.
2. Get up to the desired speed.
3. Press and release the SET− control on the steering wheel.
4. Remove foot from the accelerator.
When the cruise control has been
set to the desired speed, a green
cruise control indicator appears on
the instrument cluster and a cruise
set speed message appears on the
Head-Up Display (HUD),
if equipped.