ECO mode CADILLAC XTS 2018 User Guide
[x] Cancel search | Manufacturer: CADILLAC, Model Year: 2018, Model line: XTS, Model: CADILLAC XTS 2018Pages: 370, PDF Size: 6.45 MB
Page 147 of 370
Cadillac XTS Owner Manual (GMNA-Localizing-U.S./Canada-11354412) -
2018 - crc - 11/16/17
146 INSTRUMENTS AND CONTROLS
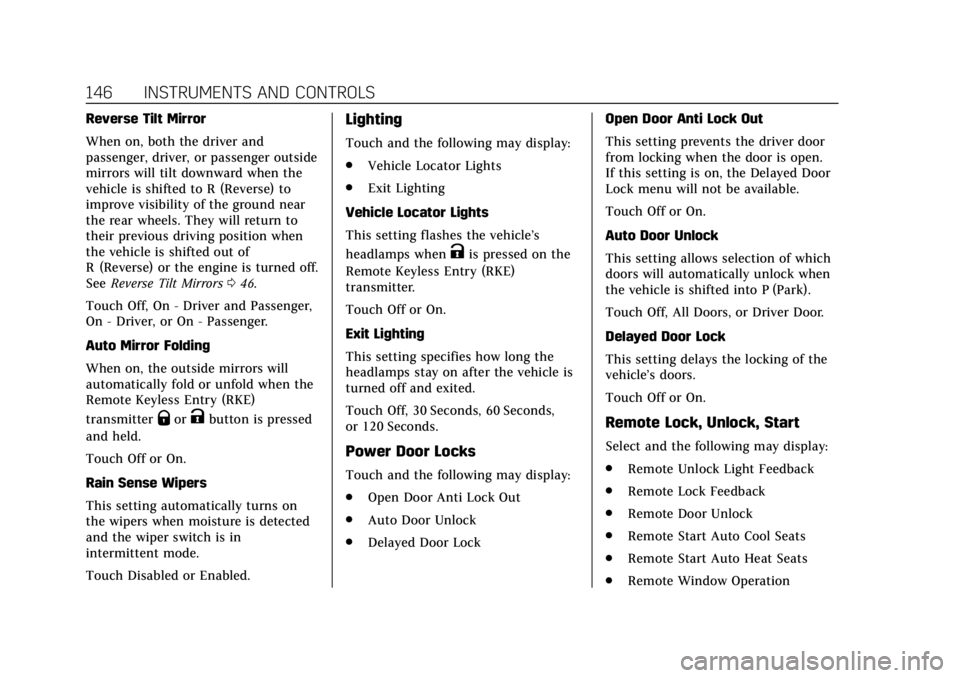
Reverse Tilt Mirror
When on, both the driver and
passenger, driver, or passenger outside
mirrors will tilt downward when the
vehicle is shifted to R (Reverse) to
improve visibility of the ground near
the rear wheels. They will return to
their previous driving position when
the vehicle is shifted out of
R (Reverse) or the engine is turned off.
SeeReverse Tilt Mirrors 046.
Touch Off, On - Driver and Passenger,
On - Driver, or On - Passenger.
Auto Mirror Folding
When on, the outside mirrors will
automatically fold or unfold when the
Remote Keyless Entry (RKE)
transmitter
QorKbutton is pressed
and held.
Touch Off or On.
Rain Sense Wipers
This setting automatically turns on
the wipers when moisture is detected
and the wiper switch is in
intermittent mode.
Touch Disabled or Enabled.
Lighting
Touch and the following may display:
. Vehicle Locator Lights
. Exit Lighting
Vehicle Locator Lights
This setting flashes the vehicle’s
headlamps when
Kis pressed on the
Remote Keyless Entry (RKE)
transmitter.
Touch Off or On.
Exit Lighting
This setting specifies how long the
headlamps stay on after the vehicle is
turned off and exited.
Touch Off, 30 Seconds, 60 Seconds,
or 120 Seconds.
Power Door Locks
Touch and the following may display:
. Open Door Anti Lock Out
. Auto Door Unlock
. Delayed Door Lock Open Door Anti Lock Out
This setting prevents the driver door
from locking when the door is open.
If this setting is on, the Delayed Door
Lock menu will not be available.
Touch Off or On.
Auto Door Unlock
This setting allows selection of which
doors will automatically unlock when
the vehicle is shifted into P (Park).
Touch Off, All Doors, or Driver Door.
Delayed Door Lock
This setting delays the locking of the
vehicle’s doors.
Touch Off or On.
Remote Lock, Unlock, Start
Select and the following may display:
.
Remote Unlock Light Feedback
. Remote Lock Feedback
. Remote Door Unlock
. Remote Start Auto Cool Seats
. Remote Start Auto Heat Seats
. Remote Window Operation
Page 166 of 370
Cadillac XTS Owner Manual (GMNA-Localizing-U.S./Canada-11354412) -
2018 - crc - 11/16/17
CLIMATE CONTROLS 165
Rear Climate Control
System
If equipped, the rear climate control
system is on the rear of the center
console. The settings can be adjusted
with the rear climate control buttons
and the rear climate display controls.
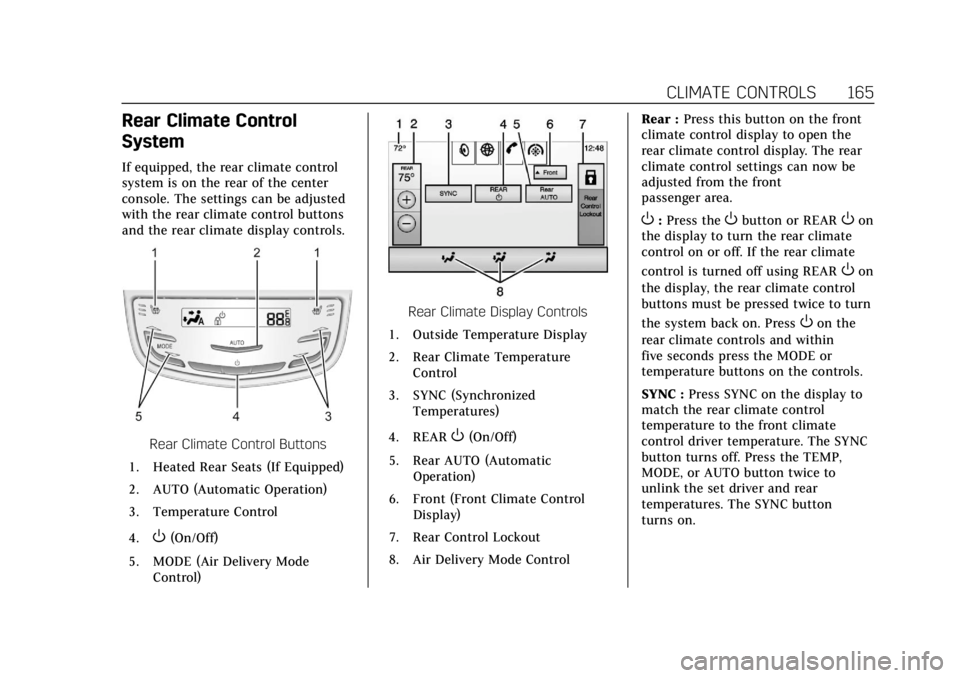
Rear Climate Control Buttons
1. Heated Rear Seats (If Equipped)
2. AUTO (Automatic Operation)
3. Temperature Control
4.
O(On/Off)
5. MODE (Air Delivery Mode Control)
Rear Climate Display Controls
1. Outside Temperature Display
2. Rear Climate Temperature Control
3. SYNC (Synchronized Temperatures)
4. REAR
O(On/Off)
5. Rear AUTO (Automatic Operation)
6. Front (Front Climate Control Display)
7. Rear Control Lockout
8. Air Delivery Mode Control Rear :
Press this button on the front
climate control display to open the
rear climate control display. The rear
climate control settings can now be
adjusted from the front
passenger area.
O: Press theObutton or REAROon
the display to turn the rear climate
control on or off. If the rear climate
control is turned off using REAR
Oon
the display, the rear climate control
buttons must be pressed twice to turn
the system back on. Press
Oon the
rear climate controls and within
five seconds press the MODE or
temperature buttons on the controls.
SYNC : Press SYNC on the display to
match the rear climate control
temperature to the front climate
control driver temperature. The SYNC
button turns off. Press the TEMP,
MODE, or AUTO button twice to
unlink the set driver and rear
temperatures. The SYNC button
turns on.
Page 170 of 370
Cadillac XTS Owner Manual (GMNA-Localizing-U.S./Canada-11354412) -
2018 - crc - 11/16/17
DRIVING AND OPERATING 169
Driving and
Operating
Driving Information
Distracted Driving . . . . . . . . . . . . . . . . 170
Defensive Driving . . . . . . . . . . . . . . . . 171
Drunk Driving . . . . . . . . . . . . . . . . . . . . 171
Control of a Vehicle . . . . . . . . . . . . . . 171
Braking . . . . . . . . . . . . . . . . . . . . . . . . . . . . 171
Steering . . . . . . . . . . . . . . . . . . . . . . . . . . . 171
Off-Road Recovery . . . . . . . . . . . . . . . . 173
Loss of Control . . . . . . . . . . . . . . . . . . . 173
Driving on Wet Roads . . . . . . . . . . . 173
Hill and Mountain Roads . . . . . . . . 174
Winter Driving . . . . . . . . . . . . . . . . . . . . 175
If the Vehicle Is Stuck . . . . . . . . . . . 176
Vehicle Load Limits . . . . . . . . . . . . . . 176
Starting and Operating
New Vehicle Break-In . . . . . . . . . . . . 180
Ignition Positions . . . . . . . . . . . . . . . . 181
Starting the Engine . . . . . . . . . . . . . . 182
Engine Heater . . . . . . . . . . . . . . . . . . . . 183
Retained AccessoryPower (RAP) . . . . . . . . . . . . . . . . . . . . 185
Shifting Into Park . . . . . . . . . . . . . . . . 185
Shifting out of Park . . . . . . . . . . . . . . 186 Parking over Things
That Burn . . . . . . . . . . . . . . . . . . . . . . . 186
Extended Parking . . . . . . . . . . . . . . . . . 186
Engine Exhaust
Engine Exhaust . . . . . . . . . . . . . . . . . . . 187
Running the Vehicle While Parked . . . . . . . . . . . . . . . . . . . . . . . . . . . 188
Automatic Transmission
Automatic Transmission . . . . . . . . . 188
Manual Mode . . . . . . . . . . . . . . . . . . . . . 190
Drive Systems
All-Wheel Drive . . . . . . . . . . . . . . . . . . 190
Brakes
Antilock Brake System (ABS) . . . . 191
Electric Parking Brake . . . . . . . . . . . . 191
Brake Assist . . . . . . . . . . . . . . . . . . . . . . . 193
Hill Start Assist (HSA) . . . . . . . . . . . 193
Ride Control Systems
Traction Control/ElectronicStability Control . . . . . . . . . . . . . . . . 193
Magnetic Ride Control . . . . . . . . . . . 195
Limited-Slip Rear Axle . . . . . . . . . . . 195
Automatic Level Control . . . . . . . . . 195
Cruise Control
Cruise Control . . . . . . . . . . . . . . . . . . . . 196
Adaptive Cruise Control . . . . . . . . . 198
Driver Assistance Systems
Driver Assistance Systems . . . . . . . 206
Assistance Systems for Parking or Backing . . . . . . . . . . . . . . . . . . . . . . . 207
Assistance Systems for Driving . . . . . . . . . . . . . . . . . . . . . . . . . . 213
Forward Collision Alert (FCA) System . . . . . . . . . . . . . . . . . . . . . . . . . . 213
Forward Automatic Braking (FAB) . . . . . . . . . . . . . . . . . . . 215
Side Blind Zone Alert (SBZA) . . . . 217
Lane Change Alert (LCA) . . . . . . . . 217
Lane Departure Warning (LDW) . . . . . . . . . . . . . . . . . 219
Lane Keep Assist (LKA) . . . . . . . . . . 220
Fuel
Fuel . . . . . . . . . . . . . . . . . . . . . . . . . . . . . . . 222
California Fuel Requirements . . . . 223
Fuels in Foreign Countries . . . . . . . 223
Fuel Additives . . . . . . . . . . . . . . . . . . . . 223
Filling the Tank . . . . . . . . . . . . . . . . . . 224
Filling a Portable Fuel Container . . . . . . . . . . . . . . . . . . . . . . . . 225
Trailer Towing
General Towing Information . . . . 226
Driving Characteristics andTowing Tips . . . . . . . . . . . . . . . . . . . . . 226
Trailer Towing . . . . . . . . . . . . . . . . . . . . 228
Towing Equipment . . . . . . . . . . . . . . . 229
Page 183 of 370
Cadillac XTS Owner Manual (GMNA-Localizing-U.S./Canada-11354412) -
2018 - crc - 11/16/17
182 DRIVING AND OPERATING
{Warning
Turning off the vehicle while
moving may cause loss of power
assist in the brake and steering
systems and disable the airbags.
While driving, only shut the vehicle
off in an emergency.
If the vehicle cannot be pulled over,
and must be shut off while driving,
press and hold ENGINE START/STOP
for longer than two seconds, or press
twice in five seconds.
ACC/ACCESSORY (Amber Indicator
Light) : This mode allows the use of
some electrical accessories when the
engine is off.
With the ignition off, pressing the
button one time without the brake
pedal applied will place the ignition
system in ACC/ACCESSORY.
The ignition will switch from ACC/
ACCESSORY to off after five minutes
to prevent battery rundown. ON/RUN/START (Green Indicator
Light) :
This mode is for driving and
starting. With the ignition off, and the
brake pedal applied, pressing ENGINE
START/STOP once will turn the
ignition on. Once engine cranking
begins, release the button. Engine
cranking will continue until the
engine starts. See Starting the Engine
0 182. The ignition will then
remain on.
Service Mode
This power mode is available for
service and diagnostics, and to verify
the proper operation of the
malfunction indicator lamp as may be
required for emission inspection
purposes. With the vehicle off, and the
brake pedal not applied, pressing and
holding the button for more than
five seconds will place the vehicle in
Service Mode. The instruments and
audio systems will operate as they do
in ON/RUN, but the vehicle will not be
able to be driven. The engine will not
start in Service Mode. Press the
button again to turn the vehicle off.
Starting the Engine
Move the shift lever to P (Park) or
N (Neutral). To restart the engine
when the vehicle is already moving,
use N (Neutral) only.
Caution
Do not try to shift to P (Park) if the
vehicle is moving. If you do, you
could damage the transmission.
Shift to P (Park) only when the
vehicle is stopped.
Caution
If the steering wheel is turned until
it reaches the end of its travel, and
is held in that position while
starting the vehicle, damage may
occur to the hydraulic power
steering system and there may be
loss of power steering assist.
Page 191 of 370
Cadillac XTS Owner Manual (GMNA-Localizing-U.S./Canada-11354412) -
2018 - crc - 11/16/17
190 DRIVING AND OPERATING
In M (Manual Mode) the transmission
will shift as an automatic until the
Tap Shift controls are used. Tap Shift
activates driver manual gear selection.
SeeManual Mode 0190.
Manual Mode
Tap Shift
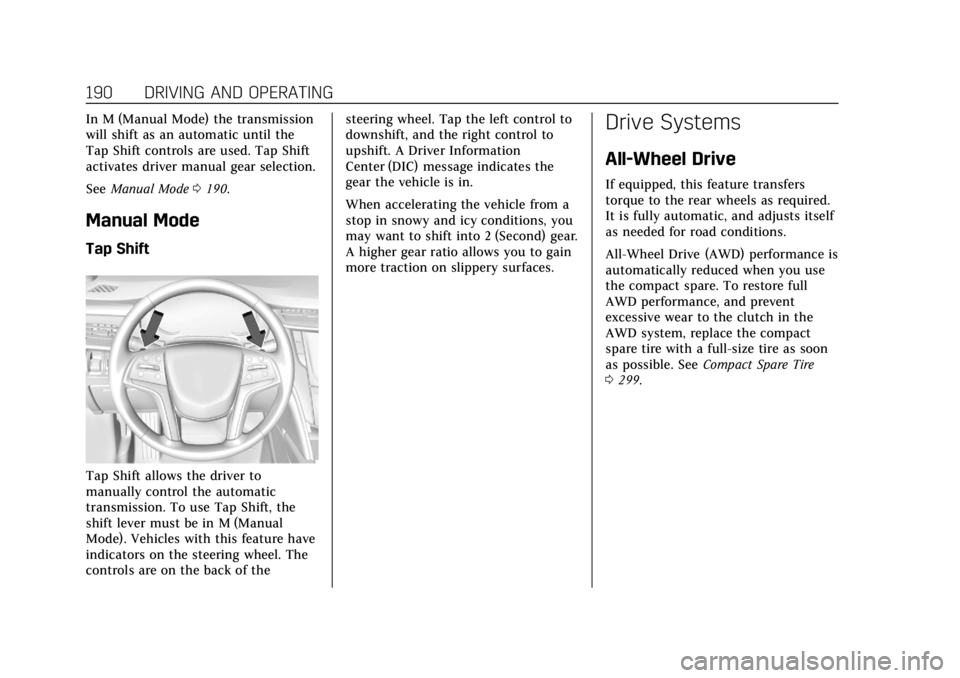
Tap Shift allows the driver to
manually control the automatic
transmission. To use Tap Shift, the
shift lever must be in M (Manual
Mode). Vehicles with this feature have
indicators on the steering wheel. The
controls are on the back of the steering wheel. Tap the left control to
downshift, and the right control to
upshift. A Driver Information
Center (DIC) message indicates the
gear the vehicle is in.
When accelerating the vehicle from a
stop in snowy and icy conditions, you
may want to shift into 2 (Second) gear.
A higher gear ratio allows you to gain
more traction on slippery surfaces.
Drive Systems
All-Wheel Drive
If equipped, this feature transfers
torque to the rear wheels as required.
It is fully automatic, and adjusts itself
as needed for road conditions.
All-Wheel Drive (AWD) performance is
automatically reduced when you use
the compact spare. To restore full
AWD performance, and prevent
excessive wear to the clutch in the
AWD system, replace the compact
spare tire with a full-size tire as soon
as possible. See
Compact Spare Tire
0 299.
Page 199 of 370
Cadillac XTS Owner Manual (GMNA-Localizing-U.S./Canada-11354412) -
2018 - crc - 11/16/17
198 DRIVING AND OPERATING
Reducing Speed While Using Cruise
Control
Do one of the following:
.Press and hold SET− down until
the desired lower speed is reached,
then release it.
. To decrease the vehicle speed in
small increments, briefly press
SET− down to the first detent. For
each press, the vehicle goes about
1 km/h (1 mph) slower.
. To decrease the vehicle speed in
larger increments, briefly press
SET− down to the second detent.
For each press, the vehicle speed
decreases to the next 5 km/h
(5 mph) mark on the speedometer.
The cruise control system may
automatically brake to slow the
vehicle down.
Passing Another Vehicle While
Using Cruise Control
Use the accelerator pedal to increase
the vehicle speed. When you take your
foot off the pedal, the vehicle will slow
down to the previous set cruise speed. While pressing the accelerator pedal
or shortly following the release to
override cruise, briefly applying the
SET−
switch will result in cruise set to
the current vehicle speed.
Using Cruise Control on Hills
How well the cruise control will work
on hills depends upon the vehicle
speed, load, and the steepness of the
hills. When going up steep hills, you
might have to step on the accelerator
pedal to maintain your speed. When
going downhill, the cruise control
system may automatically brake to
slow the vehicle down. Also, you may
have to brake or shift to a lower gear
to keep your speed down. If the brake
pedal is applied, cruise control
disengages.
Ending Cruise Control
There are four ways to end cruise
control:
. Step lightly on the brake pedal.
. Press
*.
. Shift the transmission to
N (Neutral). .
Press
J.
Erasing Speed Memory
The cruise control set speed is erased
from memory if
Jis pressed or if
the ignition is turned off.
Adaptive Cruise Control
If equipped with Adaptive Cruise
Control (ACC), it allows for selecting
the cruise control set speed and
following gap. Read this entire section
before using this system. ACC uses a
camera and radar sensors to detect
other vehicles. See Radio Frequency
Statement 0344. The following gap is
the following time (or distance)
between your vehicle and a vehicle
detected directly ahead in your path,
moving in the same direction. If no
vehicle is detected in your path, ACC
works like regular cruise control.
If a vehicle is detected in your path,
ACC can speed up the vehicle or apply
limited, moderate braking to maintain
the selected following gap. To
disengage ACC, apply the brake. If the
Traction Control System (TCS) or
Page 201 of 370
Cadillac XTS Owner Manual (GMNA-Localizing-U.S./Canada-11354412) -
2018 - crc - 11/16/17
200 DRIVING AND OPERATING
already engaged. To decrease speed by
1 km/h (1 mph), press SET−down to
the first detent. To decrease speed to
the next 5 km/h (5 mph) mark on the
speedometer, press SET− down to the
second detent.
*: Press to disengage ACC without
erasing the selected set speed.
[: Press to select a following gap
time (or distance) setting for ACC of
Far, Medium, or Near.
The speedometer reading can be
displayed in either English or metric
units. See Instrument Cluster 0118.
The increment value used depends on
the units displayed.
Switching Between ACC and
Regular Cruise Control
To switch between ACC and regular
cruise control, press and hold
*.
A Driver Information Display (DIC)
message displays. See Vehicle Messages
0 142.
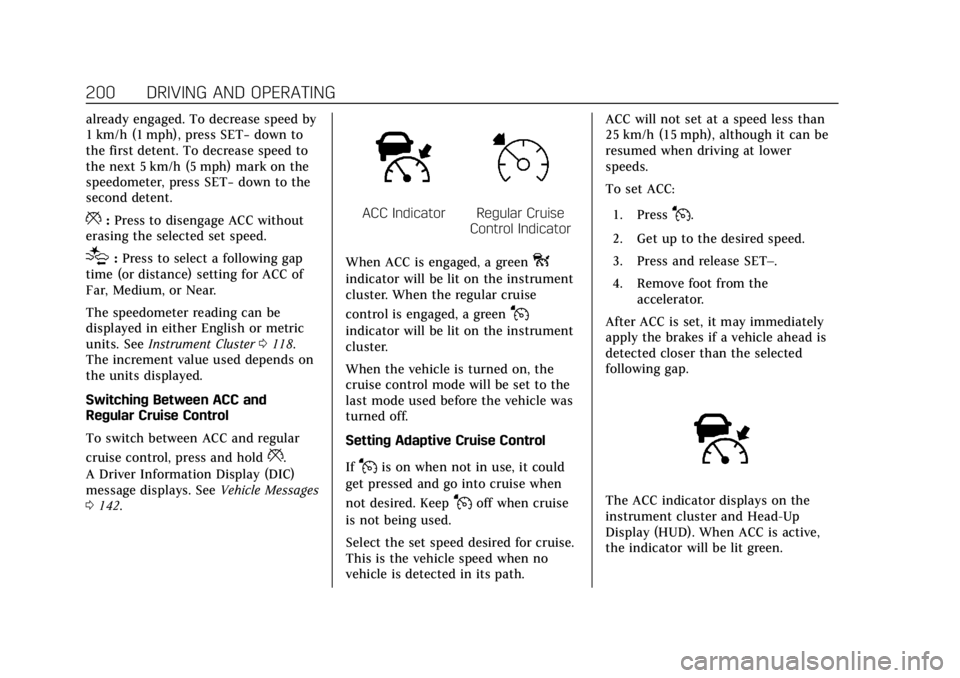
ACC IndicatorRegular Cruise
Control Indicator
When ACC is engaged, a green
o
indicator will be lit on the instrument
cluster. When the regular cruise
control is engaged, a green
J
indicator will be lit on the instrument
cluster.
When the vehicle is turned on, the
cruise control mode will be set to the
last mode used before the vehicle was
turned off.
Setting Adaptive Cruise Control
If
Jis on when not in use, it could
get pressed and go into cruise when
not desired. Keep
Joff when cruise
is not being used.
Select the set speed desired for cruise.
This is the vehicle speed when no
vehicle is detected in its path. ACC will not set at a speed less than
25 km/h (15 mph), although it can be
resumed when driving at lower
speeds.
To set ACC:
1. Press
J.
2. Get up to the desired speed.
3. Press and release SET–.
4. Remove foot from the accelerator.
After ACC is set, it may immediately
apply the brakes if a vehicle ahead is
detected closer than the selected
following gap.
The ACC indicator displays on the
instrument cluster and Head-Up
Display (HUD). When ACC is active,
the indicator will be lit green.
Page 216 of 370
Cadillac XTS Owner Manual (GMNA-Localizing-U.S./Canada-11354412) -
2018 - crc - 11/16/17
DRIVING AND OPERATING 215
or on some vehicles, Off. The first
button press shows the current setting
on the DIC. Additional button presses
will change this setting. The chosen
setting will remain until it is changed
and will affect the timing of both the
Collision Alert and the Tailgating
Alert features. The timing of both
alerts will vary based on vehicle speed.
The faster the vehicle speed, the
farther away the alert will occur.
Consider traffic and weather
conditions when selecting the alert
timing. The range of selectable alert
timings may not be appropriate for all
drivers and driving conditions.
If your vehicle is equipped with
Adaptive Cruise Control (ACC),
changing the FCA timing setting
automatically changes the following
gap setting (Far, Medium, or Near).
Following Distance Indicator
The following distance to a moving
vehicle you are following is indicated
in following time in seconds on the
Driver Information Center (DIC). See
Driver Information Center (DIC)0136. The minimum following time is
0.5 seconds away. If there is no vehicle
detected ahead, or the vehicle ahead is
out of sensor range, dashes will be
displayed.
Unnecessary Alerts
FCA may provide unnecessary alerts
for turning vehicles, vehicles in other
lanes, objects that are not vehicles,
or shadows. These alerts are normal
operation and the vehicle does not
need service.
Cleaning the System
If the FCA system does not seem to
operate properly, this may correct the
issue:
.
Clean the outside of the
windshield in front of the rearview
mirror.
. Clean the entire front of the
vehicle.
. Clean the headlamps.
Forward Automatic
Braking (FAB)
If the vehicle has Forward Collision
Alert (FCA), it also has FAB, which
includes Intelligent Brake Assist (IBA).
When the system detects a vehicle
ahead in your path that is traveling in
the same direction that you may be
about to crash into, it can provide a
boost to braking or automatically
brake the vehicle. This can help avoid
or lessen the severity of crashes when
driving in a forward gear. Depending
on the situation, the vehicle may
automatically brake moderately or
hard. This forward automatic braking
can only occur if a vehicle is detected.
This is shown by the FCA vehicle
ahead indicator being lit. See Forward
Collision Alert (FCA) System 0213.
The system works when driving in a
forward gear between 8 km/h (5 mph)
and 60 km/h (37 mph), or on vehicles
with Adaptive Cruise Control (ACC),
above 4 km/h (2 mph). It can detect
vehicles up to approximately 60 m
(197 ft).
Page 274 of 370
Cadillac XTS Owner Manual (GMNA-Localizing-U.S./Canada-11354412) -
2018 - crc - 11/16/17
VEHICLE CARE 273
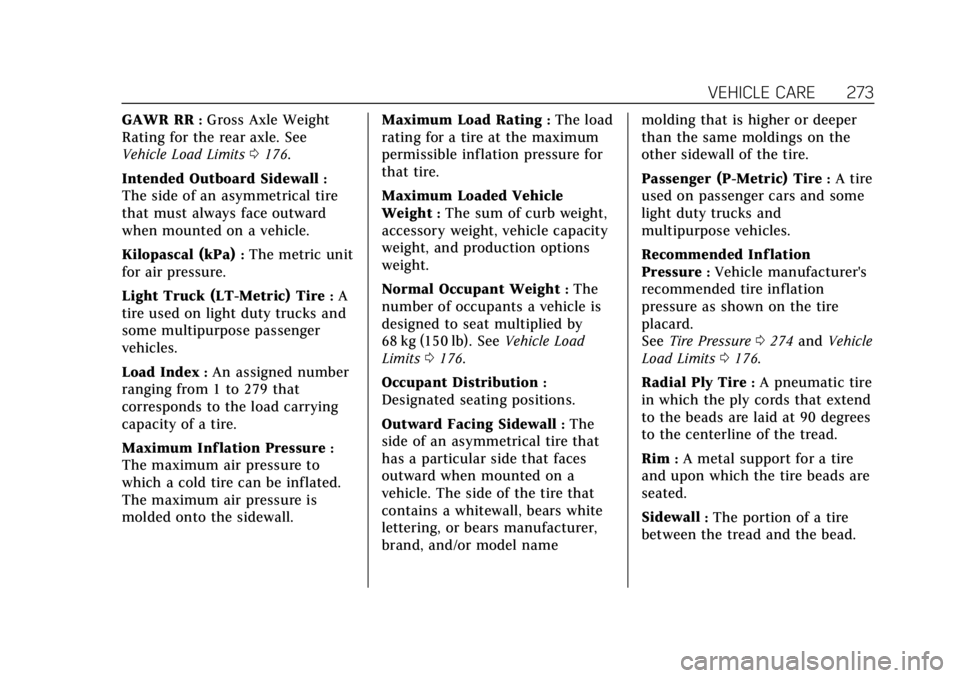
GAWR RR:Gross Axle Weight
Rating for the rear axle. See
Vehicle Load Limits 0176.
Intended Outboard Sidewall
:
The side of an asymmetrical tire
that must always face outward
when mounted on a vehicle.
Kilopascal (kPa)
:The metric unit
for air pressure.
Light Truck (LT-Metric) Tire
:A
tire used on light duty trucks and
some multipurpose passenger
vehicles.
Load Index
:An assigned number
ranging from 1 to 279 that
corresponds to the load carrying
capacity of a tire.
Maximum Inf lation Pressure
:
The maximum air pressure to
which a cold tire can be inflated.
The maximum air pressure is
molded onto the sidewall. Maximum Load Rating
:The load
rating for a tire at the maximum
permissible inflation pressure for
that tire.
Maximum Loaded Vehicle
Weight
:The sum of curb weight,
accessory weight, vehicle capacity
weight, and production options
weight.
Normal Occupant Weight
:The
number of occupants a vehicle is
designed to seat multiplied by
68 kg (150 lb). See Vehicle Load
Limits 0176.
Occupant Distribution
:
Designated seating positions.
Outward Facing Sidewall
:The
side of an asymmetrical tire that
has a particular side that faces
outward when mounted on a
vehicle. The side of the tire that
contains a whitewall, bears white
lettering, or bears manufacturer,
brand, and/or model name molding that is higher or deeper
than the same moldings on the
other sidewall of the tire.
Passenger (P-Metric) Tire
:A tire
used on passenger cars and some
light duty trucks and
multipurpose vehicles.
Recommended Inf lation
Pressure
:Vehicle manufacturer's
recommended tire inflation
pressure as shown on the tire
placard.
See Tire Pressure 0274 and Vehicle
Load Limits 0176.
Radial Ply Tire
:A pneumatic tire
in which the ply cords that extend
to the beads are laid at 90 degrees
to the centerline of the tread.
Rim
:A metal support for a tire
and upon which the tire beads are
seated.
Sidewall
:The portion of a tire
between the tread and the bead.
Page 280 of 370
Cadillac XTS Owner Manual (GMNA-Localizing-U.S./Canada-11354412) -
2018 - crc - 11/16/17
VEHICLE CARE 279
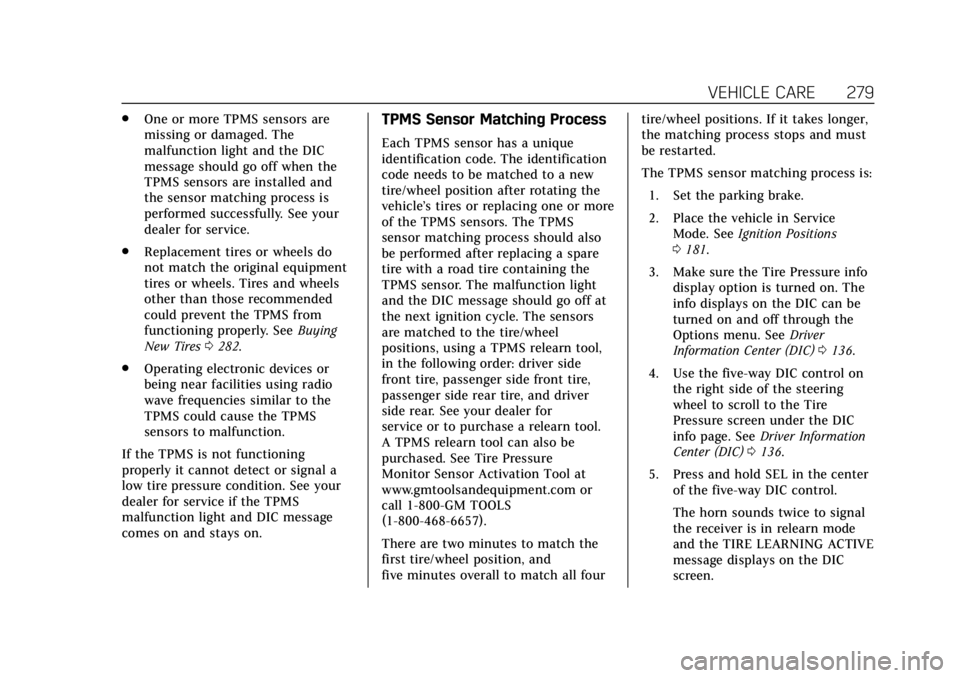
.One or more TPMS sensors are
missing or damaged. The
malfunction light and the DIC
message should go off when the
TPMS sensors are installed and
the sensor matching process is
performed successfully. See your
dealer for service.
. Replacement tires or wheels do
not match the original equipment
tires or wheels. Tires and wheels
other than those recommended
could prevent the TPMS from
functioning properly. See Buying
New Tires 0282.
. Operating electronic devices or
being near facilities using radio
wave frequencies similar to the
TPMS could cause the TPMS
sensors to malfunction.
If the TPMS is not functioning
properly it cannot detect or signal a
low tire pressure condition. See your
dealer for service if the TPMS
malfunction light and DIC message
comes on and stays on.TPMS Sensor Matching Process
Each TPMS sensor has a unique
identification code. The identification
code needs to be matched to a new
tire/wheel position after rotating the
vehicle’s tires or replacing one or more
of the TPMS sensors. The TPMS
sensor matching process should also
be performed after replacing a spare
tire with a road tire containing the
TPMS sensor. The malfunction light
and the DIC message should go off at
the next ignition cycle. The sensors
are matched to the tire/wheel
positions, using a TPMS relearn tool,
in the following order: driver side
front tire, passenger side front tire,
passenger side rear tire, and driver
side rear. See your dealer for
service or to purchase a relearn tool.
A TPMS relearn tool can also be
purchased. See Tire Pressure
Monitor Sensor Activation Tool at
www.gmtoolsandequipment.com or
call 1-800-GM TOOLS
(1-800-468-6657).
There are two minutes to match the
first tire/wheel position, and
five minutes overall to match all four tire/wheel positions. If it takes longer,
the matching process stops and must
be restarted.
The TPMS sensor matching process is:
1. Set the parking brake.
2. Place the vehicle in Service Mode. See Ignition Positions
0 181.
3. Make sure the Tire Pressure info display option is turned on. The
info displays on the DIC can be
turned on and off through the
Options menu. See Driver
Information Center (DIC) 0136.
4. Use the five-way DIC control on the right side of the steering
wheel to scroll to the Tire
Pressure screen under the DIC
info page. See Driver Information
Center (DIC) 0136.
5. Press and hold SEL in the center of the five-way DIC control.
The horn sounds twice to signal
the receiver is in relearn mode
and the TIRE LEARNING ACTIVE
message displays on the DIC
screen.