cruise control CHEVROLET ASTRO 1996 Owners Manual
[x] Cancel search | Manufacturer: CHEVROLET, Model Year: 1996, Model line: ASTRO, Model: CHEVROLET ASTRO 1996Pages: 372, PDF Size: 21.51 MB
Page 89 of 372
Horn
To sound the horn, press the horn symbols on the
steering wheel.
Tilt Wheel (Option)
Turn' SignaVMultifunction Lever
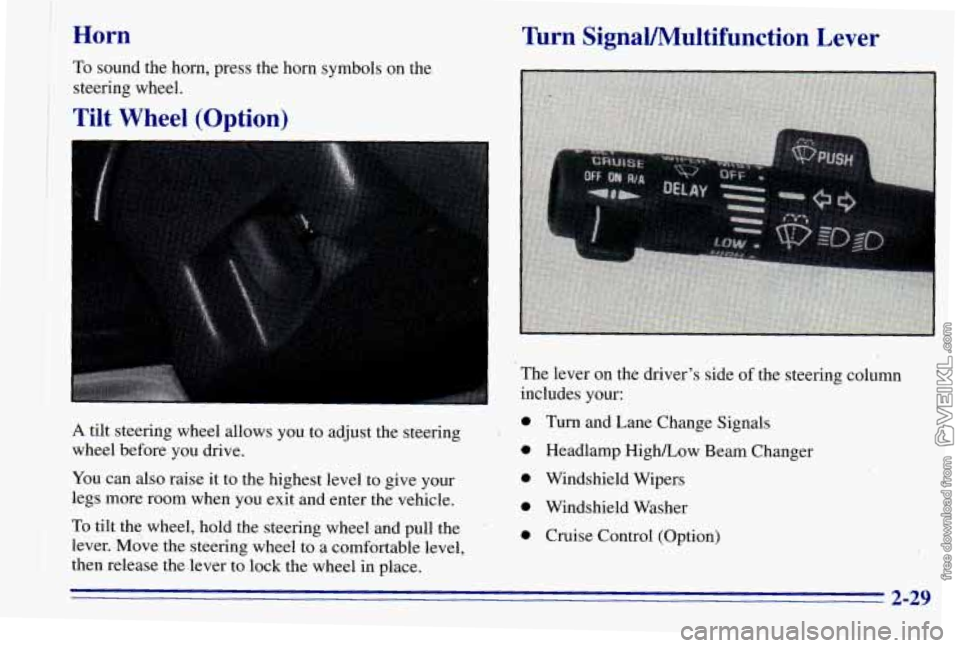
A tilt steering wheel allows you to adjust the steering
wheel before you drive.
You can also raise it to the highest level to give your
legs more room when you exit and enter the vehicle.
I ' The lever on the driver's side of the steering column
includes your:
0 Turn and Lane Change Signals
0 Headlamp High/Low Beam Changer
0 Windshield Wipers
0 Windshield Washer
To tilt t& wheel, hold the steering wheel and pull the ' 0 Cruise Control (Option)
j lever. Move the steering wheel to a comfortable level,
I then release the lever to lock the wheel in place. I
2-29
Page 92 of 372
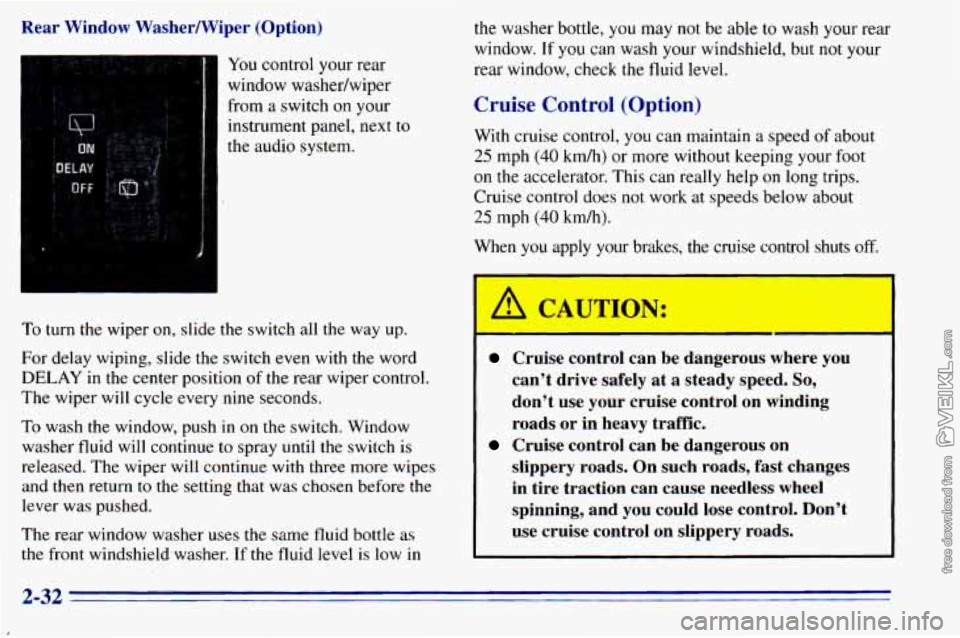
Rear Window Washermiper (Option) from
a switch on your
instrument panel, next to
the audio system.
To turn the wiper on, slide the switch all the way up.
For delay wiping, slide the switch even with
the word
DELAY in the center position of the rear wiper control.
The wiper will cycle every nine seconds.
To wash the window, push in on the switch. Window
washer fluid will continue
to spray until the switch is
released. The wiper will continue with three more wipes
and then return
to the setting that was chosen before the
lever was pushed.
The rear window washer uses the same fluid bottle as
the front windshield washer.
If the fluid level is low in
the washer bottle, you may not be able to wash your rear
window.
If you can wash your windshield, but not your
rear window, check
the fluid level.
Cruise Control (Option)
With cruise control, you can maintain a speed of about
25 mph (40 kmh) or more without keeping your foot
on the accelerator. This can really help on long trips.
Cruise control does not work at speeds below about
25 mph (40 km/h).
When you apply
y sakes, the *
A CAUTION:
#e con 1 sh i off.
Cruise control can be dal-,-- JUS wher - JOU
can’t drive safely at a steady speed. So,
don’t use your cruise control on winding
roads or in heavy traffic.
slippery roads. On such roads, fast changes
in tire traction can cause needless wheel
spinning, and you could lose control. Don’t
use cruise control on slippery roads.
Cruise control can be dangerous on
2-32
Page 93 of 372
Resuming a Set Speed
Setting Cruise Control
If you leave your cruise control switcn on when
you're not using cruise, you might hit a button
and
go into cruise when you don't want to.
You could be startled and even lose control.
Keep the cruise control switch
OFF until you
want to use it.
__~~ ~
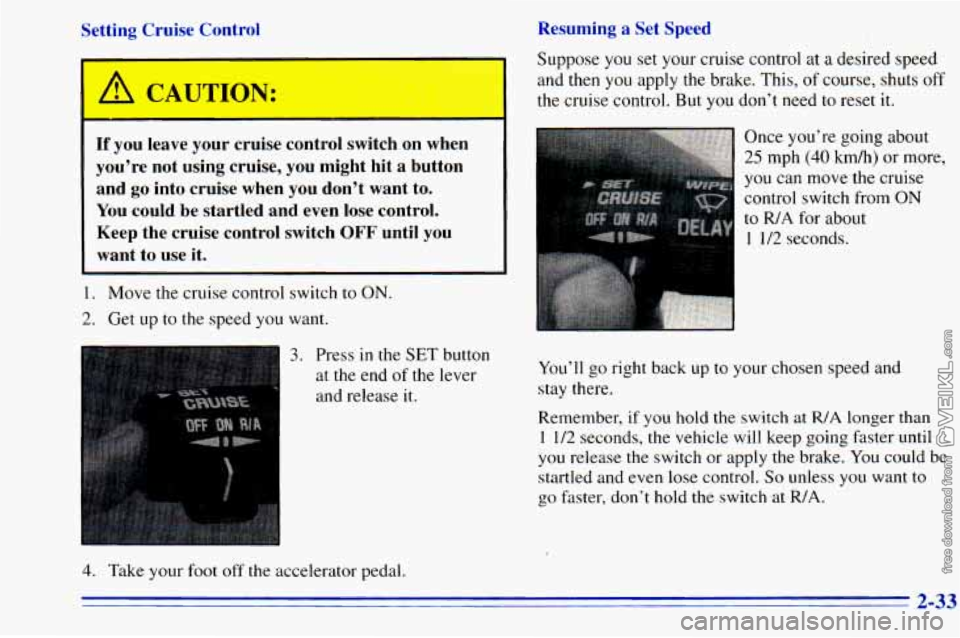
1. Move the cruise control switch to ON.
2. Get up to the speed you want. Suppose
you set your cruise control at
a desired speed
and then
you apply the brake. This, of course, shuts off
the cruise control. But you don't need to reset it.
..::: . .. .
Once you're going about
25 mph (40 km/h) or more,
you
can move the cruise
control switch from
ON
to R/A for about
1 1/2 seconds.
3. Press in the SET button
at the end
of the lever
and release it. You'll
go right back up to your chosen speed and
stay there.
Remember, if you hold the switch at R/A longer than
1 1/2 seconds, the vehicle will keep going faster until
you release the switch or apply the brake. You could be
startled and even lose control.
So unless you want to
go faster, don't hold the switch at R/A.
4. Take your foot off the accelerator pedal.
2-33
Page 94 of 372
Increasing Speed While Using Cruise Control
There are two ways to go to a higher speed:
Use the accelerator pedal to get to the higher speed.
Press the button at the end of the lever, then release
the button and the accelerator pedal. You’ll now
cruise at the higher speed.
Move the cruise switch from ON to R/A. Hold it
there until you get up to the speed you want, and
then release the switch.
(To increase your speed in
very small amounts, move the switch to
WA for less
than
3/4 of a second. Each time you do this, your
vehicle will go about
1 mph (1.6 kdh) faster.)
Reducing Speed While Using Cruise Contrel
There are two ways to reduce your speed while using
cruise control:
0 Press the button at the end of the lever until you
reach the lower speed you want, then release it.
0 To slow down in very small amounts, press the
button for less than
1/2 second. Each time you do
this, you’ll go 1 mph (1.6 km/h) slower.
Passing Another Vehicle While Using Cruise Control
Use the accelerator pedal to increase .your speed. When
you take your foot off the pedal, your vehicle will slow
down to the cruise control speed you set earlier.
Using Cruise Control on Hills
How well your cruise control will work on hills depends
upon your speed, load
and the steepness of the hills.
When going up steep
hills, you may want to step on the
accelerator pedal
to maintain your speed. When going
downhill, you may have to brake or shift to a lower gear
to keep your speed down. Of course, applying the brake
takes you out of cruise control. Many drivers find this to
be too much trouble and don’t use cruise control on
steep hills.
Ending Cruise Control
There are two ways to turn off the cruise control:
Step lightly on the brake pedal.
Move the cruise switch to 0,FE
Erasing Speed Memory
When you turn off the cruise control or the ignition.
your cruise control set speed memory
is erased.
2-34
Page 293 of 372
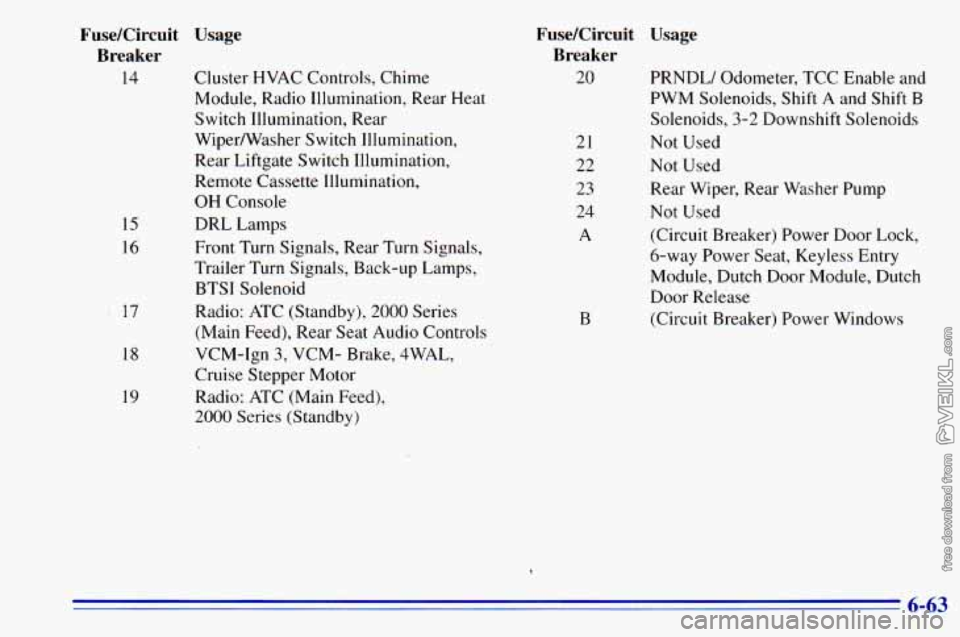
15
16
', 17
18
19
Fuse/Circuit Usage Breaker
14 Cluster HVAC Controls, Chime
Module, Radio Illumination, Rear Heat
Switch Illumination, Rear
WiperNasher Switch Illumination,
Rear Liftgate Switch Illumination, Remote Cassette Illumination,
OH Console
DRL Lamps
Front Turn Signals, Rear Turn Signals,
Trailer Turn Signals, Back-up Lamps,
BTSI Solenoid
Radio: ATC (Standby), 2000 Series
(Main Feed), Rear Seat Audio Controls
VCM-Ign 3, VCM- Brake, 4WAL,
Cruise Stepper Motor
Radio: ATC (Main Feed),
2000 Series (Standby)
A
B
Fuse/Circuit Usage
Breaker
20 PRNDLI Odometer, TCC Enable and
PWM Solenoids, Shift
A and Shift B
Solenoids, 3-2 Downshift Solenoids
Not Used
Not Used Rear Wiper, Rear Washer Pump
Not Used
(Circuit Breaker) Power Door Lock,
6-way Power Seat, Keyless Entry
Module, Dutch Door Module, Dutch
Door Release
(Circuit Breaker) Power Windows
21
22
23
24
6-63
Page 345 of 372

Part C: Periodic Maintenance
Inspections
Listed below are inspections and services which should
be performed
at least twice a year (for instance, each
spring and fall). You should let your GM dealer’s
service department or other qualified service center do
these jobs. Make sure any necessary repairs are
completed at once.
Proper procedures to perform these services may be
found
in a GM Service Manual. See “Service and Owner
Publications’’
in the Index.
Steering and Suspension Inspection
Inspect the front and rear suspension and steering
system for damaged, loose or missing parts, signs of
wear or lack of lubrication. Inspect the power steering
lines and hoses for proper hook-up, binding, leaks,
cracks, chafing, etc.
Exhaust System Inspection
Inspect the complete exhaust system. Inspect the body
near the exhaust system. Look for broken, damaged,
missing or out-of-position parts as well as open seams,
holes, loose connections
or other conditions which could
cause a heat build-up
in the floor pan or could let
exhaust fumes into the vehicle. See “Engine Exhaust’’
in the Index.
Radiator and Heater Hose Inspection
Inspect the hoses and have them replaced if they are
cracked, swollen or deteriorated. Inspect all pipes,
fittings and clamps; replace as needed.
Throttle Linkage Inspection
Inspect the throttle linkage for interference or binding,
and for damage or missing
parts. Replace parts as
needed. Replace any cables
that have high effort or
excessive wear.
Do not lubricate accelerator and cruise
control cables.
7-45
Page 362 of 372
Brakes. Anti-Lock ............................... 4-6
Braking
........................................ 4-5
Braking
in Emergencies ........................... 4-8
Break-In. New Vehicle
.......................... 2- 13
BTSICheck ................................... 7-43
Bulb Replacement
.............................. 6-36
Canadian Roadside Assistance
.................... 8-6
Capacities and Specifications
...................... 6-67
Carbon Monoxide
............... 2.26.4.25.4.32. 4.33
Cassette Deck Service
........................... 7-41
Cassette Tape Player
.................. 3- 10. 3. 12. 3.20
Cassette Tape Player Care
........................ 3-27
Center Passenger Position
........................ 1-34
Chains. Safety
................................. 4-32
Chains. Tire
................................... 6-49
Changing a Flat Tire
............................. 5-23
Charging System Light
.......................... 2-55
Check Gages Light
.............................. 2-63
Check Oil Light
................................ 2-61
Checking
Your Restraint Systems .................. 1-52
Chemical Paint Spotting
.......................... 6-57
Child Restraints
................................ 1-4 I
Securing in a Rear Outside Seat Position ........... 1-43
Securing
in the Center Seat Position .............. 1-45
Securing
in the Right Front Seat Position .......... 1-46
TopStrap
................................... 1-42
Where to Put
........................... 1-4 I. 1-42
Cigarette Lighter
............................... 2-48
Circuit Breakers and Fuses
....................... 6-61
Cleaner. Air ................................... 6-19 Cleaning
Aluminum Wheels ............................ 6-55
Fabric
...................................... 6-50
Glass
....................................... 6-53
Inside
of Your Vehicle ......................... 6-50
Instrument Panel
............................. 6-53
Leather
..................................... 6-52
Outside
of Your Vehicle ........................ 6-54
Special Problems
............................. 6-51
Stains
...................................... 6-51
Tires
....................................... 6-56
Vinyl ....................................... 6-52
Wheels
..................................... 6-55
Windshield and Wiper Blades
................... 6-53
Clock. Setting the
................................ 3-8
Comfort Controls
................................ 3-1
Compact Disc Care
............................. 3-28
Compact Disc Player
............................ 3-16
Compact Spare Tire
............................. 5-36
Control of a Vehicle .............................. 4-5
ConvenienceNet
............................... 2-46
Convex Outside Mirror
.......................... 2-39
Coolant
....................................... 6-25
Heater. Engine
............................... 2-16
RecoveryTank
............................... 5-15
Courtesy Lamps
................................ 2-37
Courtesy Transportation
........................... 8-6
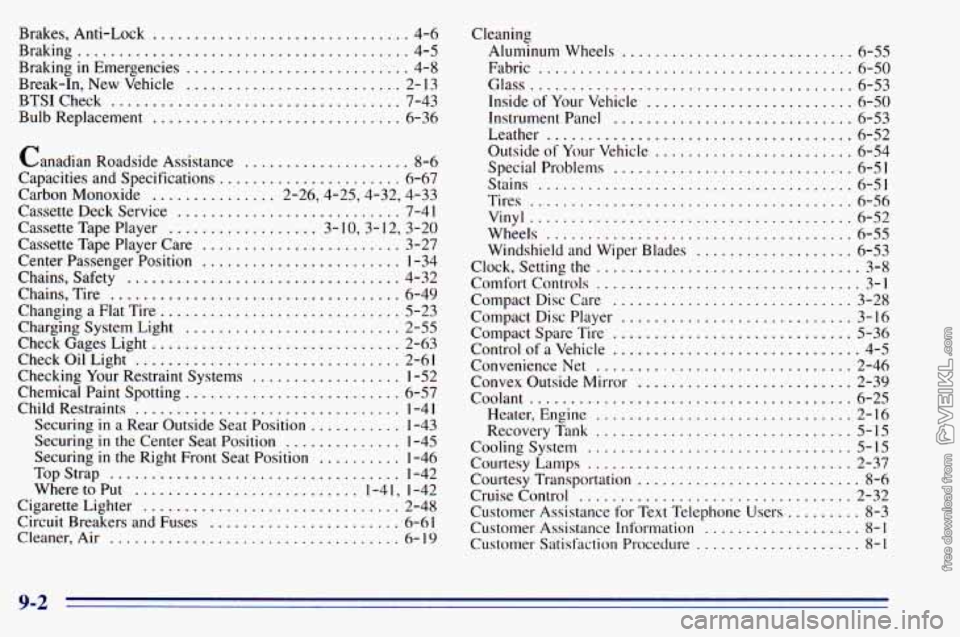
Cruise Control
................................. 2-32
Customer Assistance for Text Telephone Users
......... 8-3
Customer
Assistance Information ................... 8-1
Customer Satisfaction Procedure .................... 8-1
Cooling System
................................ 5-15
9-2