air conditioning CHEVROLET ASTRO 2003 Owners Manual
[x] Cancel search | Manufacturer: CHEVROLET, Model Year: 2003, Model line: ASTRO, Model: CHEVROLET ASTRO 2003Pages: 386, PDF Size: 17.31 MB
Page 126 of 386
Section 3 Instrument Panel
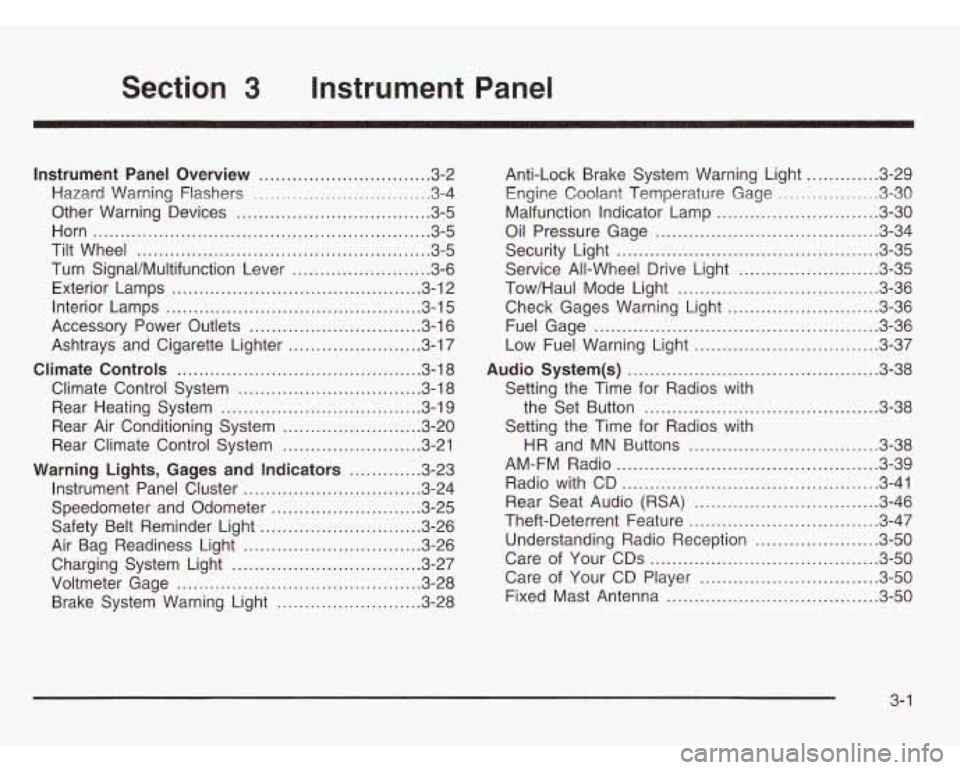
Instrument Panel Overview ............................... 3.2
Hazard Warning Flashers
................................ 3-4
Other Warning Devices
................................... 3-5
Horn
............................................................. 3-5
Tilt Wheel
..................................................... 3-5
Turn SignaVMultifunction Lever
......................... 3.6
Exterior Lamps
.......................................... 3.12
Interior Lamps
................................ ....... 3.15
Accessory Power Outlets
............................... 3.16
Ashtrays and Cigarette Lighter
........................ 3.17
Climate Controls ............................................ 3.18
Climate Control System
................................. 3.18
Rear Heating System
................................... -3-1 9
Rear Air Conditioning System ......................... 3.20
Rear Climate Control System
......................... 3.21
Warning Lights, Gages and Indicators ............. 3.23
Instrument Panel Cluster
................................ 3.24
Speedometer and Odometer
........................... 3.25
Safety Belt Reminder Light
............................. 3.26
Air Bag Readiness Light
................................ 3-26
Charging System Light
.................................. 3.27
Voltmeter Gage
........................................... -3-28
Brake System Warning Light
.......................... 3.28 Anti-Lock
Brake System Warning Light
............. 3.29
Engine Coolant Temperature Gage
= = =. ~ = = ~ ~ ~ = i. 3-39
Malfunction Indicator Lamp
............................. 3.30
Oil Pressure Gage
........................................ 3.34
Security Light
.............................................. -3-35
Service All-Wheel Drive Light
......................... 3.35
Tow/Haul Mode Light
......... ................... 3.36
Fuel Gage
................................................... 3.36
Low Fuel Warning Light
................................. 3.37
Audio System@) ............................................. 3.38
Setting the Time for Radios with
the Set Button
.......................................... 3-38
Setting the Time for Radios with
HR and MN Buttons .................................. 3-38
AM-FM Radio
............................................... 3.39
Radio with CD
.............................................. 3-41
Theft-Deterrent Feature
........... ................ 3.47
Understanding Radio Reception
................... 3.50
Care of Your CDs
......................................... 3-50
Care of Your CD Player
................................ 3-50
Fixed Mast Antenna
...................................... 3.50
Check Gages Warning
Light
........................... 3-36
Rear Seat Audio (RSA)
. . .... ............ 3.46
3-
1
Page 143 of 386
Climate Controls
Climate Control System
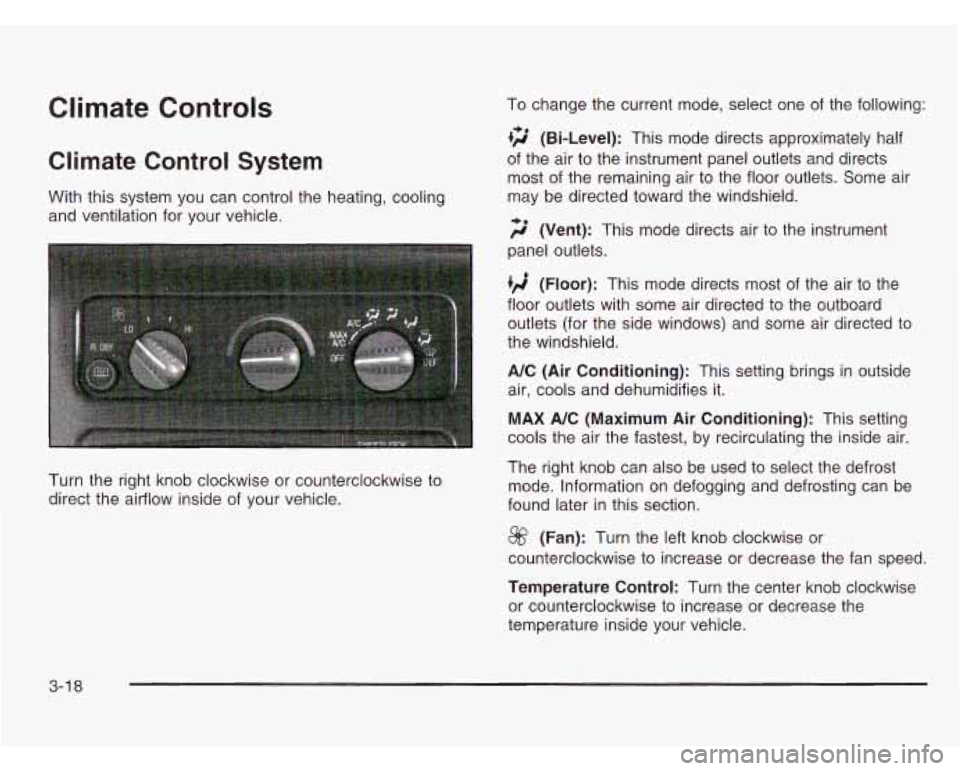
With this system you can control the heating, cooling
and ventilation for your vehicle.
Turn the right knob clockwise or counterclockwise to
direct the airflow inside of your vehicle. To change
the current mode, select one of the following:
+2 (Bi-Level): This mode directs approximately half
of the air to the instrument panel outlets and directs
most of the remaining air to the floor outlets. Some air
may be directed toward the windshield.
;$’ (Vent): This mode directs air to the instrument
panel outlets.
(Floor): This mode directs most of the air to the
floor outlets with some air directed to the outboard
outlets (for the side windows) and some air directed to
the windshield.
A/C (Air Conditioning): This setting brings in outside
air, cools and dehumidifies it.
MAX A/C (Maximum Air Conditioning): This setting
cools the air the fastest, by recirculating the inside air.
The right knob can also be used to select the defrost
mode. Information on defogging and defrosting can be
found later in this section.
@ (Fan): Turn the left knob clockwise or
counterclockwise to increase or decrease the fan speed.
Temperature Control: Turn the center knob clockwise
or counterclockwise to increase or decrease the
temperature inside your vehicle.
3-1 8
Page 144 of 386
Defogging and Defrosting
Turn the right knob to select the defog or defrost mode.
+3 (Blend): With this setting, the outside air comes
out
of both the floor and defroster outlets. Adjust the
temperature knob for warmer or cooler air. The air
conditioning compressor may operate in this setting to
dehumidfy the air.
9 (Defrost): This setting operates the defroster.
Most of the air comes out near the windshield, with
some going to the floor outlets and front side windows.
The air conditioning compressor may operate in this
setting to dehumidify the air.
The bi-level setting is useful for cold weather with a
large number of passengers or very humid conditions to
help keep the windshield clear. Use defrost to remove
fog or ice from the windshield quickly in extremely
cold conditions. The temperature knob should be in the
red area and the fan control toward high.
Rear Heating System
Your vehicle may have an optional rear heating system
that allows you to adjust the amount of air flowing
into the rear
of the vehicle, from the front-seating area.
This feature works with the main climate-control
system in your vehicle.
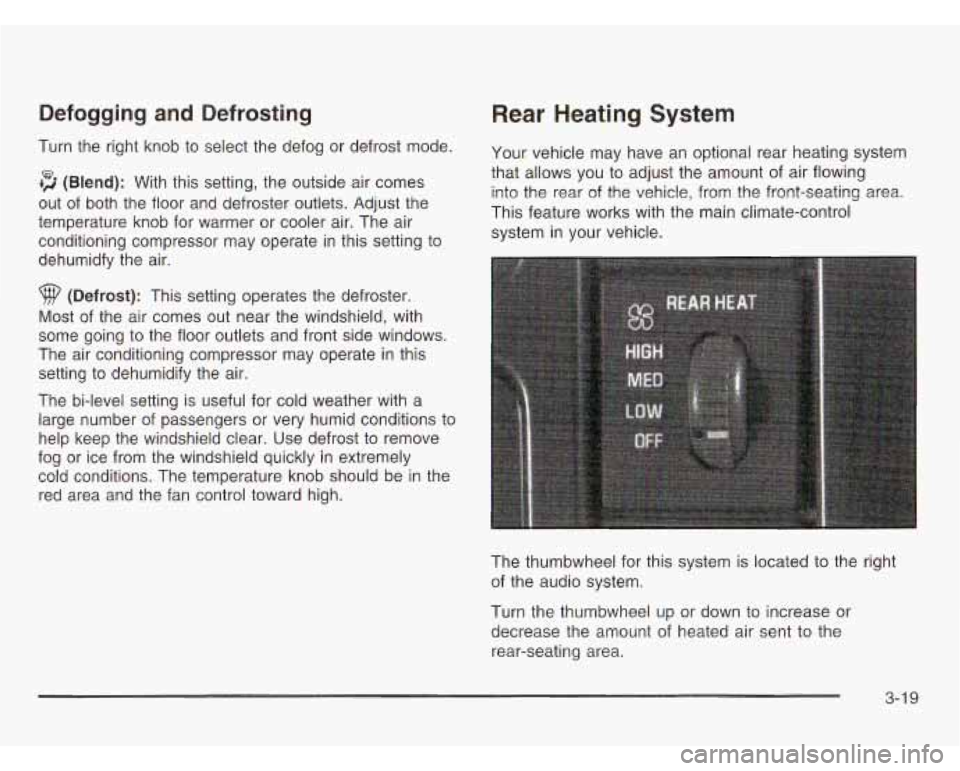
The thumbwheel for this system is located to the right
of the audio system.
Turn the thumbwheel up or down to increase or
decrease the amount of heated air sent to the
rear-seating area.
3-1 9
Page 145 of 386
Rear Air Conditioning System
Your vehicle may have an optional rear air-conditioning
system that allows you to adjust the fan speed in the
rear-seating area, from the front-seating area.
This feature works with the main climate-control system
in your vehicle.
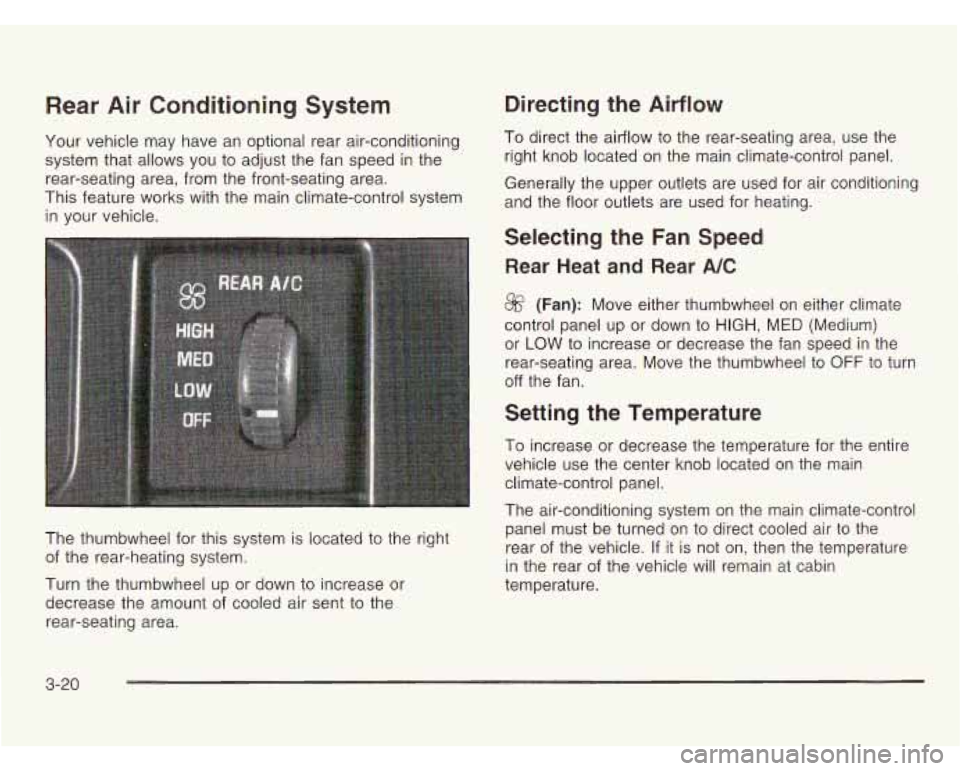
The thumbwheel for this system is located to the right
of the rear-heating system.
Turn the thumbwheel up or down to increase or
decrease the amount of cooled air sent to the
rear-seating area.
Directing the Airflow
To direct the airflow to the rear-seating area, use the
right knob located
on the main climate-control panel.
Generally the upper outlets are used for air conditioning
and the floor outlets are used for heating.
Selecting the Fan Speed
Rear Heat and Rear A/C
8f? (Fan): Move either thumbwheel on either climate
control panel up or down
to HIGH, MED (Medium)
or
LOW to increase or decrease the fan speed in the
rear-seating area. Move the thumbwheel to
OFF to turn
off the fan.
Setting the Temperature
To increase or decrease the temperature for the entire
vehicle use the center knob located on the main
climate-control panel.
The air-conditioning system on the main climate-control
panel must be turned on to direct cooled air to the
rear of the vehicle. If it is not on, then the temperature
in the rear of the vehicle will remain at cabin
temperature.
3-20
Page 312 of 386
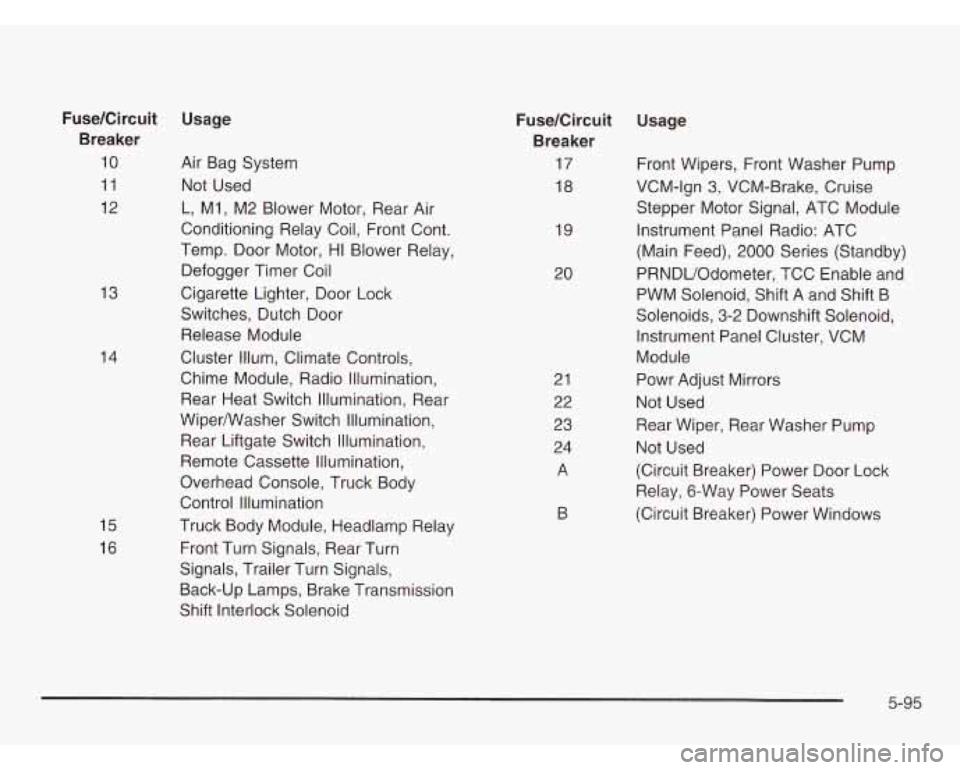
13
14
15
16
Fuse/Circuit Usage Breaker
10 Air Bag System
11 Not Used
12 L, MI, M2 Blower Motor, Rear Air
Conditioning Relay Coil, Front Cont.
Temp. Door Motor, HI Blower Relay.
Defogger Timer Coil
Cigarette Lighter, Door Lock
Switches, Dutch Door Release Module
Cluster Illum, Climate Controls,
Chime Module, Radio Illumination,
Rear Heat Switch Illumination, Rear
Wipermasher Switch Illumination,
Rear Liftgate Switch Illumination,
Remote Cassette Illumination,
Overhead Console, Truck Body
Control Illurnination
Truck Body Module, Headlamp Relay
Front Turn Signals, Rear Turn
Signals, Trailer Turn Signals,
Back-up Lamps, Brake Transmission
Shift Interlock Solenoid 21
22
23
24
A
19
20
FuseKircuit
Usage
Breaker
17 Front Wipers, Front Washer Pump
18 VCM-lgn
3, VCM-Brake, Cruise
Stepper Motor Signal, ATC Module
Instrument Panel Radio: ATC
(Main Feed),
2000 Series (Standby)
PRNDUOdometer, TCC Enable and
PWM Solenoid, Shift A and Shift B
Solenoids, 3-2 Downshift Solenoid, Instrument Panel Cluster, VCM
Module
Powr Adjust Mirrors
Not Used
Rear Wiper, Rear Washer Pump
Not Used
(Circuit Breaker) Power Door Lock
Relay, 6-Way Power Seats
(Circuit Breaker) Power Windows
B
5-95
Page 314 of 386
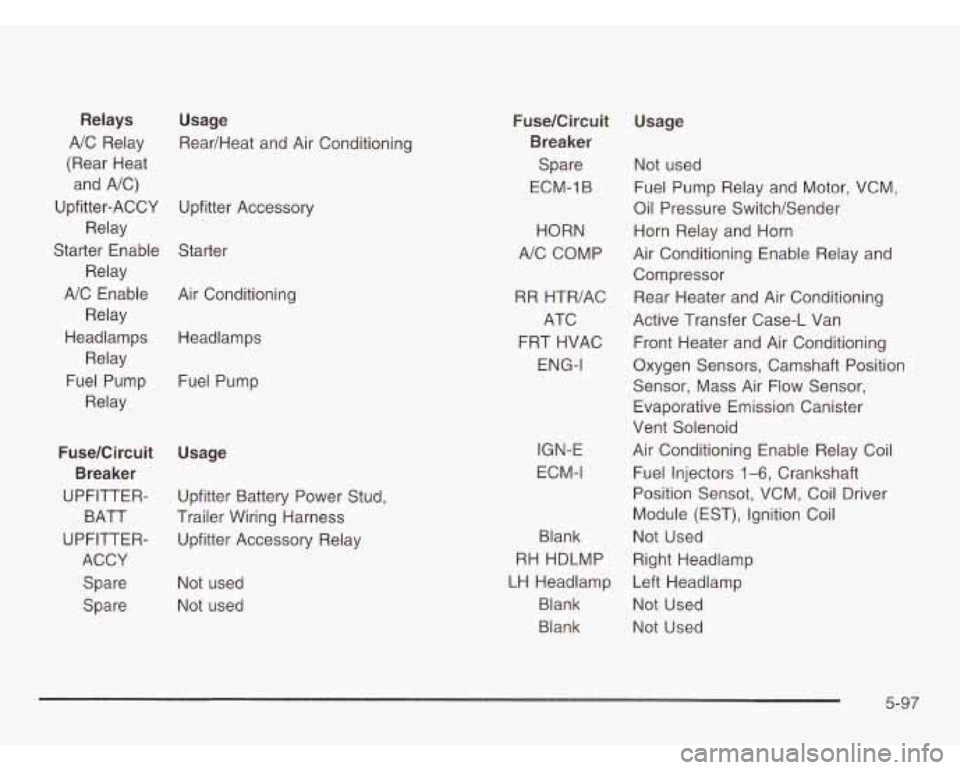
Usage
Rear/Heat and Air Conditioning
Relays
AIC Relay
(Rear Heat
and AIC)
Relay
Relay
A/C Enable
Relay
Upfitter-ACCY
Upfitter Accessory
Starter Enable Starter
Headlamps Relay
Fuel Pump
Relay Air
Conditioning
Headlamps
Fuel Pump
FuselCircuit
Usage
UPFITTER- Upfitter Battery Power Stud,
BATT Trailer Wiring Harness
UPFITTER- Upfitter Accessory Relay
ACCY
Spare Not used
Spare Not used
Breaker FuselCircuit
Breaker
Spare
ECM-1 B
HORN
AIC COMP
RR HTR/AC ATC
FRT HVAC
ENG-I
IGN-E
ECM-I
Blank
RH HDLMP
LH Headlamp
Blank
Blank
Usage
Not used
Fuel Pump Relay and Motor, VCM,
Oil Pressure Switch/Sender
Horn Relay and Horn
Air Conditioning Enable Relay and
Compressor
Rear Heater and Air Conditioning
Active Transfer Case-L Van
Front Heater and Air Conditioning
Oxygen Sensors, Camshaft Position
Sensor, Mass Air Flow Sensor,
Evaporative Emission Canister
Vent Solenoid
Air Conditioning Enable Relay Coil
Fuel Injectors
1-6, Crankshaft
Position Sensot, VCM, Coil Driver
Module (EST), Ignition Coil
Not Used
Right Headlamp
Left Headlamp
Not Used
Not Used
5-97
Page 315 of 386
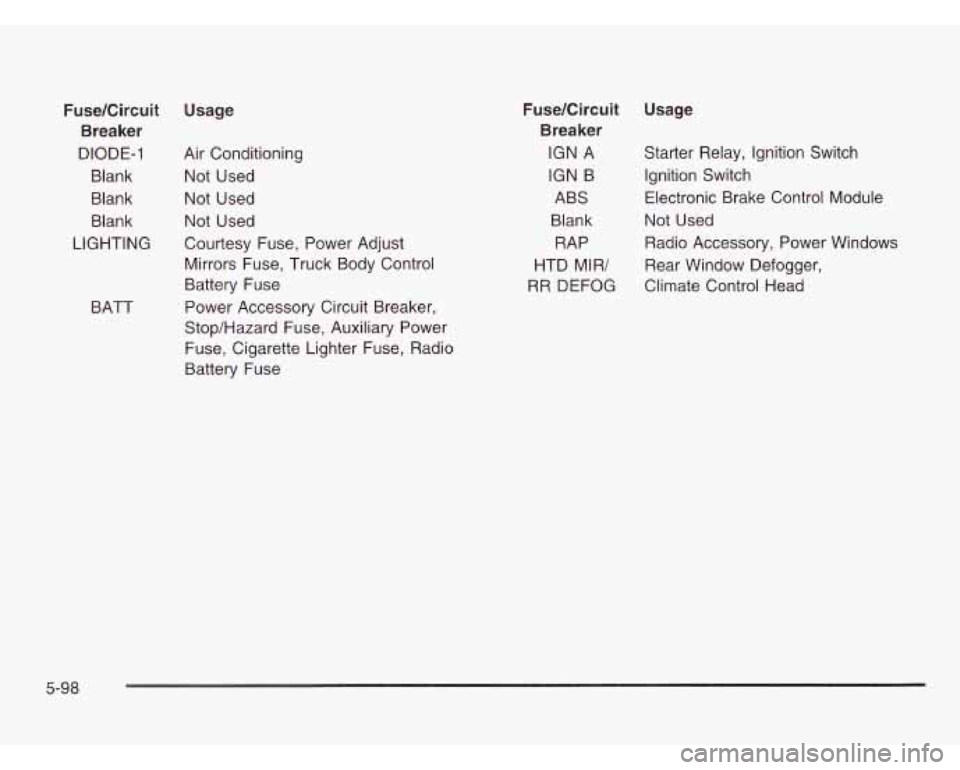
Fuse/Circuit Usage
Breaker
DIODE-I Air Conditioning
Blank Not Used
Blank
Not Used
Blank Not Used
LIGHTING Courtesy Fuse, Power Adjust
Mirrors Fuse, Truck Body Control
Battery Fuse
Power Accessory Circuit Breaker,
Stop/Hazard Fuse, Auxiliary Power
Fuse, Cigarette Lighter Fuse, Radio
Battery Fuse
BATT
Fuse/Circuit
Breaker
IGN A
IGN
B
ABS
Blank RAP
HTD MIRI
RR DEFOG
Usage
Starter Relay, Ignition Switch
Ignition Switch
Electronic Brake Control Module
Not Used Radio Accessory, Power Windows
Rear Window Defogger,
Climate Control Head
5-98
Page 349 of 386
Part C: Periodic Maintenance
Inspections
Listed in this part are inspections and services which
should be performed at least twice a year (for instance,
each spring and fall).
You should let your dealer’s
service department or other qualified service center
do these jobs. Make sure any necessary repairs
are completed at once.
Proper procedures to perform these services may be
found in a service manual. See
Service Publications
Ordering Information on page
7- 1 1.
Steering, Suspension and Front
Drive Axle Boot and Seal Inspection
Inspect the front and rear suspension and steering
system for damaged, loose or missing parts, signs of
wear or lack of lubrication. Inspect the power steering
lines and hoses for proper hook-up, binding, leaks,
cracks, chafing, etc. Clean and then inspect the drive
axle boot seals for damage, tears or leakage. Replace
seals
if necessary.
Exhaust System Inspection
Inspect the complete exhaust system. Inspect the body
near the exhaust system.
Look for broken, damaged,
missing or out-of-position parts as well as open seams,
holes, loose connections or other conditions which
could cause a heat build-up in the floor pan or could let
exhaust fumes into the vehicle. See
Engine Exhaust
on page
2-30.
Fuel System Inspection
Inspect the complete fuel system for damage or leaks.
Engine Cooling System Inspection
Inspect the hoses and have them replaced if they
are cracked, swollen or deteriorated. Inspect all pipes,
fittings and clamps; replace as needed. Clean the
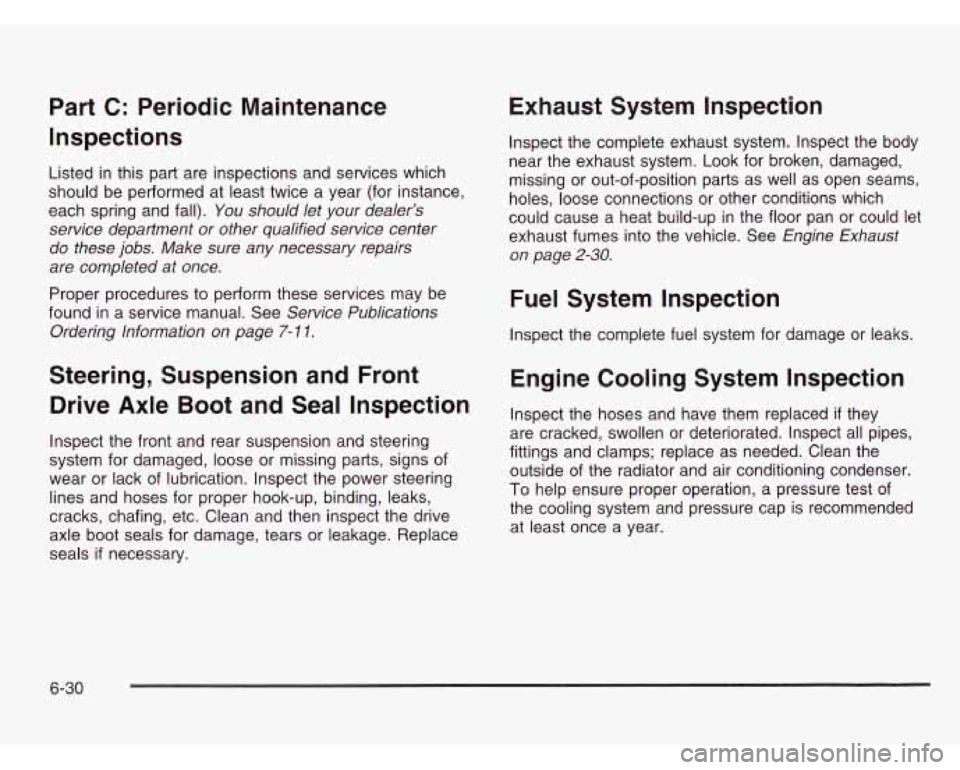
outside of the radiator and air conditioning condenser.
To help ensure proper operation, a pressure test of
the cooling system and pressure cap is recommended
at least once a year.
6-30
Page 370 of 386
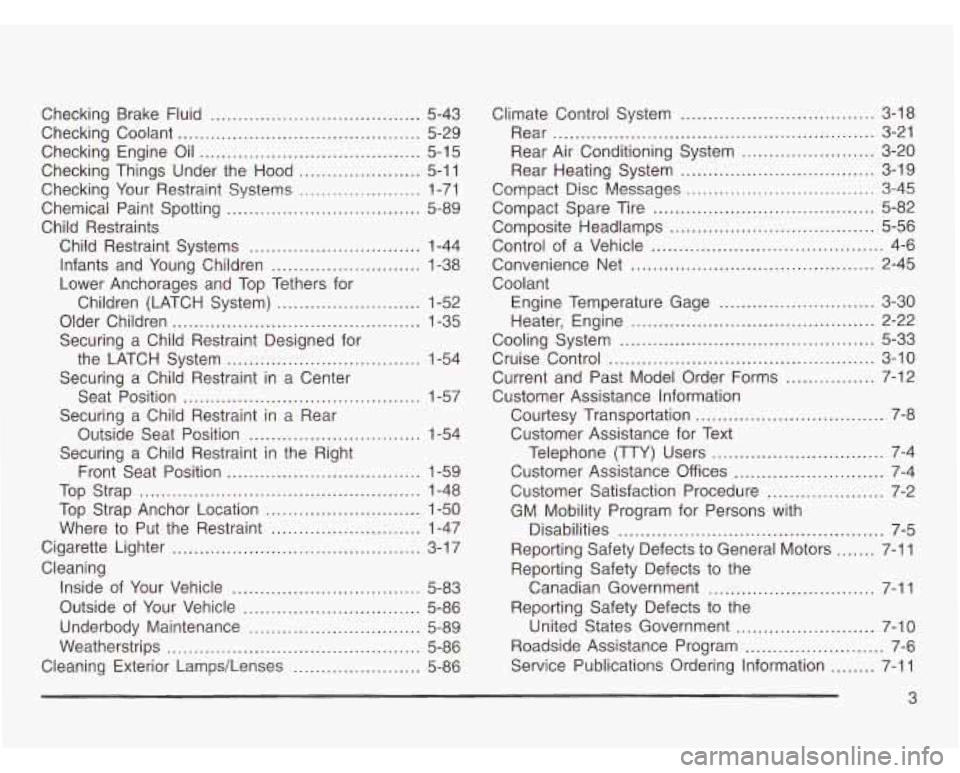
Checking Brake Fluid .................................. 5-43
Checking Coolant ............................................ 5-29
Checking Engine Oil ........................................ 5-15
Checking Things Under the Hood ...................... 5-1 1
Checking Your Restraint Systems ...................... 1-71
Chemical Paint Spotting ................................... 5-89
Child Restraints
Child Restraint Systems
............................... 1-44
Infants and Young Children ........................... 1-38
Lower Anchorages and Top Tethers for
Children (LATCH System)
.......................... 1-52
Older Children ............................................. 1-35
Securing a Child Restraint Designed for
the LATCH System
................................ 1-54
Securing a Child Restraint in a Center
Seat Position
....................................... 1-57
Securing a Child Restraint in a Rear
Outside Seat Position
............................... 1-54
Securing a Child Restraint in the Right
Front Seat Position
................................... 1-59
Top Strap ................................................... 1-48
Top Strap Anchor Location ............................ 1-50
Where to Put the Restraint ........................... 1-47
Cigarette Lighter ............................................. 3-1 7
Cleaning
Inside of Your Vehicle
.................................. 5-83
Outside of Your Vehicle ................................ 5-86
Underbody Maintenance ............................... 5-89
Weatherstrips .............................................. 5-86
Cleaning Exterior Lamps/Lenses ....................... 5-86
Climate Control System ................................... 3-18
Rear .......................................................... 3-21
Rear Heating System ................................... 3-19
Compact Disc Messages .................................. 3-45
Compact Spare Tire ........................................ 5-82
Composite Headlamps ..................................... 5-56
Control of a Vehicle .......................................... 4-6
Convenience Net ............................................ 2-45
Coolant
Engine Temperature Gage
............................ 3-30
Heater, Engine ............................................ 2-22
Cooling System .............................................. 5-33
Cruise Control ................................................ 3-10
Current and Past Model Order Forms ................ 7-12
Customer Assistance Information
Customer Assistance for Text
Customer Assistance
Off ices ........................... 7-4
Customer Satisfaction Procedure ..................... 7-2
GM Mobility Program for Persons with
Disabilities
................................................ 7-5
Reporting Safety Defects to General Motors ....... 7-11
Reporting Safety Defects to the
Canadian Government
.............................. 7-11
Reporting Safety Defects to the United States Government
......................... 7-10
Roadside Assistance Program ......................... 7-6
Service Publications Ordering Information ........ 7-11
Rear Air Conditioning System ........................ 3-20
Courtesy Transportation ......... ...... 7-8
Telephone (TTY) Users ............................... 7-4
3
Page 377 of 386
Power Steering ................................................ 4-9
Programming the HomeLink Transmitter
............. 2-35
Programmable Automatic Door Locks
.................. 2-9
Q
Questions and Answers About
Safety Belts ......... 1-17
R
Radiator Pressure Cap ................. ............ 5-30
Radios
....................................... ............ 3-38
AM-FM
....................................... ........ 3-39
Care of Your CD Player
........................... 3-50
Care of Your CDs
.................................... 3-50
Radio with CD
............................................ 3-41
Rear Seat Audio
.......................................... 3-46
Setting the Time for Radios with HR and
MN Buttons
......................................... 3-38
Setting the Time for Radios with the
Set Buttons
............................. ........ 3-38
Theft-Deterrent
........................ ........ 3-47
Understanding Reception
.......................... 3-50
Reading Lamps
.............................................. 2-40
Rear Air Conditioning System
........................... 3-20
Rear Axle
...................................................... 5-53
Rear Climate Control System
............................ 3-21
Rear Doors
.................................................... 2-13
Rear Heating System
...................................... 3-19 Rear
Rear
Rear Rear
Rear
Rear Safety Belt
Comfort Guides
...................... 1-32
Seat Audio
............................................. 3-46
Seat Operation
......................................... 1-7
Seat Outside Passenger Positions
............. 1-29
Seat Passengers, Safety Belts
.................. 1-29
Window Defoqqer
.................................... 3-21
Rearview Mirrors 2-32 -- .............................................
Reclining Seatbacks .......................................... 1-4
Recreational Vehicle Towing
............................. 4-29
Reinstalling the Engine Cover
........................... 5-23
Remote Keyless Entry System
............................ 2-4
Remote Keyless Entry System, Operation
............ 2-5
Removing the Engine Cover
............................. 5-20
Removing the Flat Tire and Installing the
Spare Tire
.................................................. 5-76
Removing the Rear Seats
.................................. 1-7
Removing the Spare Tire and
Tools ................... 5-72
Removing the Wheel Covers
............................ 5-75
Replacement Bulbs
......................................... 5-61
Replacing Brake System Parts
.......................... 5-46
Replacing Restraint System Parts
After a Crash
.............................................. 1-71
Replacing the Rear Seats
.................................. 1-9
Reporting Safety Defects Canadian Government
.................................. 7-11
General Motors
........................................... 7-11
United States Government
............................ 7-10
Reprogramming a Single HomeLink@ Button
....... 2-37
Resetting Defaults
........................................... 2-37
10